はじめに
この記事はFirebase #2 Advent Calendar 2019の21日目の記事です。
タイトル通り,Webアプリにおけるユーザーグループ機能について考えた内容を書いていきます.
この記事を書いたモチベーションは,自分が開発するWebアプリでユーザーグループ機能を実装する必要が出てきたものの,ユーザー情報がダイレクトに関わるものなので,自分の中でちゃんと整理しながらやらないと不安極まりなく,頭の整理も兼ねて書きました.また,FirebaseとFirestoreのみでどう実装できるかを試したかったというのもあります.(機能はまだ検討中)
しかし,予想以上に検討すべき事項が多かったことから(当たり前だが),機能と設計の全体像については複数記事に分けて書くことにしました.
本記事はとりあえず土台を考えてみた程度に止まっており,下記の様な内容をカバーできていません.
- 登録時のメールアドレスの所有確認
- 各ユーザーの役割や管理者権限の変更
- 複数グループへの所属管理
- Firestoreルールのあるべき姿
- etc...
(サンプルコードのanyなどは追って書き直します...)
使ったサービス+技術
- Firebase Hosting
- Firebase Authentication
- Firestore
- React.js
- material-ui
どんな機能を作るか?
土台なので,まずはユーザーグループを管理する上で最低限必要となりそうな機能のみ考えています.
それらの機能の大枠とフローは下記の通りです.
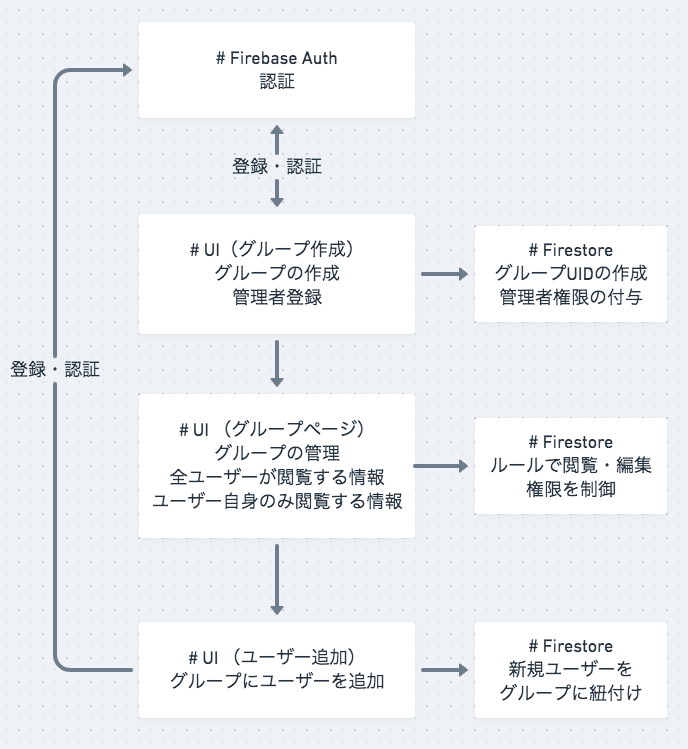
この記事でやっていること
ユーザーグループの作成から新規ユーザーの追加まで,です.
今回のユーザーグループ作成の機能では,誰でもユーザーグループを作成できるものの,ユーザーグループを作ったユーザー=管理者という形になっています.また,グループに新しいユーザーを追加できるのもグループを作った管理者のみとなっています.
新規ユーザーグループの作成・管理者登録
0. Firebaseの設定
公式のクイックスタートと変わりないですが,とりあえずこれがなければ始まらないので.
Google Providerやfunctionsは追々使うので入ってますが,本記事では使ってません.
import firebase from "firebase/app";
import "firebase/firestore";
import "firebase/functions";
import "firebase/auth";

firebase.initializeApp({
  apiKey: process.env.REACT_APP_FIREBASE_APIKEY,
  authDomain: process.env.REACT_APP_FIREBASE_AUTHDOMAIN,
  projectId: process.env.REACT_APP_GCP_PROJECTID,
});

export default firebase;
export const providerGoogle = new firebase.auth.GoogleAuthProvider();
export const firestore = firebase.firestore();
export const functions = firebase.functions();
export const { FieldValue } = firebase.firestore;
1. トップページ
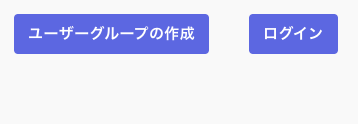
これはソースいらないと思いますが一応.
import React from "react";
import { makeStyles, createStyles, Theme } from "@material-ui/core/styles";
import { Button } from "@material-ui/core";

/* 省略 */

const TopPage: React.FC = () => {
  const classes = useStyles();

  return (
    <div>
      <Button className={classes.button} href="/signUp">
        ユーザーグループの作成
      </Button>
      <Button className={classes.button} href="/login">
        ログイン
      </Button>
    </div>
  );
};
2. ユーザーグループ・管理者アカウントの作成
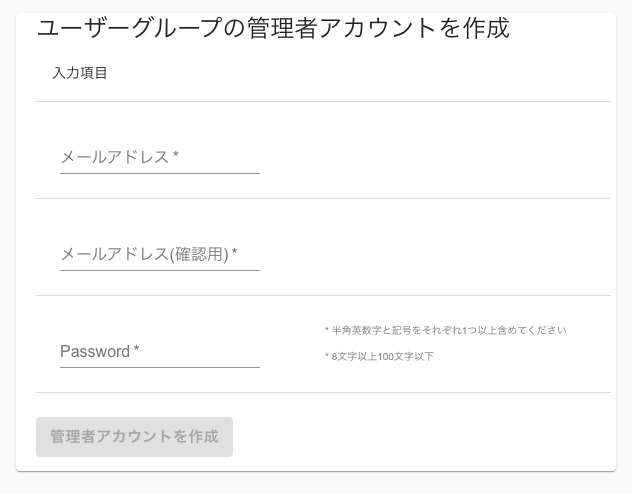
とりあえず必要最低限の情報を取得し,
firebase.auth().createUserWithEmailAndPassword()
に投げてユーザーグループの管理者となるアカウントの登録を行っています.
なので,ここではユーザーグループという箱を作ってる訳ではなく,グループを作れるアカウントを作成してるだけです.
注)
本来はここでメールアドレスの所有確認を前段に挟みますが,私の都合で省略しています.
メールアドレスの本人確認メールを投げ,継続URLから登録に進む,,,という流れは追って修正するか,別記事書いてこちらにリンク貼ります.
(公式だとこの辺の機能ですね.https://firebase.google.com/docs/auth/web/passing-state-in-email-actions?hl=ja)
ここはGoogleやFacebookのProviderを使っても良いですが,個人都合でメアド&パスワードにしています.
ソースは各機能に関する部分を抜粋して載せていきます.
本筋に関係のない部分は割愛しています.
const SignUpForm: React.FC = () => {
  const classes = useStyles();
  const [email, setEmail] = useState<string>("");
  const [emailError, setEmailError] = useState<string>("");
  const [emailCheck, setEmailCheck] = useState<string>("");
  const [emailCheckError, setEmailCheckError] = useState<string>("");
  const [password, setPassword] = useState<string>("");
  const [complete, setComplete] = useState<boolean>(false);

  const signUp = (): void => {
    firebase
      .auth()
      .createUserWithEmailAndPassword(email, password)
      .then(() => {
        console.log("Success create user.");
      })
      .catch((error: any) => {
        console.log(error.code);
        console.log(error.message);
        if (`${error.message}`.indexOf("already") !== -1) {
          alert("既に登録済のメールアドレスです.");
        }
      });
  };

  const handleEmailChange = (event: any) => {
    setEmail(event.target.value);
    const error = event.target.validationMessage;
    if (error) {
      setEmailError(error);
    } else {
      setEmailError("");
    }
  };

  const handleEmailCheckChange = (event: any) => {
    setEmailCheck(event.target.value);
  };

  useEffect(() => {
    if (email.length > 2) {
      if (email !== emailCheck) {
        setEmailCheckError("* メールアドレスが一致していません");
      } else {
        setEmailCheckError("* メールアドレスが一致しました");
      }
    }
  }, [email, emailCheck]);

  const handlePasswordChange = (event: any) => {
    setPassword(event.target.value);
  };

  const handleSubmit = (event: any) => {
    if (complete) {
      event.preventDefault();
      signUp();
    }
  };

  useEffect(() => {
    const regex = RegExp(
      /^(?=.*?[a-z])(?=.*?\d)(?=.*?[!-\/:-@[-`{-~])[!-~]{8,100}$/i
    );
    console.log(`EmailError: ${emailError}`);
    if (
      emailError.length === 0 &&
      email === emailCheck &&
      regex.test(password)
    ) {
      console.log("the email and password is good.");
      setComplete(true);
    } else {
      console.log("the email and password is bad.");
      setComplete(false);
    }
  }, [email, emailCheck, password]);

  return (
    <div>
      <Card className={classes.mainCard}>
        <Typography variant="h5">
          ユーザーグループの管理者アカウントを作成
        </Typography>
        <form
          className={classes.root}
          onSubmit={handleSubmit}
          noValidate
          autoComplete="off"
        >
          <TableContainer>
            <Table className={classes.tableRoot}>
              <TableHead>
                <TableRow>
                  <TableCell>入力項目</TableCell>
                  <TableCell />
                </TableRow>
              </TableHead>
              <TableBody>
                <TableRow>
                  <TableCell>
                    <TextField
                      required
                      className={classes.textField}
                      id="standard-email"
                      label="メールアドレス"
                      onChange={handleEmailChange}
                      type="email"
                      value={email}
                    />
                  </TableCell>
                  <TableCell />
                </TableRow>
                <TableRow>
                  <TableCell>
                    <TextField
                      required
                      className={classes.textField}
                      id="check-email"
                      label="メールアドレス(確認用)"
                      onChange={handleEmailCheckChange}
                      type="email"
                      value={emailCheck}
                    />
                  </TableCell>
                  <TableCell>
                    <Typography
                      className={classes.errorCaption}
                      variant="caption"
                      style={
                        email === emailCheck
                          ? { color: "green" }
                          : { color: "red" }
                      }
                    >
                      {emailCheckError}
                    </Typography>
                  </TableCell>
                </TableRow>
                <TableRow>
                  <TableCell>
                    <TextField
                      required
                      className={classes.passwordField}
                      id="standard-password"
                      label="Password"
                      type="password"
                      autoComplete="current-password"
                      onChange={handlePasswordChange}
                    />
                  </TableCell>
                  <TableCell>
                    <Typography className={classes.caption} variant="caption">
                      <p>* 半角英数字と記号をそれぞれ1つ以上含めてください</p>
                      <p>* 8文字以上100文字以下</p>
                    </Typography>
                  </TableCell>
                </TableRow>
              </TableBody>
            </Table>
          </TableContainer>
          <p>
            <Button
              className={classes.button}
              type="submit"
              variant="contained"
              disabled={!complete}
            >
              管理者アカウントを作成
            </Button>
          </p>
        </form>
      </Card>
    </div>
  );
};
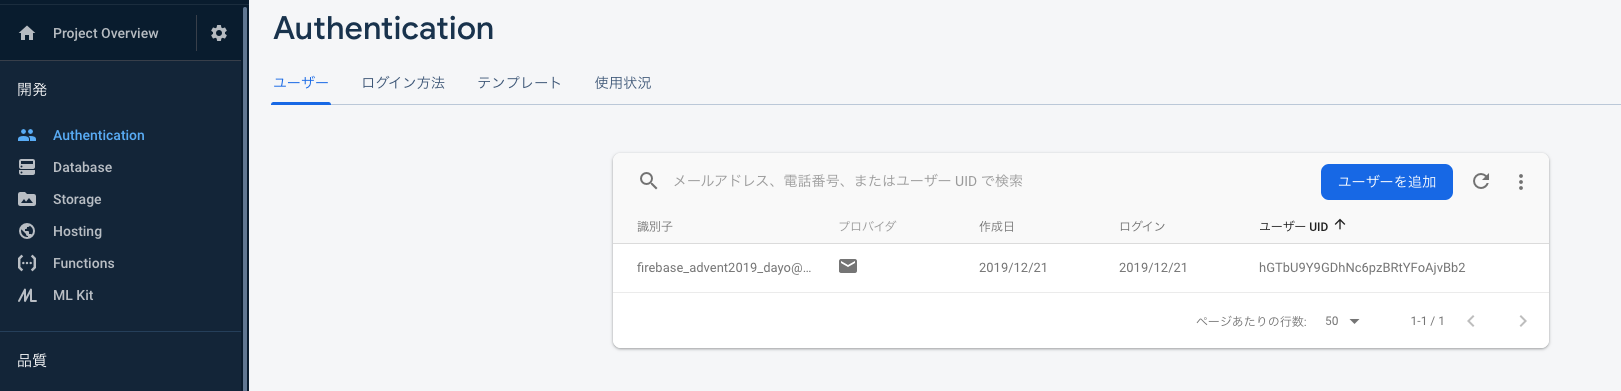
入力フォームに必要な情報を入力してボタンを押せば,firebase authenticationのページにて,入力したアドレスでユーザーが作成されています.
3. 管理者登録後の遷移
ユーザーグループの作成(というより管理者登録)を終えたら,
firebase.auth().onAuthStateChanged()
で認証状態の変化を検知し,ユーザーグループの管理画面へ遷移させます.
(前述のソースコードではルーティング部分の処理を省略してるので,自動で遷移はしません)
管理者の初回ログインでは,グループの識別に使うグループUIDの作成と,管理者権限の管理をfirestoreで行えるよう役割を付与しています.本記事ではグループUID生成をカバーできていないので,これまた追々更新したいところ...
2回目以降のログインや,管理者権限を持たないユーザーのログイン時は,firestoreからユーザーが所属するグループや役割を取得する形になっています.
import React, { useState, useEffect } from "react";
import firebase, { firestore, FieldValue } from "./configFirebase";
import SignUpForm from ".SignUpForm";
import TopPage from "./TopPage";
import GroupPage from "./GroupPage";
import LoginPage from "./LoginPage";
import AddUserPage from "./AddUserPage";
const App: React.FC = () => {
const [loginUser, setUser] = useState<any | null>(null);
const [isLoading, setLoading] = useState<boolean>(false);
// 初回ロード時
useEffect(() => {
setLoading(true);
// firebase authenticationの機能で認証
firebase.auth().onAuthStateChanged((user: any) => {
// 登録済みのユーザーで認証できた場合
if (user) {
// firestoreにアクセス
// 初回ログインではここで管理者のユーザー情報をfirestoreにsetする(管理者ログイン以外は登録時にユーザー情報をもつ)
// 2回目以降のログインでは,ここでユーザー情報を取得する
Promise.resolve(50)
.then(() => {
firestore
.collection("users")
.doc(`${user.uid}`)
.get()
.then((doc: any) => {
if (doc.data()) {
console.log("already registed User Logined.");
const { userName, role, groupUID } = doc.data();
setUser({ userName, role, groupUID });
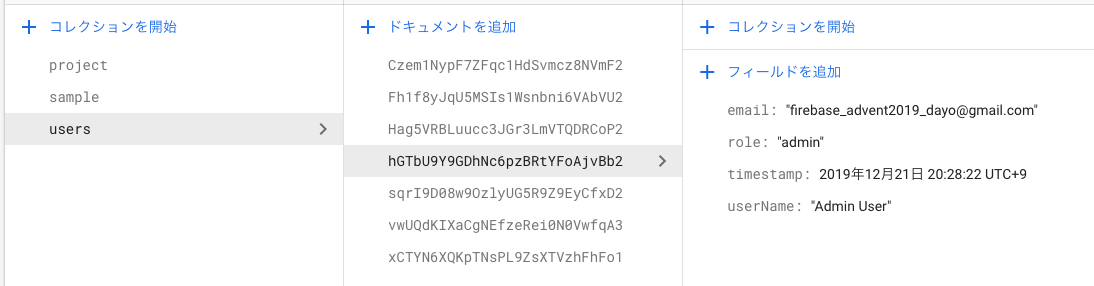
} else {
const docRef = firestore
.collection("users")
.doc(`${user.uid}`);
docRef.set({
email: user.email,
userName: "Admin User",
role: "admin",
timestamp: FieldValue.serverTimestamp(),
groupUID: "test" // UIDを生成(後日追記,,,),
});
}
});
})
.then(() => setLoading(false));
} else {
setLoading(false);
// signUpPageへリダイレクト
}
});
}, []);
return (
<Router>
<Switch>
<Route exact path="/top" component={() => <TopPage />} />
<Route exact path="/login" component={() => <LoginPage />} />
{loginUser ? (
<Switch>
<Route
exact
path="/groupPage"
component={() => <GroupPage user={loginUser} />}
/>
<Route
exact
path="/addUser"
component={() => <AddUserPage userRole={loginUser.role} groupUID={loginUser.groupUID} />}
/>
<Redirect to="groupPage" />
</Switch>
) : (
<Route exact path="/signUp" component={() => <SignUpForm />} />
)}
</Switch>
</Router>
);
};
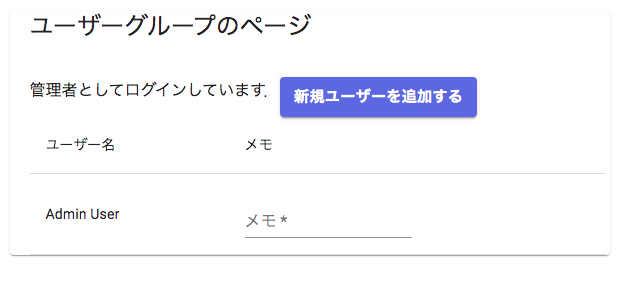
const GroupPage = (props: GroupPageTypes) => {
  const classes = useStyles(props);
  const [memo, setMemo] = useState<string>("");
  const { user } = props;
  const { userName } = user;
  const { role } = user;

  const handleMemo = (event: any) => {
    console.log(event.target.value);
    setMemo(event.target.value);
  };

  return (
    <div>
      <Card className={classes.mainCard}>
        <Typography variant="h5">ユーザーグループのページ</Typography>
        <br />
        {role === "admin" ? (
          <>
            管理者としてログインしています.
            <Button
              className={classes.button}
              variant="contained"
              href="/addUser"
            >
              新規ユーザーを追加する
            </Button>
          </>
        ) : (
          ""
        )}
        <br />
        <TableContainer>
          <Table className={classes.tableRoot}>
            <TableHead>
              <TableRow>
                <TableCell>ユーザー名</TableCell>
                <TableCell>役割</TableCell>
                <TableCell>メモ</TableCell>
              </TableRow>
            </TableHead>
            <TableBody>
              <TableRow>
                <TableCell> {userName} </TableCell>
                <TableCell> {role} </TableCell>
                <TableCell>
                  <TextField
                    required
                    className={classes.textField}
                    id="memo"
                    label="メモ"
                    onChange={handleMemo}
                    type="email"
                    value={memo}
                  />
                </TableCell>
              </TableRow>
            </TableBody>
          </Table>
        </TableContainer>
      </Card>
    </div>
  );
};
ユーザーグループに新規ユーザーを追加する
グループへ新規ユーザーを追加する際は,Slackのワークスペースなどの様に招待メールで継続URLを送信し,そのURLからパスワード登録などを行ってもらうのが良いと考えています.
が,前述の通り本記事ではメールアドレス確認部分を端折ってるので,管理者がグループの長としてメールアドレスと共通の初期パスワードの登録を行う形になっています.ここも後日(ry
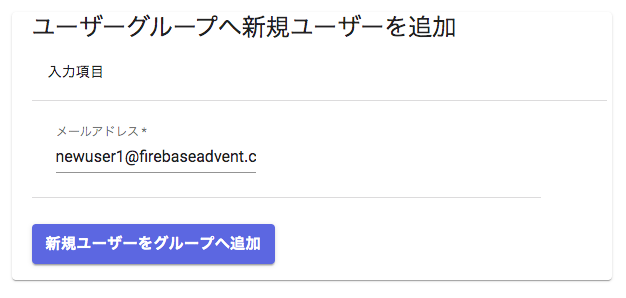
ここでグループへ追加ボタンを押すと,先ほどのFirebase Authenticationのページへ新規ユーザーが作成されます.

type AddUserTypes = {
  userRole: string;
  groupUID: string;
};

const AddUserPage = (props: AddUserTypes) => {
  const classes = useStyles();
  const { userRole } = props;
  const [email, setEmail] = useState<string>("");
  const [emailError, setEmailError] = useState<string>("error");
  const [complete, setComplete] = useState<boolean>(false);

  const createNewUser = (): void => {
    const initialPassword = "firebaseAdvent2019@";
    firebase
      .auth()
      .createUserWithEmailAndPassword(email, initialPassword)
      .then(() => {
        console.log("Success create new user.");
      })
      .catch((error: any) => {
        console.log(error.code);
        console.log(error.message);
        if (`${error.message}`.indexOf("already") !== -1) {
          alert("既に登録済のメールアドレスです.");
        }
      });
  };

  const handleEmailChange = (event: any) => {
    setEmail(event.target.value);
    const error = event.target.validationMessage;
    if (error) {
      setEmailError(error);
    } else {
      setEmailError("");
    }
  };

  useEffect(() => {
    if (emailError.length === 0) {
      setComplete(true);
    } else {
      setComplete(false);
    }
  }, [emailError]);

  const handleSubmit = (event: any) => {
    event.preventDefault();
    if (emailError.length === 0) {
      createNewUser();
    }
  };

  return (
    <div>
      <Card className={classes.mainCard}>
        <Typography variant="h5">
          ユーザーグループへ新規ユーザーを追加
        </Typography>
        {userRole === "admin" ? (
          <form
            className={classes.root}
            onSubmit={handleSubmit}
            noValidate
            autoComplete="off"
          >
            <TableContainer>
              <Table className={classes.tableRoot}>
                <TableHead>
                  <TableRow>
                    <TableCell>入力項目</TableCell>
                    <TableCell />
                  </TableRow>
                </TableHead>
                <TableBody>
                  <TableRow>
                    <TableCell>
                      <TextField
                        required
                        className={classes.textField}
                        id="standard-email"
                        label="メールアドレス"
                        onChange={handleEmailChange}
                        type="email"
                        value={email}
                      />
                    </TableCell>
                  </TableRow>
                </TableBody>
              </Table>
            </TableContainer>
            <p>
              <Button
                className={classes.button}
                type="submit"
                variant="contained"
                disabled={!complete}
              >
                新規ユーザーをグループへ追加
              </Button>
            </p>
          </form>
        ) : (
          "新規ユーザーの追加を行えるのは管理者のみです."
        )}
      </Card>
    </div>
  );
};
おわりに
本記事ではここまでです.
ユーザーグループを管理するアカウントの作成から,新規ユーザー追加までを行いました.
とりあえず作ってみるかと勢いで始めましたが,書いてると色々足りない部分が出てきますね...
自分は書き始めないと詳細な設計部分などが見えてこないタイプですが,色々甘すぎました.
必要な機能の全体像や設計は改めて整理したいと思います.
(次は肝心の新規ユーザーを対象グループへ紐付ける部分,新規ユーザーが初回ログインした時にどんな処理が走るかを書いていきます.)