この記事は、「【連載】初めてのReact Native + Expo開発環境構築入門」の子記事です。環境などの条件は、親記事をご覧ください。
前回までに、請求書情報をサーバーから取得して表示できるようになったので、今回は呼び出す先のサーバー情報をQRコードから取得できるようにします。
QRコードにあらかじめJSONを仕込んでおけば、複数の設定項目がある設定をアプリの設定方法説明書なしでユーザーに実施してもらえるようになるなど、利便性アップや業務の効率化が見込めます。
【注意】現時点で、QRスキャナ機能がうまく動作しない場合があるようです。詳しくはフォーラム参照。
目標:Importボタンを押す → QRコードリーダー → QRに入ってるURLから請求書を読み込み
QRリーダーをインストール
BarCodeScannerモジュールは、QRだけでなくいろんな企画のバーコードも読み込めるバーコード・QRリーダーです。さくっとインストールします。Visual Studio CodeでReact Nativeのプロジェクトを開き、Ctrl + @でPowerShellを開いて以下のコマンドを実行。
expo install expo-barcode-scanner
QRコード読み込み画面を設置
QRコード読み込み画面は、ExpoのバーコードAPIの例からコピーして、unstatedのためのHOC化を実施します。
import * as React from "react";
import { Text, View, StyleSheet, Button } from "react-native";
import Constants from "expo-constants";
import * as Permissions from "expo-permissions";
import { Subscribe } from "unstated";
import { BarCodeScanner } from "expo-barcode-scanner";
import InvoiceContainer from "../containers/InvoiceContainer";
class BarcodeScannerScreenContent extends React.Component {
state = {
hasCameraPermission: null,
scanned: false
};
async componentDidMount() {
this.getPermissionsAsync();
}
getPermissionsAsync = async () => {
const { status } = await Permissions.askAsync(Permissions.CAMERA);
this.setState({ hasCameraPermission: status === "granted" });
};
render() {
const { hasCameraPermission, scanned } = this.state;
if (hasCameraPermission === null) {
return <Text>Requesting for camera permission</Text>;
}
if (hasCameraPermission === false) {
return <Text>No access to camera</Text>;
}
return (
<View
style={{
flex: 1,
flexDirection: "column",
justifyContent: "flex-end"
}}
>
<BarCodeScanner
onBarCodeScanned={scanned ? undefined : this.handleBarCodeScanned}
style={StyleSheet.absoluteFillObject}
/>
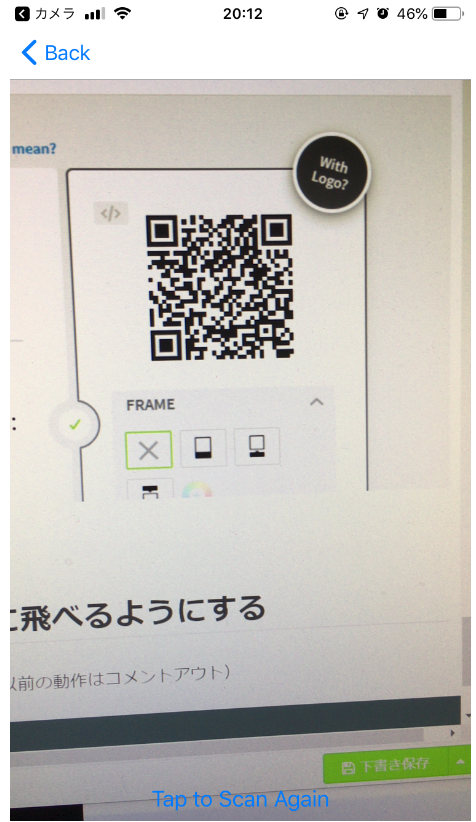
{scanned && <Button title={"Tap to Scan Again"} onPress={() => this.setState({ scanned: false })} />}
</View>
);
}
handleBarCodeScanned = ({ type, data }) => {
this.setState({ scanned: true });
// alert(`Bar code with type ${type} and data ${data} has been scanned!`);
let jsondata = {};
if (this.isJson(data) && (jsondata = JSON.parse(data)).invoice_endpoint_url) {
this.props.globalState.getDataFromServer(jsondata.invoice_endpoint_url);
this.props.navigation.goBack();
} else {
alert("This is not a valid QR code.");
}
};
isJson(str) {
try {
JSON.parse(str);
} catch (e) {
return false;
}
return true;
}
}
const BarcodeScannerScreen = ({ navigation }) => {
return (
<Subscribe to={[InvoiceContainer]}>
{globalState => <BarcodeScannerScreenContent globalState={globalState} navigation={navigation} />}
</Subscribe>
);
};
export default BarcodeScannerScreen;
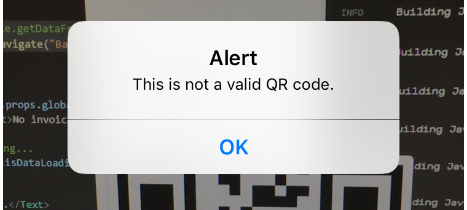
unstatedとnavigationのためにHOC化以外に実施していることは、QRコードを読み込んだら中身をチェックし、もしJSONで、さらに中にinvoice_endpoint_urlがあったら指定URLから請求書読み込み実施して画面を戻る、そうでなければ「This is not a valid QR code.」とアラート、です。アラートの場合、navigationのBackボタンで画面を戻ることもできるし、「Tap to Scan Again」ボタンで再挑戦することもできます。
また、グローバルStateのInvoiceContainerのgetDataFromServer()をコールするときに、QRコードから受け取ったinvoice_endpoint_urlを渡すことにしました。このため、InvoiceContainerの修正も必要になります。
作った画面コンポーネントをnavigationに登録。
...
import BarcodeScannerScreen from "./components/BarcodeScannerScreen";
...
const RootStack = createStackNavigator(
  {
    Home: HomeScreen,
    InvoiceEdit: InvoiceEditScreen,
    Summary: SummaryScreen,
    BarcodeScanner: BarcodeScannerScreen
  },
  {
    initialRouteName: "Home"
  }
);
...
指定されたURLから請求書を読み込む動作を実装
請求書取得のエンドポイントはもともとINVOICE_API_ENDPOINTに定数化していましたが、引数で受け付けるように変更します。
...
// const INVOICE_API_ENDPOINT = "http://192.168.1.8:8080/invoice.js";
...
  getDataFromServer(endpoint) {
    this.setState({ isDataLoading: true });
    axios
      .get(endpoint, { timeout: 3000 })
...
※ついでに通信タイムアウトを3秒に設定しました。
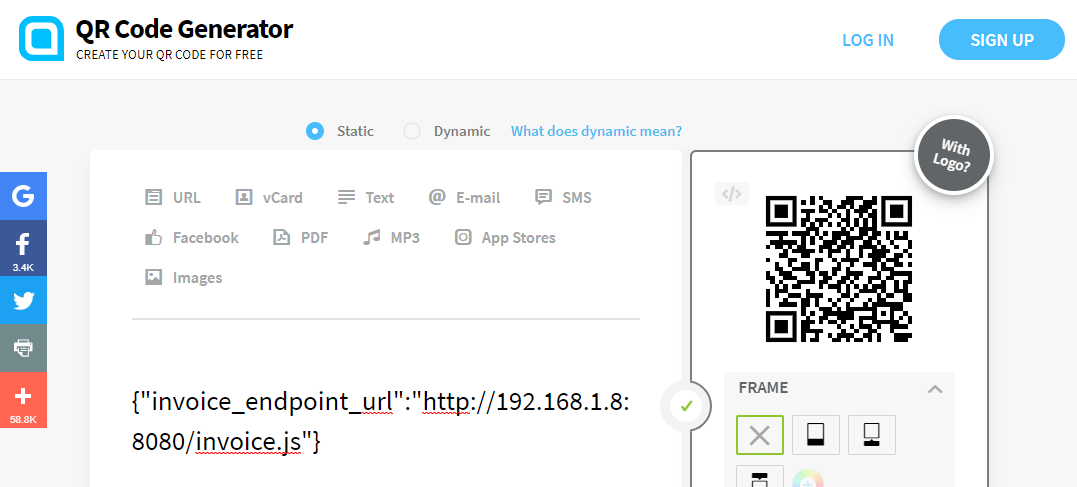
JSONにエンドポイントURLが入ったQRコードを作成
オンラインQRコード生成アプリ QR Code Generatorなどで、以下のJSONをQRコード化。※ここで指定するURLは、前回の記事の請求書JSONファイルが取れるアドレスを指定します。
{"invoice_endpoint_url":"http://192.168.1.8:8080/invoice.js"}
請求書読み込みボタンでQRスキャン画面に飛べるようにする
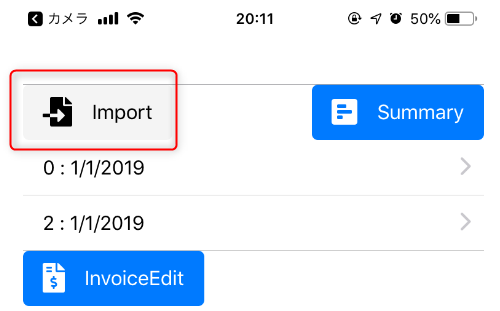
HomeScreenのImportボタンで、QRリーダー画面に飛べるようにします。(以前の動作はコメントアウト)
  onImportClick() {
    // this.props.globalState.getDataFromServer();
    this.props.navigation.navigate("BarcodeScanner");
  }
コンポーネントではなくグローバルState側にサーバーとの通信動作を記述しているので、変更はとても簡単ですね。
結果
Importボタンを押すとQRスキャン画面へ。
間違ったQRコード(やバーコード)を読むと、警告。
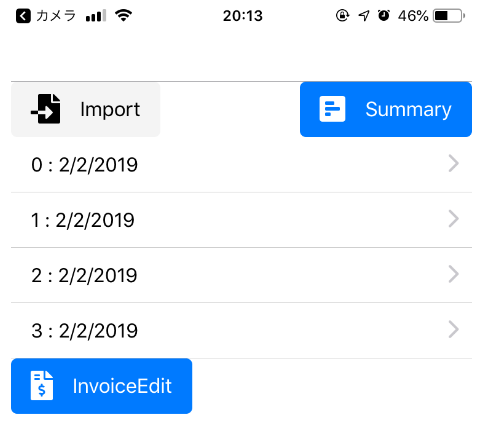
正しいQRを読み込むと、サーバーの請求書を読み込んで元画面に遷移。