本日は、vSphere with TanzuでAPPデプロイをやってみようと思います。
APPのデプロイ
さっそく、Deploy a workloadに従い、APPへの操作を学習していきましょう!
Pod操作
まずは、「pod作成&ログイン→pod内で操作→pod削除」をやってみたいと思います。
# ログインは一定時間で有効期限が切れます。必要に応じて、ログインし直しましょう。
$ SC_IP=172.18.0.208
$ NS=tkgs-dev
$ kubectl vsphere login --server=$SC_IP --tanzu-kubernetes-cluster-name tkc-1 --tanzu-kubernetes-cluster-namespace $NAMESPACE --insecure-skip-tls-verify

# busybox podを作成して、pod内のshellにログインするコマンド
$ kubectl run -i --tty busybox --image=busybox --restart=Never -- sh
# (/ # というプロンプトに変わり、ログイン出来たことが確認できる)
/ #

# googleさんに話しかけてみる
/ # ping google.com
PING google.com (172.217.25.206): 56 data bytes
64 bytes from 172.217.25.206: seq=0 ttl=114 time=3.975 ms
^C

# googleさんへの経路を確認
/ # traceroute -n google.com
traceroute to google.com (172.217.161.46), 30 hops max, 46 byte packets
 1  192.168.1.1  0.492 ms  0.002 ms  0.001 ms
 2  172.18.0.1  1.562 ms  1.005 ms  1.243 ms
 3  192.168.5.1  1.863 ms  0.757 ms  0.878 ms
 4  *  *  *
# (以下省略)

# exitすると、プロンプトが戻ってきてPodが「完了」状態となる。
/ # exit
$ kubectl get pods
NAME      READY   STATUS      RESTARTS   AGE
busybox   0/1     Completed   0          62s

# Podの削除
$ kubectl delete pod busybox
pod "busybox" deleted
$ kubectl get pods
No resources found in default namespace.
Persistent Volumeの作成
次のシナリオです。vSphere with Tanzuでは、Storage Classを用いたPersistent Volume(K8s上の永続ディスク)の利用が特徴の一つなので、試してみたいと思います。
# デモファイルのダウンロード
$ wget https://raw.githubusercontent.com/vsphere-tmm/vsphere-with-tanzu-quick-start/master/manifests/pvc.yaml

# PVC(永続ディスクの要求)マニフェスト。3GiのサイズでRWOのディスクを要求する内容。
$ cat pvc.yaml
apiVersion: v1
kind: PersistentVolumeClaim
metadata:
  name: vsphere-with-tanzu-pv
spec:
  accessModes:
    - ReadWriteOnce
  resources:
    requests:
      storage: 3Gi

# TKCデプロイ時に指定したDefault StorageClassの情報。
$ kubectl get storageclass
NAME                               PROVISIONER              RECLAIMPOLICY   VOLUMEBINDINGMODE   ALLOWVOLUMEEXPANSION   AGE
k8s-dev-storage-policy (default)   csi.vsphere.vmware.com   Delete          Immediate           true                   13h

# 現時点では、PVやPVCが存在しないことを確認
$ kubectl get pv,pvc
No resources found in default namespace.

# 先ほどのPVCマニフェストを適用
$ kubectl apply -f pvc.yaml
persistentvolumeclaim/vsphere-with-tanzu-pv created

# しばらく待ち、PVCによってPVが作成されたことを確認。
# また、StorageClassに、k8s-dev-storage-policy が用いられていることも確認できる。
$ kubectl get pv,pvc
NAME                                                        CAPACITY   ACCESS MODES   RECLAIM POLICY   STATUS   CLAIM                           STORAGECLASS             REASON   AGE
persistentvolume/pvc-ef525f2a-75b1-49b6-9d8e-d95edf6e5b10   3Gi        RWO            Delete           Bound    default/vsphere-with-tanzu-pv   k8s-dev-storage-policy            32s

NAME                                          STATUS   VOLUME                                     CAPACITY   ACCESS MODES   STORAGECLASS             AGE
persistentvolumeclaim/vsphere-with-tanzu-pv   Bound    pvc-ef525f2a-75b1-49b6-9d8e-d95edf6e5b10   3Gi        RWO            k8s-dev-storage-policy   53s
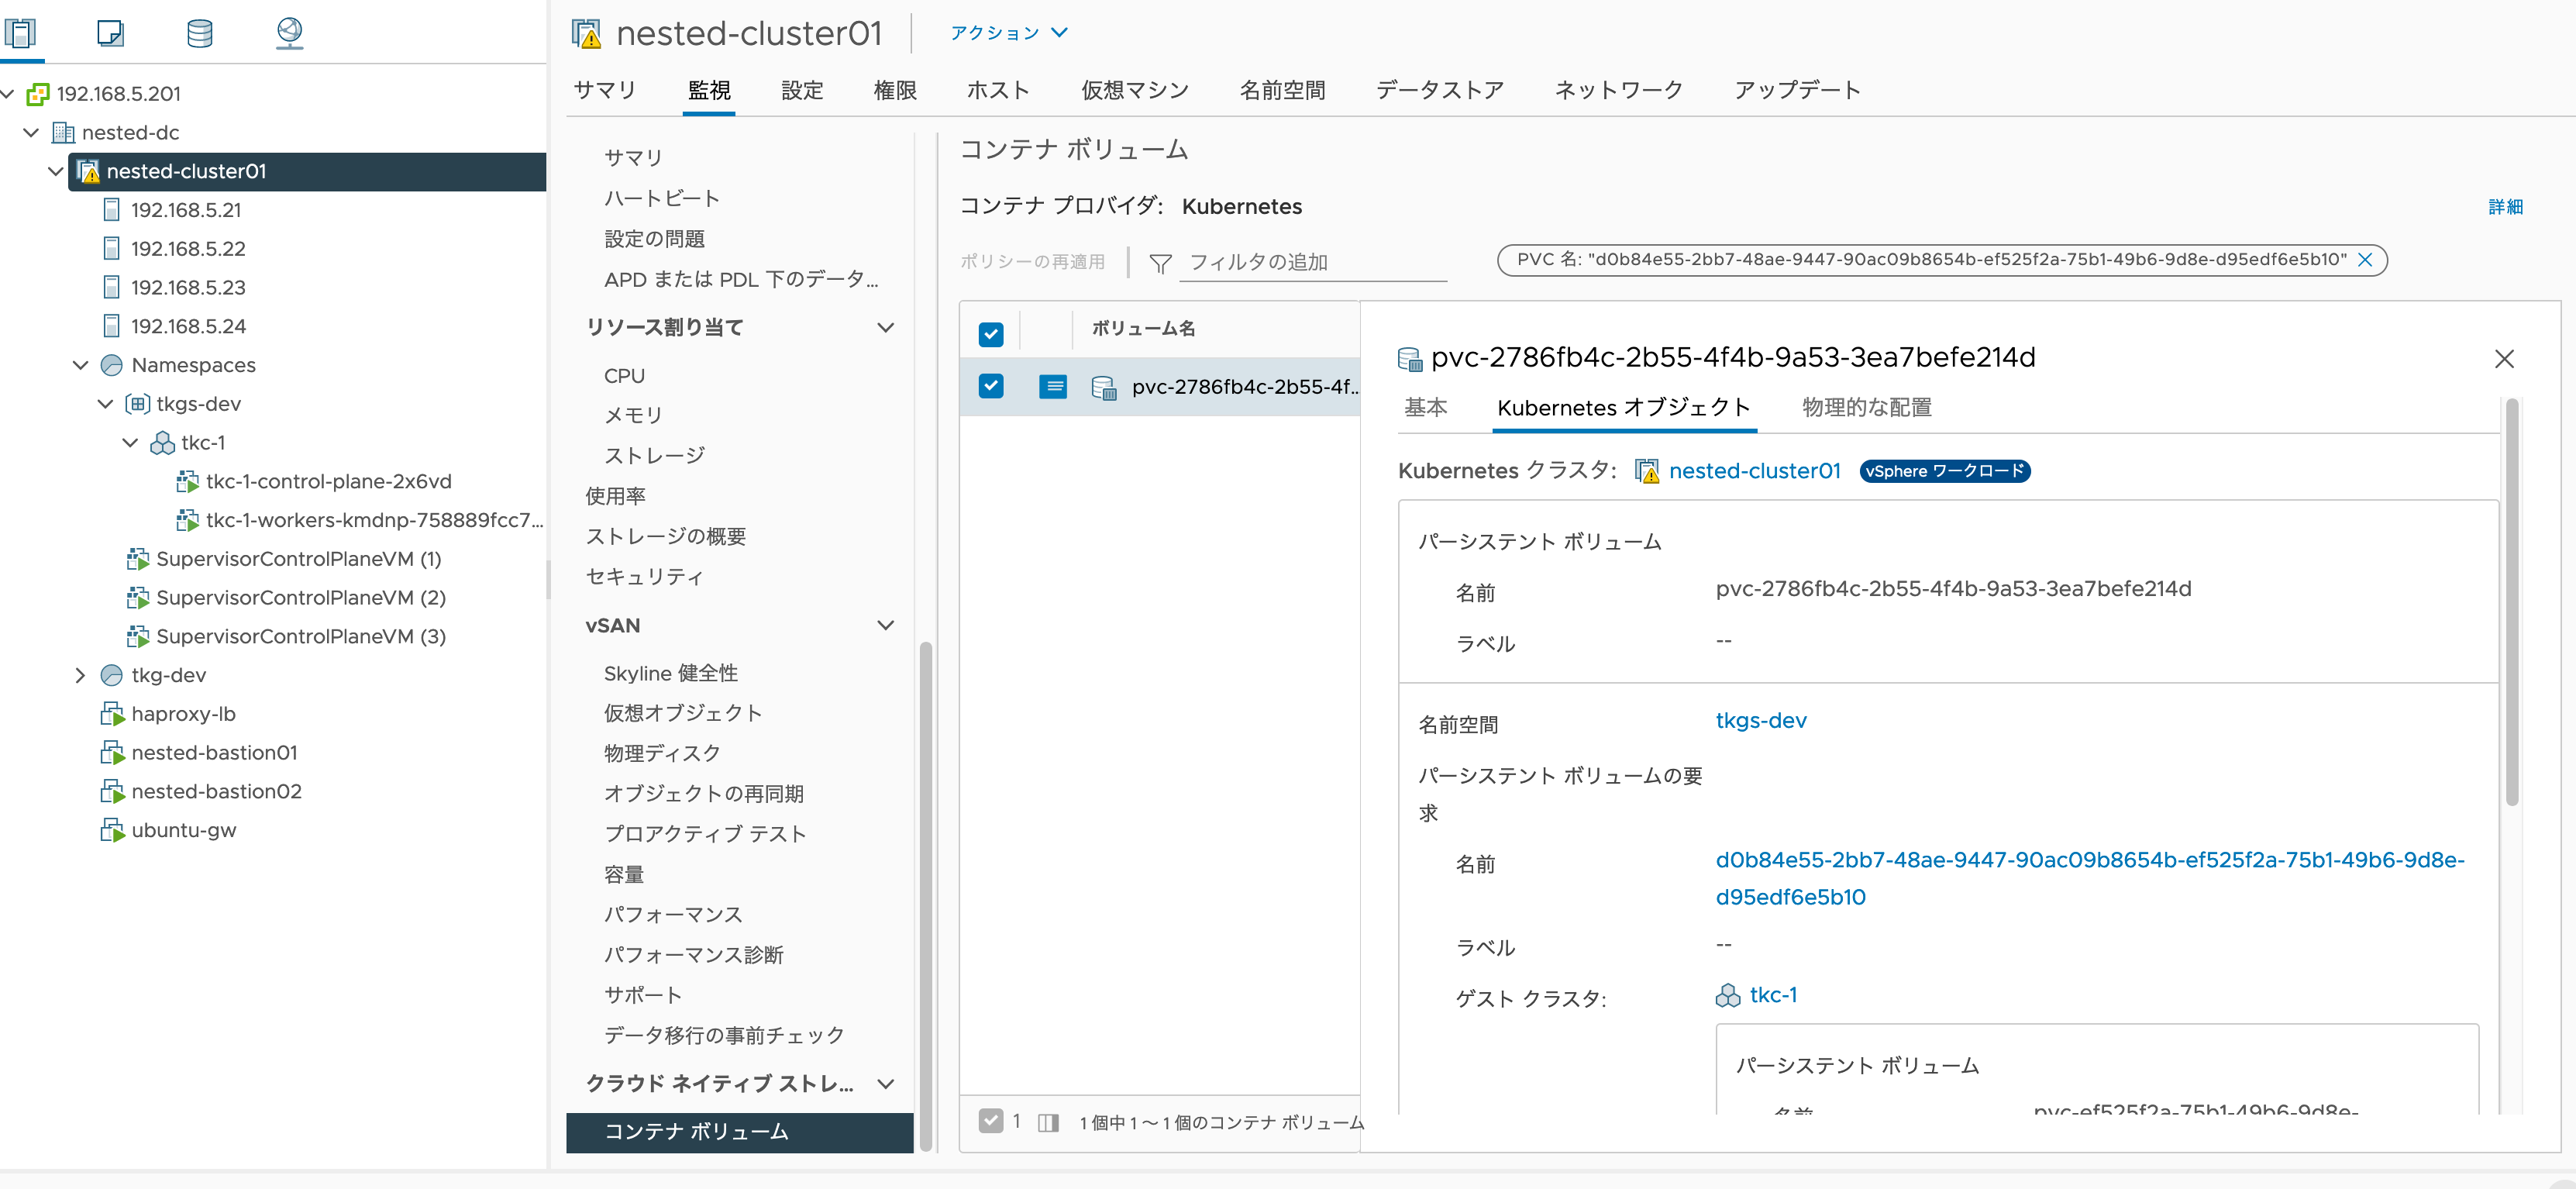
ここで、vCenterを見てみましょう。要求したPVCは、「tkgs-dev」 namespace の「ストレージ」タブから、「パーシステントボリュームの要求」として、確認可能となります。

PVC名をクリックすると、vSphereクラスタの「クラウドネイティブストレージ」の「コンテナボリューム」項目に遷移し、PVの情報が確認できます。

vCenter上からK8sのリソース情報が見えるのは、vSphere with Tanzuの1つの強みです。
PVを持ったPodのデプロイ
続いて、先ほど作成した「vsphere-with-tanzu-pv」を使用するPodをデプロイします。
# サンプルPodのダウンロード
$ wget https://raw.githubusercontent.com/vsphere-tmm/vsphere-with-tanzu-quick-start/master/manifests/pod.yaml

# Pod内容の確認。先ほどの「vsphere-with-tanzu-pv」というPVCをボリュームとして定義し、「/usr/share/nginx/html」にマウントしていることが分かる。
$ cat pod.yaml

# 現在のPodの確認。default namespaceにはなにもない。
$ kubectl get pod
No resources found in default namespace.

# Podのデプロイ。Podリソースが追加されたことが確認できる。
$ kubectl apply -f pod.yaml
pod/vsphere-with-tanzu-pod created
$ kubectl get pod
NAME                     READY   STATUS    RESTARTS   AGE
vsphere-with-tanzu-pod   1/1     Running   0          4m12s
さっそく、このPodにブラウザからアクセスしてみましょう。
ここで1つポイントとして、現在踏み台を経由してK8sにアクセスするため、K8sから踏み台にPortフォワードし、さらに踏み台に対してもSSHポートフォワードしてあげることで、K8sリソースをローカルPCで表示可能となります。こんなイメージ。
ローカルPC <-- (8080 portに転送) -- 踏み台 <-- (8080 portに変換して転送) -- Port 80を持つPod
こういうのを、多段ポートフォワードといいます。割と踏み台がある環境では、Podが持つ管理画面へのアクセスにこの技を多用するので、覚えておくとよいでしょう。
# 踏み台の8080portは、localhostの8080portに転送しつつ、sshログイン
% ssh ubuntu@192.168.5.44 -L 8080:localhost:8080
# (出力メッセージは省略)

# ここから踏み台環境での操作。指定のPodの port 80 を、接続元の 8080 port に転送するコマンド
$ kubectl port-forward vsphere-with-tanzu-pod 8080:80
Forwarding from 127.0.0.1:8080 -> 80
このように、アクセス出来ます。ただし、コンテンツが何もないため、以下の画面となります。

Podに入り、PVにコンテンツを設置してあげましょう。
# Podの中に入るコマンド
$ kubectl exec -it vsphere-with-tanzu-pod -- bash

# Pod内の操作。PVが設置してある /usr/share/nginx/html に、コンテンツの設置
$ cd /usr/share/nginx/html
$ curl https://raw.githubusercontent.com/vsphere-tmm/vsphere-with-tanzu-quick-start/master/site/index.html -o index.html
$ exit
再び多段ポートフォワードして、ブラウザにアクセスすると・・・、今度は表示できました!

LoadBalancerの利用
毎回多段ポートフォワードするのは面倒ですよね?HAProxyを使って、K8sコンテナネットワークの外部から、アクセスできるようにしましょう。
# まずはサンプルコンテンツのダウンロード
$ wget https://raw.githubusercontent.com/vsphere-tmm/vsphere-with-tanzu-quick-start/master/manifests/svc.yaml

# Serviceリソースは、podを公開するためのリソース。Type: LoadBalancerによって、外部LBを利用する。
$ cat svc.yaml

# kubernetesとsupervisorの2つのサービスは、TKC作成時に最初から作成されています。
$ kubectl get svc
NAME         TYPE        CLUSTER-IP   EXTERNAL-IP   PORT(S)    AGE
kubernetes   ClusterIP   10.96.0.1    <none>        443/TCP    18h
supervisor   ClusterIP   None         <none>        6443/TCP   18h

# Serviceリソースのデプロイ。「nginx-service」が追加されているのが分かる。
$ kubectl apply	-f svc.yaml
service/nginx-service created
$ kubectl get svc
NAME            TYPE           CLUSTER-IP      EXTERNAL-IP    PORT(S)        AGE
kubernetes      ClusterIP      10.96.0.1       <none>         443/TCP        18h
nginx-service   LoadBalancer   10.109.180.30   172.18.0.211   80:30861/TCP   5s
supervisor      ClusterIP      None            <none>         6443/TCP       18h
上記の「EXTERNAL-IP」でアサインされた「172.18.0.211」にアクセスしてみましょう。

出来ましたね!実はこれ、結構凄いことなんです。
一般的なK8s環境の場合、HAProxyをこのK8s環境で利用可能になるよう、マニュアル導入する必要があるですが、Supervisor Clusterによって、TKCにロードバランサーが自動で割り当てられていることが分かります。
vSphere with Tanzuのお話は、以上でおしまいです!
明日からは、ちょっと別の話をしていきたいと思います。