はじめに
ASP.NET Core 3.1 では、Microsoft Identity Web というライブラリを使用して、Web アプリケーションの認証を容易に実装できます。特に、Microsoft.Identity.Web.UI パッケージを使うことで、サインイン/サインアウトの処理を担うコントローラーの処理の記述を大幅に削減できます。Microsoft.Identity.Web.UI パッケージには、AccountController が含まれているので、自身で処理を書く必要がありません。
今回は、この Microsoft Identity Web を使った、ASP.NET Core Web アプリケーションへの Microsoft アカウント認証の実装方法を説明します。
Azure Active Directory へのアプリの登録
Azure Portal から、Azure Active Directory を選択し、[アプリの登録] - [新規登録] を選択します。
[アプリケーションの登録] から、以下の各項目を設定し、[登録] を選択します。
- [サポートされているアカウントの種類]: 個人用 Microsoft アカウントのみ (今回は、Microsoft アカウントのみを対象とするので)
- [リダイレクト URI]: https://<アプリの URL>/signin-oidc
[リダイレクト URI] は、ここでは一つしか登録できませんが、後で、編集/追加もできます。まずは、Visual Studio でのデバッグ実行時に起動する IIS Express の URL を指定しています。

アプリの登録が完了したら、Azure Active Directory の [アプリの登録] を選択し、一覧に作成してアプリが表示されていることを確認します。
作成したアプリを選択し、[認証] を選択します。ここで、リダイレクト URI の編集/追加も行えます。
以下の各項目を設定し、[保存] を選択します。
- [ログアウト URL]: https://<アプリの URL>/signout-callback-oidc
- [暗黙の付与]: [ID トークン] を選択

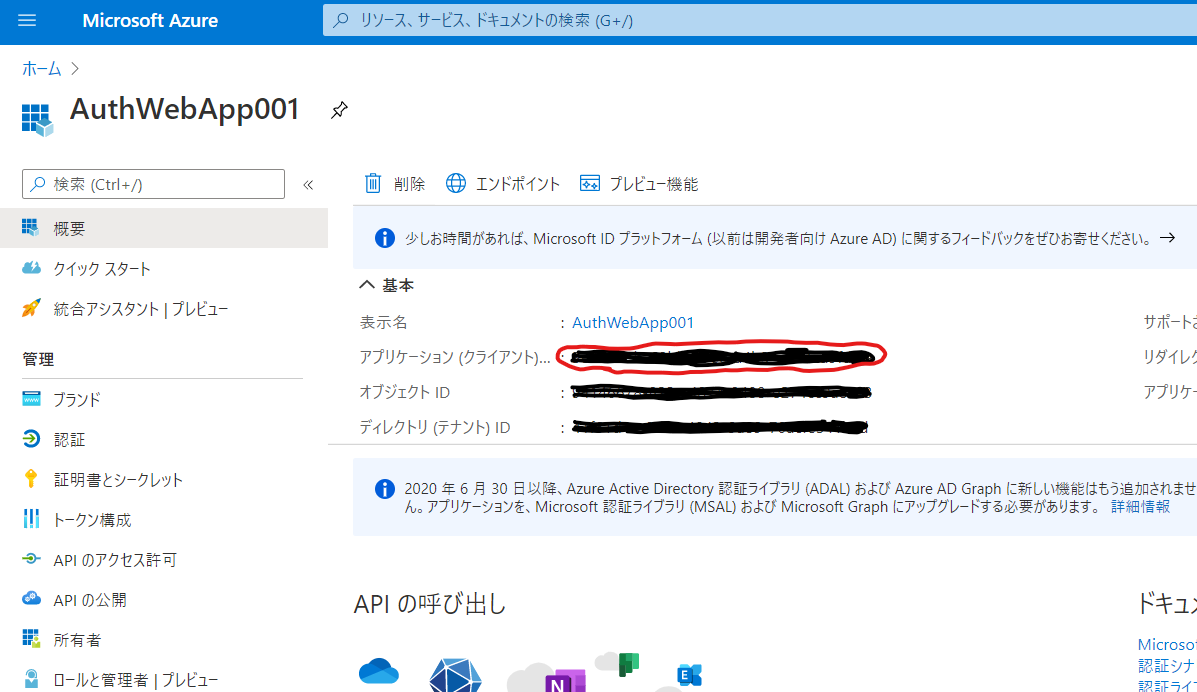
次に、対象の登録アプリの概要を選択し、クライアント ID をメモしておきます。
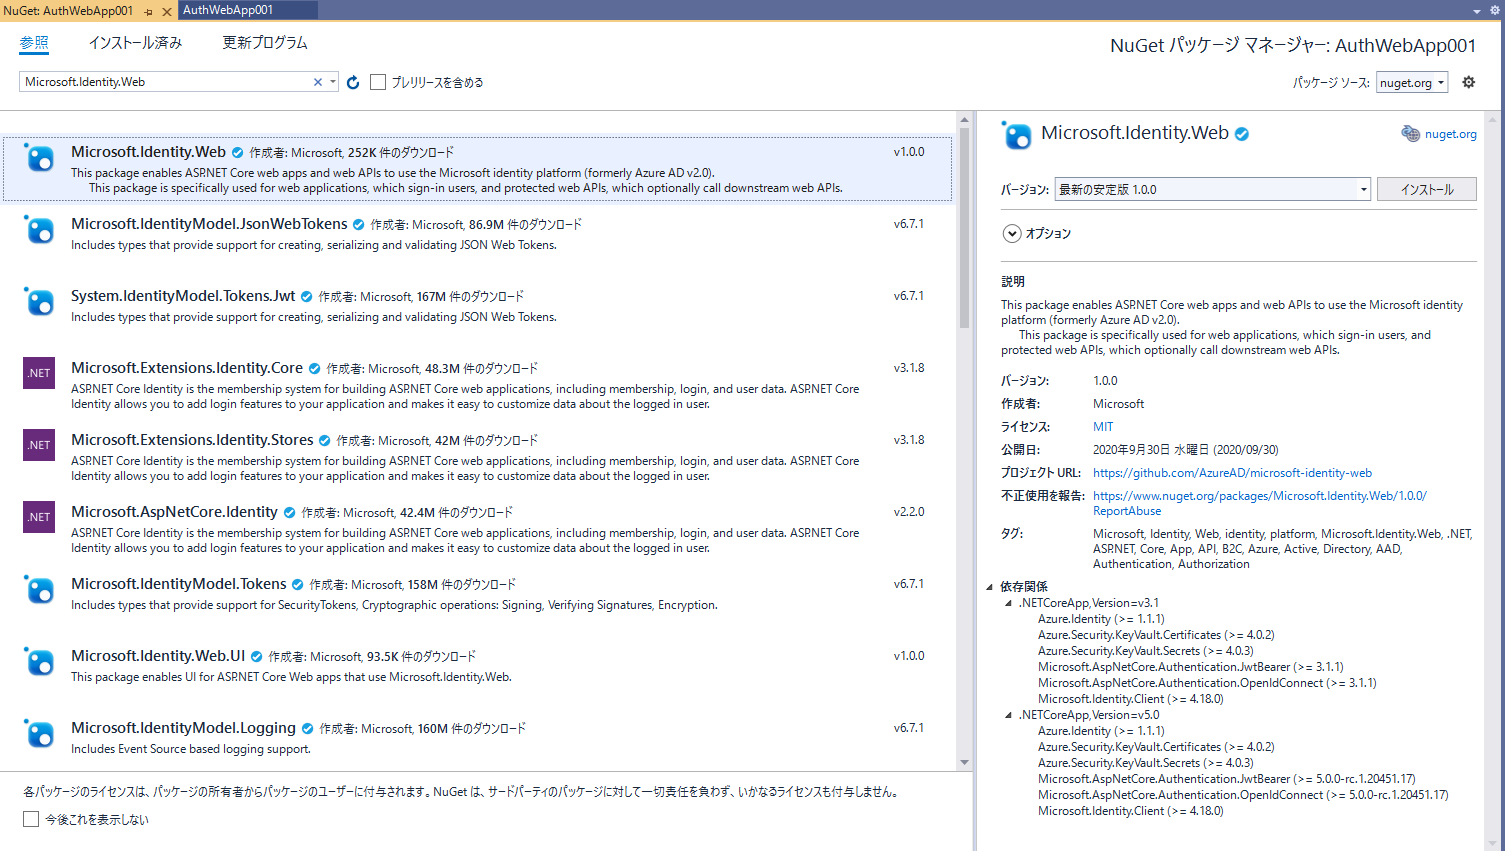
Microsoft Identity Web パッケージの追加
NuGet から Microsoft.Identity.Web パッケージを取得し、プロジェクトへ追加します。
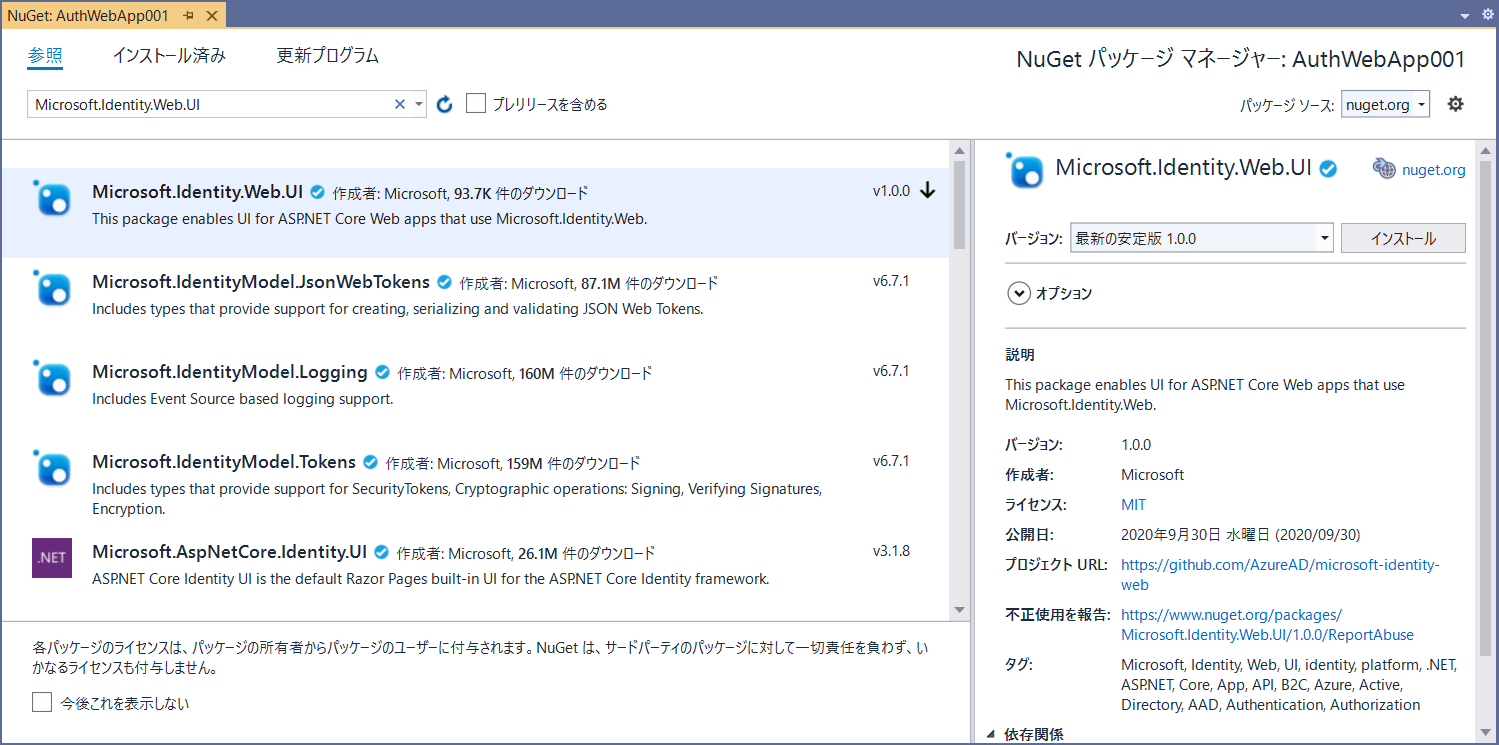
次に、Microsoft.Identity.Web.UI パッケージを取得し、プロジェクトへ追加します。
アプリ構成情報の定義
appsettings.json に、AzureAd(任意) という項目を追加し、配下に、Instance、Domain、TenantId、ClientId、CallbackPath、SignedOutCallbackPath の各項目を定義します。
{
  "AzureAd": {
    "Instance": "https://login.microsoftonline.com/",
    "Domain": "<Web アプリのドメイン>",
    "TenantId": "consumers",
    "ClientId": "<メモした登録アプリ Client Id>",
    "CallbackPath": "/signin-oidc",
    "SignedOutCallbackPath": "/signout-callback-oidc"
  },
  "Logging": {
    "LogLevel": {
      "Default": "Information",
      "Microsoft": "Warning",
      "Microsoft.Hosting.Lifetime": "Information"
    }
  },
  "AllowedHosts": "*"
}
Azure Active Directory に登録されているユーザーの認証の場合は、TenantId に、Azure Active Directory の Tenant Id を設定するのですが、Microsoft アカウントの場合は、 "consumers" とします。
認証 UI、認証ミドルウェアの追加
Startup.cs に追加した各パッケージへの参照を追加します。
using Microsoft.Identity.Web;
using Microsoft.Identity.Web.UI;
Startup.ConfigureServices メソッドに、各サービスの定義を行います。
public void ConfigureServices(IServiceCollection services)
{
    //認証の追加 appsettings.json の AzureAd で定義された各項目で初期化
    services.AddMicrosoftIdentityWebAppAuthentication(Configuration, "AzureAd");

    services.AddControllersWithViews()
        .AddMicrosoftIdentityUI(); // Microsoft.Identity.Web.UI 拡張メソッド - 認証 UI の追加
}
次に、Startup.Configure メソッドに、認証ミドルウェアを追加します。
public void Configure(IApplicationBuilder app, IWebHostEnvironment env)
{
    ...

    app.UseAuthentication(); //認証ミドルウェアの追加
    app.UseAuthorization();

    ...
}
サインイン/サインアウト リンクの追加
サインイン/サインインのリンクを View に定義します。
ここでは、Partial View(Views/Shared/_LoginPartial.cshtml) として定義します。
認証されていない時には、サインインのリンク、認証されている時には、サインアウトのリンクを表示するようにします。
リンク先は、エリア MicrosoftIdentity の Account/SignOut および Account/SignIn アクションです。
Microsoft.Identity.Web.UI に含まれている AccountController のアクションをコールしています。
<ul class="navbar-nav">
@if (!User.Identity.IsAuthenticated)
{
    <li class="nav-item">
        <a class="nav-link text-dark" asp-area="MicrosoftIdentity" asp-controller="Account" asp-action="SignIn">サインイン</a>
    </li>
}
else
{
    <li class="nav-item">
        <span class="navbar-text text-dark">@User.Identity.Name</span>
    </li>
    <li class="nav-item">
        <a class="nav-link text-dark" asp-area="MicrosoftIdentity" asp-controller="Account" asp-action="SignOut">サインアウト</a>
    </li>
}
</ul>
好みの場所に、インラインで、Partial View を定義して、リンクを表示します。
…
<partial name="_LoginPartial" />
…
次に、認証結果を確認するためのアクションとビューを定義します。
アクションには、Authorize 属性をつけて、認証が必要とマークします。
[Authorize]
public IActionResult WhoAreYou()
{
    return View();
}
ビューは、クレームをリスト表示するのみとしています。
@{
    ViewData["Title"] = "WhoAreYou";
}
<h1>@ViewData["Title"]</h1>

<p>あなたは誰?</p>

<dl>
    @foreach (var claim in User.Claims)
    {
        <dt>@claim.Type</dt>
        <dd>@claim.Value</dd>
    }
</dl>
動作確認
Visual Studio でデバッグ実行します。
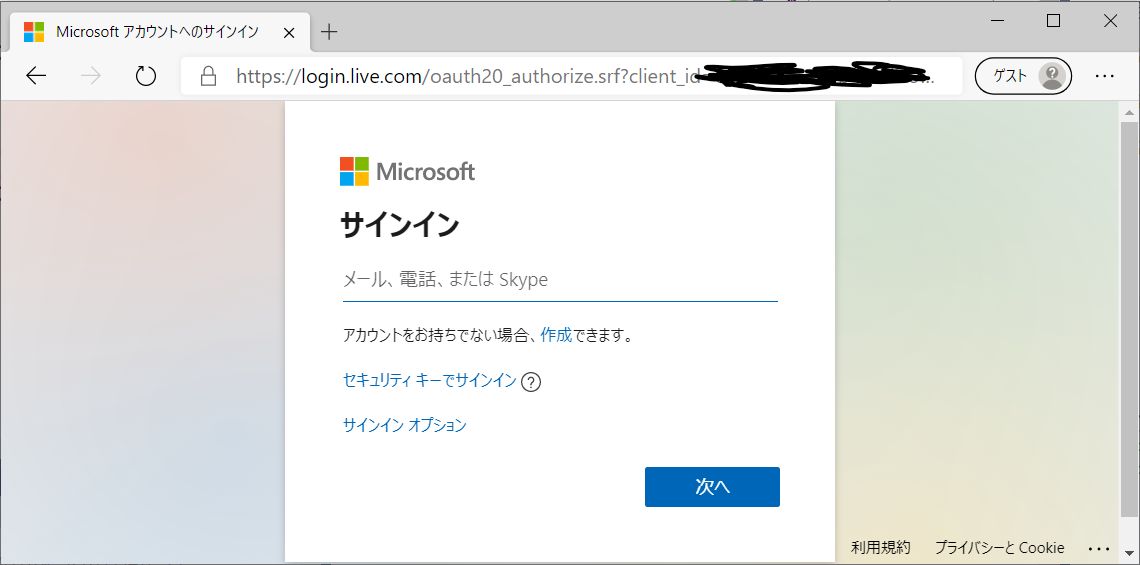
先の手順で追加したサインイン リンクを選択します。
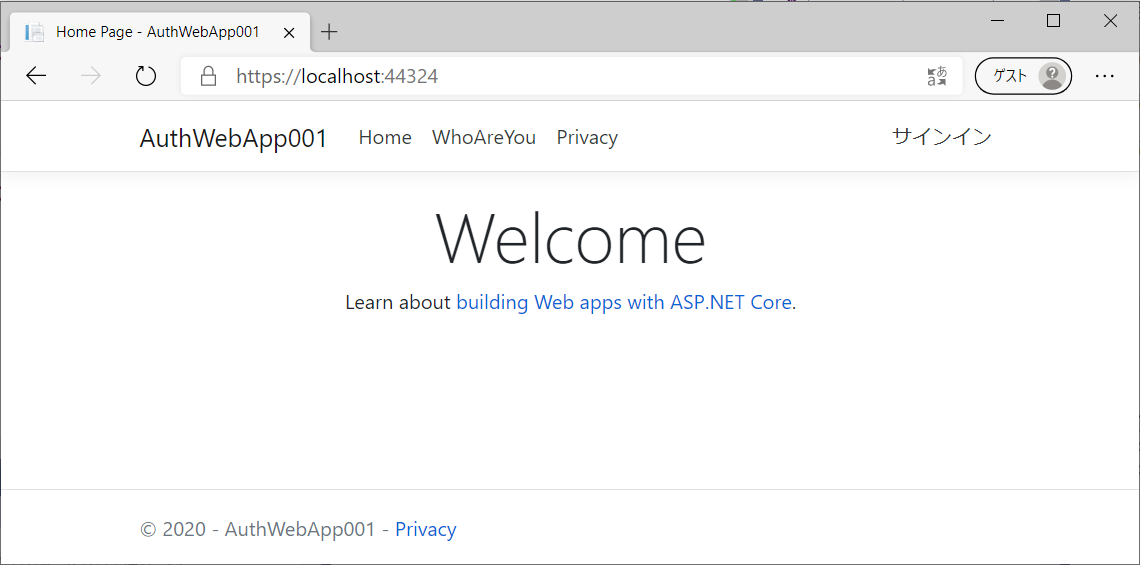
Microsoft アカウントのサインイン画面が表示されます。
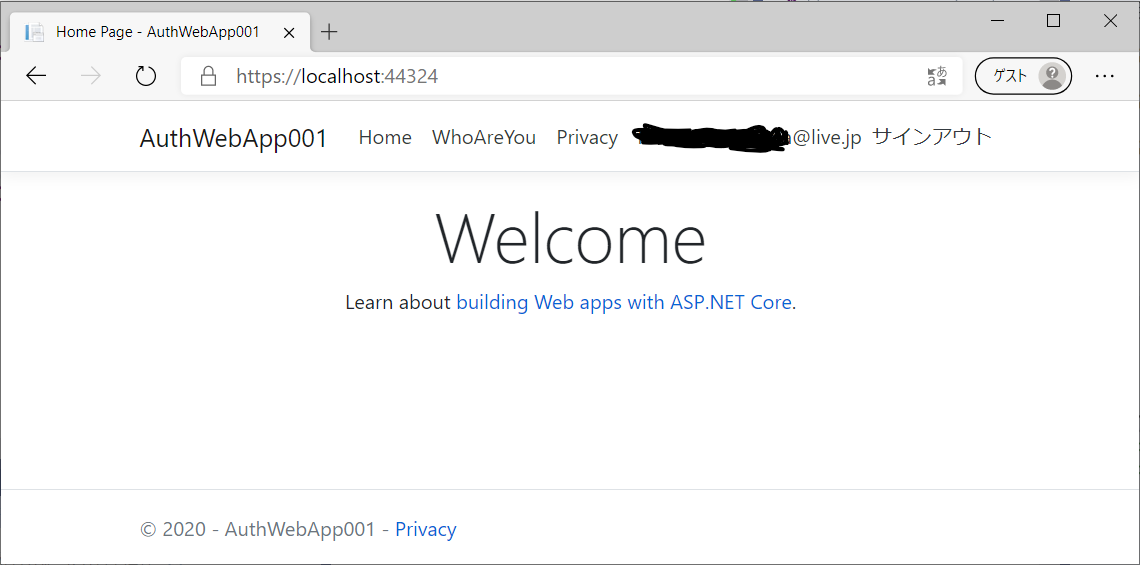
Microsoft アカウントでサインインすると、Microsoft アカウントが表示され、リンクがサインアウトに変更されます。
認証結果を確認のためのページを参照します。
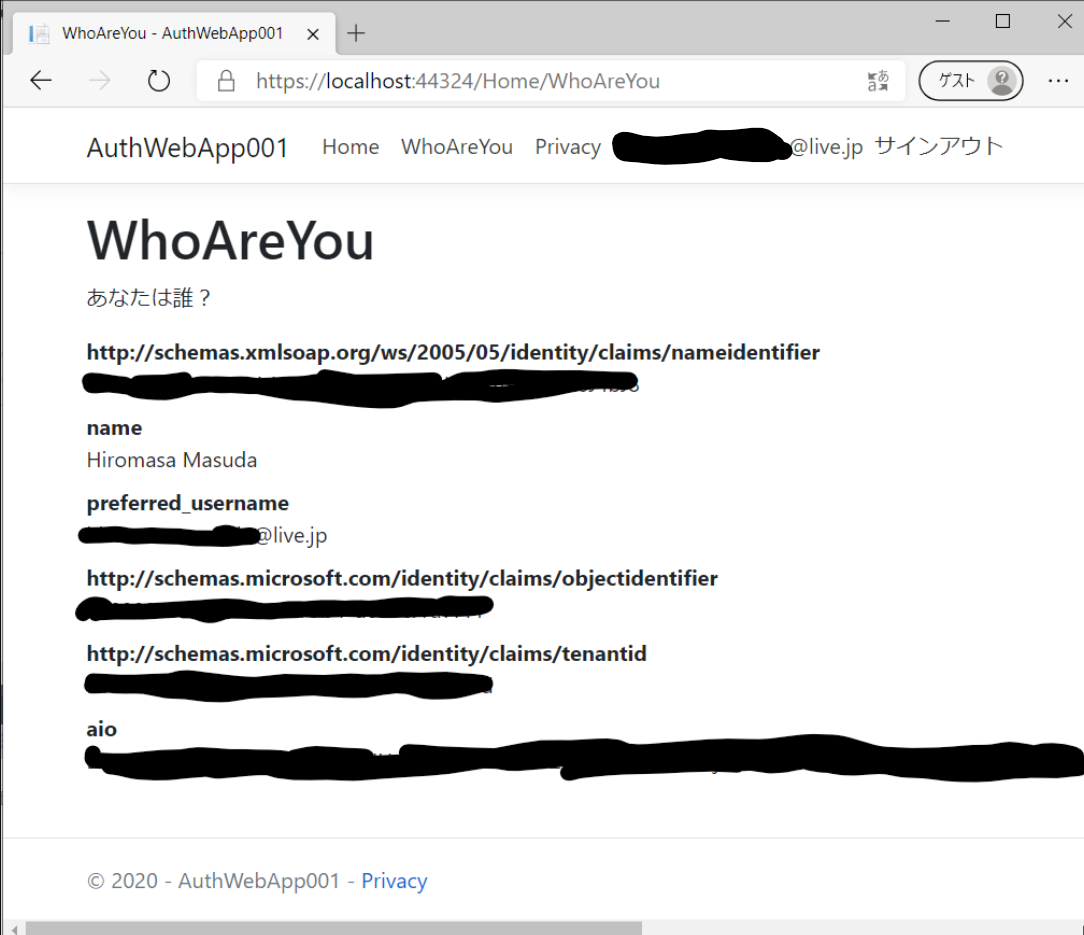
ここで重要なクレームは、以下となります。
- http://schemas.microsoft.com/identity/claims/objectidentifier: オブジェクトの ID。今回の場合は、ユーザー アカウントの ID。
- http://schemas.microsoft.com/identity/claims/tenantid: Azure Active Directory のテナント ID。Microsoft アカウントの場合は、"9188040d-6c67-4c5b-b112-36a304b66dad" となります。
まとめ
ASP.NET Core 3.1 では、Web アプリに必ず必要となる認証を Microsoft Identity Web ライブラリを使うことで、実装コストを大幅に落とすことができます。
今回は、Microsoft アカウントでの認証を例としましたが、実装を一部変更して、Azure Active Directory アカウントを対象とすることもできます。
.NET Core の次世代 .NET 5.0(現状プレビュー) でも利用できるので、今後もより機能が充実していくと考えています。