はじめに
AppiumでFlutterアプリのテストを自動化する 環境構築編 - Qiita
の続きになります。
実際にテストコードを書いて、それを実行するところまでやります。
今回は勉強も兼ねつつ、比較的に簡単に用意できそうな「Python」を使います。
前提条件
AppiumでFlutterアプリのテストを自動化する 環境構築編 - Qiita
で、Appiumの環境構築が完了していること
pipコマンドのインストール
PythonはMacで標準で入っているはずなので、特に新たにインストールする必要はありません。
pipコマンドもすでに使えるはずですが、もし入っていなかった場合は、
https://bootstrap.pypa.io/get-pip.py
をダウンロードし、ダウンロード先で以下のコマンドを実行してください。
(うまくいかない場合は、頭にsudoと付けて実行してみてください)
python get-pip.py
Appium-Python-Clientのインストール
以下のコマンドを実行し、Appium-Python-Clientをインストールします。
(うまくいかない場合は、頭にsudoと付けて実行してみてください)
pip install Appium-Python-Client
今回使用するサンプルアプリ
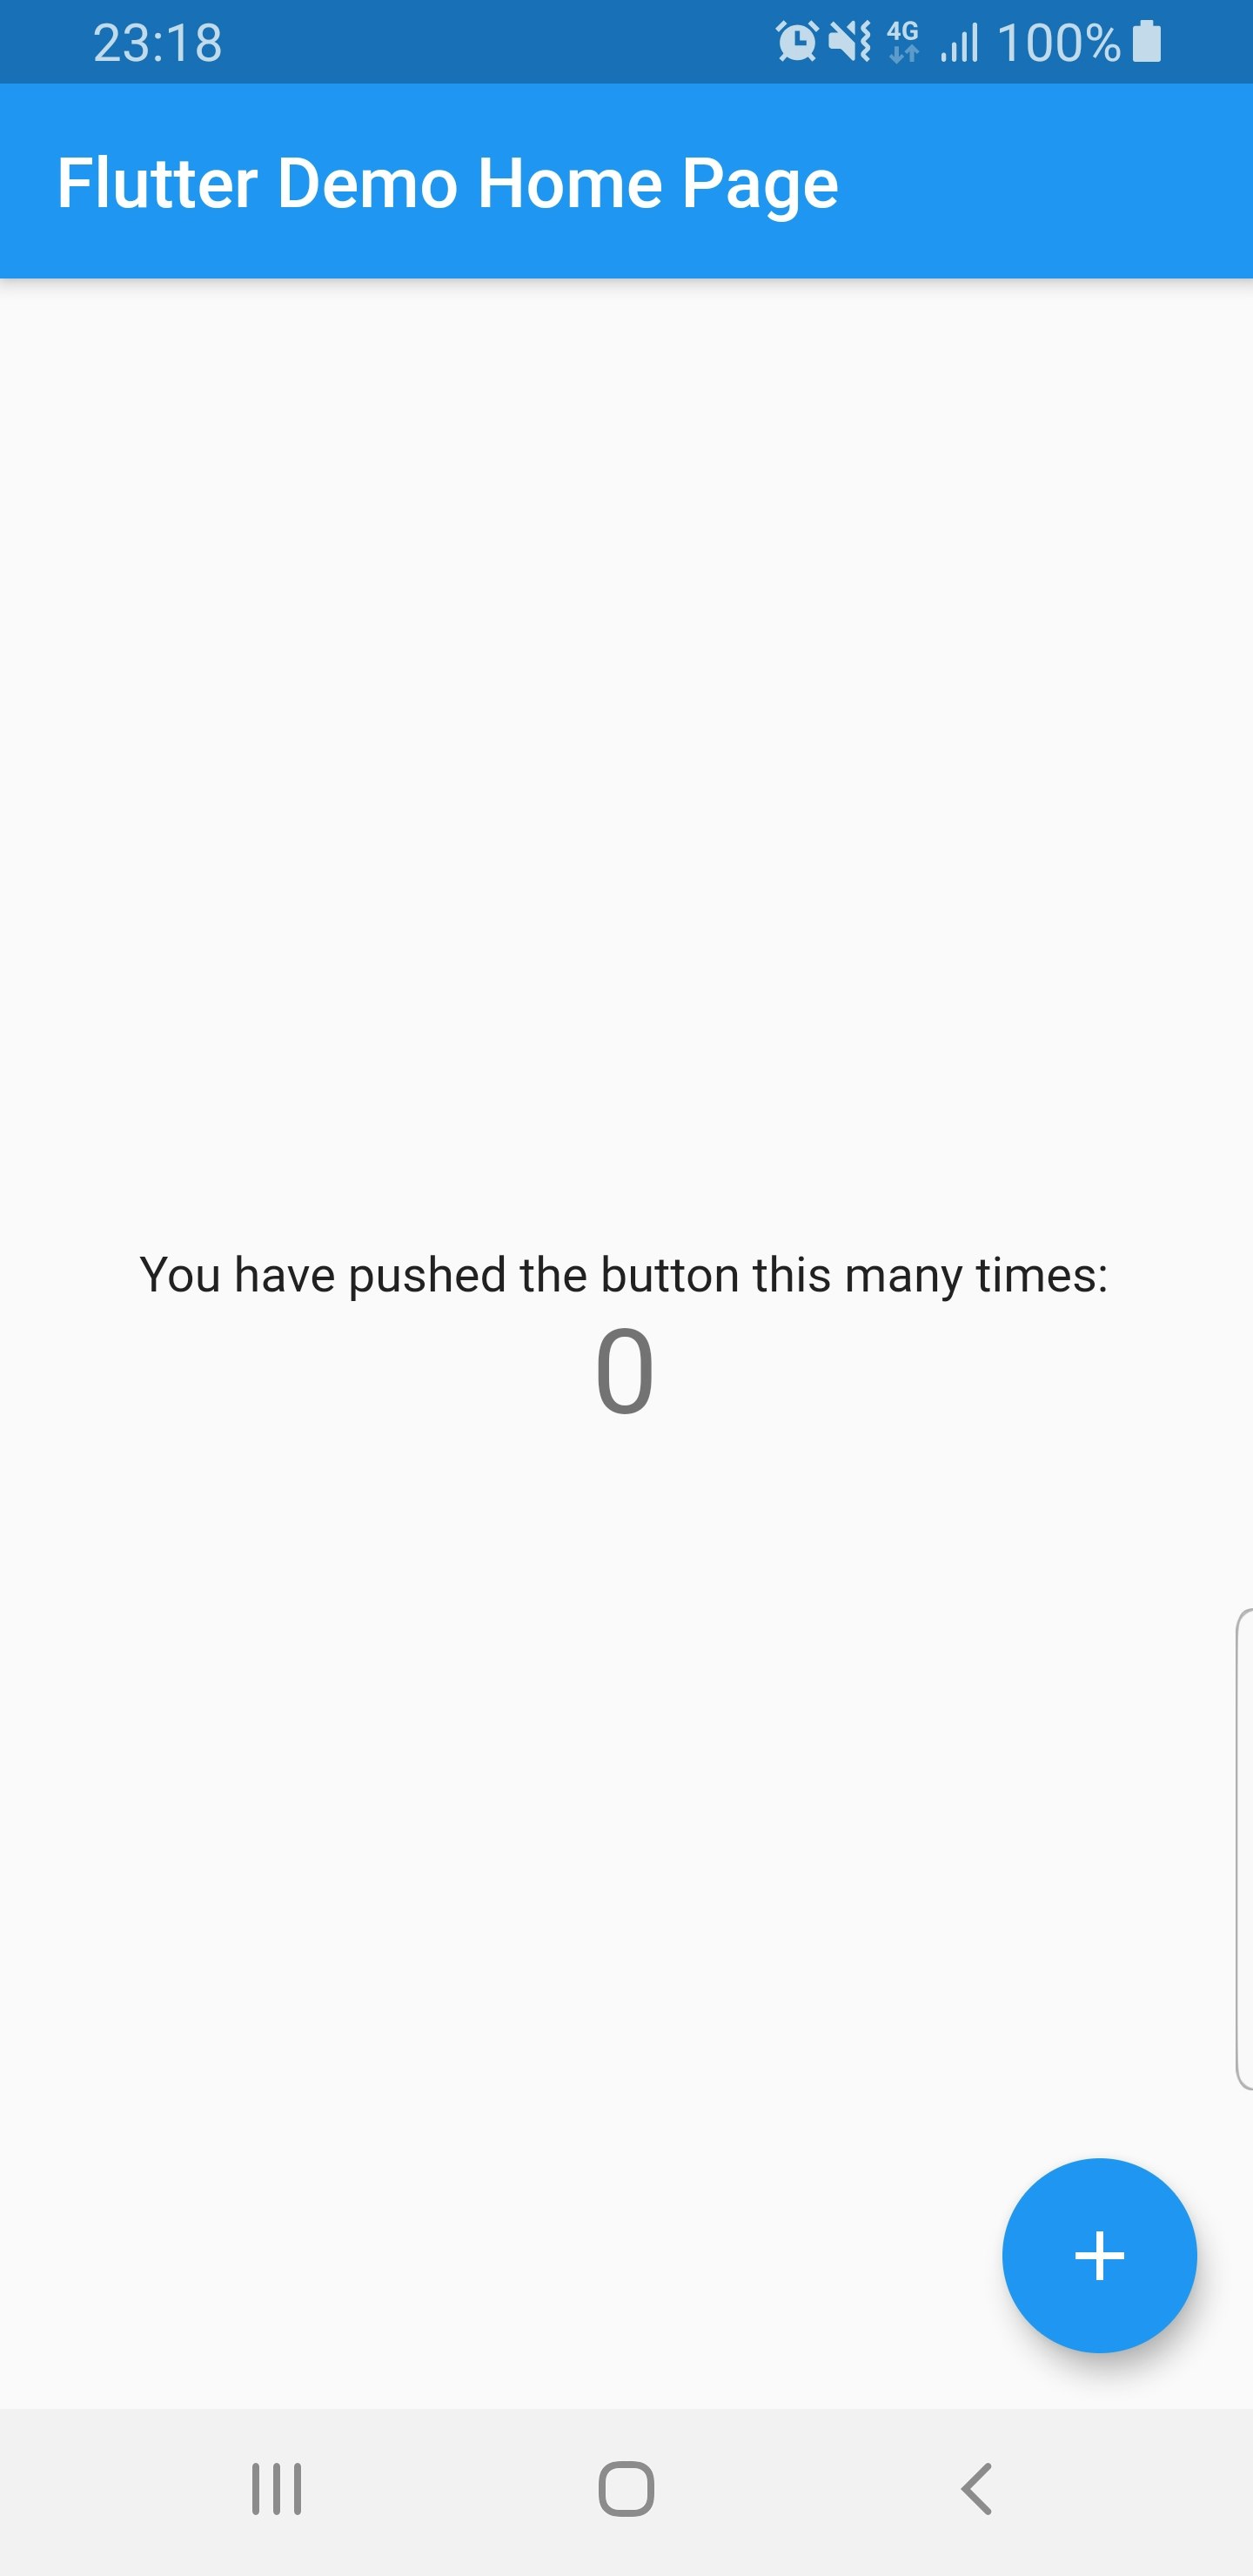
ごく簡単なサンプルアプリを以下に用意しました。
(Android Studioで新規Flutterプロジェクトを作った際にデフォルトで書かれているカウントアップアプリです)
Appium Desktopでテストコードを記録
Appium Desktopを起動させ、「Start Session」でセッションを開始するところまでやっておきます。
(手順については環境構築編を参照してください)
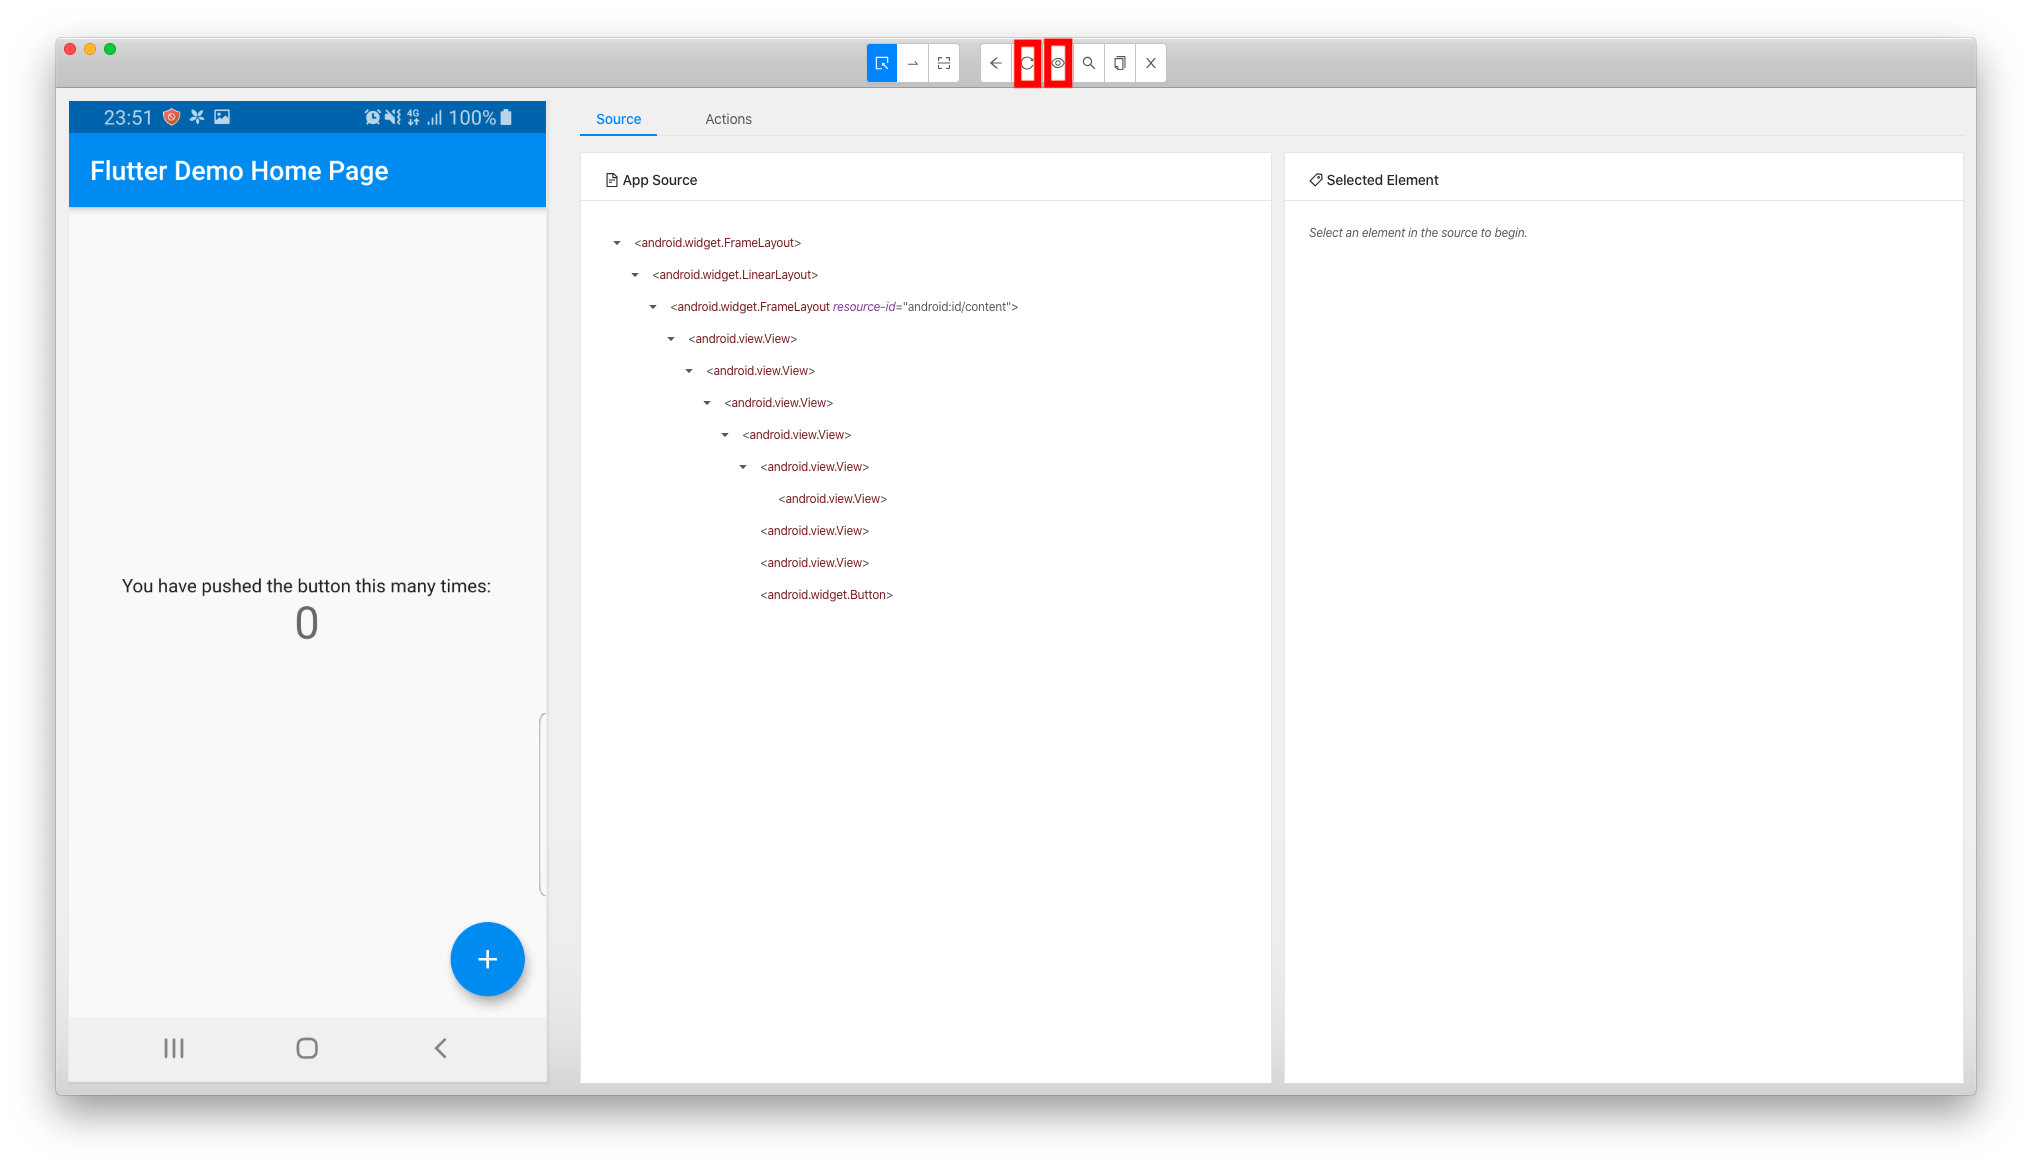
セッションを開始すると、以下の画面が立ち上がります。
左側にアプリの画面が表示されます。
もし表示が端末の画面と一致していない場合、更新ボタンをクリックすると画面が更新されます。
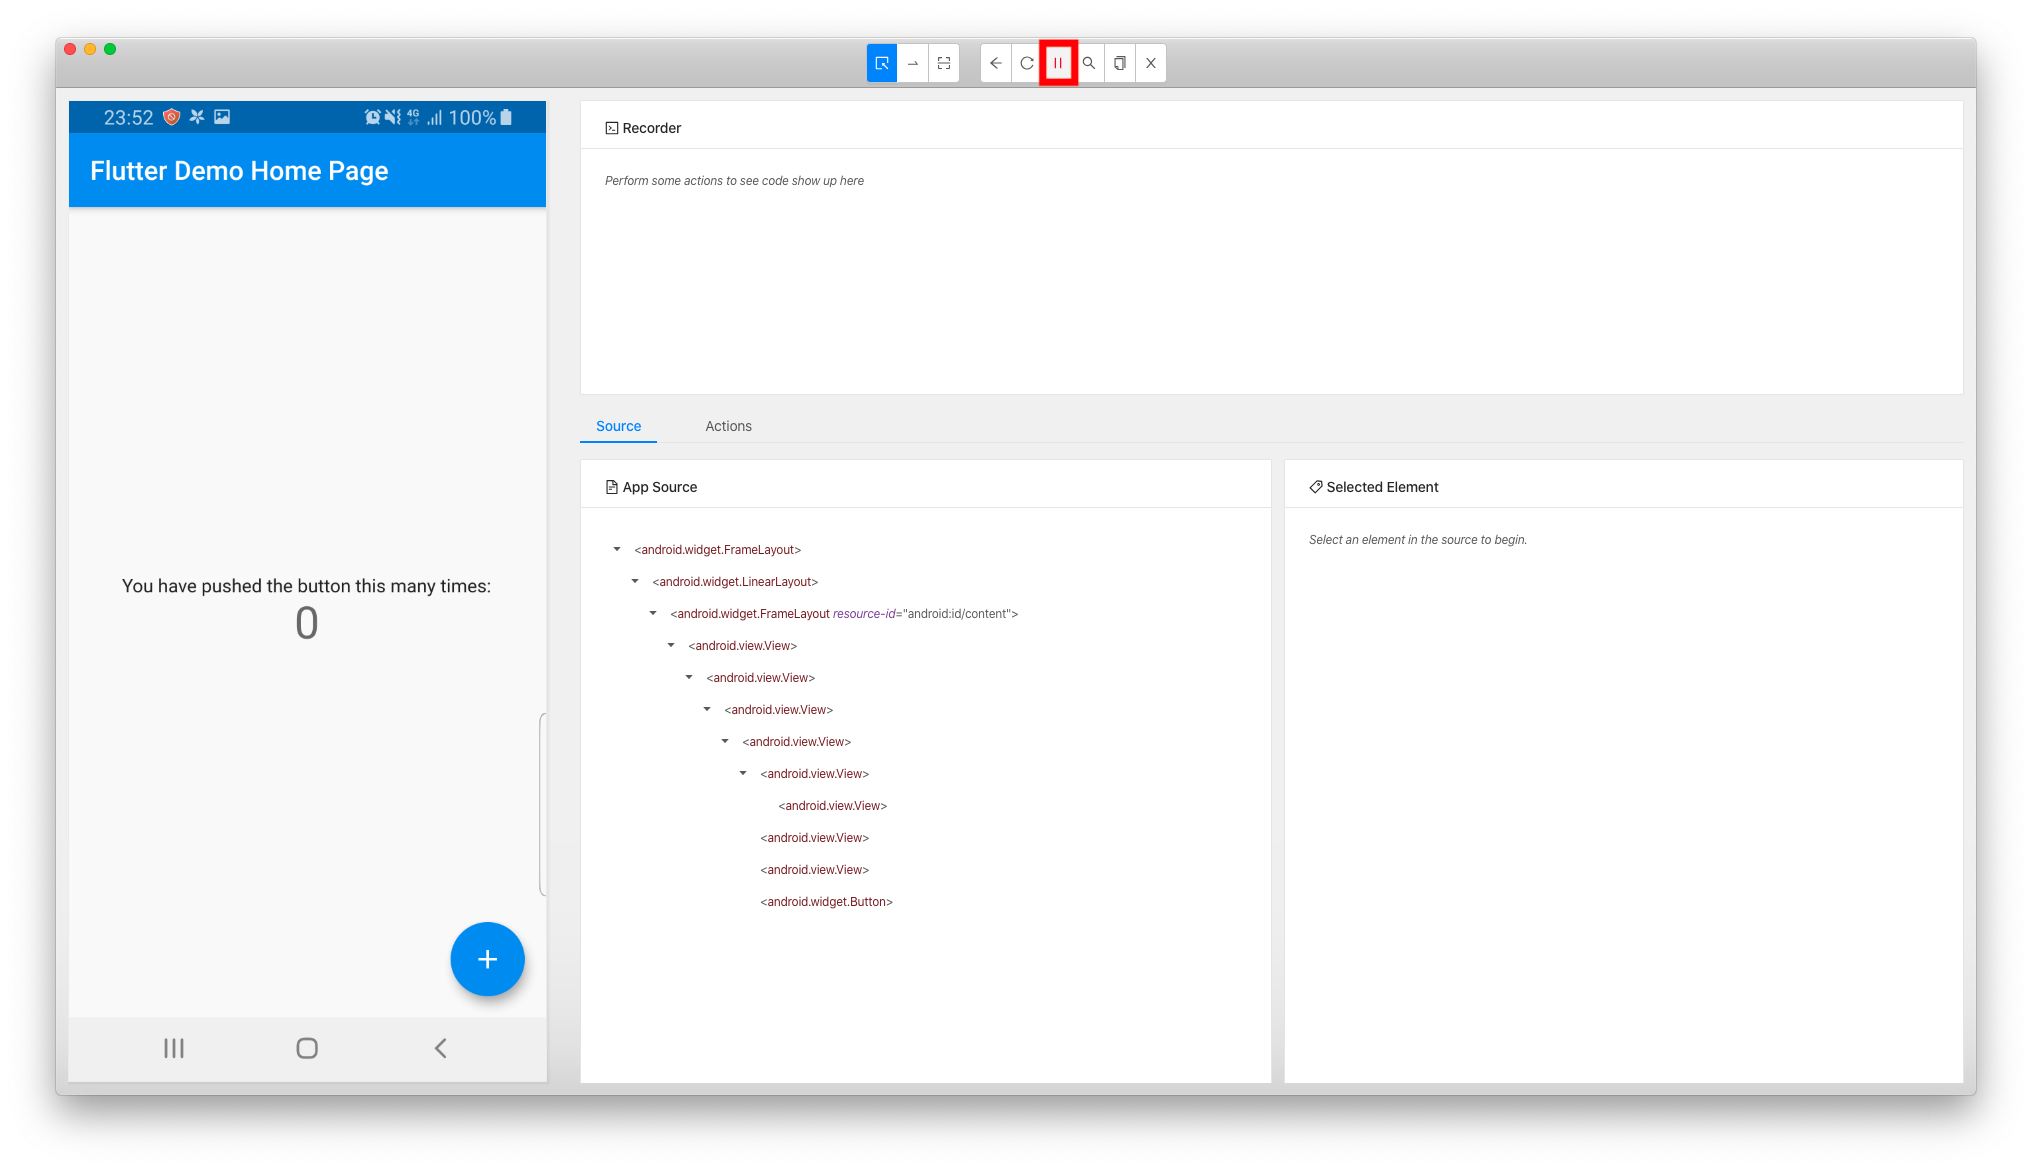
まず、記録ボタンをクリックし、記録を開始します。
すると、画面が切り替わり、記録ボタンの代わりに一時停止ボタンが表示されます。
記録を止める場合は、一時停止ボタンをクリックしてください。
次に、端末ではなくAppiumの画面からプラスボタンをクリックします。
すると、右側にプラスボタンに関する情報が表示されます。

Tapをクリックすると、上側にテストコードが表示されます。
テストコードの言語を選択することができ、「Python」を選択します。
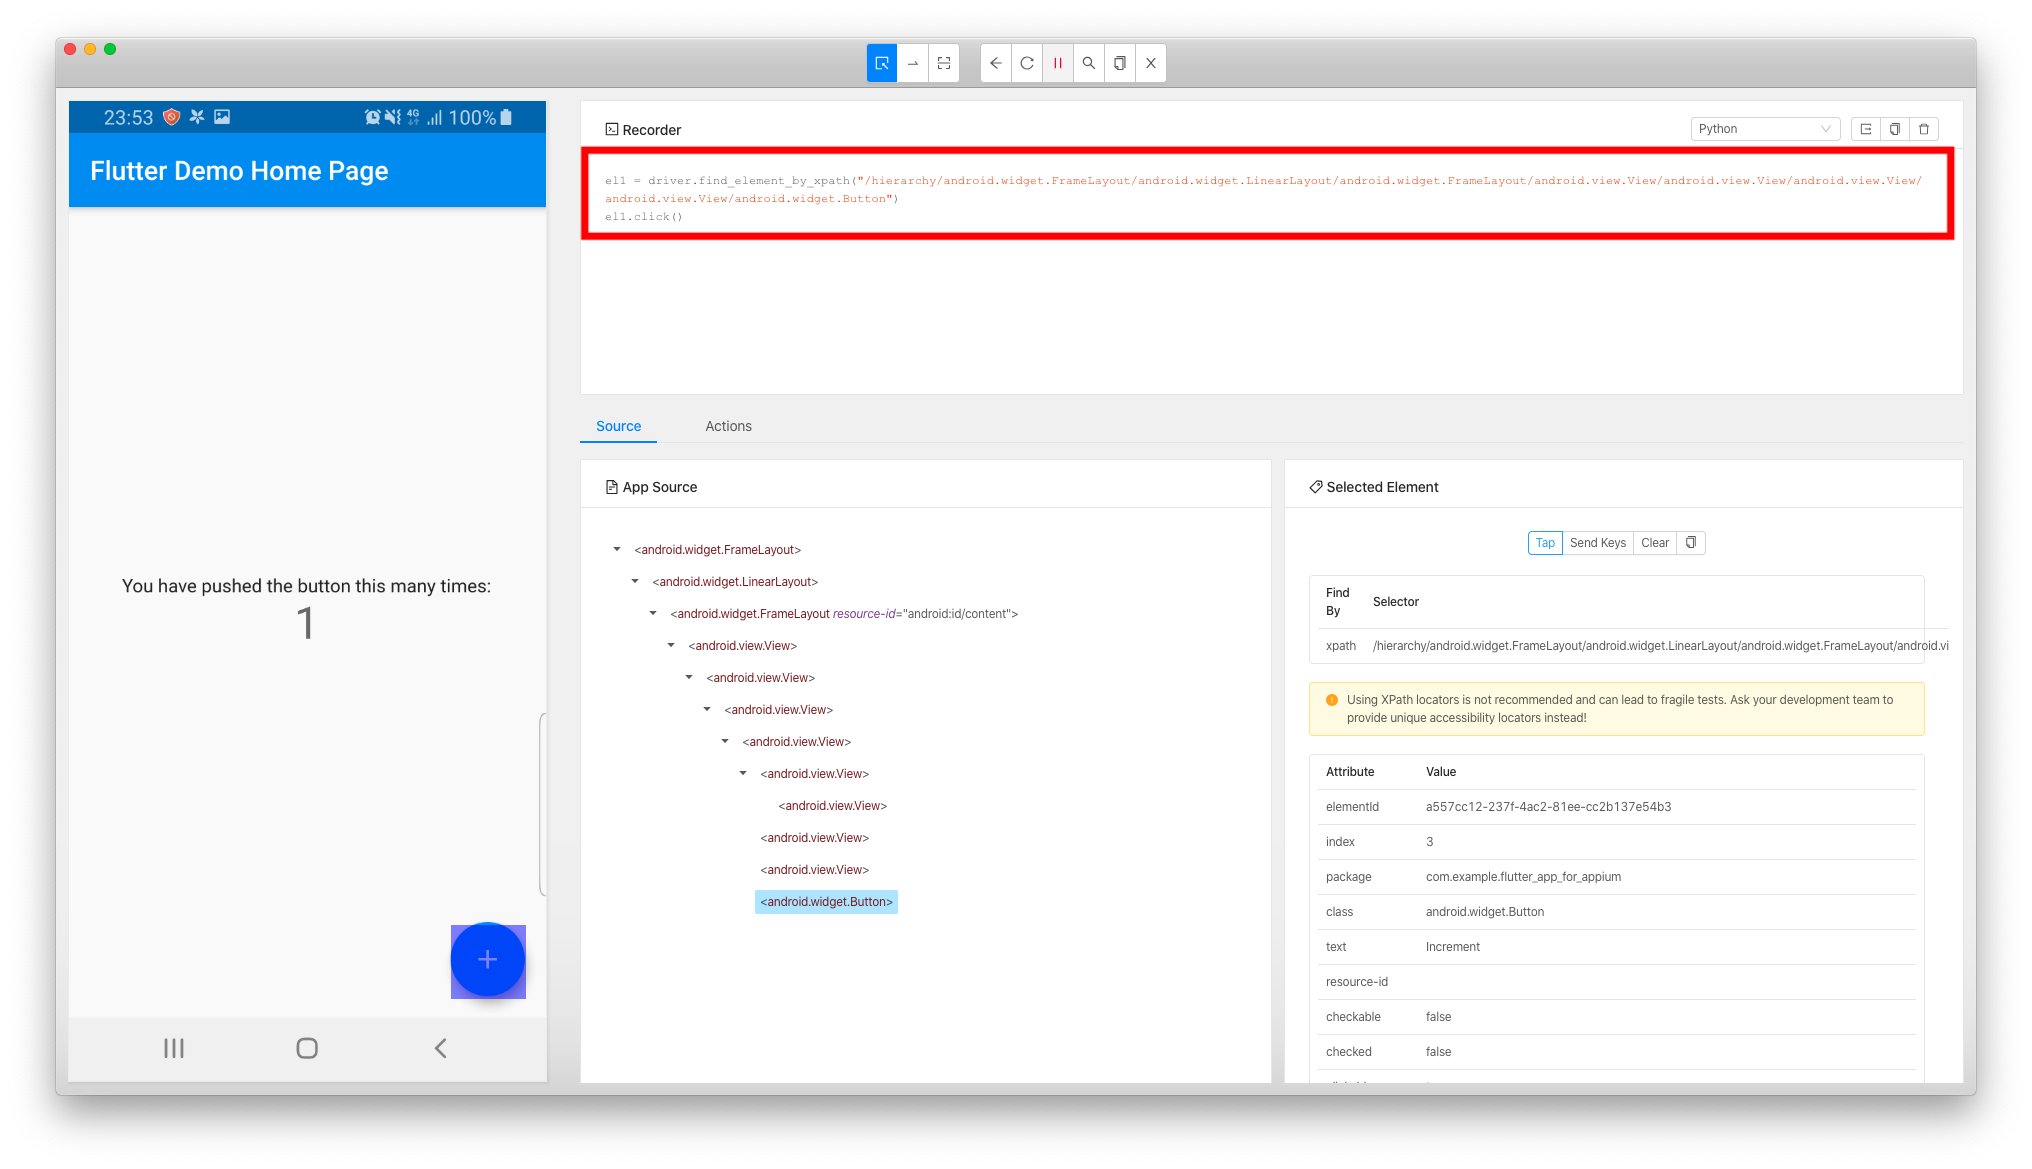
他にも、JS(wd)、JS(Webdriver.io)、Ruby、Java、Robot Frameworkを選択できます。

これにより、ボタンを押した時のテストコードを記録できます。
記録されたテストコードは以下になります。
el1 = self.driver.find_element_by_xpath("/hierarchy/android.widget.FrameLayout/android.widget.LinearLayout/android.widget.FrameLayout/android.view.View/android.view.View/android.view.View/android.view.View/android.widget.Button")
el1.click()
次に、「1」と表示されているテキストについて、きちんと「1」と表示されているかをテストしたいと思います。
要素に関しては、要素をクリックすると「Selected Element」の「Selector」から取得できます。
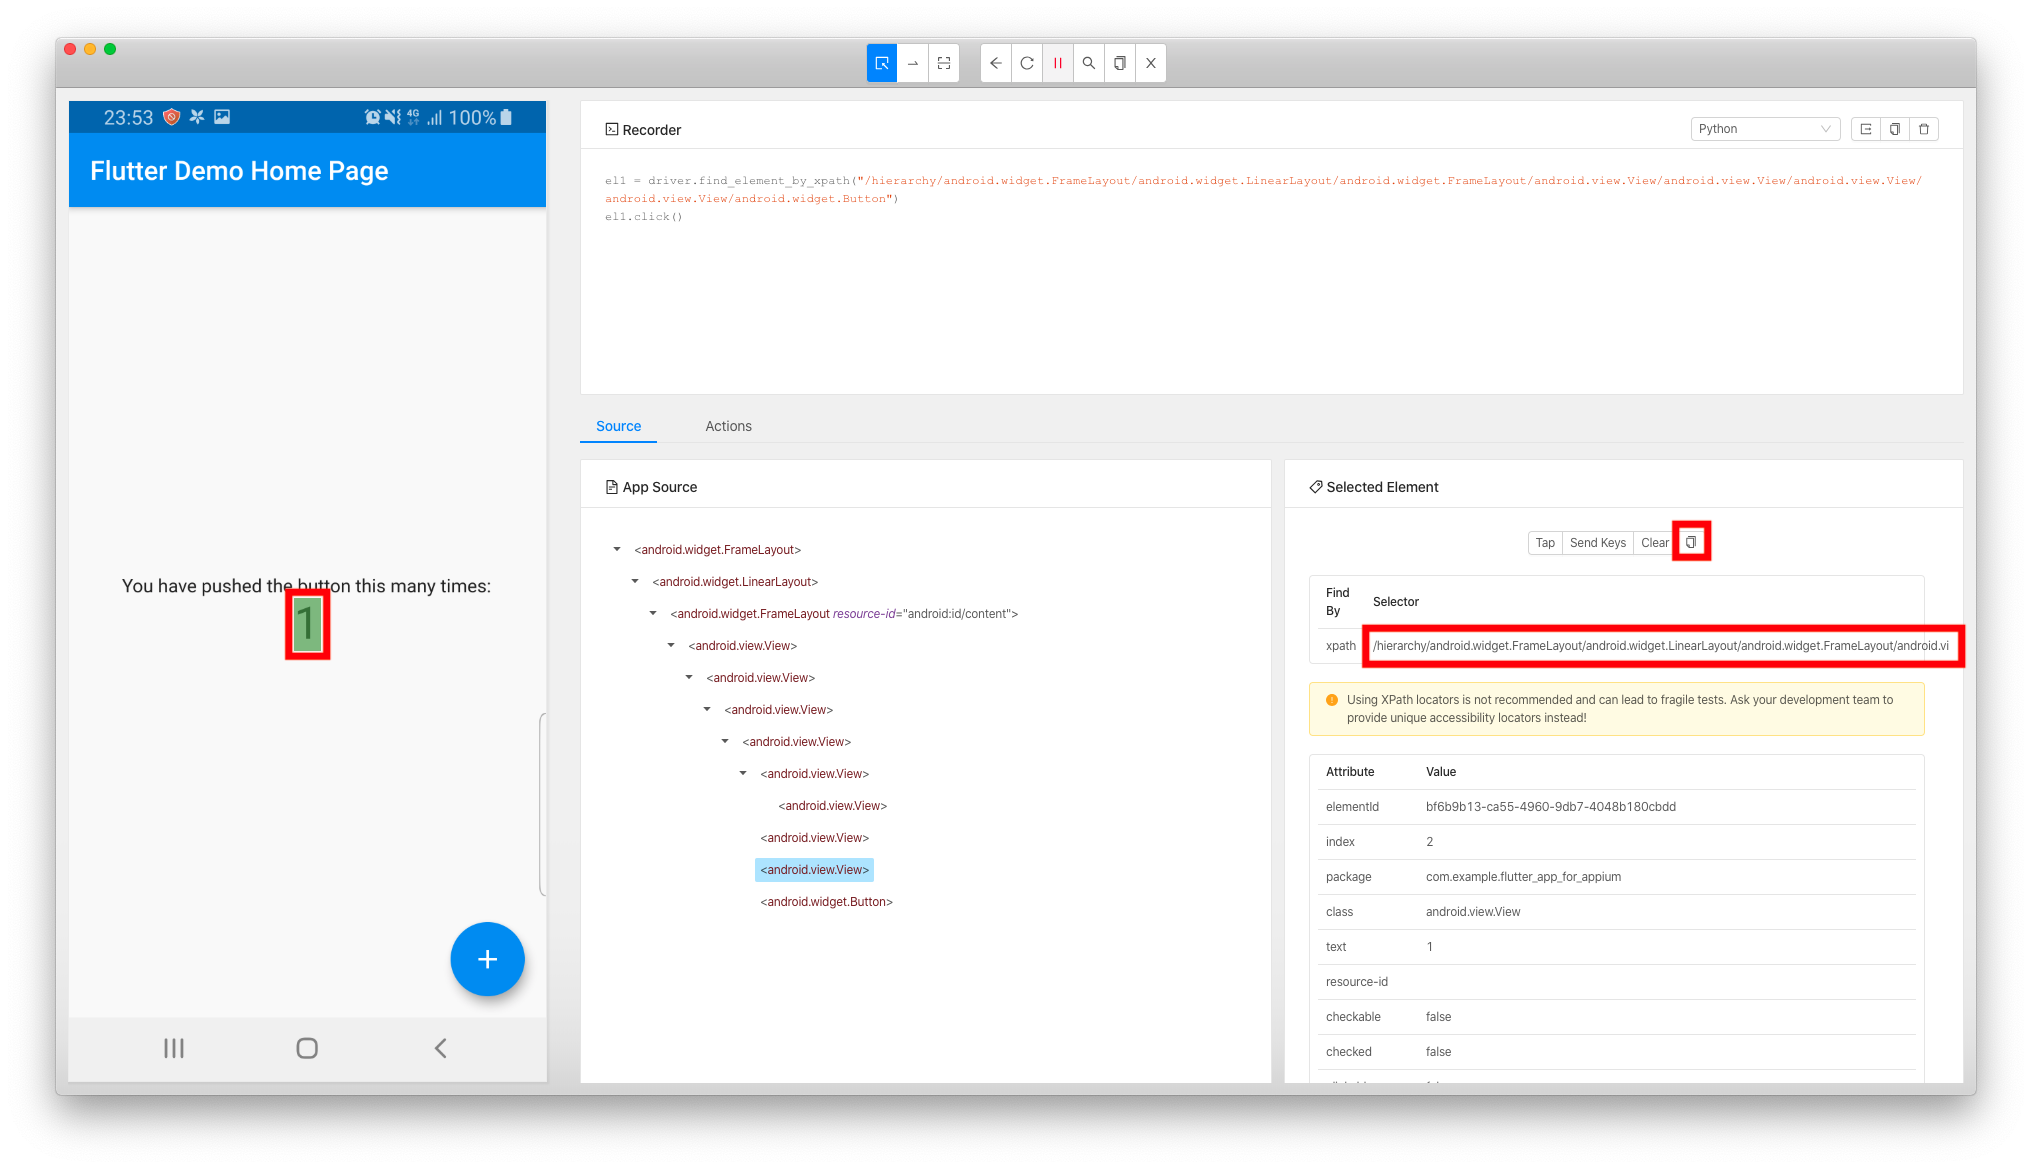
が、Appium Desktopでどうやって記録すればよいのかわかりませんでした。
Appium-Python-Client · PyPI
のサイトによると、get_attribute関数を使ってテキストに設定されている値を取得すればできそうです。
el = driver.find_element_by_class_name('android.widget.EditText')
driver.set_value(el, 'Testing')

text = el.get_attribute('text')
assertEqual('Testing', text)

el.set_value('More testing')
text = el.get_attribute('text')
assertEqual('More testing', text)
以下の通りテストコードを記載しました。
el2 = self.driver.find_element_by_xpath("/hierarchy/android.widget.FrameLayout/android.widget.LinearLayout/android.widget.FrameLayout/android.view.View/android.view.View/android.view.View/android.view.View/android.view.View[3]")
text = el2.get_attribute('text')
self.assertEqual('1', text)
記録したテストコードを実行できるようにする
ただ記録しただけでは、まだ実行できる状態になっていないため、実行できるよう土台を作ります。
コードの全容は以下となります。
import os
import unittest
from appium import webdriver
from time import sleep

class FlutterAppTests(unittest.TestCase):
    "Class to run tests against the Chess Free app"
    def setUp(self):
        "Setup for the test"
        desired_caps = {}
        desired_caps['platformName'] = 'Android'
        desired_caps['platformVersion'] = '9'
        desired_caps['deviceName'] = '988a97354e4e4c5054'
        desired_caps['app'] = os.path.abspath(os.path.join(os.path.dirname(__file__), '/Users/Hitoshi/AndroidStudioProjects/flutter_app_for_appium/build/app/outputs/apk/release/app-release.apk'))
        self.driver = webdriver.Remote('http://localhost:4723/wd/hub', desired_caps)

    def tearDown(self):
        "Tear down the test"
        self.driver.quit()

    def test_single_player_mode(self):
        "Test the Flutter app launches correctly"
        sleep(1)
        # -----ここからAppium Desktopで記録したコードを貼り付ける
        el1 = self.driver.find_element_by_xpath("/hierarchy/android.widget.FrameLayout/android.widget.LinearLayout/android.widget.FrameLayout/android.view.View/android.view.View/android.view.View/android.view.View/android.widget.Button")
        el1.click()
        el2 = self.driver.find_element_by_xpath("/hierarchy/android.widget.FrameLayout/android.widget.LinearLayout/android.widget.FrameLayout/android.view.View/android.view.View/android.view.View/android.view.View/android.view.View[3]")
        text = el2.get_attribute('text')
        self.assertEqual('1', text)
        # -----ここまでAppium Desktopで記録したコードを貼り付ける

if __name__ == '__main__':
    suite = unittest.TestLoader().loadTestsFromTestCase(FlutterAppTests)
    unittest.TextTestRunner(verbosity=2).run(suite)
ここで、かいつまんで説明していきます。
まず、setUp関数の中で、デバイスとAPKの情報を記載します。
ここは、Appium Desktopの「Desired Capabilities」と同じ情報を記載すればOKです。
desired_caps = {}
desired_caps['platformName'] = 'Android'
desired_caps['platformVersion'] = '9'
desired_caps['deviceName'] = '988a97354e4e4c5054'
desired_caps['app'] = os.path.abspath(os.path.join(os.path.dirname(__file__), '/Users/Hitoshi/AndroidStudioProjects/flutter_app_for_appium/build/app/outputs/apk/release/app-release.apk'))
次に、test_single_player_mode関数の中に、先ほどAppium Desktopで記録したテストコードを貼り付けます。
もちろん自前で実装しても構いません。
ここに実際のテストコードを記載していきます。
el1 = self.driver.find_element_by_xpath("/hierarchy/android.widget.FrameLayout/android.widget.LinearLayout/android.widget.FrameLayout/android.view.View/android.view.View/android.view.View/android.view.View/android.widget.Button")
el1.click()
el2 = self.driver.find_element_by_xpath("/hierarchy/android.widget.FrameLayout/android.widget.LinearLayout/android.widget.FrameLayout/android.view.View/android.view.View/android.view.View/android.view.View/android.view.View[3]")
text = el2.get_attribute('text')
self.assertEqual('1', text)
最後に、tearDown関数で、ドライバを終了させます。
self.driver.quit()
テストコードの実行
コマンドでテストコードを実行します。
python flutter_app_for_appium_test.py
すると、以下のように表示されるはずです。
端末側もアプリが起動し、ボタンが押されてカウントアップされるはずです。
test_single_player_mode (__main__.FlutterAppTests)
Test the Flutter app launches correctly ... ok

----------------------------------------------------------------------
Ran 1 test in 25.573s

OK