モバイルアプリのUIテストを自動化するためのツール、「Appium」を導入することになったため、備忘録として残しておきます。
前提条件
- OSがmacOSであること
- Homebrewがインストール済みであること
- npm(Node.js)がインストール済みであること
- Flutterの環境および知見があること
Appiumのインストール
$ npm install -g appium
$ npm install -g appium-doctor
$ npm install -g wd
Appiumの環境設定
ANDROID_HOMEとJAVA_HOMEをパスとして通しておく必要があります。
.bash_profileに以下を追記してください。
# ANDROID_HOMEの設定
export ANDROID_HOME=/Users/Hitoshi/Library/Android/sdk
export PATH=${PATH}:$ANDROID_HOME/tools:$ANDROID_HOME/platform-tools
# JAVA_HOMEの設定
export JAVA_HOME=$(/usr/libexec/java_home -v 1.8)
export PATH=${PATH}:$JAVA_HOME/bin
appium-doctor --androidを実行し、「### Diagnostic for necessary dependencies starting ###」より下の項目に全てチェックマークが入っていればOKです。
「### Diagnostic for optional dependencies starting ###」より下の項目は任意のため、無視してもらっても大丈夫かと思います。
Hitoshi-no-Air:~$ appium-doctor --android
info AppiumDoctor Appium Doctor v.1.11.1
info AppiumDoctor ### Diagnostic for necessary dependencies starting ###
info AppiumDoctor  ✔ The Node.js binary was found at: /Users/Hitoshi/.nodebrew/current/bin/node
info AppiumDoctor  ✔ Node version is 10.13.0
info AppiumDoctor  ✔ ANDROID_HOME is set to: /Users/Hitoshi/Library/Android/sdk
info AppiumDoctor  ✔ JAVA_HOME is set to: /Library/Java/JavaVirtualMachines/jdk1.8.0_73.jdk/Contents/Home
info AppiumDoctor  ✔ adb exists at: /Users/Hitoshi/Library/Android/sdk/platform-tools/adb
info AppiumDoctor  ✔ android exists at: /Users/Hitoshi/Library/Android/sdk/tools/android
info AppiumDoctor  ✔ emulator exists at: /Users/Hitoshi/Library/Android/sdk/tools/emulator
info AppiumDoctor  ✔ Bin directory of $JAVA_HOME is set
info AppiumDoctor ### Diagnostic for necessary dependencies completed, no fix needed. ###
info AppiumDoctor
info AppiumDoctor ### Diagnostic for optional dependencies starting ###
WARN AppiumDoctor  ✖ opencv4nodejs cannot be found.
info AppiumDoctor  ✔ ffmpeg is installed at: /usr/local/bin/ffmpeg. ffmpeg version 4.1.4 Copyright (c) 2000-2019 the FFmpeg developers
WARN AppiumDoctor  ✖ mjpeg-consumer cannot be found.
WARN AppiumDoctor  ✖ bundletool.jar cannot be found
info AppiumDoctor ### Diagnostic for optional dependencies completed, 3 fixes possible. ###
info AppiumDoctor
info AppiumDoctor ### Optional Manual Fixes ###
info AppiumDoctor The configuration can install optionally. Please do the following manually:
WARN AppiumDoctor  ➜ Why opencv4nodejs is needed and how to install it: https://github.com/appium/appium/blob/master/docs/en/writing-running-appium/image-comparison.md
WARN AppiumDoctor  ➜ mjpeg-consumer module is required to use MJPEG-over-HTTP features. Please install it with 'npm i -g mjpeg-consumer'.
WARN AppiumDoctor  ➜ bundletool.jar is used to handle Android App Bundle. Please read http://appium.io/docs/en/writing-running-appium/android/android-appbundle/ to install it
info AppiumDoctor
info AppiumDoctor ###
info AppiumDoctor
info AppiumDoctor Bye! Run appium-doctor again when all manual fixes have been applied!
info AppiumDoctor
Appium Desktopのインストール
以下からダウンロードします。
https://github.com/appium/appium-desktop/releases
バージョン:v1.13.0
ファイル名:Appium-mac-1.13.0.dmg
dmgファイルを開き、appファイルをアプリケーションフォルダに移動させます。
実機と接続
Android
アプリを起動させると、以下の画面が表示されます。
そのまま、「Start Server v1.13.0」をクリックします。

すると、以下の画面が起動します。
画面右上の虫眼鏡のボタンをクリックします。

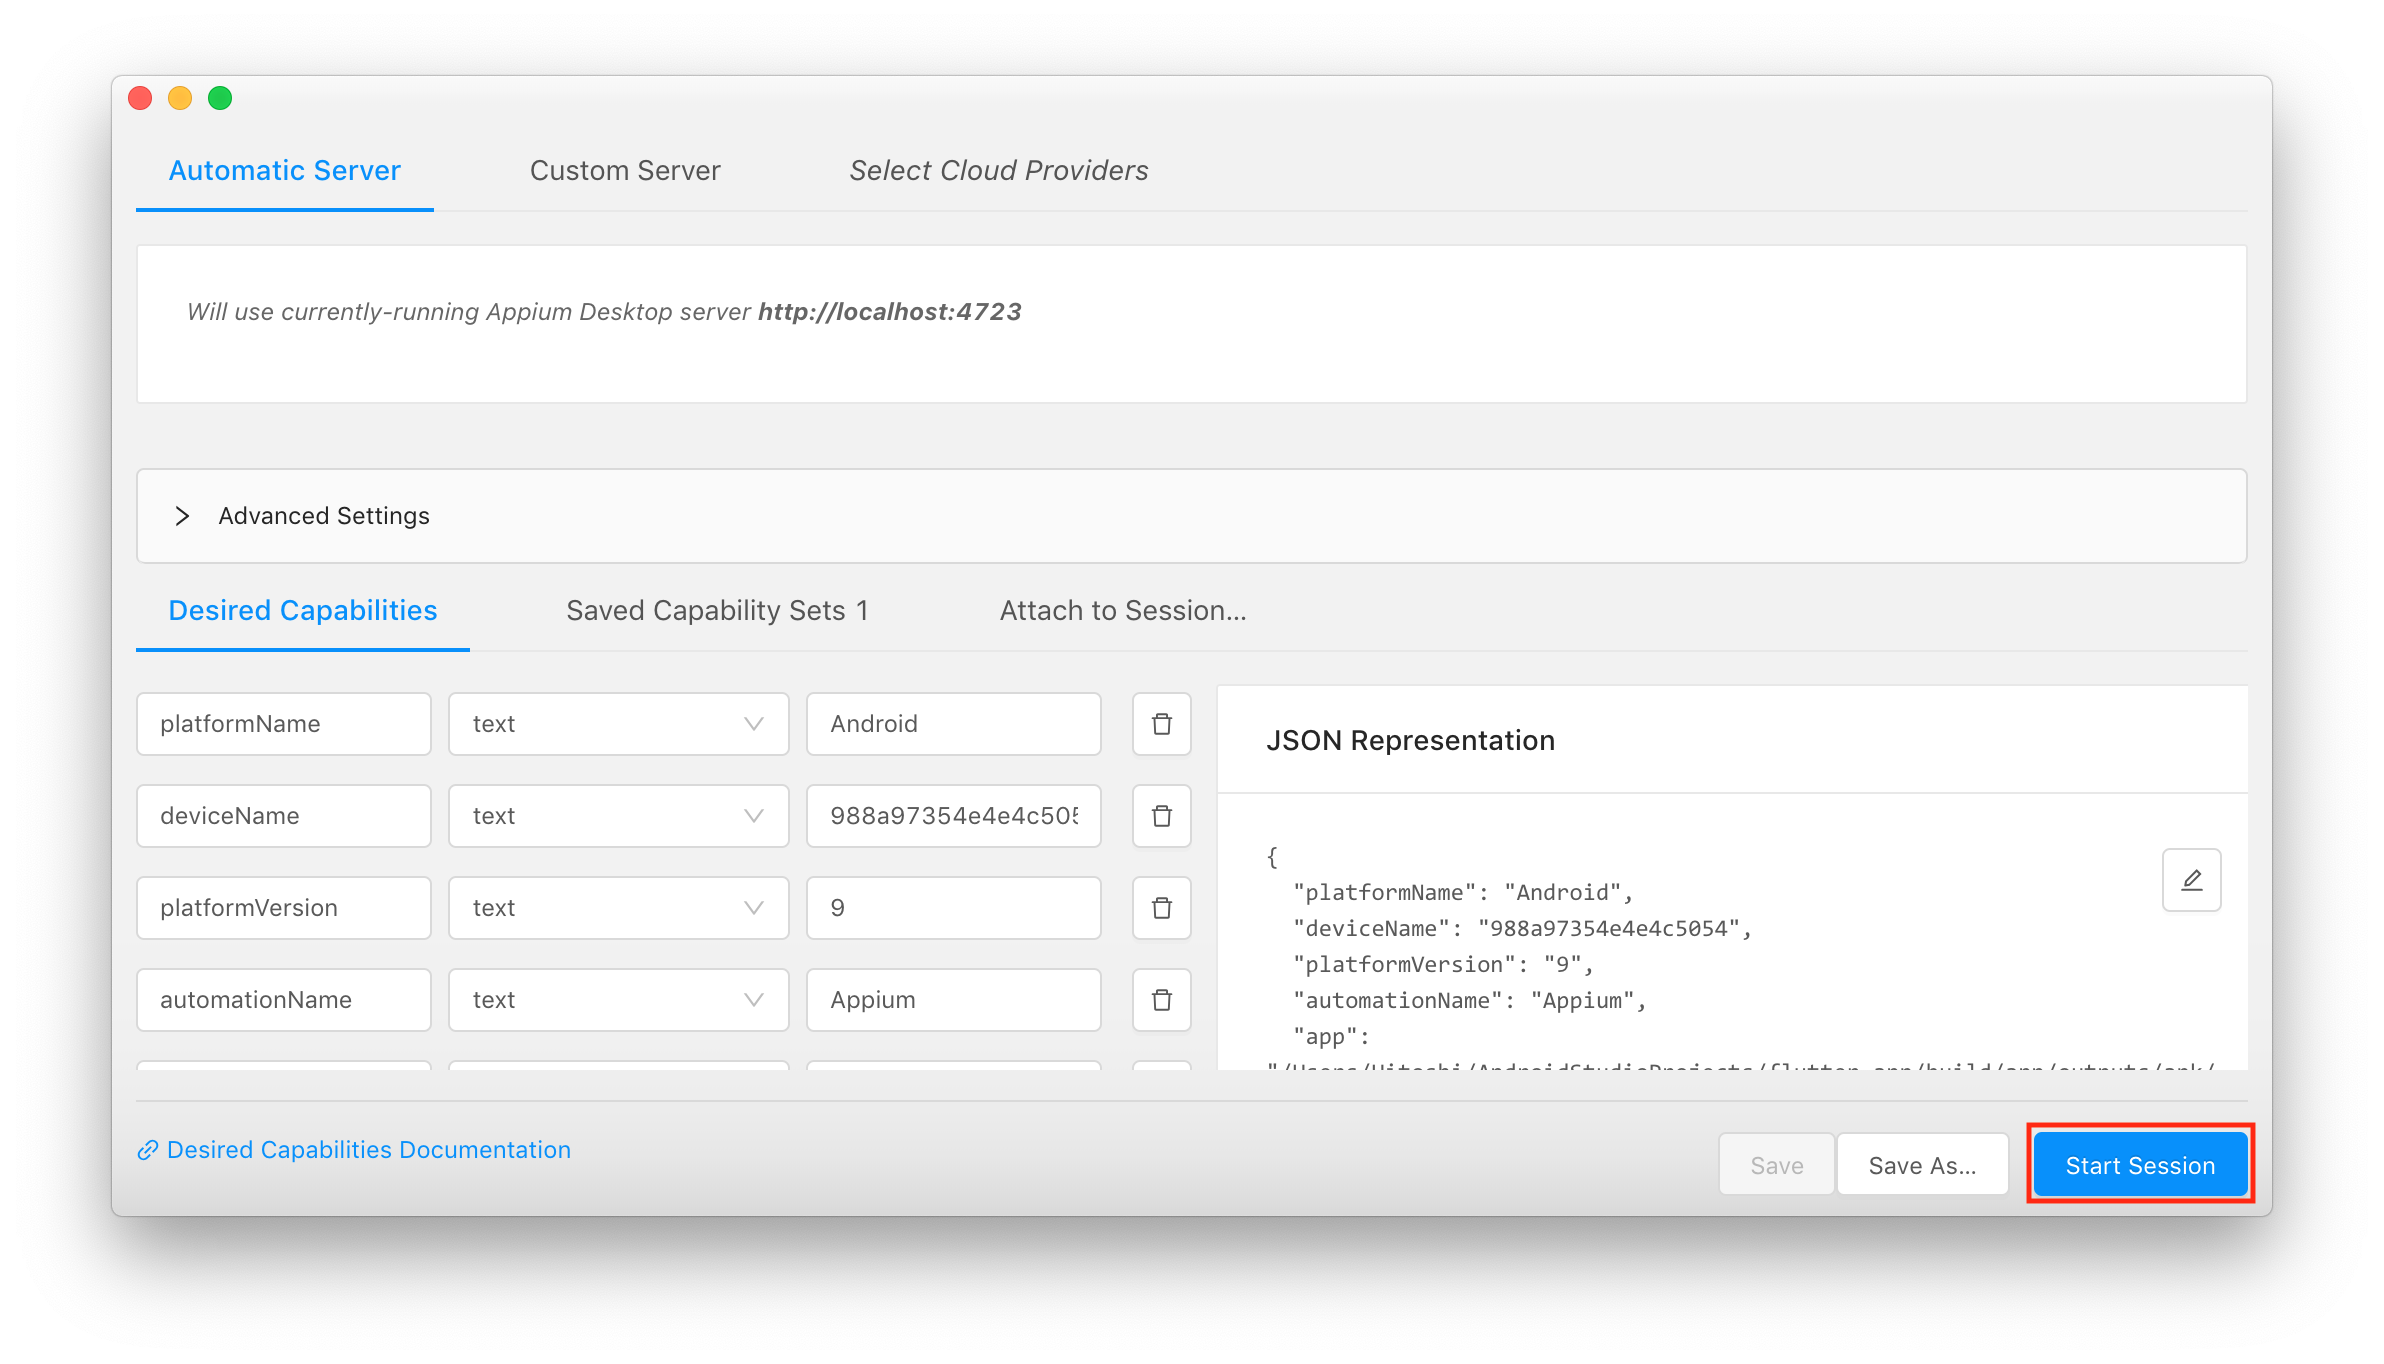
「Automatic Server」の「Desired Capabilities」を選択し、右下の「JSON Representation」にある鉛筆マークをクリックします。
ちなみに、直接JSONを入力しなくても、左側から「Name」と「Value」をそれぞれ入力することもできます。

すると、編集可能な状態になりますので、以下の通り編集します。
{
  "platformName": "Android",
  "deviceName": "adb devicesコマンドで得られた値",
  "platformVersion": "実機のAndroid OSバージョン",
  "automationName": "Appium",
  "app": "ローカルPC上のAPKのパス"
}
「adb devicesコマンドで得られた値」というのは、「List of devices attached」の下に出てくる、「xxxxxxxxxxxxxx」のことです。
$ adb devices
List of devices attached
xxxxxxxxxxxxxx	device
入力したら、保存ボタンをクリックし、内容を反映させます。

反映後、「Start Session」をクリックし、セッションを開始します。
この際、実機側がスリープ状態になっていないことを確認してください。

セッションを開始後、正常であれば以下の画面が立ち上がります。

今回はここまでとします。
追記
続きとして、実践編を投稿しました。