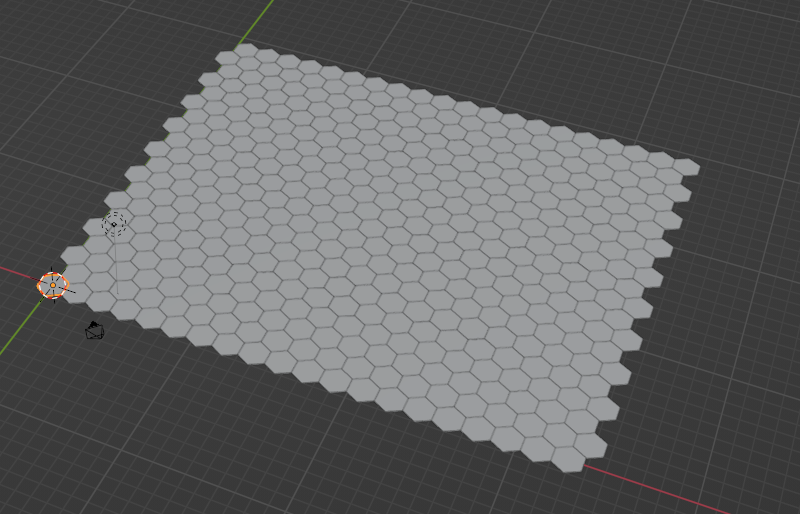
こういうやつを作ります。Blender スクリプトを使います。
メッシュを敷き詰める
import bpy
import math
import random
# 六角形タイルの設定
tile_radius = 1.0  # タイルの半径
rows = 20          # 行の数
cols = 20          # 列の数
# アニメーションの設定
animation_duration = 60  # アニメーションの総時間(秒)
frame_rate = 24          # フレームレート
total_frames = animation_duration * frame_rate
tiles_to_animate_per_frame = 30  # 1フレームあたりにアニメーションを適用するタイルの数
material_name = "Material"  # ここに適用したいマテリアルの名前を設定

# 六角形タイルを生成する関数
def create_hex_tile(x, y, radius):
    bpy.ops.mesh.primitive_cylinder_add(vertices=6, radius=radius, depth=0.1, location=(x, y, 0))

# タイルを配置する関数
def place_tiles(rows, cols, radius):
    row_height = 1.5 * radius
    for row in range(rows):
        for col in range(cols):
            x = col * math.sqrt(3) * radius
            y = row * row_height
            if row % 2 == 1:
                x += radius * math.sqrt(3)/2
            create_hex_tile(x, y, radius)

# タイルにアニメーションを設定する関数
def animate_tile(tile, start_frame, end_frame, start_angle, end_angle):
    tile.rotation_mode = 'XYZ'
    # 開始フレームでの回転を設定(指定された開始角度)
    tile.rotation_euler[2] = start_angle
    tile.keyframe_insert(data_path="rotation_euler", frame=start_frame)
    # 終了フレームでの回転を設定(指定された終了角度)
    tile.rotation_euler[2] = end_angle
    tile.keyframe_insert(data_path="rotation_euler", frame=end_frame)

# タイルの配置を開始
place_tiles(rows, cols, tile_radius)
# 生成されたタイルのリストを取得
tiles = [obj for obj in bpy.data.objects if obj.type == 'MESH' and "Cylinder" in obj.name]

# タイル回転の記録しながら相対回転を定義
n = len(tiles)
m = total_frames//frame_rate
tile_rotation_info = [[0]*(n) for i in range(m+1)]
tile_idx = list(range(n))
for i in range(m):
    selected_tiles_idx = random.sample(tile_idx,30)
    for idx in range(n):
        start_angle = tile_rotation_info[i][idx]
        if idx in selected_tiles_idx:
            tile_rotation_info[i+1][idx] = start_angle + math.radians(random.randint(-1,1)*60)
        else:
            tile_rotation_info[i+1][idx] = start_angle
        end_angle = tile_rotation_info[i+1][idx]
        animate_tile(tiles[idx],i*frame_rate,(i+0.5)*frame_rate,start_angle,end_angle)

# マテリアルを取得(存在しない場合は新規作成)
material = bpy.data.materials.get(material_name)
if material is None:
    material = bpy.data.materials.new(name=material_name)
# すべてのタイルにマテリアルを適用
for tile in tiles:
    if len(tile.data.materials) == 0:
        tile.data.materials.append(material)
    else:
        tile.data.materials[0] = material
# すべてのタイルのアニメーションデータを削除(デバッグ用)
# for tile in tiles:
#     tile.rotation_euler = (0,0,0)
#     tile.animation_data_clear()
これを実行すると、以下のようなタイル達が生成されます。
テクスチャを設定
実はこっちの方が大変です。
対称性のあるテクスチャを描けば模様生成ができますが、手描きでそんな厳密な描画は不可能です。
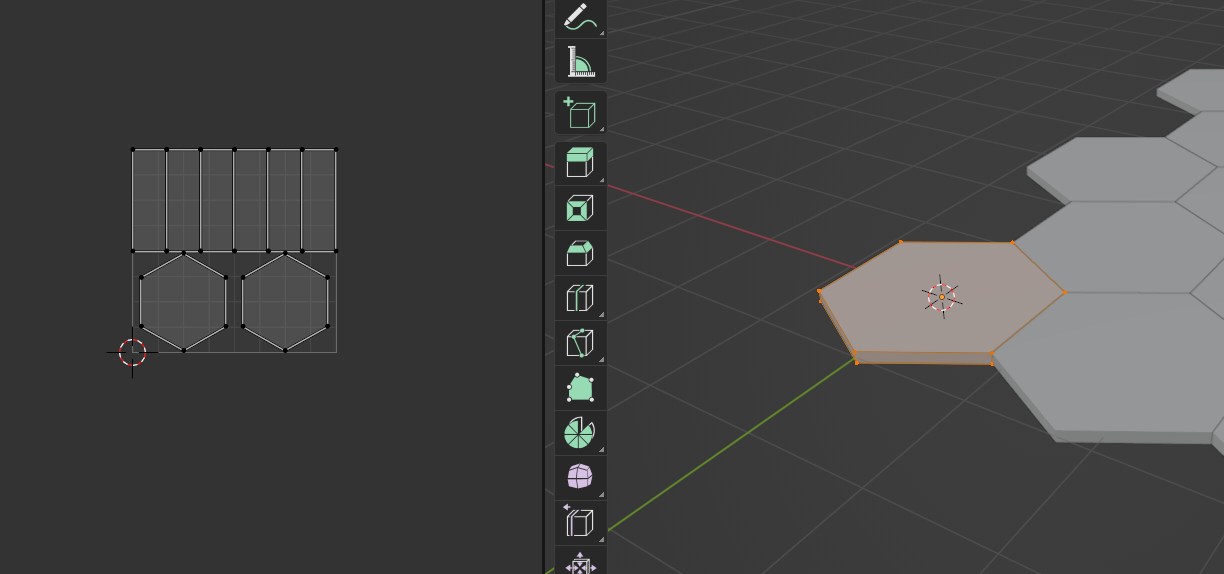
プリミティブの六角形がこのようなUVマップになっていることを利用して、なんとかプロシージャルに描いていきます。
UVマップの座標は以下のように得られます。
for vertice in tile.data.uv_layers[0].data:
   vertice.uv
output
Vector((1.0, 0.5))
Vector((1.0, 1.0))
Vector((0.8333333134651184, 1.0))
Vector((0.8333333134651184, 0.5))
Vector((0.8333333134651184, 0.5))
Vector((0.8333333134651184, 1.0))
Vector((0.6666666269302368, 1.0))
Vector((0.6666666269302368, 0.5))
Vector((0.6666666269302368, 0.5))
Vector((0.6666666269302368, 1.0))
Vector((0.4999999403953552, 1.0))
Vector((0.4999999403953552, 0.5))
Vector((0.4999999403953552, 0.5))
Vector((0.4999999403953552, 1.0))
Vector((0.33333325386047363, 1.0))
Vector((0.33333325386047363, 0.5))
Vector((0.45784610509872437, 0.3700000047683716))
Vector((0.25, 0.49000000953674316))
Vector((0.042153894901275635, 0.3699999749660492))
Vector((0.042153894901275635, 0.1300000250339508))
Vector((0.2499999850988388, 0.01000000536441803))
Vector((0.45784610509872437, 0.12999999523162842))
Vector((0.33333325386047363, 0.5))
Vector((0.33333325386047363, 1.0))
Vector((0.16666658222675323, 1.0))
Vector((0.16666658222675323, 0.5))
Vector((0.16666658222675323, 0.5))
Vector((0.16666658222675323, 1.0))
Vector((-8.940696716308594e-08, 1.0))
Vector((-8.940696716308594e-08, 0.5))
Vector((0.75, 0.49000000953674316))
Vector((0.9578461050987244, 0.3700000047683716))
Vector((0.9578461050987244, 0.12999999523162842))
Vector((0.75, 0.01000000536441803))
Vector((0.5421538949012756, 0.1300000250339508))
Vector((0.5421538949012756, 0.3699999749660492))
気合で六角形の座標を見つけて、Blender とは別に Python を立ち上げてテクスチャを描画します。
from PIL import Image, ImageDraw

def draw_circle_on_image(image, center, radius, thickness):
    """
    既存の画像に円を描画する関数。

    :param image: PIL Image オブジェクト(改変前の画像)
    :param center: 円の中心点(タプル形式、例:(x, y))
    :param radius: 円の半径
    :param thickness: 円の太さ
    :return: 円が描画された画像
    """
    # 描画オブジェクトを作成
    draw = ImageDraw.Draw(image)

    # 外側の円を描く
    outer_radius = radius + thickness/2
    outer_bbox = [
        center[0] - outer_radius,
        center[1] - outer_radius,
        center[0] + outer_radius,
        center[1] + outer_radius
    ]
    draw.ellipse(outer_bbox, fill=(0, 0, 0))  # 黒色で塗りつぶす

    # 内側の円(背景色)を描く
    inner_radius = radius - thickness/2
    inner_bbox = [
        center[0] - inner_radius,
        center[1] - inner_radius,
        center[0] + inner_radius,
        center[1] + inner_radius
    ]
    draw.ellipse(inner_bbox, fill=(255,255,255))

    return image

def draw_line_on_image(image, start_point, end_point, thickness):
    """
    既存の画像に直線を描画する関数。

    :param image: PIL Image オブジェクト(改変前の画像)
    :param start_point: 直線の始点(タプル形式、例:(x1, y1))
    :param end_point: 直線の終点(タプル形式、例:(x2, y2))
    :param thickness: 直線の太さ
    :return: 直線が描画された画像
    """
    # 描画オブジェクトを作成
    draw = ImageDraw.Draw(image)

    # 直線を描く
    draw.line([start_point, end_point], fill=(0, 0, 0), width=thickness)

    return image


points = [
    (0.45784610509872437, 0.3700000047683716),
    (0.25, 0.49000000953674316),
    (0.042153894901275635, 0.3699999749660492),
    (0.042153894901275635, 0.1300000250339508),
    (0.2499999850988388, 0.01000000536441803),
    (0.45784610509872437, 0.12999999523162842)
]

def transform_point(original : tuple) -> tuple:
    x,y = original
    x *= 1024
    y *= 1024
    y = 1024 - y
    return (x,y)

def distance(A : tuple, B : tuple) -> float:
    x = A[0] - B[0]
    y = A[1] - B[1]
    import math
    return math.sqrt(x*x+y*y)

def mid_point(A : tuple, B : tuple) -> tuple:
    return ((A[0] + B[0])/2, (A[1] + B[1])/2)


points = [transform_point(point) for point in points]

background_color = (255, 255, 255)  # 白色
image = Image.new("RGB", (1024, 1024), background_color)

for i in range(2):
    before = points[3*i + 2]
    after =points[(3*i + 3)%6]
    print(before,after)
    image = draw_circle_on_image(image, before, distance(before,after)/2,30))

draw_line_on_image(image,mid_point(points[0],points[1]),mid_point(points[3],points[4]),30)

image.save('output.png')
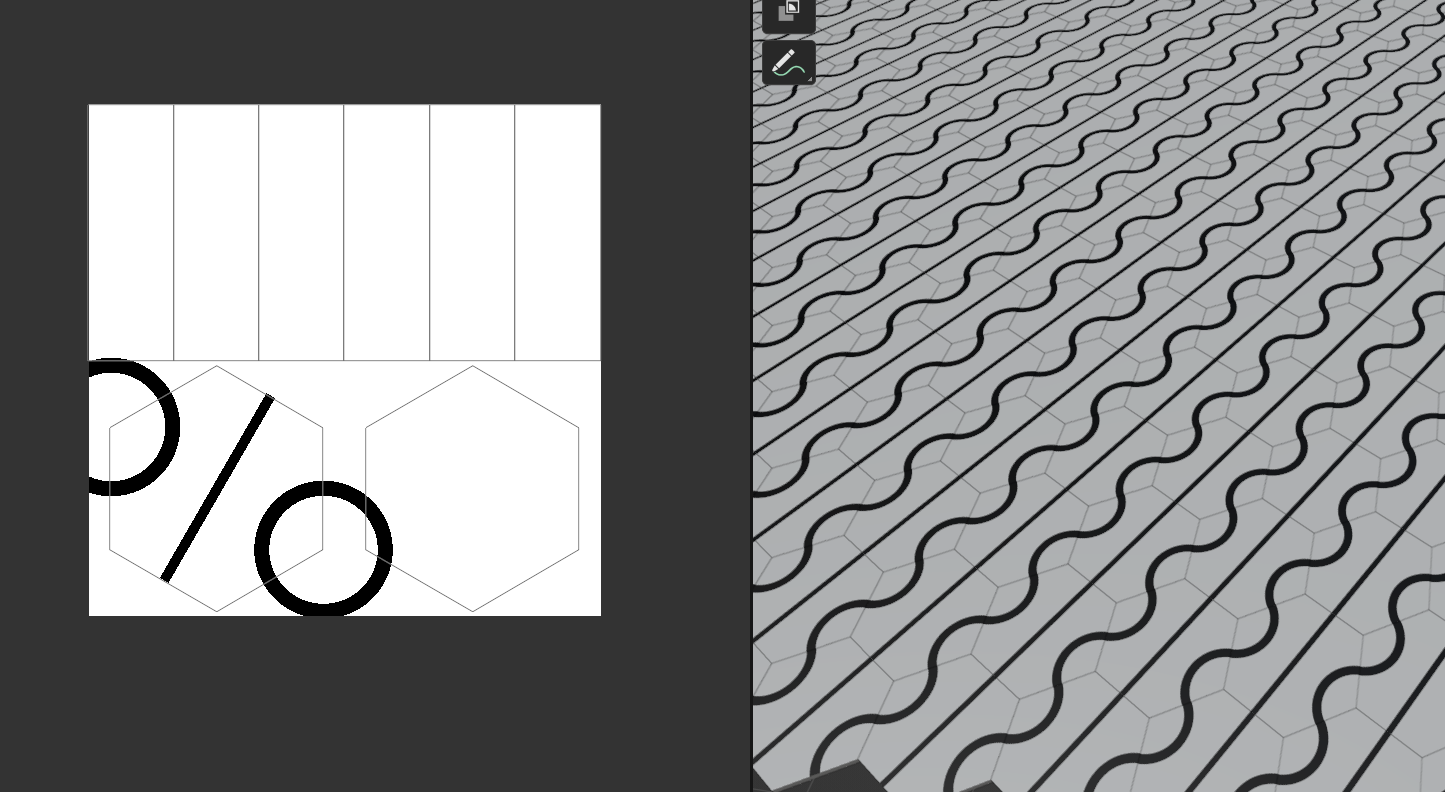
このようになります。
後は、アニメーションを開始すると、回転に応じて、色々なテセレーション模様が生成されます。


