目次
1.概要
2.環境
3.Angular側の導入
4.ROS側の導入
5.実践
6.おわりに
概要
今年のROS Advent CalendarにはROSとWebを連携する系の記事が多くあって面白いな〜と思って見ていたのですが、
VueやReactとROSの連携の記事はあるのに、AngularとROSについての記事って殆どないな…ということに気づきました。
そこで、本記事ではAngularを使ってROSと通信するところまで簡単に記載させていただきます。
ここが間違ってるという点があれば、見つけ次第コメントしていただけるとありがたいです。
環境
- Ubuntu 20.04
- ROS 1 noetic
- node v16.10.0
- Angular 13
Angular側の導入
前提
Angular,ROSの環境構築はすでに済んでいる仮定で進めます。
また、これから先はAngularで作成したプロジェクト内で行うものとします。
1. roslibjsを導入
ROSと通信するためのライブラリであるroslibjsを導入します。
npm install roslib
2. 型定義をインストール
roslibjsは名前の通りJavaScriptで使う用なので、TypeScriptでも使えるように型定義ファイルをインストールします。
npm i @types/roslib --save-dev
3. 依存関係のインストール
roslibjsは多くのライブラリに依存しているので、それらをインストールします。
npm install
4. WebWorkifyの修正
この部分は@shiro-kuma様のReactでROSのtopicをリアルタイム描画しながらフロントに入門するを参考にさせていただきました。ありがとうございます。
Angular12からはWebpackが5になりましたが、ここで書かれているようにWebpack5とroslibjsは相性が悪いようです。
具体的にはWebpack5に含まれるWebworkifyの不具合のようですので、該当箇所をWebworkifyのissueを参考に修正します。
まずはAngularプロジェクト内のnode_modules/webworkify/index.jsを開きます。
そして、
 var bundleFn = arguments[3];
 var sources = arguments[4];
 var cache = arguments[5];
 var stringify = JSON.stringify;
module.exports = function (fn, options) {
となっているのを、
var stringify = JSON.stringify;

module.exports = function (fn, options) {
    var bundleFn = arguments[3];
    var sources = arguments[4];
    var cache = arguments[5];
のように変更します。
これでAngular側の導入は完了です。
ROS側の導入
ros-bridge-serverをインストール
http://wiki.ros.org/rosbridge_suite
ここを参考に、ros-bridge-serverをインストールします。これはROSにwebsocketという通信方式を使ってアクセスできるようにするパッケージです。
sudo apt-get install ros-noetic-rosbridge-server
ROS側の導入は以上です。
実践
とりあえずComponentを1つ、Serviceを1つ作ってください。
Service側はこんな感じで書きます。
Service
import { Injectable } from '@angular/core';
import * as ROSLIB from 'roslib';
import { Subject, Observable } from 'rxjs';

@Injectable({
  providedIn: 'root',
})
export class RosService {
  ros: ROSLIB.Ros;
  url = 'ws://127.0.0.1:9090';
  isConnected: Subject<boolean> = new Subject();
  listener: ROSLIB.Topic;
  talker: ROSLIB.Topic;

  constructor() {
    this.ros = new ROSLIB.Ros({
      url: this.url,
    });
    this.ros.on('connection', () => {
      console.log('Connected');
      this.isConnected.next(true);
    });

    this.ros.on('error', (error) => {
      console.log('error', error);
      this.isConnected.next(false);
    });

    this.ros.on('close', () => {
      console.log('closed');
      this.isConnected.next(false);
    });

    this.listener = new ROSLIB.Topic({
      ros: this.ros,
      name: '/listener',
      messageType: 'std_msgs/String',
    });

    this.talker = new ROSLIB.Topic({
      ros: this.ros,
      name: '/talker',
      messageType: 'std_msgs/String',
    });
  }
}
コンストラクタでROSLIB.Rosオブジェクトを作成します。このオブジェクトは1つしか必要ないので使い回せるようにServiceで宣言します。
また、SubScribe/Publishするときに使うROSLIB.Topicオブジェクトもここで生成します。
次にコンポーネントはこんな感じで書きます。
Component
import { Component, OnInit } from '@angular/core';
import * as ROSLIB from 'roslib';
import { RosService } from '../ros.service';

export interface String {
  data: string;
}

@Component({
  selector: 'app-top',
  templateUrl: './top.component.html',
  styleUrls: ['./top.component.scss'],
})
export class TopComponent implements OnInit {
  isConnected: boolean = false;
  message: string = '';
  constructor(private rosService: RosService) {}

  ngOnInit(): void {
    this.rosService.isConnected.subscribe(
      (data: boolean) => (this.isConnected = data)
    );
    this.rosService.listener.subscribe((msg: ROSLIB.Message) => {
      this.message = (msg as String).data;
    });
  }

  talk(message: any): void {
    const publishMsg: String = { data: message };
    this.rosService.talker.publish(publishMsg);
  }
}
名前がtop.componentというよくわからない名前になってるのは気にしないでください笑
コンポーネントでは主にデータの表示とpublishを行います。
注意してほしいのは、ROSのstd_msgs/String型は存在しないので、
export interface String {
  data: string;
}
のようにして自分で型を定義してあげるところです。
最後にHTMLです。
HTML
<h1>ROS connected: {{ isConnected }}</h1>
<h1>Subscribed Message:{{ message }}</h1>
<label>
  publish message:
  <input type="text" #msg />
</label>
<button (click)="talk(msg.value)">publish</button>
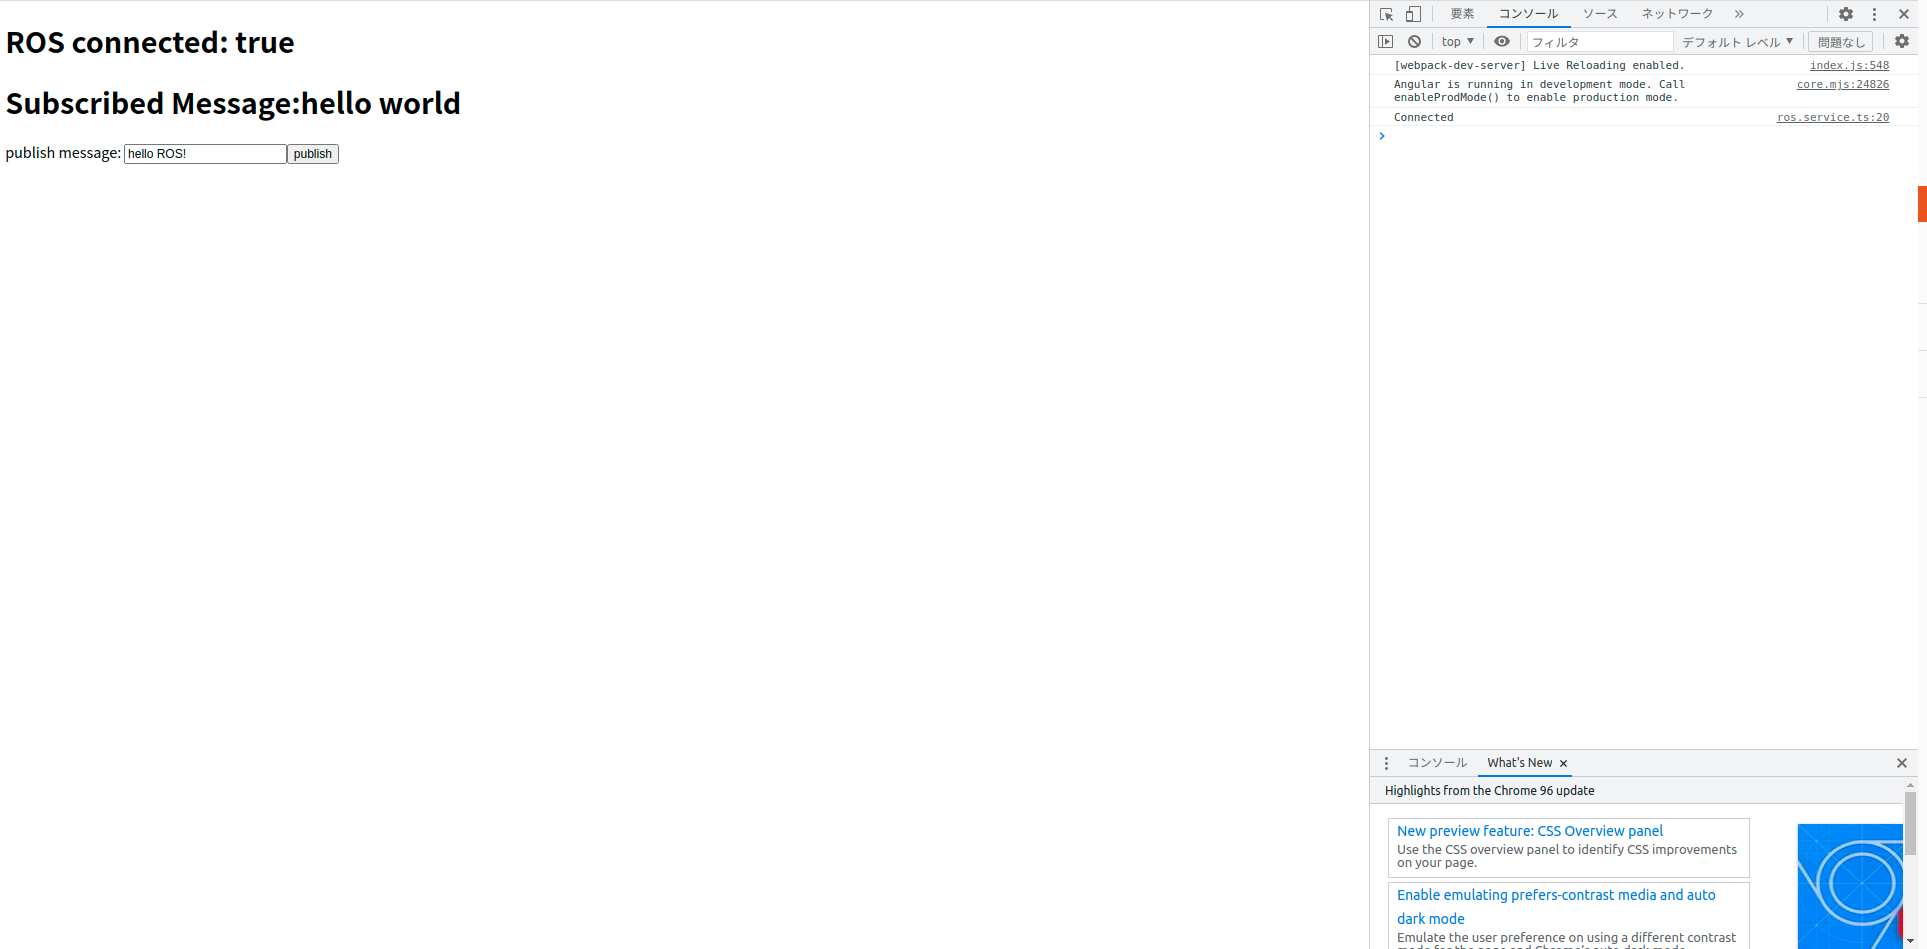
HTMLはとりあえずシンプルに書きました。入力欄に文字を入れてpublishボタンを押すとpublishされるようになっています。
実際の画面
実行
ターミナルを開いて、
roslaunch rosbridge_server rosbridge_websocket.launch
と入力するとサーバーが立ち上がり、Webサイトと通信を開始します。Webサイト上で
ROS connected:trueとなれば接続完了です。
Subscribe
さっきとは別のターミナルで
rostopic pub /listener std_msgs/String "data: 'hello world'"
と入力してください。Webサイト上の
Subscribed Messageにhello world!が表示されればSubscribeしています。
Publish
また別のターミナルで
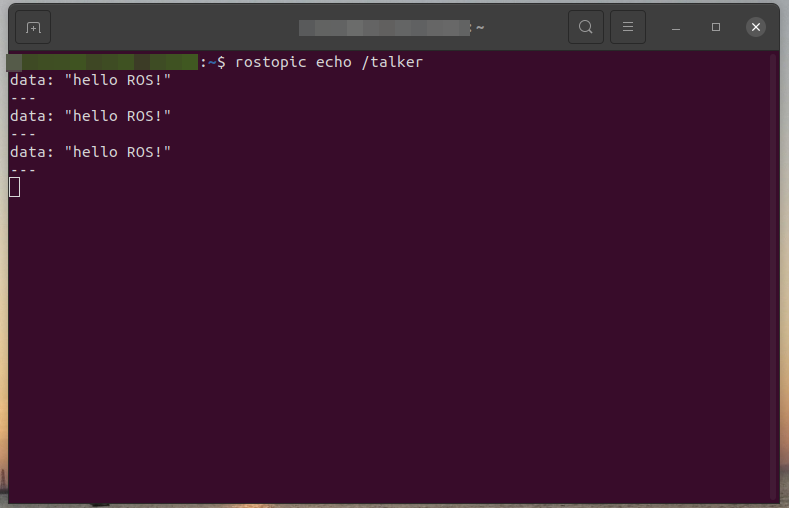
rostopic echo /talker
と入力してください。/talkerトピックの受信待ちをします。
次に、webサイト上で適当に文字を入力してpublishボタンを押してください。
僕はHello ROS!と入力しました。
すると、ターミナルでは以下のように表示されます。

ちゃんとPublishできていることがわかります。
おわりに
とりあえず簡単にAngular上でrosとpub/sub通信するプログラムを作ることができました。ネットではAngularとROSで連携する記事は本当に少ないので、困っている人の手助けになれば幸いです。
