はじめに
やること
- 気象庁の1日ごとの気象データをスクレイピングする
- 取得したデータをPostgreSQLのDBにINSERTする
- 取得するデータは2007年~2022年の「今日」の一日前まで、全国の観測地点でデータがあるところ
環境等
- プログラミング言語: Python3.10
- DBサーバ: Amazon AWS RDB
- 実行環境: Amazon AWS EC2
- スクレイピングに使うライブラリ: BeautifulSoup
参考にした情報
制作にあたり、以下の記事と記載のコードを参考にさせていただきました。
やろうと思ったきっかけ
私は写真が趣味でして、撮影するのに天候は重要なわけですが、気象庁などの天気予報はせいぜい1~2ヶ月先がいいところ。しかし、撮影の計画は数ヶ月前から練るもので、この日にしようと思った日がたまたま撮影に適さない天候だったら悲しいわけです。
そこで、最終的な目標を「未来の任意の日付の日地点における天候が、撮影に適しているかを評価する」としまして、まずはそのバックデータを取得することが必要だったわけです。
というわけで、そのバックデータとなる気象データをローカルのDBに落としてこなければならないな、とおもいこんなことを考えました。
...という事もありますが、最近流行のビッグデータでAIで機械学習がどうのこうの、とか、AWSとかいろいろなモノの勉強も兼ねてます。
準備
スクレイピングについて
気象庁の気象データは、なんかをチョチョっと操作すればCSVとかでドガっとデータが得られる...というふうに都合良く行かないので、正攻法では手動でポチポチする必要があります。この辺の話はこちらの記事にわかりやすくまとめてあります。
データが無いならスクレイピングすればいいじゃん!!ってことで、そのやり方もわかったので光明がみえてきました。
データベースについて
スクレイピングしたデータはどこかに仕舞っておく必要がありますね。最近はやりのNoSQLみたいなやつもありますが、昔ながらのリレーショナルデータベースでいきます。
後でやる(予定の)計算とかもRDB側のクエリでなんとかしたいな、って言う思いがあるので、PostgreSQLでやってます。
実行環境について
実行環境は、Amazon RDSとEC2です。オンプレでも仮想環境でもラズパイでも動かせると思います。
取得するデータ
取得する気象データは、今回は1日ごとのデータです。気象庁のサイトから取得できるデータは、次の通りでした。日本語の部分は気象庁のWEBサイトでの表記で、アルファベットの部分は私が勝手に英訳したものです。テーブル名とかになってます。
- 日付: date
- 気圧(hPa)[現地]: pressure_ground
- 気圧(hPa)[海面]: pressure_sea
- 降水量(mm)[合計]: rainfall_amount
- 降水量(mm)[最大(1時間)] : rainfall_max_one_hour
- 降水量(mm)[最大(10分間)]: rainfall_ten_minute
- 気温(℃)[平均]: temperature_ave
- 気温(℃)気温[最高]: temperature_max
- 気温(℃)気温[最低]: temperature_min
- 湿度(%)[平均]: humidity_average
- 湿度(%)[最小]: humidity_min
- 風向・風速(m/s)[平均風速]: windspeed_ave
- 風向・風速(m/s)[最大風速_風速]: windspeed_max_value
- 風向・風速(m/s)[最大風速_風向]: windspeed_max_direction
- 風向・風速(m/s)[最大瞬間風速_風速]: windspeed_max_instant_value
- 風向・風速(m/s)[最大瞬間風速_風向]: windspeed_max_instant_direction
- 日照時間(h): sunshine_hour
- 雪(cm)[降雪合計]: snowfall_amount
- 雪(cm)[最深積雪]: snow_depth
- 天気概況(昼)[06:00-18:00]: weather_overview_daytime
- 天気概況(夜)[18:00-翌日06:00]: weather_overview_night
観測地点に関するデータ
これに加えて、場所を表すコードを使います。観測地点の場所を表しているのだと思います。
観測地点に関する情報は、こちらのサイトにあるものを参考にさせていただきました。
更新されてから時間が経っているようですが、そんなに頻繁にかわるものでもないので、まあ問題ないでしょう。
どこかに最新版ないかな...
テーブル構造
このデータを格納するテーブルの構造を考えます。上記の取得データは1日毎のデータです。これを1レコードとして考えます。地点を表すコードも入れておきます。
地点コードは数字だけで構成されています。地点コードだけだと場所が分かりませんが、別テーブルに地名(と座標)を入れておいて、あとで結合すれば良いでしょう。
というわけで、テーブルを作成するクエリです。
- 主キーは登録順の整数シリアル値で(MySQLでいうAUTO_INCREMENT)、INSERTするごとに自動インクリメントになります。
- 温度、気温、気圧などは小数点を扱える型にします
- 風向き(wind*_direction)は、気象庁のデータでは"北"とか"南南西"とか言う表記になっています。あとで機械学習するときにこれだと不便かもしれないので、北を0度とした360度表記にするので整数型にしています。
- 地点コードは、整数型か文字列を扱える型にするか迷いましたが整数型にしました。たぶん、ソートとかするときラクそうです。
- weather_overview* は、天気概況です。「晴時々曇り」とかそういうのです。文字列として表記してます。試しにスクレイピングしたところ、表記のバリエーションがかなり多いし、長い文字列になる場合もあるので余裕をみておきます。
CREATE TABLE weather_table(
    id SERIAL PRIMARY KEY ,
    date          DATE,
    prec_no			 INTEGER,
    block_no		 INTEGER,
    pressure_ground  REAL,
    pressure_sea     REAL,
    rainfall_amount  REAL,
    rainfall_max_one_hour  REAL,
    rainfall_ten_minute    REAL,
    temperature_ave  REAL,
    temperature_max  REAL,
    temperature_min  REAL,
    humidity_average  REAL,
    humidity_min      REAL,
    windspeed_ave     REAL,
    windspeed_max_value    REAL,
    windspeed_max_direction  INTEGER,
    windspeed_max_instant_value   REAL,
    windspeed_max_instant_direction  INTEGER,
    sunshine_hour  REAL,
    snowfall_amount  REAL,
    snow_depth   REAL,
    weather_overview_daytime   VARCHAR(200),
    weather_overview_night     VARCHAR(200)
);
その他DB設定
AWS RDBで作成したインスタンスは、デフォルトのユーザが管理者権限をもっています。アプリ(Python)側からこの権限を使うのは危ないので、アプリから接続する専用のユーザを作っておきます。
ちなみに、PostgresSQLでは、ユーザのことをロール(ROLE)と呼ぶそうです。
CREATE ROLE username LOGIN PASSWORD 'password';
作成したテーブルにSELECTとINSERTの権限を付与します。
GRANT SELECT, INSERT ON weather_table TO username;
SERIALのデータ型を使っているので、それを使うための権限も付与します。
GRANT USAGE ON SEQUENCE weather_table_id_seq TO username;
テーブルが出来たので、スクレイピングしたデータを受け入れる準備が整いました。
コードの前に、実行結果
実行例
こんな感じでスクレイピングとデータのINSERTが進んでいきます。
$ python3 weather_scraper.py
weather_scraper.py started!!
fetch failed for 三森山!! wait 10 second.__________________________________________________________.
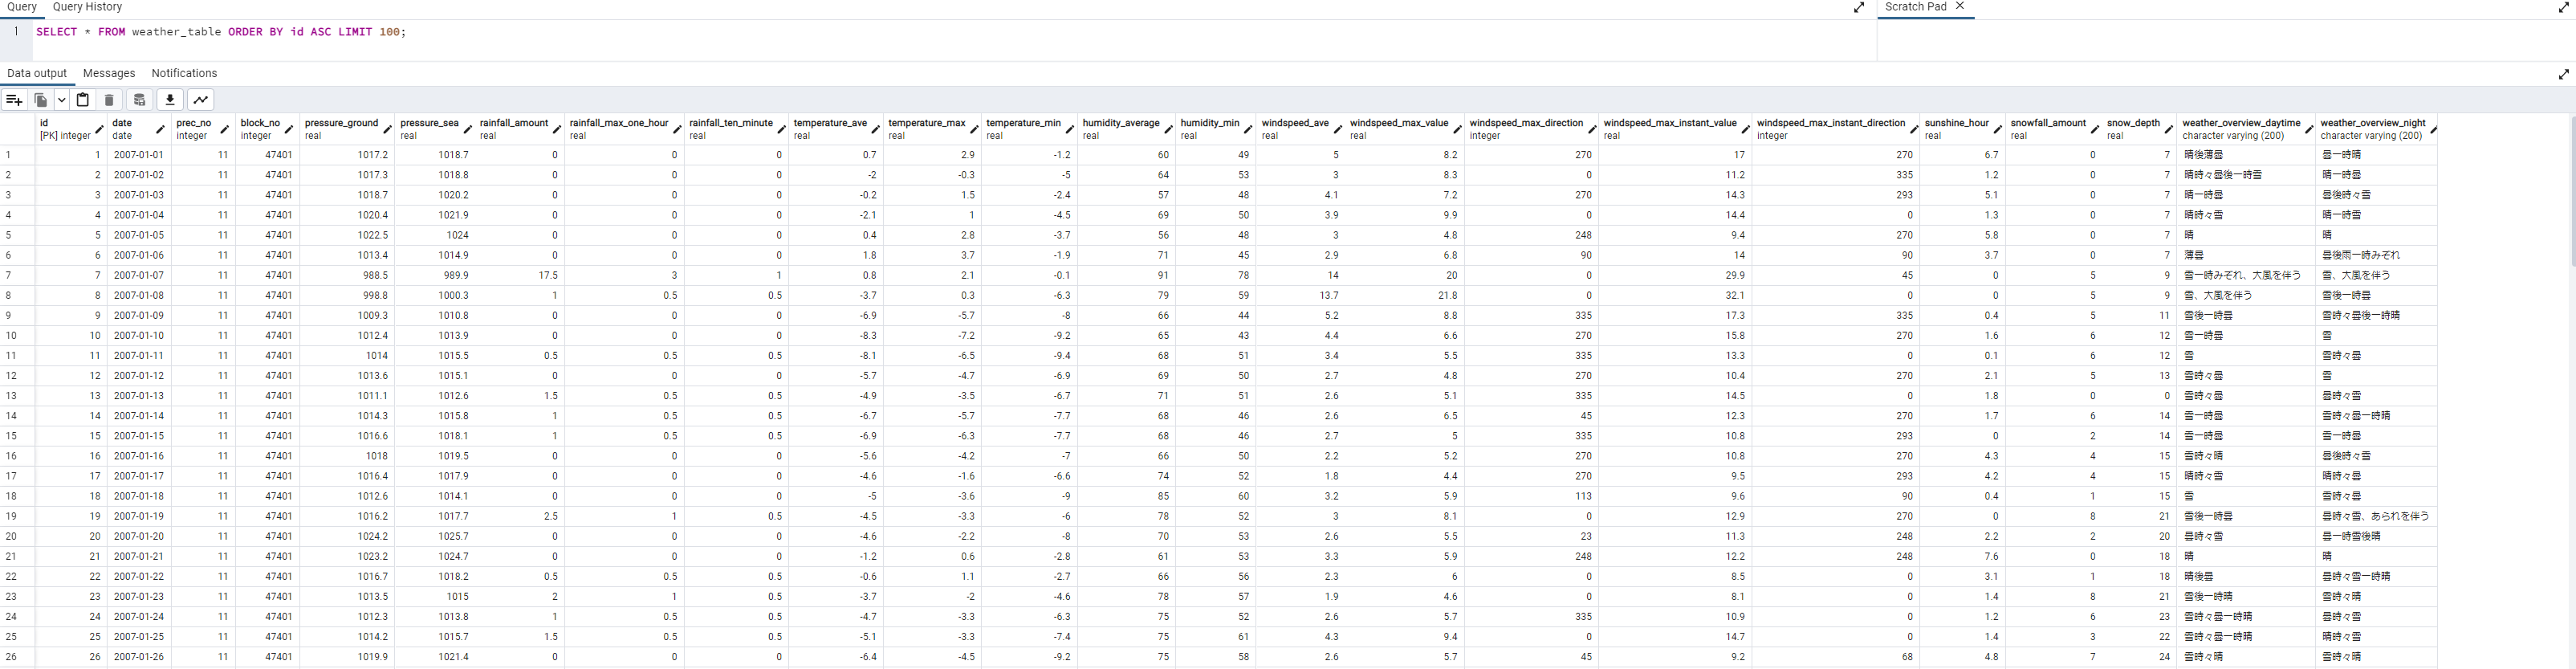
INSERTしたデータはこんな感じになりました
どれくらい時間がかかるか
どの地点を選択するかにもよりますが、こちらのサイトで紹介されている地点をすべて網羅すると、全行程で3~5日かかるっぽいです。
サーバからBANされないか
コードの所々にsleep()を入れています。sleep()入れないで実行すると、実行途中にサーバ側から接続切られることが多々ありました。とりあえずですが、10秒くらいsleep()入れておけば、サーバ側から切られることが無くなりました。
もしかすると、もうちょっと長くsleep()した方が良いかもしれませんが...
コードの説明
実際に動いているコードを記載します。
部分毎の説明
説明とともにコードを掲載します。(全文通したのは後述)
- 使用するライブラリなど import
from bs4 import BeautifulSoup

import csv
import json
import requests
import psycopg2
from datetime import datetime
import codecs
import time
-スクレイピングするURLとよく使う処理
# URLで年と月ごとの設定ができるので%sで指定した英数字を埋め込めるようにします。
base_url = "http://www.data.jma.go.jp/obd/stats/etrn/view/daily_s1.php?prec_no=%s&block_no=%s&year=%s&month=%s&day=1&view=p1"


# 取ったデータをfloat型に返還する。変換できない文字は0.0で代用。
def str2float(str):
    try:
        return float(str)
    except:
        return 0.0


#場所データのcsvファイル名
place_csv_file_name = './place.csv'

#logfile名
logfile_name = "./weather_scraper.log"

#ログファイルに記録する
def printlog(label_str, body_str):
    print(datetime.now(), ',' ,label_str, ',', body_str,
                            file =  codecs.open(logfile_name, 'a', 'utf-8'))

#端末に印字する(文字が流れていかないように1行で上書きする)
def printmsg(msg):
    print('\r___________________________________________________________________________________________________' , end='')
    print('\r%s' % msg, end='')
- DBMSに接続する処理など
#SQLサーバの情報
dbms_hostname = 'xxxxxxxxx.rds.amazonaws.com'
dbms_port = 12345
dbms_database_name ='postgres'

#SQLサーバに接続するためのユーザ名とパスワード情報を保存したファイル名
db_auth_filename = 'auth.json'

#DBの認証情報をファイルから読み取る
def read_auth(filename):
    file = open(filename, "r")
    auth = json.load(file)
    file.close()

    return auth

#DBMSに接続する
def connect_dbms():
    auth = read_auth("auth.json")
    dbms_username = auth['username']
    dbms_password = auth['password']

    con = psycopg2.connect(
        host = dbms_hostname,
        port = dbms_port,
        database=dbms_database_name,
        user= dbms_username,
        password=dbms_password)

    return con
- 方角を0度~360度で表す(北を0度とする)
- 風向きは「北」とか「北北東」とかの文字列で取得されるので、0度を北としたときの角度で表記する
def kanji_direction_to_degree(kanji_direction):
    direction = -1

    match   kanji_direction:
        case '北北東':
            direction = 23
        case '東北東':
            direction = 68
        case '東南東':
            direction = 113
        case '南南東':
            direction = 158
        case '南南西':
            direction = 203
        case '西南西':
            direction = 248
        case '西北西':
            direction = 293
        case '北北西':
            direction = 335
        case '北東':
            direction = 45
        case '南東':
            direction = 135
        case '南西':
            direction = 225
        case '北西':
            direction = 315
        case '北':
            direction = 0
        case '東':
            direction = 90
        case '南':
            direction = 180
        case '西':
            direction = 270
        case _:
            direction = -1
    return direction
- プログラムを開始
- 最初に、地点データをCSVから読み込んでくる
- ちなみに、CSVはこんな感じ
No.,i,地点名,prec_no,block_no,緯度(度)経度(度、分)標高(m),緯度(分),経度(度)標高(m),経度(分)標高(m),標高(m)
1,1 ,稚内,11 ,47401 ,45,24.9 ,141 ,40.7 ,2.8
2,2 ,沓形,11 ,2 ,45,10.7 ,141 ,8.3 ,14.0
3,3 ,浜頓別,11 ,3 ,45,7.5 ,142 ,21.0 ,18.0
4,4 ,北見枝幸,11 ,47402 ,44,56.4 ,142 ,35.1 ,6.7
- コードはこれ
if __name__ == "__main__":
    #場所データを格納する配列を初期化
    place_code_prec_no = []
    place_code_block_no = []
    place_name = []

    print('weather_scraper.py started!!')

    #場所データをcsvから読み込み
    csv_file = open(place_csv_file_name, 'r', encoding='utf-8', errors='', newline='' )
    f = csv.reader(csv_file, delimiter=",", doublequote=True, lineterminator="\r\n", quotechar='"', skipinitialspace=True)

    header = next(f)
    for row in f:
        place_code_prec_no.append(int(row[3].strip(' ')))   #地域コード
        place_code_block_no.append(int(row[4].strip(' ')))  #地点コード
        place_name.append(row[2].strip(' '))  #地点名

    csv_file.close()
- DBMSに接続する
   #DBMSに接続
   connector = connect_dbms()

   #cursorの取得
   cursor = connector.cursor()
- 一番外側のループで地点を設定する
- ログファイルに進行状況も記録します
    #各地点(地域・場所)をスクレイピングする
    for place in place_name:
        exception_place_count = 0  #その地点(地域・場所)での例外カウンタをクリア

        place_count = place_count + 1

        printlog('NEW_PLACE_FETCH_START', place)

        fail_flag = False   #失敗フラグ初期化

        index = place_name.index(place)
- 年ごとにデータを取得するためのループ
- 後の方にあるループで、データ取得に失敗していたときに、その地点を諦めるかどうかを判断ためにfail_flagを利用しています。
        # データを取得する年、とりあえず15年前まで
        years = [2022, 2021,
                 2020, 2019, 2018, 2017, 2016, 2015, 2014, 2013, 2012, 2011,
                 2010, 2009, 2008, 2007]
        for year in years:

            #取得に失敗していたら、この地点は諦める
            if(fail_flag == True):
                printmsg('fetch failed for %s!! wait 10 second.' % place)
                printlog('FETCH_FAILED', place)

                time.sleep(10)    #サーバへの気遣いsleep
                break  #次の地点へ
- 月ごとのデータを扱うループ。「今年」の場合は、「今月」までの取得とする
            #各月のデータを取得する
            month = 1 #1月から開始
            month_max = 12 #最終月

            #今年の場合は、今月が最終月
            if(year == datetime.now().year):
                month_max = datetime.now().month

            while(month <= month_max):
                # インクリメントは、ループの終わりでやっている。(例外発生時にその月をやり直すため)

                printmsg("fetching.  area: %s,  year: %s, records_inserted: %s, place_count: %s." % (place, year, inserted_count, place_count))
                printlog("FETCHING", "area: %s,  year: %s, records_inserted: %s, place_count: %s." % (place, year, inserted_count, place_count))
- ここまで来れば、取得するべきURLができあがる。
- URLを指定してデータを取得する
- データを取得出来なかったときは例外が発生するとおもうので、ある程度リトライして、それでも取得出来なければあきらめる。
                #URLを指定してデータを取得(fetch)する
                try:
                    # 2つの地点コードと年と月を当てはめる。
                    r = requests.get(base_url % (
                        place_code_prec_no[index], place_code_block_no[index], year, month))
                except:
                    printmsg("exception. wait 30 second. After wait, retry fetching.")
                    printlog('EXCEPTION', 'fetch retry.')


                    exception_place_count = exception_place_count + 1
                    exception_amount_count = exception_amount_count + 1

                    #例外の合計回数が10回以上の場合
                    if(exception_amount_count >= 10):
                        #サーバから嫌われたと思って、プログラム終了する
                        printmsg("too many exception!! terminated.")
                        printlog('TERMINATED','')
                        exit(-1)  #プログラム終了

                    #その地点での例外の回数が3回以上の場合、残りの月を放棄してその地点を諦める
                    if(exception_place_count >=3):
                        printmsg("skip this area due to exception")
                        printlog('AREA_SKIPPED','area: %s' % place)
                        #この地点はあきらめる
                        fail_flag = True
                        time.sleep(30)  #30秒待つ。サーバへの気遣い
                        break

                    #規定回数未満の場合は、この月をやりなおす
                    time.sleep(30)  #30秒待つ。サーバへの気遣い
                    continue

                #データ取得終了
                printmsg("fetched.  area: %s,  year: %s, records_inserted: %s, place_count: %s." % (place, year, inserted_count, place_count))
                printlog("FETCHED", "area: %s,  year: %s, records_inserted: %s, place_count: %s." % (place, year, inserted_count, place_count))

                #取得に成功したので、失敗フラグクリア
                fail_flag = False
- 取得したデータをBeautifulSoupに渡して解析してもらう
- 指定した地点・年月のデータがないときは、その地点は諦める
- (新しくできた地点だと、あまり昔のデータは登録されていないかもしれない。直近の年月から昔に遡って取得しているので、なるべく多くのデータを取得できるはず。)
                r.encoding = r.apparent_encoding

                #BeautifulSoupに取得したデータを渡す
                soup = BeautifulSoup(r.text, 'html.parser')

                # findAllで条件に一致するものをすべて抜き出します。
                # 今回の条件はtrタグでclassがmtxになってるものです。
                rows = soup.findAll('tr', class_='mtx')

                # 表の最初の1~4行目はカラム情報なのでスライスする。(indexだから初めは0だよ)
                rows = rows[4:]

                #データがない場合は、その地点は諦める
                if(len(rows) == 0):
                    printmsg("fetched but no data found.  area: %s,  year: %s, records_inserted: %s, place_count: %s." % (place, year, inserted_count, place_count))
                    printlog("FETCHED_NO_DATA", "area: %s,  year: %s, records_inserted: %s, place_count: %s." % (place, year, inserted_count, place_count))
                    fail_flag = True
                    break
- ここまでで、1ヶ月分のデータが取得できている。
- データはテーブルに入っている。
- 1日が1行となっている。
- 列が各項目になっている。これらを分解して、DBMSに登録できる表記に変換する
                # 1日〜最終日までの1行を網羅し、取得します。
                for row in rows:
                    # 今度はtrのなかのtdをすべて抜き出します
                    data = row.findAll('td')

                    #日時(yyyy/mm/dd), date
                    date = str(year) + "/" + str(month) + "/" + str(data[0].string);

                    # 地点コードA, prec_no
                    prec_no = place_code_prec_no[index]

                    # 地点コードB, block_no
                    block_no = place_code_block_no[index]

                    # 気圧(hPa)[現地], pressure_ground
                    pressure_ground = str2float(data[1].string)

                    # 気圧(hPa)[海面], pressure_sea
                    pressure_sea = str2float(data[2].string)

                    # 降水量(mm)[合計], rainfall_amount
                    rainfall_amount = str2float(data[3].string)

                    # 降水量(mm)[最大(1時間)] , rainfall_max_one_hour
                    rainfall_max_one_hour = str2float(data[4].string)

                    # 降水量(mm)[最大(10分間)], rainfall_ten_minute
                    rainfall_ten_minute = str2float(data[5].string)

                    # 気温(℃)[平均], temperature_ave
                    temperature_ave = str2float(data[6].string)

                    # 気温(℃)気温[最高], temperature_max
                    temperature_max = str2float(data[7].string)

                    # 気温(℃)気温[最低], temperature_min
                    temperature_min = str2float(data[8].string)

                    # 湿度(%)[平均], humidity_average
                    humidity_average = str2float(data[9].string)

                    # 湿度(%)[最小], humidity_min
                    humidity_min = str2float(data[10].string)

                    # 風向・風速(m/s)[平均風速], windspeed_ave
                    windspeed_ave = str2float(data[11].string)

                    # 風向・風速(m/s)[最大風速_風速], windspeed_max_value
                    windspeed_max_value = str2float(data[12].string)

                    # 風向・風速(m/s)[最大風速_風向], windspeed_max_direction
                    if(len(data[13])>0):
                        windspeed_max_direction = kanji_direction_to_degree(data[13].string.string.strip(' ').strip(' ').strip(']').strip(')'))
                    else:
                        windspeed_max_direction = -1

                    # 風向・風速(m/s)[最大瞬間風速_風速], windspeed_max_instant_value
                    windspeed_max_instant_value = str2float(data[14].string)

                    # 風向・風速(m/s)[最大瞬間風速_風向], windspeed_max_instant_direction
                    if(len(data[15])>0): #データが取れていなかったら -1 にする
                        windspeed_max_instant_direction = kanji_direction_to_degree(data[15].string.strip(' ').strip(' ').strip(']').strip(')'))
                    else:
                        windspeed_max_instant_direction = -1
                    # 日照時間(h), sunshine_hour
                    sunshine_hour = str2float(data[16].string)

                    # 17番(降雪量合計)は、記録なしのときは"--"となるみたいなので、0になおす
                    snowfall_amount = 0
                    if(len(data[17]) > 0):
                        if (data[17].string != '--'):  # 雪(cm)[降雪合計], snowfall_amount
                            snowfall_amount =str2float(data[17].string)


                    # 雪(cm)[最深積雪], snow_depth
                    snow_depth = str2float(data[18].string)

                    # 天気概況(昼)[06:00-18:00], weather_overview_daytime

                    if( len(data[19]) > 0):
                        weather_overview_daytime = data[19].string.replace(' ','').replace(' ','').replace(')','').replace(']','')
                    else:
                        weather_overview_daytime = "-"

                    # 天気概況(夜)[18:00-翌日06:00], weather_overview_night
                    if( len(data[20]) > 0):
                        weather_overview_night = data[20].string.replace(' ','').replace(' ','').replace(')','').replace(']','')
                    else:
                        weather_overview_night = "-"
- 1レコードのデータができた
- しかし、なぜか「今月」の場合も最終日までデータがあるようです。この場合、全てのデータが0になっているっぽい。気圧データは0になるってことはあり得ないので、気圧が0ならDBにINSERTしないことにします。
- INSERTするクエリをつくったあと、クエリを実行します
- ログファイルにも、使ったクエリ文を記録しておきます
                    #データがなかったら(気圧が取れてないのはデータが取れてないと言うこと)
                    if( (pressure_ground > 0 ) and (pressure_sea) > 0 ):
                        printmsg("inserting.  area: %s,  year: %s, month: %s, records_inserted: %s, place_count: %s." % (place, year, month, inserted_count, place_count))

                        #クエリを実行して追加
                        cursor.execute('INSERT INTO weather_table ( date, prec_no, block_no, pressure_ground, \
                                pressure_sea, rainfall_amount, rainfall_max_one_hour, rainfall_ten_minute, \
                                temperature_ave, temperature_max, temperature_min, humidity_average, \
                                humidity_min, windspeed_ave, windspeed_max_value, windspeed_max_direction, \
                                windspeed_max_instant_value, windspeed_max_instant_direction, sunshine_hour, \
                                snowfall_amount, snow_depth, weather_overview_daytime, weather_overview_night) \
                                VALUES( %s, %s,  %s, %s, %s,   %s,   %s,   %s,   %s, %s, \
                                        %s,     %s,      %s,   %s, %s, %s, %s, %s, %s, %s, \
                                        %s,    %s, %s)' , (
                                date, prec_no, block_no, pressure_ground,
                                pressure_sea, rainfall_amount, rainfall_max_one_hour, rainfall_ten_minute,
                                temperature_ave, temperature_max, temperature_min, humidity_average,
                                humidity_min, windspeed_ave, windspeed_max_value, windspeed_max_direction,
                                windspeed_max_instant_value, windspeed_max_instant_direction, sunshine_hour,
                                snowfall_amount, snow_depth, weather_overview_daytime, weather_overview_night)
                                )

                        #反映する
                        connector.commit()

                        printmsg("inserted.  area: %s,  year: %s, month: %s, records_inserted: %s, place_count: %s." % (place, year, month, inserted_count, place_count))
                        printlog('INSERTED', 'area: %s,  year: %s, month: %s, \"INSERT INTO weather_table ( '
                                'date, prec_no, block_no, pressure_ground, '
                                'pressure_sea, rainfall_amount, rainfall_max_one_hour, rainfall_ten_minute, '
                                'temperature_ave, temperature_max, temperature_min, humidity_average, '
                                'humidity_min, windspeed_ave, windspeed_max_value, windspeed_max_direction, '
                                'windspeed_max_instant_value, windspeed_max_instant_direction, sunshine_hour, '
                                'snowfall_amount, snow_depth, weather_overview_daytime, weather_overview_night) '
                                'VALUES( %s, %s, %s,  %s, %s, %s, %s, %s, %s, %s, '
                                        '%s, %s, %s,  %s, %s, %s, %s, %s, %s, %s, '
                                        '%s, %s, %s)\"' % (
                                place, year, month, date, prec_no, block_no, pressure_ground,
                                pressure_sea, rainfall_amount, rainfall_max_one_hour, rainfall_ten_minute,
                                temperature_ave, temperature_max, temperature_min, humidity_average,
                                humidity_min, windspeed_ave, windspeed_max_value, windspeed_max_direction,
                                windspeed_max_instant_value, windspeed_max_instant_direction, sunshine_hour,
                                snowfall_amount, snow_depth, weather_overview_daytime, weather_overview_night))

                        #挿入済みカウンタをインクリメント
                        inserted_count = inserted_count + 1
コードの全文
コードの全文を掲載します
from bs4 import BeautifulSoup

import csv
import json
import requests
import psycopg2
from datetime import datetime
import codecs
import time
from urllib.error import HTTPError
from urllib.error import URLError
import sys

# URLで年と月ごとの設定ができるので%sで指定した英数字を埋め込めるようにします。
base_url = "http://www.data.jma.go.jp/obd/stats/etrn/view/daily_s1.php?prec_no=%s&block_no=%s&year=%s&month=%s&day=1&view=p1"


# 取ったデータをfloat型に返還する。変換できない文字は0.0で代用。
def str2float(str):
    try:
        return float(str)
    except:
        return 0.0


#場所データのcsvファイル名
place_csv_file_name = './place.csv'

#logfile名
logfile_name = "./weather_scraper.log"

#ログファイルに記録する
def printlog(label_str, body_str):
    print(datetime.now(), ',' ,label_str, ',', body_str,
                            file =  codecs.open(logfile_name, 'a', 'utf-8'))

#端末に印字する(文字が流れていかないように1行で上書きする)
def printmsg(msg):
    print('\r___________________________________________________________________________________________________' , end='')
    print('\r%s' % msg, end='')


#SQLサーバの情報
dbms_hostname = 'xxxxxxxxxxxx.rds.amazonaws.com'
dbms_port = 12345
dbms_database_name ='postgres'

#SQLサーバに接続するためのユーザ名とパスワード情報を保存したファイル名
db_auth_filename = 'auth.json'

#DBの認証情報をファイルから読み取る
def read_auth(filename):
    file = open(filename, "r")
    auth = json.load(file)
    file.close()

    return auth

#DBMSに接続する
def connect_dbms():
    auth = read_auth("auth.json")
    dbms_username = auth['username']
    dbms_password = auth['password']

    con = psycopg2.connect(
        host = dbms_hostname,
        port = dbms_port,
        database=dbms_database_name,
        user= dbms_username,
        password=dbms_password)

    return con


#方角を整数値に変換、
def kanji_direction_to_degree(kanji_direction):
    direction = -1

    match   kanji_direction:
        case '北北東':
            direction = 23
        case '東北東':
            direction = 68
        case '東南東':
            direction = 113
        case '南南東':
            direction = 158
        case '南南西':
            direction = 203
        case '西南西':
            direction = 248
        case '西北西':
            direction = 293
        case '北北西':
            direction = 335
        case '北東':
            direction = 45
        case '南東':
            direction = 135
        case '南西':
            direction = 225
        case '北西':
            direction = 315
        case '北':
            direction = 0
        case '東':
            direction = 90
        case '南':
            direction = 180
        case '西':
            direction = 270
        case _:
            direction = -1
    return direction


if __name__ == "__main__":
    #場所データを格納する配列を初期化
    place_code_prec_no = []
    place_code_block_no = []
    place_name = []

    print('weather_scraper.py started!!')

    #場所データをcsvから読み込み
    csv_file = open(place_csv_file_name, 'r', encoding='utf-8', errors='', newline='' )
    f = csv.reader(csv_file, delimiter=",", doublequote=True, lineterminator="\r\n", quotechar='"', skipinitialspace=True)

    header = next(f)
    for row in f:
        place_code_prec_no.append(int(row[3].strip(' ')))   #地域コード
        place_code_block_no.append(int(row[4].strip(' ')))  #地点コード
        place_name.append(row[2].strip(' '))  #地点名

    csv_file.close()


    #DBMSに接続
    connector = connect_dbms()

    #cursorの取得
    cursor = connector.cursor()

    inserted_count = 0     #何レコード挿入したか
    place_count = 0      #何カ所廻ったか
    exception_amount_count = 0 #例外が合計何回発生したか


    #各地点(地域・場所)をスクレイピングする
    for place in place_name:
        exception_place_count = 0  #その地点(地域・場所)での例外カウンタをクリア

        place_count = place_count + 1

        printlog('NEW_PLACE_FETCH_START', place)

        fail_flag = False   #失敗フラグ初期化

        index = place_name.index(place)
        # データを取得する年、とりあえず15年前まで
        years = [2022, 2021,
                 2020, 2019, 2018, 2017, 2016, 2015, 2014, 2013, 2012, 2011,
                 2010, 2009, 2008, 2007]
        for year in years:

            #取得に失敗していたら、この地点は諦める
            if(fail_flag == True):
                printmsg('fetch failed for %s!! wait 10 second.' % place)
                printlog('FETCH_FAILED', place)

                time.sleep(10)    #サーバへの気遣いsleep
                break  #次の地点へ

            #各月のデータを取得する
            month = 1 #1月から開始
            month_max = 12 #最終月

            #今年の場合は、今月が最終月
            if(year == datetime.now().year):
                month_max = datetime.now().month

            while(month <= month_max):
                # インクリメントは、ループの終わりでやっている。(例外発生時にその月をやり直すため)

                printmsg("fetching.  area: %s,  year: %s, records_inserted: %s, place_count: %s." % (place, year, inserted_count, place_count))
                printlog("FETCHING", "area: %s,  year: %s, records_inserted: %s, place_count: %s." % (place, year, inserted_count, place_count))

                #URLを指定してデータを取得(fetch)する
                try:
                    # 2つの地点コードと年と月を当てはめる。
                    r = requests.get(base_url % (
                        place_code_prec_no[index], place_code_block_no[index], year, month))
                except:
                    printmsg("exception. wait 30 second. After wait, retry fetching.")
                    printlog('EXCEPTION', 'fetch retry.')


                    exception_place_count = exception_place_count + 1
                    exception_amount_count = exception_amount_count + 1

                    #例外の合計回数が10回以上の場合
                    if(exception_amount_count >= 10):
                        #サーバから嫌われたと思って、プログラム終了する
                        printmsg("too many exception!! terminated.")
                        printlog('TERMINATED','')
                        exit(-1)  #プログラム終了

                    #その地点での例外の回数が3回以上の場合、残りの月を放棄してその地点を諦める
                    if(exception_place_count >=3):
                        printmsg("skip this area due to exception")
                        printlog('AREA_SKIPPED','area: %s' % place)
                        #この地点はあきらめる
                        fail_flag = True
                        time.sleep(30)  #30秒待つ。サーバへの気遣い
                        break

                    #規定回数未満の場合は、この月をやりなおす
                    time.sleep(30)  #30秒待つ。サーバへの気遣い
                    continue

                #データ取得終了
                printmsg("fetched.  area: %s,  year: %s, records_inserted: %s, place_count: %s." % (place, year, inserted_count, place_count))
                printlog("FETCHED", "area: %s,  year: %s, records_inserted: %s, place_count: %s." % (place, year, inserted_count, place_count))

                #取得に成功したので、失敗フラグクリア
                fail_flag = False

                r.encoding = r.apparent_encoding

                #BeautifulSoupに取得したデータを渡す
                soup = BeautifulSoup(r.text, 'html.parser')

                # findAllで条件に一致するものをすべて抜き出します。
                # 今回の条件はtrタグでclassがmtxになってるものです。
                rows = soup.findAll('tr', class_='mtx')

                # 表の最初の1~4行目はカラム情報なのでスライスする。(indexだから初めは0だよ)
                rows = rows[4:]

                #データがない場合は、その地点は諦める
                if(len(rows) == 0):
                    printmsg("fetched but no data found.  area: %s,  year: %s, records_inserted: %s, place_count: %s." % (place, year, inserted_count, place_count))
                    printlog("FETCHED_NO_DATA", "area: %s,  year: %s, records_inserted: %s, place_count: %s." % (place, year, inserted_count, place_count))
                    fail_flag = True
                    break

                # 1日〜最終日までの1行を網羅し、取得します。
                for row in rows:
                    # 今度はtrのなかのtdをすべて抜き出します
                    data = row.findAll('td')

                    #日時(yyyy/mm/dd), date
                    date = str(year) + "/" + str(month) + "/" + str(data[0].string);

                    # 地点コードA, prec_no
                    prec_no = place_code_prec_no[index]

                    # 地点コードB, block_no
                    block_no = place_code_block_no[index]

                    # 気圧(hPa)[現地], pressure_ground
                    pressure_ground = str2float(data[1].string)

                    # 気圧(hPa)[海面], pressure_sea
                    pressure_sea = str2float(data[2].string)

                    # 降水量(mm)[合計], rainfall_amount
                    rainfall_amount = str2float(data[3].string)

                    # 降水量(mm)[最大(1時間)] , rainfall_max_one_hour
                    rainfall_max_one_hour = str2float(data[4].string)

                    # 降水量(mm)[最大(10分間)], rainfall_ten_minute
                    rainfall_ten_minute = str2float(data[5].string)

                    # 気温(℃)[平均], temperature_ave
                    temperature_ave = str2float(data[6].string)

                    # 気温(℃)気温[最高], temperature_max
                    temperature_max = str2float(data[7].string)

                    # 気温(℃)気温[最低], temperature_min
                    temperature_min = str2float(data[8].string)

                    # 湿度(%)[平均], humidity_average
                    humidity_average = str2float(data[9].string)

                    # 湿度(%)[最小], humidity_min
                    humidity_min = str2float(data[10].string)

                    # 風向・風速(m/s)[平均風速], windspeed_ave
                    windspeed_ave = str2float(data[11].string)

                    # 風向・風速(m/s)[最大風速_風速], windspeed_max_value
                    windspeed_max_value = str2float(data[12].string)

                    # 風向・風速(m/s)[最大風速_風向], windspeed_max_direction
                    if(len(data[13])>0):
                        windspeed_max_direction = kanji_direction_to_degree(data[13].string.string.strip(' ').strip(' ').strip(']').strip(')'))
                    else:
                        windspeed_max_direction = -1

                    # 風向・風速(m/s)[最大瞬間風速_風速], windspeed_max_instant_value
                    windspeed_max_instant_value = str2float(data[14].string)

                    # 風向・風速(m/s)[最大瞬間風速_風向], windspeed_max_instant_direction
                    if(len(data[15])>0): #データが取れていなかったら -1 にする
                        windspeed_max_instant_direction = kanji_direction_to_degree(data[15].string.strip(' ').strip(' ').strip(']').strip(')'))
                    else:
                        windspeed_max_instant_direction = -1
                    # 日照時間(h), sunshine_hour
                    sunshine_hour = str2float(data[16].string)

                    # 17番(降雪量合計)は、記録なしのときは"--"となるみたいなので、0になおす
                    snowfall_amount = 0
                    if(len(data[17]) > 0):
                        if (data[17].string != '--'):  # 雪(cm)[降雪合計], snowfall_amount
                            snowfall_amount =str2float(data[17].string)


                    # 雪(cm)[最深積雪], snow_depth
                    snow_depth = str2float(data[18].string)

                    # 天気概況(昼)[06:00-18:00], weather_overview_daytime

                    if( len(data[19]) > 0):
                        weather_overview_daytime = data[19].string.replace(' ','').replace(' ','').replace(')','').replace(']','')
                    else:
                        weather_overview_daytime = "-"

                    # 天気概況(夜)[18:00-翌日06:00], weather_overview_night
                    if( len(data[20]) > 0):
                        weather_overview_night = data[20].string.replace(' ','').replace(' ','').replace(')','').replace(']','')
                    else:
                        weather_overview_night = "-"

                    #データがなかったら(気圧が取れてないのはデータが取れてないと言うこと)
                    if( (pressure_ground > 0 ) and (pressure_sea) > 0 ):
                        printmsg("inserting.  area: %s,  year: %s, month: %s, records_inserted: %s, place_count: %s." % (place, year, month, inserted_count, place_count))

                        #クエリを実行して追加
                        cursor.execute('INSERT INTO weather_table ( date, prec_no, block_no, pressure_ground, \
                                pressure_sea, rainfall_amount, rainfall_max_one_hour, rainfall_ten_minute, \
                                temperature_ave, temperature_max, temperature_min, humidity_average, \
                                humidity_min, windspeed_ave, windspeed_max_value, windspeed_max_direction, \
                                windspeed_max_instant_value, windspeed_max_instant_direction, sunshine_hour, \
                                snowfall_amount, snow_depth, weather_overview_daytime, weather_overview_night) \
                                VALUES( %s, %s,  %s, %s, %s,   %s,   %s,   %s,   %s, %s, \
                                        %s,     %s,      %s,   %s, %s, %s, %s, %s, %s, %s, \
                                        %s,    %s, %s)' , (
                                date, prec_no, block_no, pressure_ground,
                                pressure_sea, rainfall_amount, rainfall_max_one_hour, rainfall_ten_minute,
                                temperature_ave, temperature_max, temperature_min, humidity_average,
                                humidity_min, windspeed_ave, windspeed_max_value, windspeed_max_direction,
                                windspeed_max_instant_value, windspeed_max_instant_direction, sunshine_hour,
                                snowfall_amount, snow_depth, weather_overview_daytime, weather_overview_night)
                                )

                        #反映する
                        connector.commit()

                        printmsg("inserted.  area: %s,  year: %s, month: %s, records_inserted: %s, place_count: %s." % (place, year, month, inserted_count, place_count))
                        printlog('INSERTED', 'area: %s,  year: %s, month: %s, \"INSERT INTO weather_table ( '
                                'date, prec_no, block_no, pressure_ground, '
                                'pressure_sea, rainfall_amount, rainfall_max_one_hour, rainfall_ten_minute, '
                                'temperature_ave, temperature_max, temperature_min, humidity_average, '
                                'humidity_min, windspeed_ave, windspeed_max_value, windspeed_max_direction, '
                                'windspeed_max_instant_value, windspeed_max_instant_direction, sunshine_hour, '
                                'snowfall_amount, snow_depth, weather_overview_daytime, weather_overview_night) '
                                'VALUES( %s, %s, %s,  %s, %s, %s, %s, %s, %s, %s, '
                                        '%s, %s, %s,  %s, %s, %s, %s, %s, %s, %s, '
                                        '%s, %s, %s)\"' % (
                                place, year, month, date, prec_no, block_no, pressure_ground,
                                pressure_sea, rainfall_amount, rainfall_max_one_hour, rainfall_ten_minute,
                                temperature_ave, temperature_max, temperature_min, humidity_average,
                                humidity_min, windspeed_ave, windspeed_max_value, windspeed_max_direction,
                                windspeed_max_instant_value, windspeed_max_instant_direction, sunshine_hour,
                                snowfall_amount, snow_depth, weather_overview_daytime, weather_overview_night))

                        #挿入済みカウンタをインクリメント
                        inserted_count = inserted_count + 1

                # 次の月へ
                month = month + 1
                #ひと月ごとに10秒休む(WEBサーバへの気遣い)
                time.sleep(10)

            #1年ごとにさらに10秒の休止
            time.sleep(10)
以上