初心者が実装できるとちょっぴり嬉しいポイントだと思うので、備忘録として記載します。
環境
- X-code10.2
- Swift5
- 対象OS 12.0
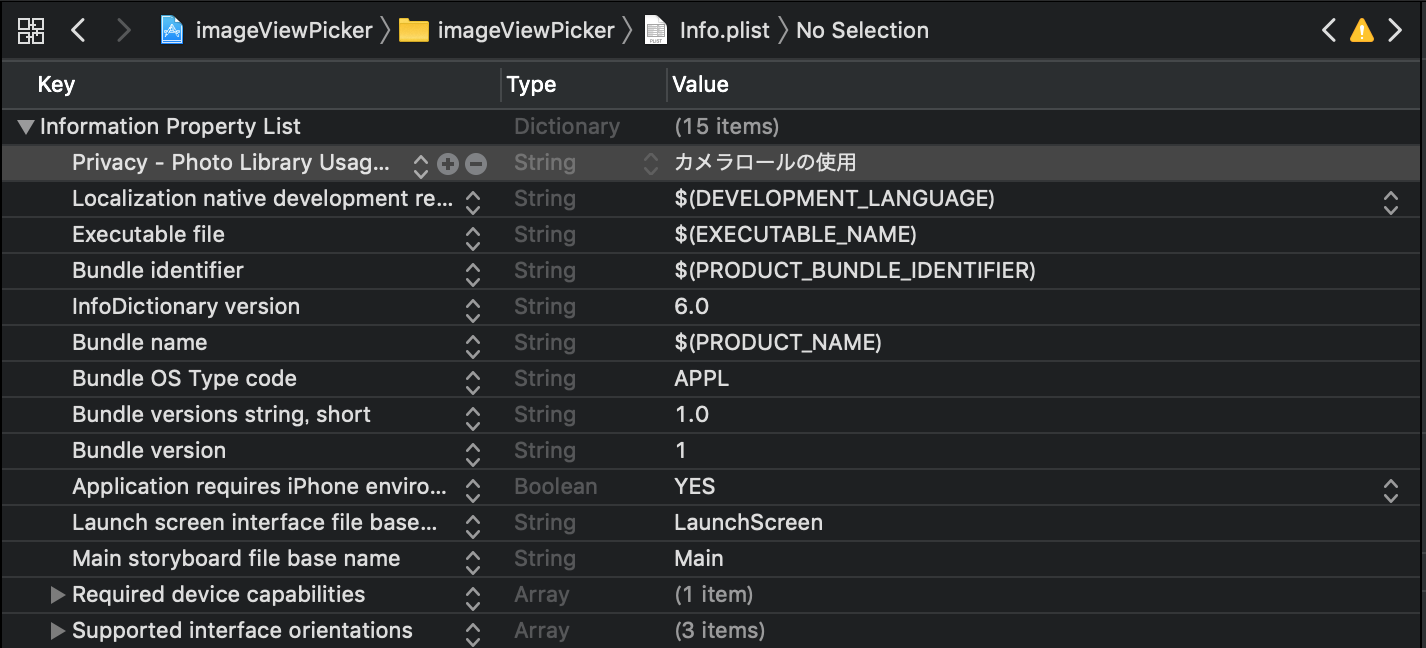
1.info.plistに登録する
ListにNSPhotoLibraryUsageDescriptionのキーを追加し、
Valueにカメラロールの使用目的を記載します。
2.実装する
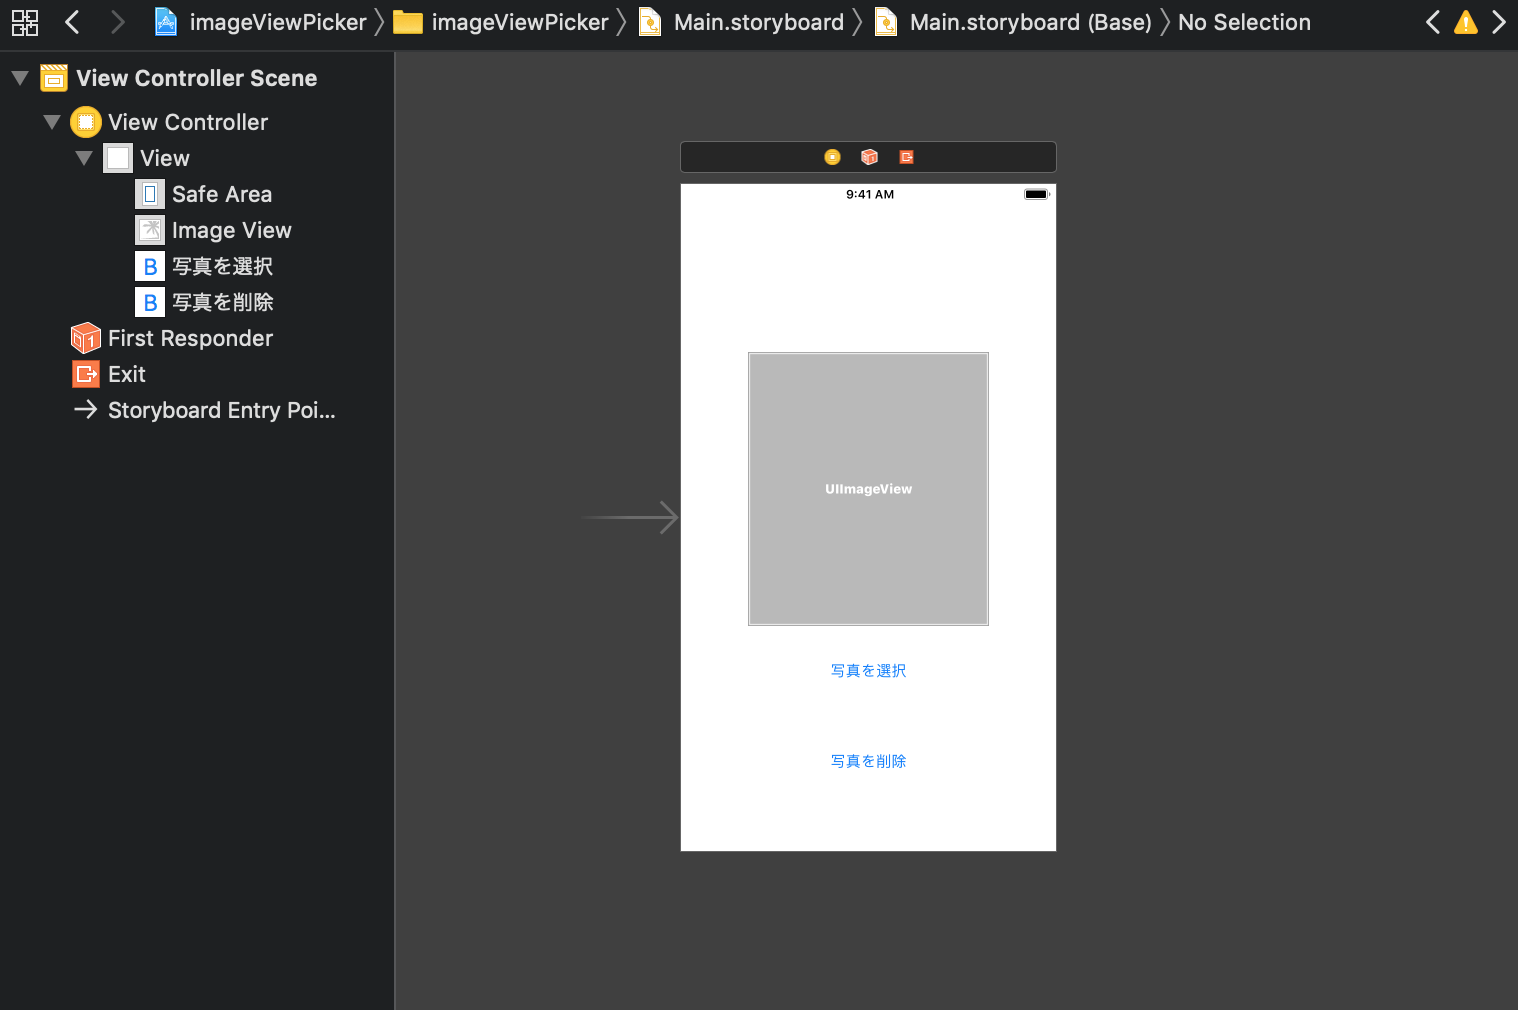
部品はStoryBoardに適当に配置しました。
ViewController.swift
import UIKit

final class ViewController: UIViewController {

    @IBOutlet weak var imageView: UIImageView! {
        didSet {
            // デフォルトの画像を表示する
            imageView.image = UIImage(named: "no_image.png")
        }
    }

    override func viewDidLoad() {
        super.viewDidLoad()
    }

    @IBAction func selectPicture(_ sender: UIButton) {
        // カメラロールが利用可能か?
        if UIImagePickerController.isSourceTypeAvailable(.photoLibrary) {
            // 写真を選ぶビュー
            let pickerView = UIImagePickerController()
            // 写真の選択元をカメラロールにする
            // 「.camera」にすればカメラを起動できる
            pickerView.sourceType = .photoLibrary
            // デリゲート
            pickerView.delegate = self
            // ビューに表示
            self.present(pickerView, animated: true)
        }
    }

    @IBAction func deletePicture(_ sender: UIButton) {
        // アラート表示
        showAlert()
    }

    /// アラート表示
    func showAlert() {
        let alert = UIAlertController(title: "確認",
                                      message: "画像を削除してもいいですか?",
                                      preferredStyle: .alert)
        let okButton = UIAlertAction(title: "OK",
                                     style: .default,
                                     handler:{(action: UIAlertAction) -> Void in
                                        // デフォルトの画像を表示する
                                        self.imageView.image = UIImage(named: "no_image.png")
        })
        let cancelButton = UIAlertAction(title: "キャンセル", style: .cancel, handler: nil)

        // アラートにボタン追加
        alert.addAction(okButton)
        alert.addAction(cancelButton)

        // アラート表示
        present(alert, animated: true, completion: nil)
    }
}

extension ViewController: UIImagePickerControllerDelegate, UINavigationControllerDelegate {
    // 写真を選んだ後に呼ばれる処理
    func imagePickerController(_ picker: UIImagePickerController, didFinishPickingMediaWithInfo info: [UIImagePickerController.InfoKey : Any]) {
        // 選択した写真を取得する
        let image = info[.originalImage] as! UIImage
        // ビューに表示する
        imageView.image = image
        // 写真を選ぶビューを引っ込める
        self.dismiss(animated: true)
    }
}
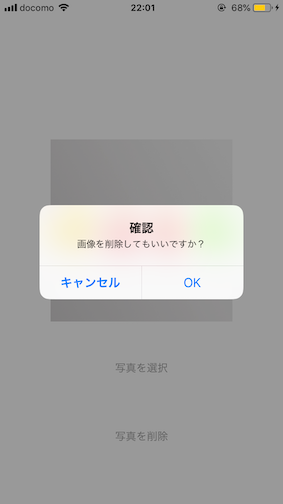
「写真を削除」ボタンを押下し、OKボタンを選択すると画像が削除されます
表示するだけならとても簡単みたい!
ご指摘などあれば、コメントお願いいたします。

