Mackerel-agentを停止する
sudo /etc/init.d/mackerel-agent stop
サーバ起動時設定からMackerelをはずす
サーバ起動時に自動で上がるサービスの一覧を確認する
$ chkconfig --list
(略)
mackrel-agent       0:off   1:off   2:off   3:off   4:off   5:off   6:off
該当する設定をはずす
$ chkconfig --del mackrel-agent
サーバ発行のIDファイルを削除
rm /var/lib/mackerel-agent/id
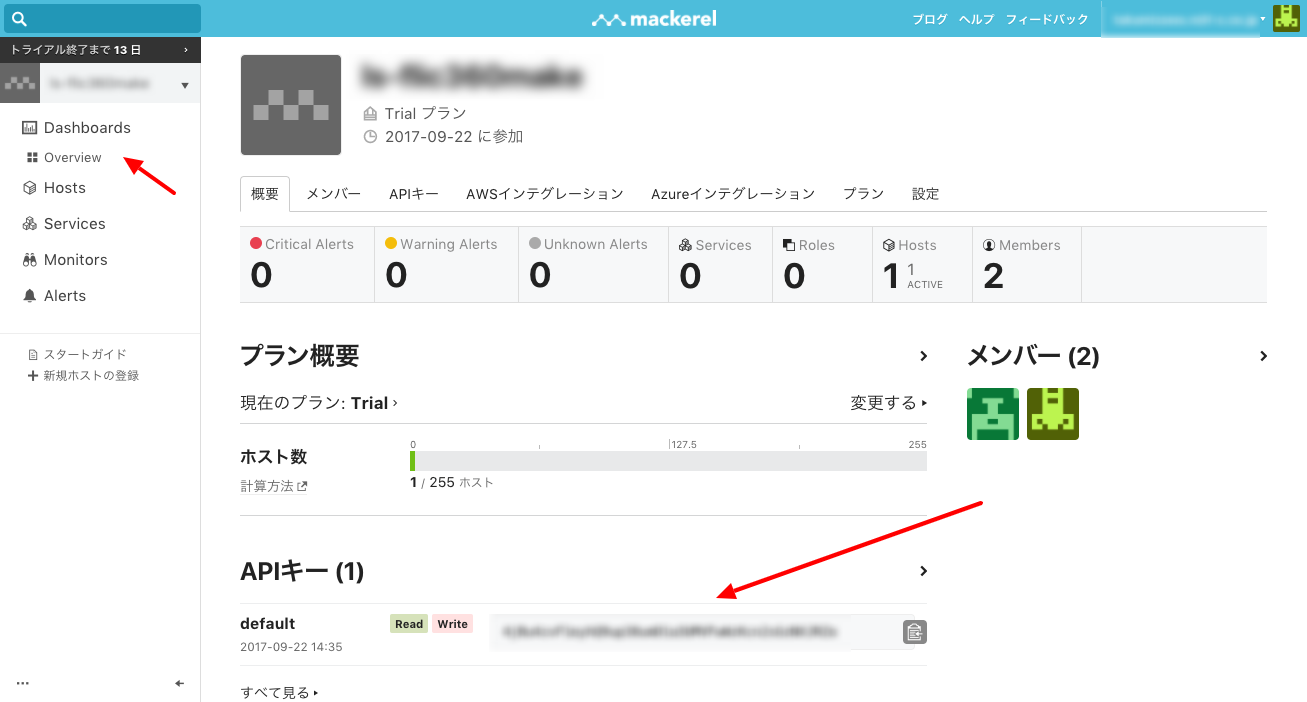
移行する先のMackerelのAPI KEYを取得
DashboardのOverview>詳細にあります。
移行先にMackerel-agentをインストール
Hostの設定からエージェントのインストール方法が出ています(下図参照)。GCPのRedhatサーバだと以下の通り。
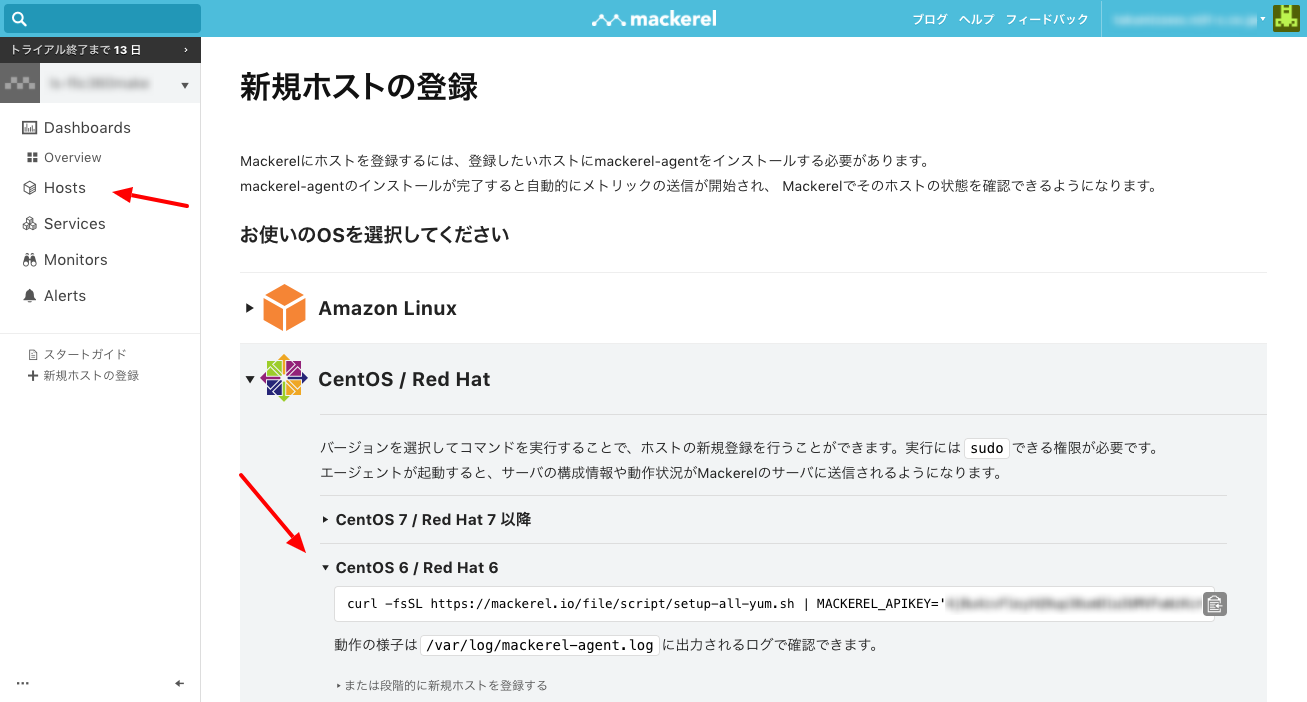
curl -fsSL https://mackerel.io/file/script/setup-all-yum.sh | MACKEREL_APIKEY='xxx' sh
必要に応じてプラグインをインストールします(以下参照)。
https://qiita.com/hardreggaecafe/items/f7af6a5d98028bda13c8
(プラグインインストール後)mackerel-agent.confのapikeyより下をコピーして書き換え
apikey = "xxx" # エージェントインストールで勝手に追加される
# pidfile = "/var/run/mackerel-agent.pid"
# root = "/var/lib/mackerel-agent"
# verbose = false
(略)
[plugin.checks.check_httpd]
command = "check-procs --pattern httpd"
[plugin.checks.mysql_connection]
command = "check-mysql connection --host=xxx --port=3306 --user=xxx --password=xxx --warning=250 -- critical=280"
Mackerel-agentを再起動
sudo /etc/init.d/mackerel-agent restart
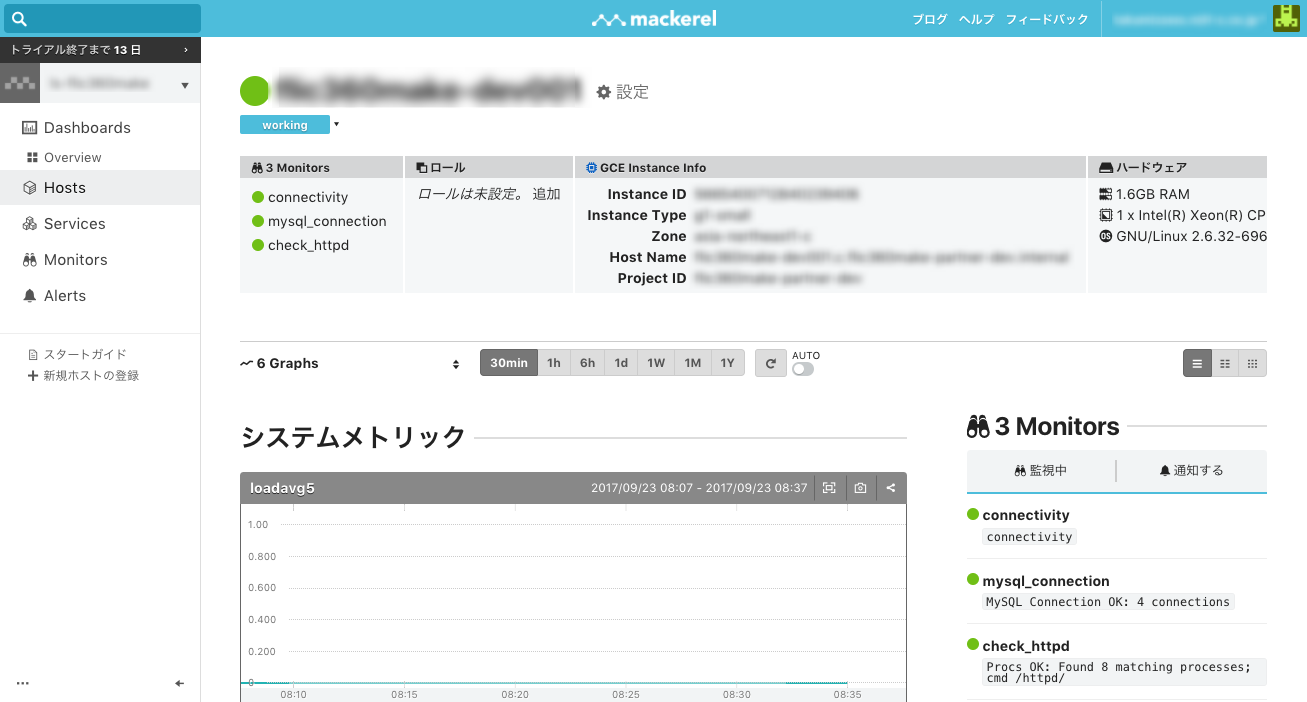
移行完了
うまくいくとホストが登録されて以下のように各種メトリクスが計測できるようになります。