はじめに
MacにHomebrewを導入した際の手順を簡単にまとめてみました。
Homebrewとは
Mac OS用のパッケージ管理システムです。
Macのターミナル(コマンドライン)から、ソフトウェア(ex.PHP、Pythonなど)などを簡単に導入出来るようにするものです。
環境
Mac OS Mojave Version 10.14
手順
1. ターミナルを起動
Macでは、ターミナルが標準装備されています。
「アプリケーション」の中の「Utilities」フォルダーの中にある、ターミナルを開きます。
(command + spaceを押して「ターミナル」でもOKです)
2. Command Line Toolsのインストール
ターミナルを起動したら、Homebrewをインストールするのに必要なコマンドを入力します。
xcode-select --install
上記のコマンドをターミナルに打った後に、いろいろな画面が表示されると思いますが、
インストールや同意するを押して進めます。
「ソフトウェアがインストールされました」と表示されればOKです。
Command Line Tools が正しくインストールされると, 次のコマンドでインストールされたバージョンを確認できます。
xcode-select -v
3. Homebrewのインストール
非常に簡単です。
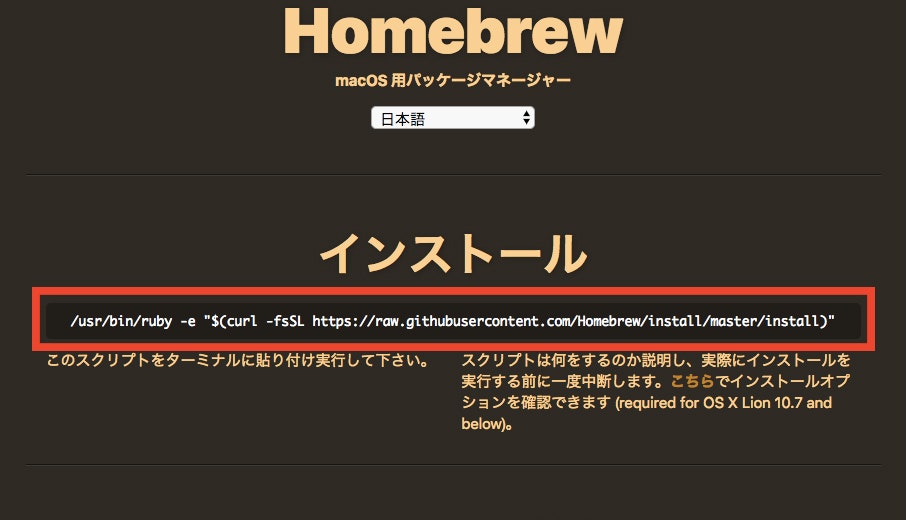
Homebrewの公式HPから、インストール用のスクリプトをコピーしてターミナルに貼り付けるだけです。
Installation successful!と表示されればOKです。
最後に
下記のコマンドを入力して、Your system is ready to brew. と表示されれば導入成功です。
$ brew doctor
以上、ざっくりですがHomebrew導入についてでした!
お疲れ様でした。
