前回の記事で、フォーラムのユーザーシステムを構築しました。これにより、ユーザーは登録、ログイン、および自分のIDの下での投稿が可能になりました。
しかし、投稿が公開された後、現在のところ変更することはできません。エラーを見つけたり、さらにコンテンツを追加したりしたい場合はどうすればよいでしょうか?
この記事では、新しい機能、つまりユーザーが作成した投稿を編集できるようにする機能を実装します。
ステップ1:投稿編集ページの作成
まず、ユーザーが投稿のタイトルとコンテンツを編集できる新しいHTMLページが必要です。このページは新しい投稿フォームと非常によく似ていますが、既存の投稿データで事前に埋め込まれます。
templatesフォルダにedit_post.htmlという名前の新しいファイルを作成します。
templates/edit_post.html
<!DOCTYPE html>
<html>
  <head>
    <title>Edit Post - My FastAPI Forum</title>
    <style>
      body {
        font-family: sans-serif;
        margin: 2em;
      }
      form {
        width: 500px;
        margin: 0 auto;
      }
      input,
      textarea {
        width: 100%;
        padding: 8px;
        margin-bottom: 10px;
        box-sizing: border-box;
      }
      button {
        padding: 10px 15px;
        background-color: #007bff;
        color: white;
        border: none;
        cursor: pointer;
      }
      a {
        display: block;
        margin-top: 1em;
        text-align: center;
      }
    </style>
  </head>
  <body>
    <h1>Edit Post</h1>
    <form method="post">
      <input type="text" name="title" value="{{ post.title }}" required /><br />
      <textarea name="content" rows="10" required>{{ post.content }}</textarea>
      <br />
      <button type="submit">Update Post</button>
    </form>
    <a href="/posts">Cancel</a>
  </body>
</html>
このテンプレートの核心は、titleとcontentの2つの入力フィールドを持つフォームです。Jinja2の{{ post.title }}と{{ post.content }}構文を使用して、バックエンドから渡された投稿データでフォームを事前に埋め込みます。
ステップ2:編集用のAPIルートの追加
次に、編集ロジックを処理するためにmain.pyに2つの新しいルートを追加する必要があります。main.pyファイルを開き、次のコードを追加します。
main.py(新しいルートの追加)
# ... (以前のインポートやアプリ、テンプレートの定義は変更されません) ...

# --- Routes ---

# ... (/, /posts, /api/postsなどの以前のルートは変更されません) ...

@app.get("/posts/{post_id}/edit", response_class=HTMLResponse)
async def get_edit_post_form(
    request: Request,
    post_id: int,
    db: AsyncSession = Depends(get_db),
    current_user: Optional[models.User] = Depends(get_current_user)
):
    if not current_user:
        return RedirectResponse(url="/login", status_code=status.HTTP_302_FOUND)

    result = await db.execute(select(models.Post).where(models.Post.id == post_id))
    post = result.scalar_one_or_none()

    if not post:
        raise HTTPException(status_code=404, detail="Post not found")

    if post.owner_id != current_user.id:
        raise HTTPException(status_code=403, detail="Not authorized to edit this post")

    return templates.TemplateResponse("edit_post.html", {"request": request, "post": post})


@app.post("/posts/{post_id}/edit")
async def edit_post(
    post_id: int,
    title: str = Form(...),
    content: str = Form(...),
    db: AsyncSession = Depends(get_db),
    current_user: Optional[models.User] = Depends(get_current_user)
):
    if not current_user:
        return RedirectResponse(url="/login", status_code=status.HTTP_302_FOUND)

    result = await db.execute(select(models.Post).where(models.Post.id == post_id))
    post = result.scalar_one_or_none()

    if not post:
        raise HTTPException(status_code=404, detail="Post not found")

    if post.owner_id != current_user.id:
        raise HTTPException(status_code=403, detail="Not authorized to edit this post")

    post.title = title
    post.content = content
    await db.commit()

    return RedirectResponse(url="/posts", status_code=status.HTTP_303_SEE_OTHER)

# ... (以降のルート、/register, /login, /logoutなどは変更されません) ...
ここでは2つのルートを追加しました。
-
GET /posts/{post_id}/edit:このルートはURLからのpost_idに基づいてデータベースで投稿を検索します。次に、post.owner_idがcurrent_user.idと一致することを確認します。検証が成功した場合、edit_post.htmlテンプレートをレンダリングし、クエリされたpostオブジェクトを渡します。 -
POST /posts/{post_id}/edit:このルートは、フォームから新しいtitleとcontentを受け取り、postオブジェクトの属性を更新します。この操作では、ログインステータスと投稿の所有権も検証します。
ステップ3:メインページにエントリーポイントを追加
ルートの準備ができました。次に、ユーザーが編集ページにアクセスできるように、投稿のエントリーポイントを追加する必要があります。
templates/posts.htmlファイルを変更します。
templates/posts.html(更新)
... (ファイルヘッダーとスタイルシートは変更されません) ...
<body>
... (ヘッダーと新規投稿フォームセクションは変更されません) ...
<hr />
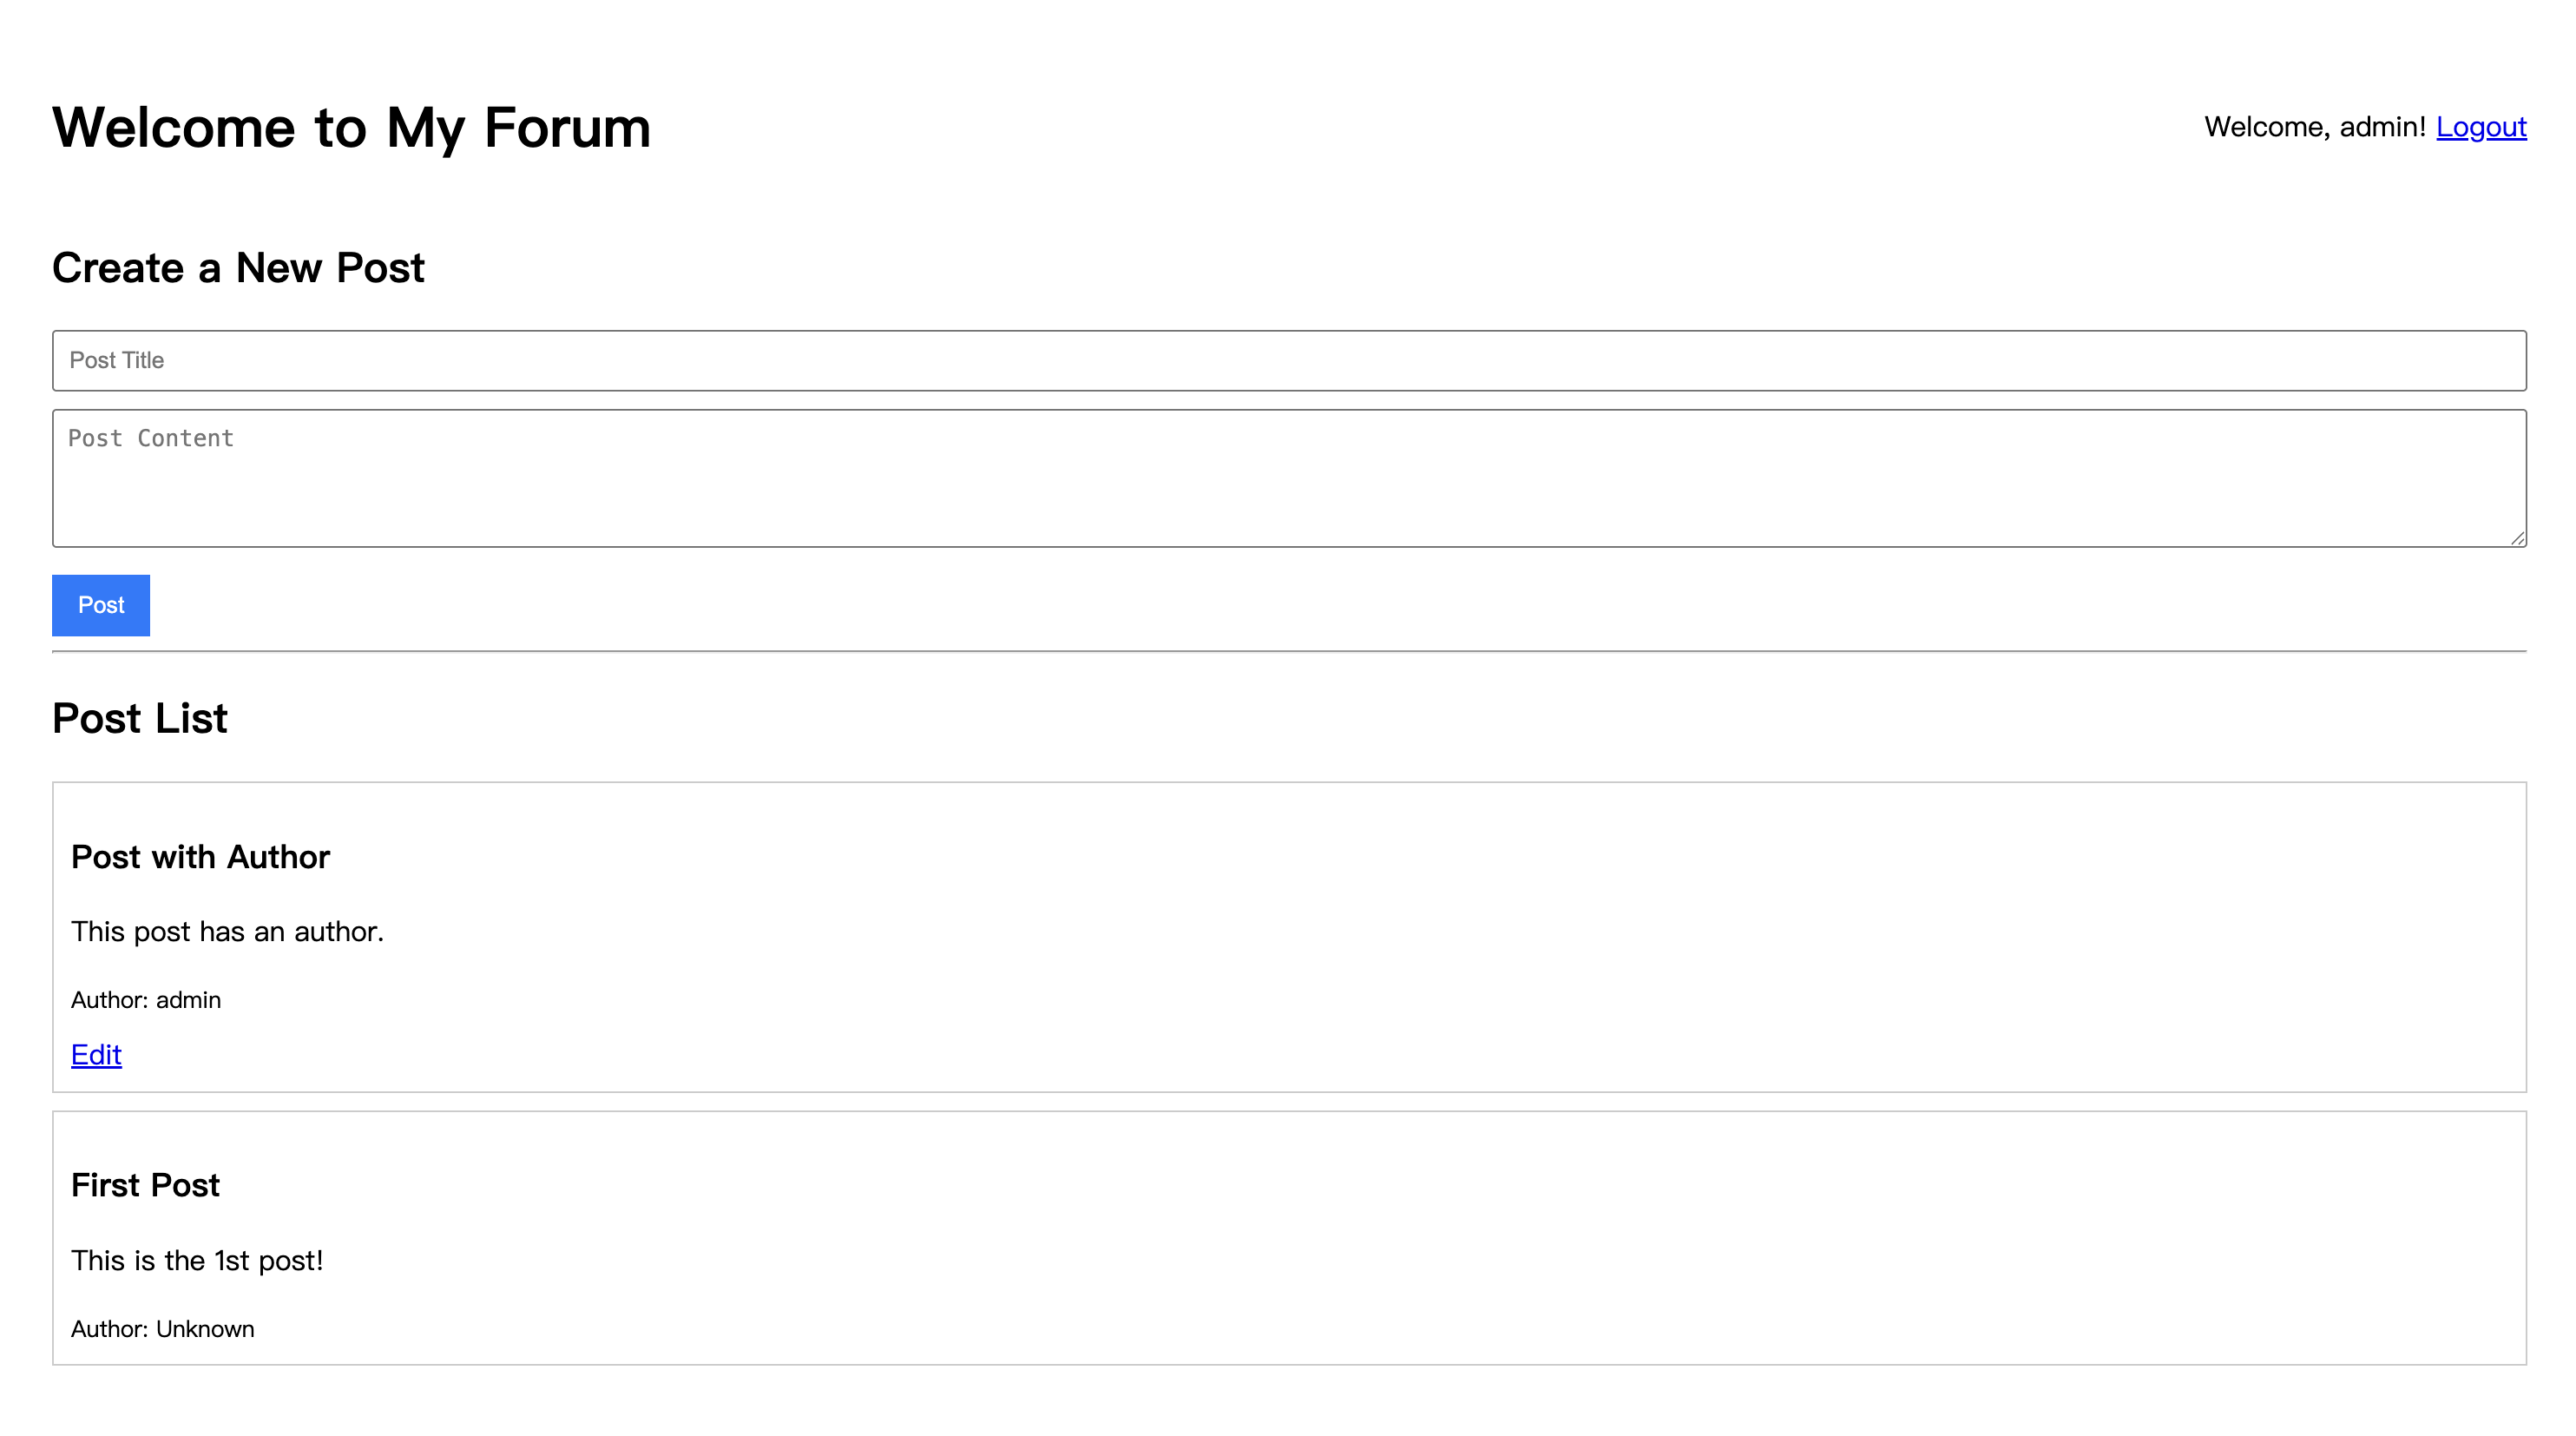
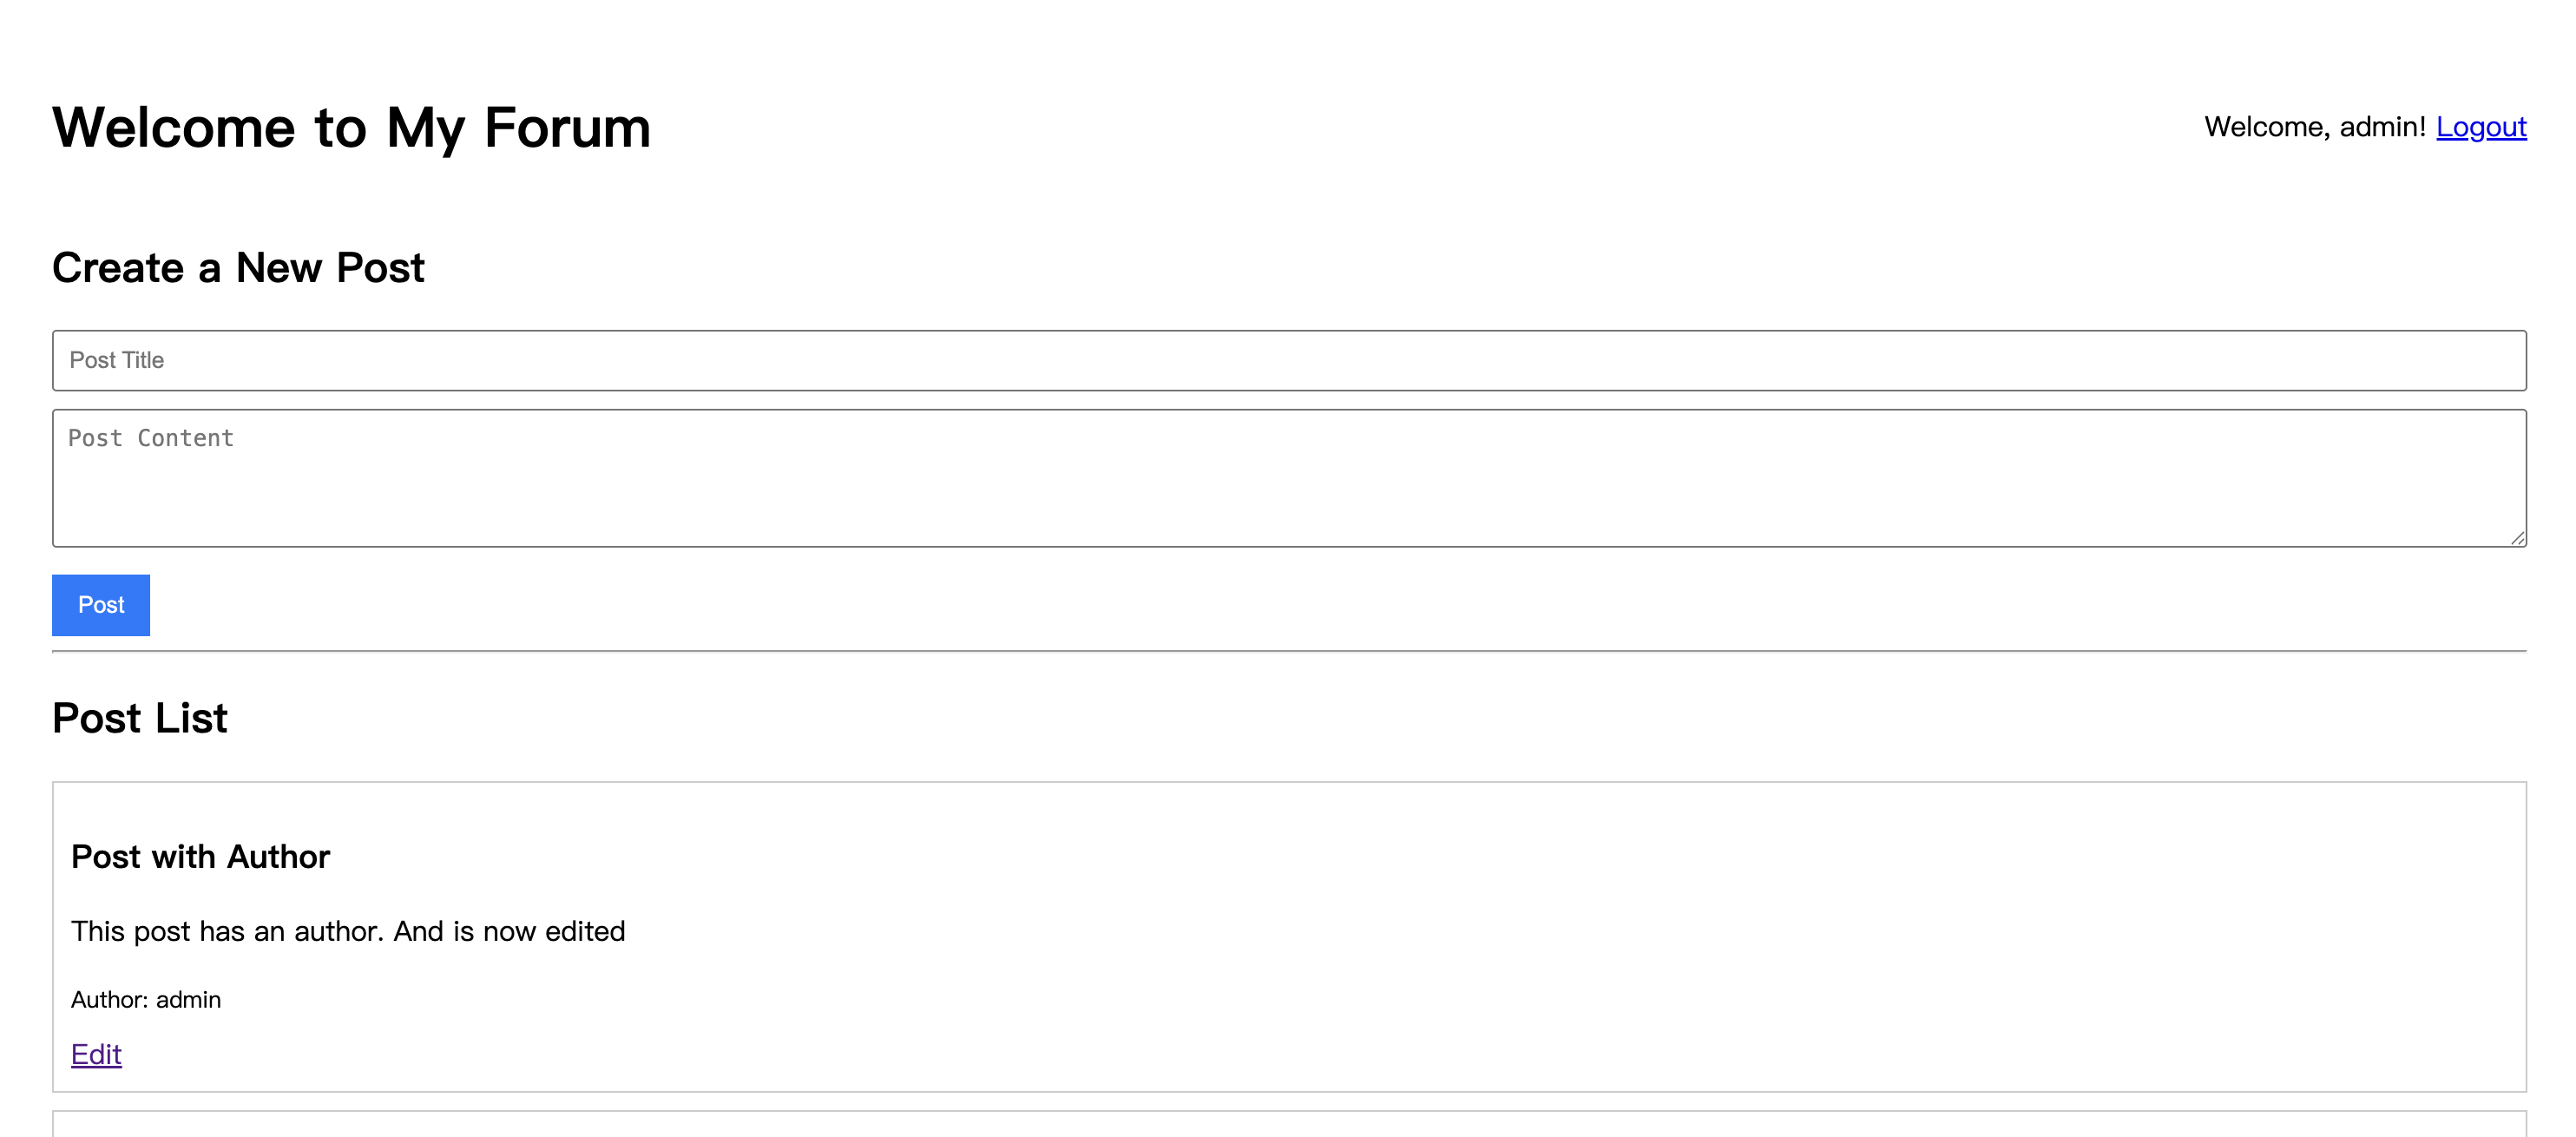
<h2>Post List</h2>
{% for post in posts %}
<div style="border: 1px solid #ccc; padding: 10px; margin-bottom: 10px;">
<h3>{{ post.title }}</h3>
<p>{{ post.content }}</p>
<small>Author: {{ post.owner.username if post.owner else 'Unknown' }}</small>
{% if current_user and post.owner_id == current_user.id %}
<div style="margin-top: 10px;">
<a href="/posts/{{ post.id }}/edit">Edit</a>
</div>
{% endif %}
</div>
{% endfor %}
</body>
</html>
投稿情報の下にJinja2の条件文を追加しました。
{% if current_user and post.owner_id == current_user.id %}
現在のユーザーがログインしている場合(current_userが存在する)で、投稿のowner_idが現在のユーザーのidと一致する場合、「Edit」リンク(/posts/{{ post.id }}/editを指す)が表示されます。
これにより、ユーザーは自分の投稿にのみ編集ボタンが表示され、他人の投稿は編集できなくなります。
実行と検証
uvicornサーバーを再起動します。
uvicorn main:app --reload
http://127.0.0.1:8000にアクセスしてログインします。
以前に公開した投稿を見つけ、「Edit」リンクが表示されるはずです。他のユーザーの投稿には「Edit」リンクは表示されません。
「Edit」をクリックすると、投稿の元のタイトルとコンテンツで事前に埋め込まれた編集フォームにリダイレクトされます。
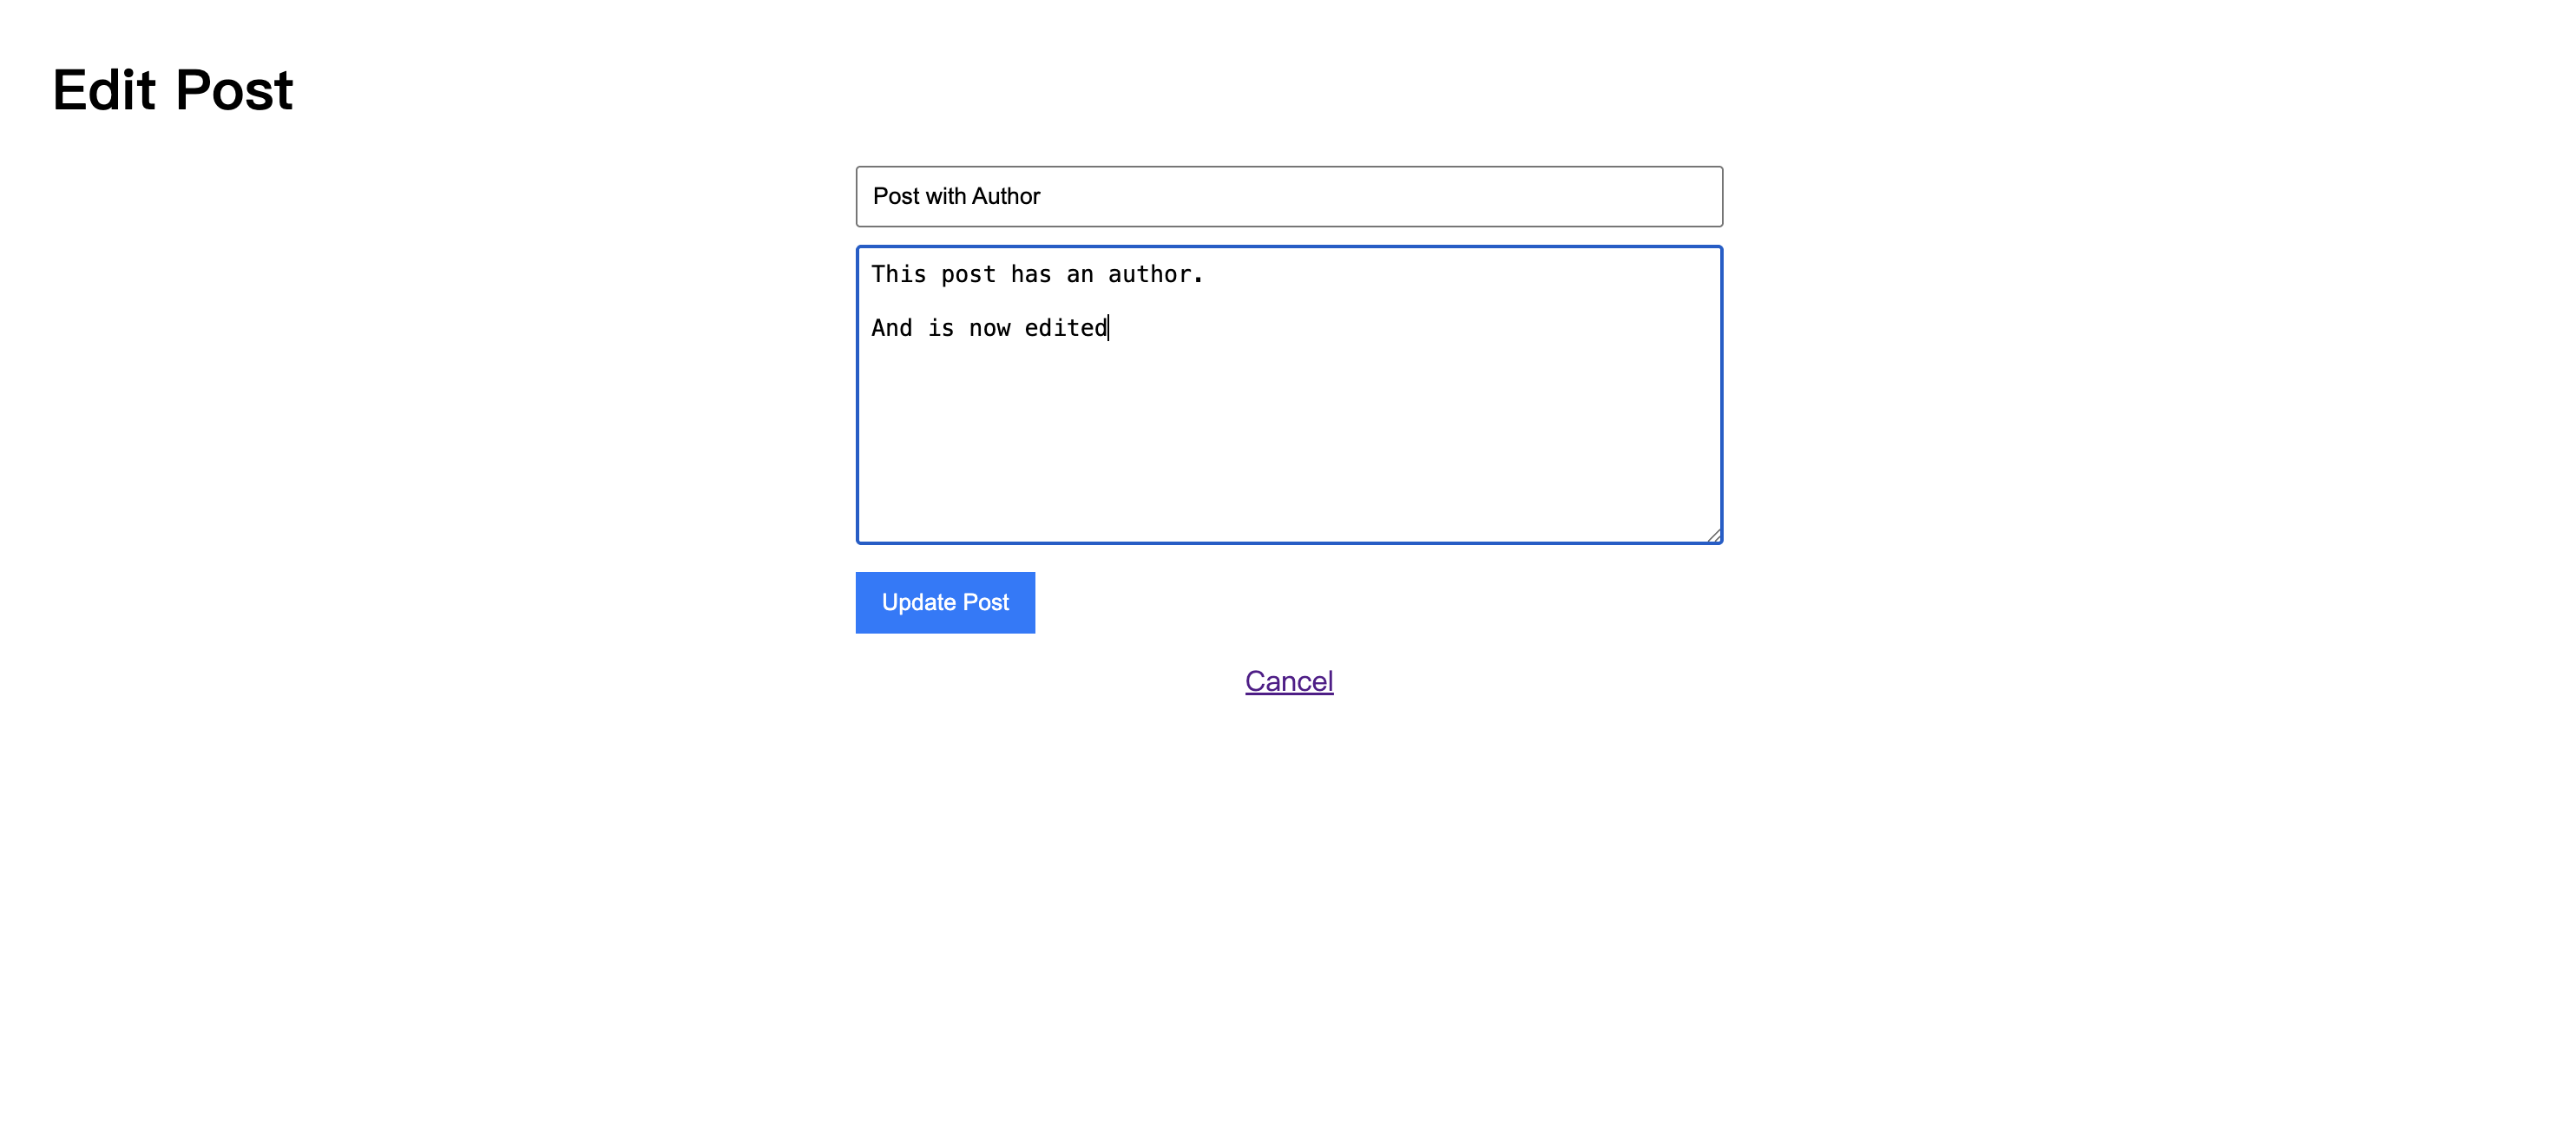
コンテンツを変更して「Update Post」をクリックします。ページはホームページにリダイレクトされ、投稿コンテンツが正常に更新されたことを確認できます。
プロジェクトのオンラインデプロイ
最初のチュートリアルと同様に、このステップの結果をオンラインにデプロイして、友人たちにプロジェクトの変更と進捗を体験してもらうことができます。
簡単なデプロイソリューションはLeapcellを使用することです。

以前にデプロイしたことがある場合は、コードをGitリポジトリにプッシュするだけで、Leapcellが最新のコードを自動的に再デプロイしてくれます。
Leapcellのデプロイサービスを初めて使用する場合は、こちらの記事のチュートリアルを参照してください。
まとめ
フォーラムに編集機能が追加され、より完全なものになりました。
投稿以外にも、フォーラムでのインタラクションは不可欠です。ユーザーは興味深い(または物議を醸す)投稿を見たとき、その下に自分の意見を共有したくなるでしょう。
次の記事では、フォーラムにインタラクティブな機能を追加します。投稿へのコメントと返信を実装し、ユーザーがそれらについて議論できるようにします。
Xでフォローする:@LeapcellJapan
関連記事: