やりたいこと・やったこと
PowerAppsで頻繁にSharePointオンラインのカスタムリストを使うので、リストの作成や列追加もいっそPowerApps→Flowで完結させたい!
そのためにSharePoint REST APIをFlowから実行!だけどBodyに何かいていいかわからない
今回はSharePoint REST APIを利用してフィールドを作成する際に、どういうBodyを入れるかの備忘録を記載します。
FlowでSharePoint REST APIを実行
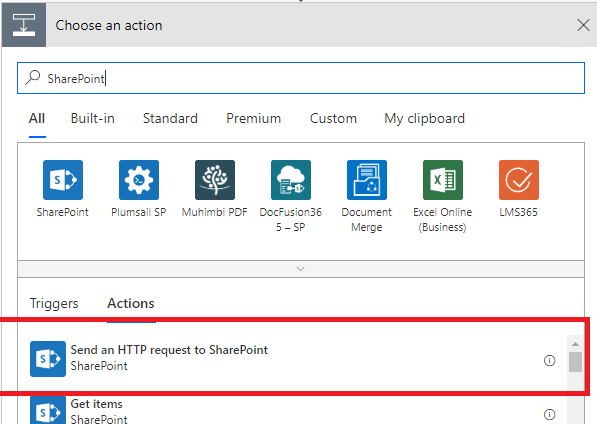
Microsoft Flowで「SharePoint」と検索すると表示されるアクションに、「Send an HTTP request to SharePoint」というのがあります。これをつかっていきます。

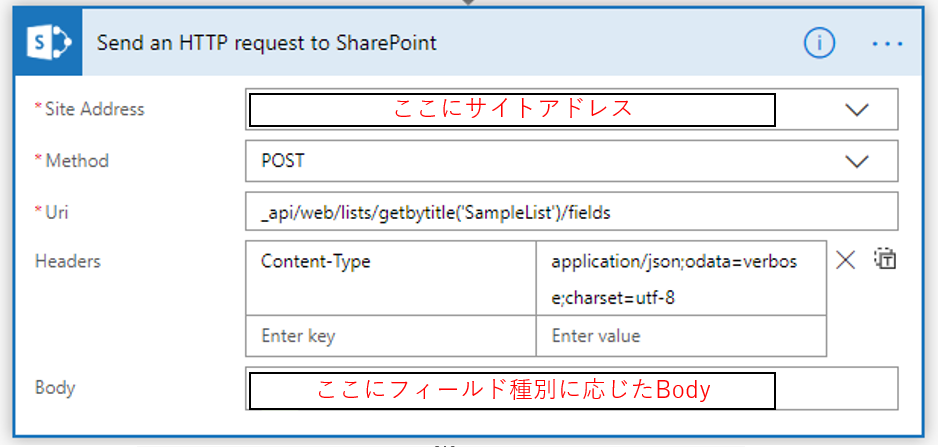
今回はフィールドの追加をしますので、以下のようにアクションのパラメータをセットします。

ここでUriは _api/web/lists/getbytitle('リストのタイトル')/fields で、MethodをGETにすれば対象リストに含まれるフィールドの一覧(プロパティ含む)が得られますし、POSTにすればフィールドの追加ができます。
Lookup列のみ、addfield methodを使いなさいと怒られます。
追加する際にはBodyにフィールドの設定をJson形式で記載する必要があります。(名前、フィールドのタイプ、ユニークにするか、デフォルト値は など)
Bodyの中身
基本は下記のような構成でBodyを構成します。
DefaultValueやDescription,Requiredは省略可能でした。
 {
    "__metadata": {
      "type": "SP.Field" //追加するフィールドの種別
    },
    "DefaultValue": "1", //デフォルト値
    "Description": "", //フィールドの記述
    "EnforceUniqueValues": false, //ユニークな値を強制するか
    "Required": false, //必須か
    "Title": "bool", //列名
    "FieldTypeKind": 8, //フィールドの種類
    +フィールド種別に応じたプロパティ
 }
送るBodyの詳細はこちら にまとめられています。これだけ見ればきっとわかるはず。Exampleもあるので。
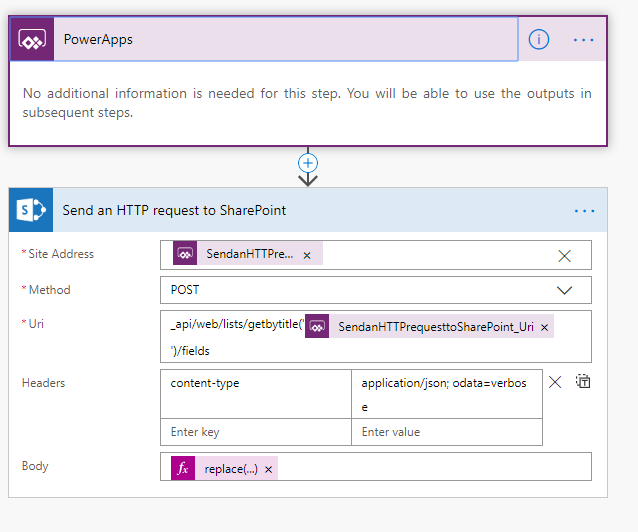
実際つくったFlow
PowerAppsではリストのGUIDやサイトアドレスをCollectionとして持っています。
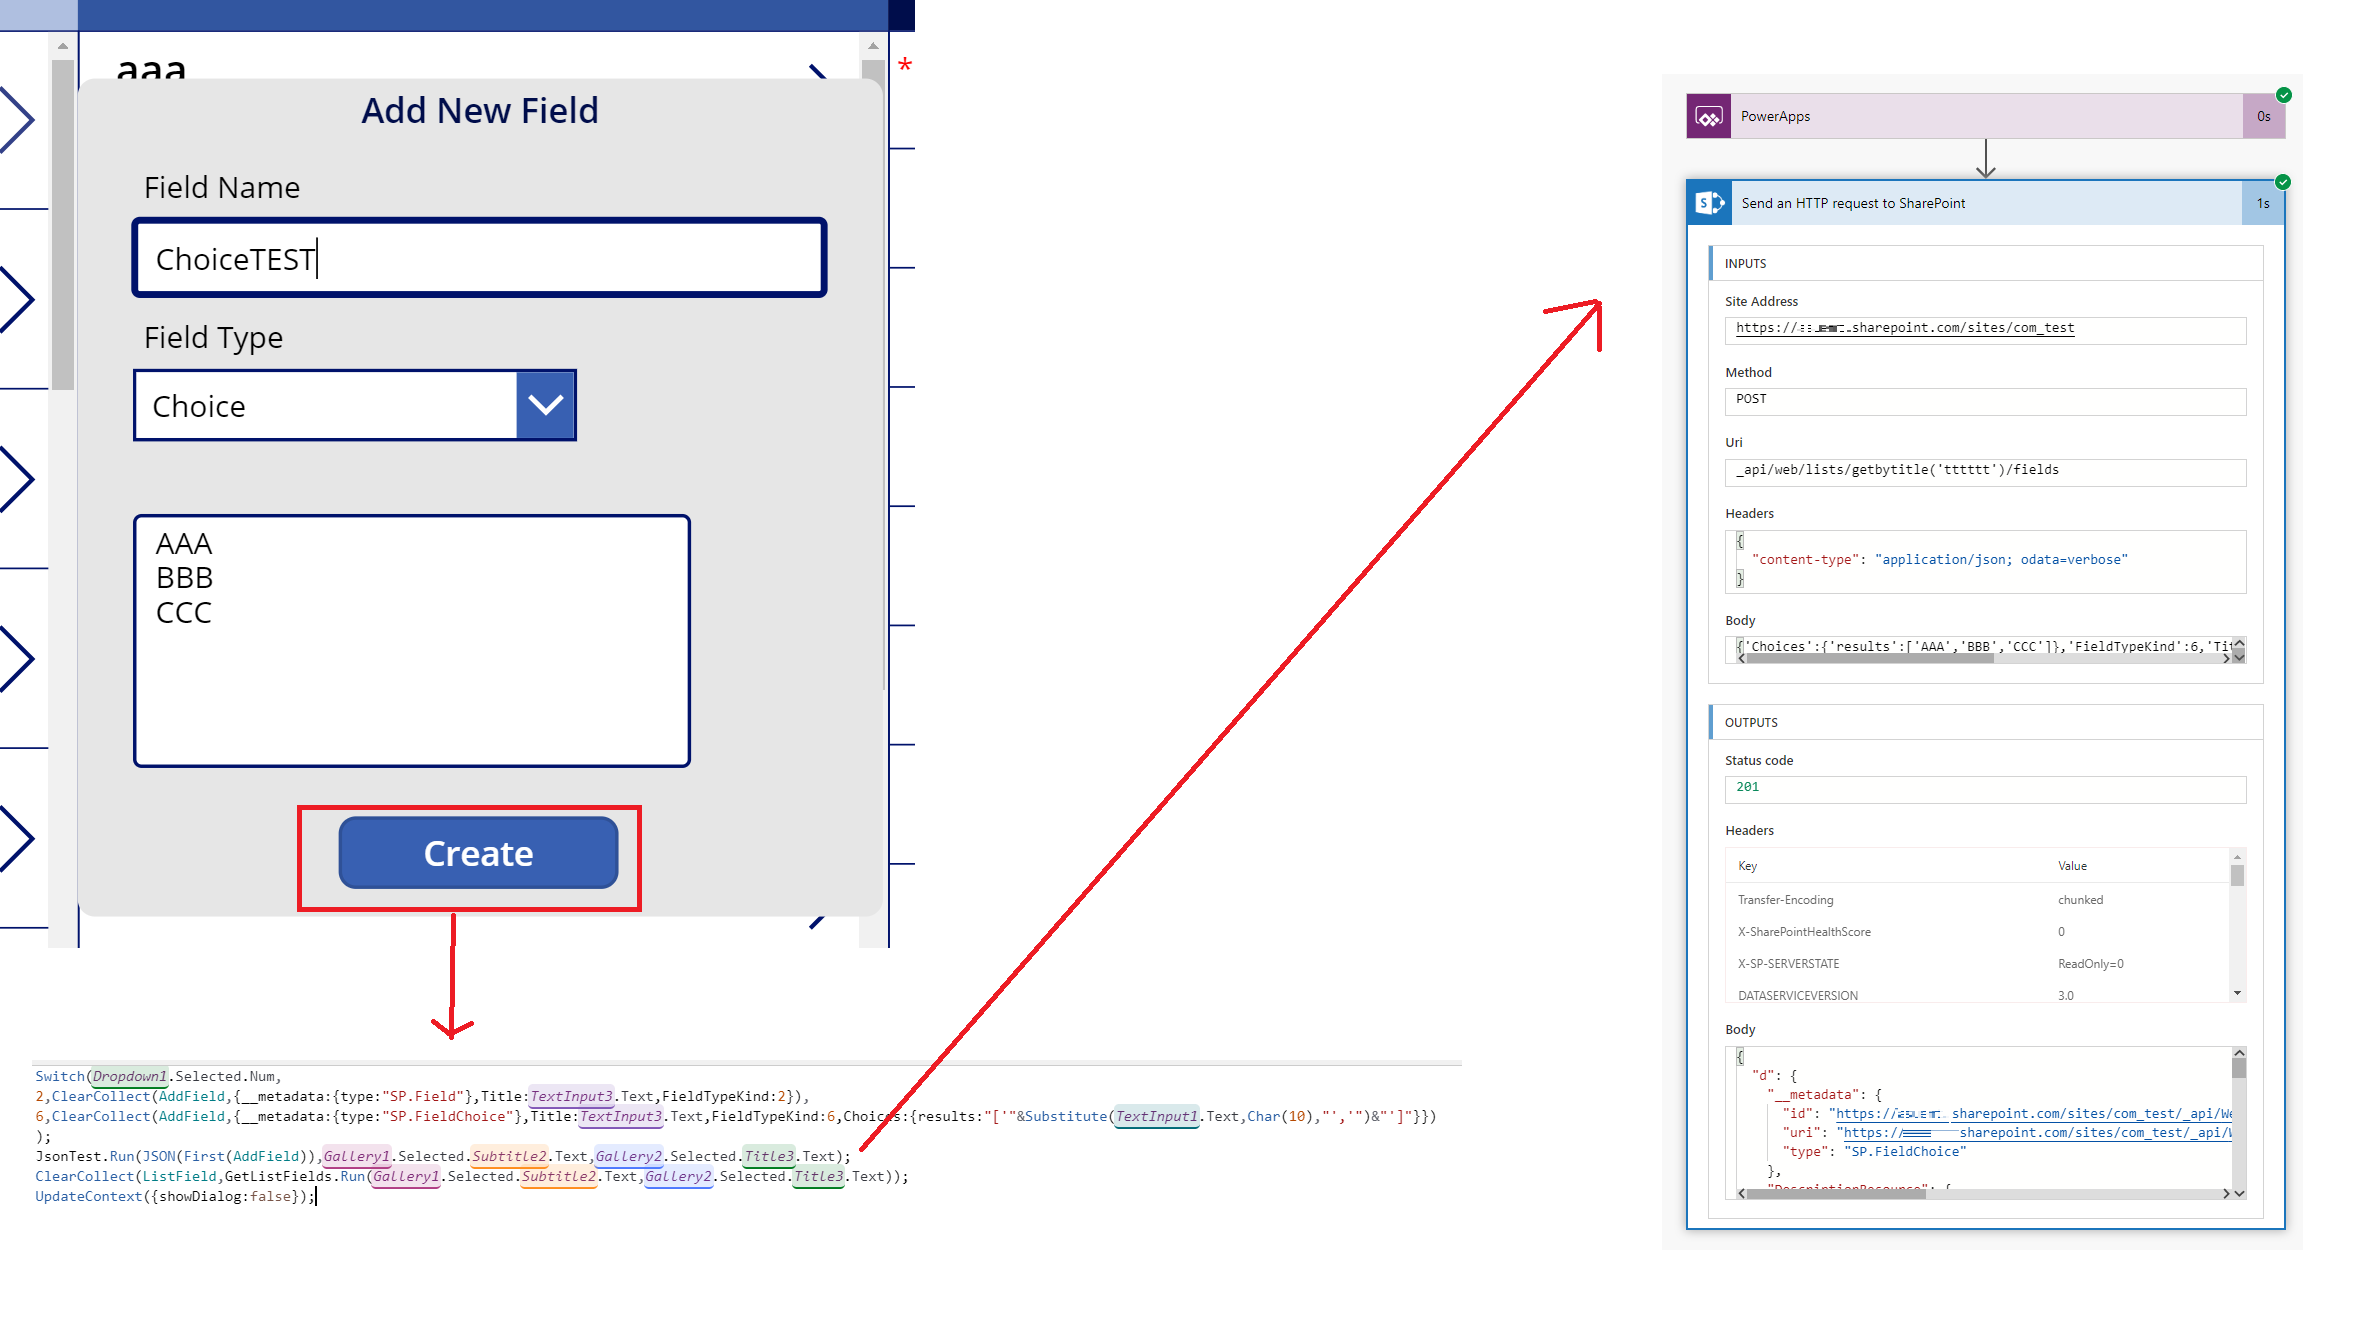
Bodyの中身ですが、これはPowerAppsからおくったJsonをちょっと加工して挿入しています。
replace(replace(replace(triggerBody()['SendanHTTPrequesttoSharePoint_Body'],'"[','['),']"',']'),'"','''')
ということで自分用メモでした。

