なにこれ
Flutterプロジェクトを作成した時に作成されるサンプルがどんな風に動いているのかを調べたメモ。
Flutterに入門して4日目時点の理解を残す。
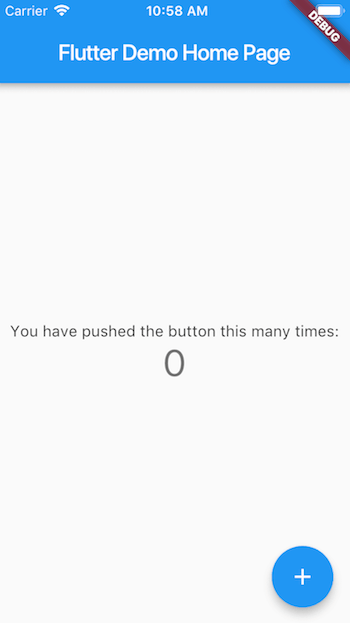
どんなサンプル?
こいつです。プロジェクト作成時に記述されているシンプルなカウンターアプリです。
バージョン情報
$ flutter --version
Flutter 1.13.6-pre.38 • channel master • https://github.com/flutter/flutter.git
Framework • revision b28dd0c296 (4 days ago) • 2019-12-28 10:33:01 +0800
Engine • revision 5a730c60d3
Tools • Dart 2.8.0 (build 2.8.0-dev.0.0 1db1a837f8)
理解を進める
/lib/main.dartのファイルが対象。テストコードは対象外。
全部貼る。コメントの量がすごいから削除する。
コメント含めたコード
import 'package:flutter/material.dart';

void main() => runApp(MyApp());

class MyApp extends StatelessWidget {
  // This widget is the root of your application.
  @override
  Widget build(BuildContext context) {
    return MaterialApp(
      title: 'Flutter Demo',
      theme: ThemeData(
        // This is the theme of your application.
        //
        // Try running your application with "flutter run". You'll see the
        // application has a blue toolbar. Then, without quitting the app, try
        // changing the primarySwatch below to Colors.green and then invoke
        // "hot reload" (press "r" in the console where you ran "flutter run",
        // or simply save your changes to "hot reload" in a Flutter IDE).
        // Notice that the counter didn't reset back to zero; the application
        // is not restarted.
        primarySwatch: Colors.blue,
      ),
      home: MyHomePage(title: 'Flutter Demo Home Page'),
    );
  }
}

class MyHomePage extends StatefulWidget {
  MyHomePage({Key key, this.title}) : super(key: key);

  // This widget is the home page of your application. It is stateful, meaning
  // that it has a State object (defined below) that contains fields that affect
  // how it looks.

  // This class is the configuration for the state. It holds the values (in this
  // case the title) provided by the parent (in this case the App widget) and
  // used by the build method of the State. Fields in a Widget subclass are
  // always marked "final".

  final String title;

  @override
  _MyHomePageState createState() => _MyHomePageState();
}

class _MyHomePageState extends State<MyHomePage> {
  int _counter = 0;

  void _incrementCounter() {
    setState(() {
      // This call to setState tells the Flutter framework that something has
      // changed in this State, which causes it to rerun the build method below
      // so that the display can reflect the updated values. If we changed
      // _counter without calling setState(), then the build method would not be
      // called again, and so nothing would appear to happen.
      _counter++;
    });
  }

  @override
  Widget build(BuildContext context) {
    // This method is rerun every time setState is called, for instance as done
    // by the _incrementCounter method above.
    //
    // The Flutter framework has been optimized to make rerunning build methods
    // fast, so that you can just rebuild anything that needs updating rather
    // than having to individually change instances of widgets.
    return Scaffold(
      appBar: AppBar(
        // Here we take the value from the MyHomePage object that was created by
        // the App.build method, and use it to set our appbar title.
        title: Text(widget.title),
      ),
      body: Center(
        // Center is a layout widget. It takes a single child and positions it
        // in the middle of the parent.
        child: Column(
          // Column is also a layout widget. It takes a list of children and
          // arranges them vertically. By default, it sizes itself to fit its
          // children horizontally, and tries to be as tall as its parent.
          //
          // Invoke "debug painting" (press "p" in the console, choose the
          // "Toggle Debug Paint" action from the Flutter Inspector in Android
          // Studio, or the "Toggle Debug Paint" command in Visual Studio Code)
          // to see the wireframe for each widget.
          //
          // Column has various properties to control how it sizes itself and
          // how it positions its children. Here we use mainAxisAlignment to
          // center the children vertically; the main axis here is the vertical
          // axis because Columns are vertical (the cross axis would be
          // horizontal).
          mainAxisAlignment: MainAxisAlignment.center,
          children: <Widget>[
            Text(
              'You have pushed the button this many times:',
            ),
            Text(
              '$_counter',
              style: Theme.of(context).textTheme.display1,
            ),
          ],
        ),
      ),
      floatingActionButton: FloatingActionButton(
        onPressed: _incrementCounter,
        tooltip: 'Increment',
        child: Icon(Icons.add),
      ), // This trailing comma makes auto-formatting nicer for build methods.
    );
  }
}
サンプルプログラム
import 'package:flutter/material.dart';

void main() => runApp(MyApp());

class MyApp extends StatelessWidget {
  @override
  Widget build(BuildContext context) {
    return MaterialApp(
      title: 'Flutter Demo',
      theme: ThemeData(
        primarySwatch: Colors.blue,
      ),
      home: MyHomePage(title: 'Flutter Demo Home Page'),
    );
  }
}

class MyHomePage extends StatefulWidget {
  MyHomePage({Key key, this.title}) : super(key: key);

  final String title;

  @override
  _MyHomePageState createState() => _MyHomePageState();
}

class _MyHomePageState extends State<MyHomePage> {
  int _counter = 0;

  void _incrementCounter() {
    setState(() {
      _counter++;
    });
  }

  @override
  Widget build(BuildContext context) {
    return Scaffold(
      appBar: AppBar(
        title: Text(widget.title),
      ),
      body: Center(
        child: Column(
          mainAxisAlignment: MainAxisAlignment.center,
          children: <Widget>[
            Text(
              'You have pushed the button this many times:',
            ),
            Text(
              '$_counter',
              style: Theme.of(context).textTheme.display1,
            ),
          ],
        ),
      ),
      floatingActionButton: FloatingActionButton(
        onPressed: _incrementCounter,
        tooltip: 'Increment',
        child: Icon(Icons.add),
      ),
    );
  }
}
進め方
コードを4分割して調査したコメントをつけていく。
Widgetの細かいプロパティについては特記しない。
1部
以下コードを読む
import 'package:flutter/material.dart';

main() => runApp(MyApp());
-
importはライブラリを読み込む処理 -
main()はアプリケーションのエントリーポイントとなる関数
https://dart.dev/guides/language/language-tour#the-main-function -
runApp()は受け付けたWidget展開して画面に描画する
https://api.flutter.dev/flutter/widgets/runApp.html -
MyApp()はWidgetを返却するクラス。これはアプリケーションコードとして自動生成されるので、Widget型を返却すれば名前は何でもOK
2部
以下コードを読む
class MyApp extends StatelessWidget {
  @override
  Widget build(BuildContext context) {
    return MaterialApp(
      title: 'Flutter Demo',
      theme: ThemeData(
        primarySwatch: Colors.blue,
      ),
      home: MyHomePage(title: 'Flutter Demo Home Page'),
    );
  }
}
-
StatelessWidgetは状態をもたないWidgetと指定する。状態を持つ場合はStatefulWidgetを利用する
StatelessWidget https://api.flutter.dev/flutter/widgets/StatelessWidget-class.html
StatefulWidget https://api.flutter.dev/flutter/widgets/StatefulWidget-class.html -
@overrideはアノテーション。Dartも先頭@でアノテーションと表現する。他に@requiredとかある -
build()はこのWidget(MyApp)で表現されるUIの一部を表現する。
https://api.flutter.dev/flutter/widgets/StatelessWidget/build.html -
BuildContextはWidgetツリー内のWidgetの場所を取り扱う
https://api.flutter.dev/flutter/widgets/BuildContext-class.html -
MaterialApp()はマテリアルデザインを用いたアプリケーションと定義する。
https://api.flutter.dev/flutter/material/MaterialApp-class.html
Widget型を返却するクラスのプロパティについては都度ドキュメントを読むのが良い。
公式ドキュメントは型を追いやすく記載してくれているので、何を渡してやる必要があるのかは追いやすい。
3部
以下コードを読む
class MyHomePage extends StatefulWidget {
  MyHomePage({Key key, this.title}) : super(key: key);
  final String title;

  @override
  _MyHomePageState createState() => _MyHomePageState();
}
-
MyHomePage({Key key, this.title}) : super(key: key);- コンストラクタについてはDartのドキュメントを読んでおいた方がいいかも
- コンストラクタはクラスと同名の関数で定義する
- 引数の
{}はoptionalであることを示す - 引数自身を
this.hogeとすることで、インスタンス変数への代入処理を省略できる - コンストラクタの後の
:で初期化処理を行うことができる。この場合ではスーパークラスにKeyを渡している。
assert()で値の検査を行うこともできるらしい。
-
final String title;でtitleに値を登録している。constとfinalの違いはなんだろう。。。 -
_MyHomePageState createState() => _MyHomePageState();で_MyHomePageStateというStateを作成する。 - メソッドや変数等の先頭の
_でアクセス修飾子privateを示す。
4部
以下コードを読む
class _MyHomePageState extends State<MyHomePage> {
  int _counter = 0;

  void _incrementCounter() {
    setState(() {
      _counter++;
    });
  }

  @override
  Widget build(BuildContext context) {
    return Scaffold(
      appBar: AppBar(
        title: Text(widget.title),
      ),
      body: Center(
        child: Column(
          mainAxisAlignment: MainAxisAlignment.center,
          children: <Widget>[
            Text(
              'You have pushed the button this many times:',
            ),
            Text(
              '$_counter',
              style: Theme.of(context).textTheme.display1,
            ),
          ],
        ),
      ),
      floatingActionButton: FloatingActionButton(
        onPressed: _incrementCounter,
        tooltip: 'Increment',
        child: Icon(Icons.add),
      ),
    );
  }
}
-
setState()で状態を更新してUIを更新する。
https://api.flutter.dev/flutter/widgets/ModalRoute/setState.html -
Scaffold()でページ単位のベースとなるWidgetを生成する
https://api.flutter.dev/flutter/material/Scaffold-class.html -
$_counterは_counterを変数展開する。
おわり
- フロントエンド開発でReact, Vueは知っていたので、WidgetやStateの概念はすんなり入ってくる。導入の習熟コスト低い。
- Dart自体も癖のある文法ではないので読みやすい。当面はFlutterやりながらわからない箇所をドキュメントを読みに行くくらいで良さそう。
- Flutterは公式ドキュメント読みやすい。型で追っていくことが可能なので英語そんなに読めなくてもドキュメント読める。
- 似た記事結構あるけど、自分で調べて書いた事で習熟度上がった。自分の理解が追いついていない箇所を注力的に調べられた。