はじめに
Meraki Scanning API を使って位置情報を可視化するの後編。
前編では、そもそもの Scanning API の設定方法から単にデータを受け入れる方法を紹介した。
ぶっちゃけサンプルで載せたLambdaのコードを参考にあとはお好きにどうぞっていう感じではあるのだが、とはいえ、あの段階だとまだどんなもんかよくわからないと思う。
というわけで、ちょっとした可視化のサンプルも紹介したいと思う。別にこれが最適な解というわけではなくて、あくまでサンプルである。
準備物
必要なのは2つ。
- XY座標を記録したCSVなどのデータファイル
- オフィスマップ画像
1についてはScanning APIからぶん投げられてきたJSONそのままは鈍重すぎてキツい。よって、Lambdaを改良しデータをコンパクトにしたCSVを生成できるようにする。
2は手元に既にあるならまぁそれでよし。ないなら後述の手段で手に入るかもしれない。
実装例: CSV化してS3にぶん投げる
まず、やればわかるがとにかくJSONが重い。重すぎる。
あまり使わない情報も大量に含まれているので、最低限必要な情報のみを抜き出してCSV化する。
さらにそれをS3に置いておいて、あとはどうにでもどうぞ!というやり方。
import os
import json
import base64
import uuid
import csv
import io
from datetime import datetime, timezone

import boto3

MERAKI_VALIDATOR = os.environ["MERAKI_VALIDATOR"]
MERAKI_SECRET = os.environ["MERAKI_SECRET"]
S3_BUCKET = os.environ["S3_BUCKET"]
S3_PREFIX = os.environ.get("S3_PREFIX", "meraki/scanning/").lstrip("/")

ALLOWED_PATH = "/meraki/scanning"

s3 = boto3.client("s3")

def _get_method(event) -> str:
    m = (event.get("requestContext", {}).get("http", {}) or {}).get("method")
    if m:
        return m.upper()
    return (event.get("httpMethod") or "GET").upper()

def _get_path(event) -> str:
    p = (event.get("requestContext", {}).get("http", {}) or {}).get("path")
    if p:
        return p
    p = event.get("rawPath")
    if p:
        return p
    return event.get("path") or "/"

def _get_body_text(event) -> str:
    body = event.get("body") or ""
    if event.get("isBase64Encoded"):
        try:
            return base64.b64decode(body).decode("utf-8", errors="replace")
        except Exception:
            return ""
    return body

def _resp(status: int, body: str, content_type: str = "text/plain; charset=utf-8"):
    return {"statusCode": status, "headers": {"Content-Type": content_type}, "body": body}

def _utc_now_compact():
    # 例: 20251209T123456Z
    return datetime.now(timezone.utc).strftime("%Y%m%dT%H%M%SZ")

def _s3_put_text(key: str, text: str, content_type: str):
    s3.put_object(
        Bucket=S3_BUCKET,
        Key=key,
        Body=text.encode("utf-8"),
        ContentType=content_type,
    )

def _pick_latest_location(locations):
    # locations は "recent history" なので、最後を最新として採用(必要なら time でソートでもOK)
    if not locations:
        return None
    if isinstance(locations, list) and len(locations) > 0:
        return locations[-1]
    return None

def _csv_from_wifi_payload(payload: dict) -> str:
    """
    Meraki Scanning API v3 WiFi payload から observations をCSVに整形
    主要フィールド:
      - data.networkId
      - observations[].clientMac / userId / ipv4 / ipv6 / ssid / os / manufacturer
      - locations[] の最新: x,y,lat,lng,time,floorPlanId,floorPlanName,variance,nearestApTags,rssiRecords
      - latestRecord: time,nearestApMac,nearestApRssi(locations無し時にも使う)
    """
    data = payload.get("data") or {}
    network_id = data.get("networkId")
    observations = data.get("observations") or []

    # CSVヘッダ(必要なら増減OK)
    fieldnames = [
        "networkId",
        "clientMac",      # 対象識別(MAC)
        "userId",         # 対象名として使える(メール/username等)
        "ipv4",
        "ipv6",
        "ssid",
        "os",
        "manufacturer",
        "time",           # locations最新のtime、なければ latestRecord.time
        "x",              # locations最新のx (meters)
        "y",              # locations最新のy (meters)
        "lat",
        "lng",
        "floorPlanId",
        "floorPlanName",
        "variance",
        "nearestApMac",   # latestRecord.nearestApMac
        "nearestApRssi",  # latestRecord.nearestApRssi
        "nearestApTags",  # locations最新の nearestApTags を ; 連結
        "rssiRecords",    # locations最新の rssiRecords を apMac:rssi;... 形式
    ]

    buf = io.StringIO()
    writer = csv.DictWriter(buf, fieldnames=fieldnames)
    writer.writeheader()

    for obs in observations:
        locations = obs.get("locations") or []
        latest_loc = _pick_latest_location(locations)

        latest_record = obs.get("latestRecord") or {}

        # locations側(あれば)
        x = (latest_loc or {}).get("x")
        y = (latest_loc or {}).get("y")
        lat = (latest_loc or {}).get("lat")
        lng = (latest_loc or {}).get("lng")
        time = (latest_loc or {}).get("time") or latest_record.get("time")

        floor_plan_id = (latest_loc or {}).get("floorPlanId") or obs.get("floorPlanId")
        floor_plan_name = (latest_loc or {}).get("floorPlanName") or obs.get("floorPlanName")
        variance = (latest_loc or {}).get("variance")

        nearest_ap_tags = (latest_loc or {}).get("nearestApTags") or []
        if isinstance(nearest_ap_tags, list):
            nearest_ap_tags = ";".join([str(x) for x in nearest_ap_tags if x is not None])
        else:
            nearest_ap_tags = str(nearest_ap_tags)

        rssi_records = (latest_loc or {}).get("rssiRecords") or []
        rr_out = []
        if isinstance(rssi_records, list):
            for rr in rssi_records:
                ap = rr.get("apMac")
                rssi = rr.get("rssi")
                if ap is None and rssi is None:
                    continue
                rr_out.append(f"{ap}:{rssi}")
        rssi_records_str = ";".join(rr_out)

        row = {
            "networkId": network_id,
            "clientMac": obs.get("clientMac"),
            "userId": obs.get("userId"),
            "ipv4": obs.get("ipv4"),
            "ipv6": obs.get("ipv6"),
            "ssid": obs.get("ssid"),
            "os": obs.get("os"),
            "manufacturer": obs.get("manufacturer"),
            "time": time,
            "x": x,
            "y": y,
            "lat": lat,
            "lng": lng,
            "floorPlanId": floor_plan_id,
            "floorPlanName": floor_plan_name,
            "variance": variance,
            "nearestApMac": latest_record.get("nearestApMac"),
            "nearestApRssi": latest_record.get("nearestApRssi"),
            "nearestApTags": nearest_ap_tags,
            "rssiRecords": rssi_records_str,
        }
        writer.writerow(row)

    return buf.getvalue()

def lambda_handler(event, context):
    method = _get_method(event)
    path = _get_path(event)

    # パス固定
    if path != ALLOWED_PATH:
        return _resp(404, "not found")

    # Validate (GET)
    if method == "GET":
        return _resp(200, MERAKI_VALIDATOR)

    # Receiver (POST)
    if method != "POST":
        return _resp(405, "method not allowed")

    raw = _get_body_text(event)
    if not raw.strip():
        return _resp(400, "empty body")

    try:
        payload = json.loads(raw)
    except json.JSONDecodeError:
        return _resp(400, "invalid json")

    # shared secret check
    if payload.get("secret") != MERAKI_SECRET:
        return _resp(403, "forbidden")

    # S3 keys
    ts = _utc_now_compact()
    rid = str(uuid.uuid4())
    base = f"{S3_PREFIX.rstrip('/')}/{ts}_{rid}"

    # 1) raw JSON を保存
    json_key = f"{base}.json"
    _s3_put_text(json_key, json.dumps(payload, ensure_ascii=False), "application/json")

    # 2) WiFi のときだけ CSV も保存
    ptype = payload.get("type")
    csv_key = None
    if ptype == "WiFi":
        csv_text = _csv_from_wifi_payload(payload)
        csv_key = f"{base}.csv"
        _s3_put_text(csv_key, csv_text, "text/csv; charset=utf-8")

    # 200を素早く返す(重い処理は避ける)
    resp_obj = {"ok": True, "jsonKey": json_key, "csvKey": csv_key, "type": ptype}
    return _resp(200, json.dumps(resp_obj, ensure_ascii=False), "application/json; charset=utf-8")
まぁ別にDynamoDBに叩き込んでおく...みたいなのでも全然ありだし、CSVにせずとも、加工してコンパクトにした状態でSQSやらKinesisにぶんなげる... みたいなのでも良いと思う。
フロント
サンプル・アプリケーションをGitHubに置いておいたので参考にしてみてほしい。
https://github.com/gzock/meraki-office-map/blob/master/web/src/App.tsx
Lambdaから生成されたcsvをベースにXY座標を取り出してマッピングしてるだけ。
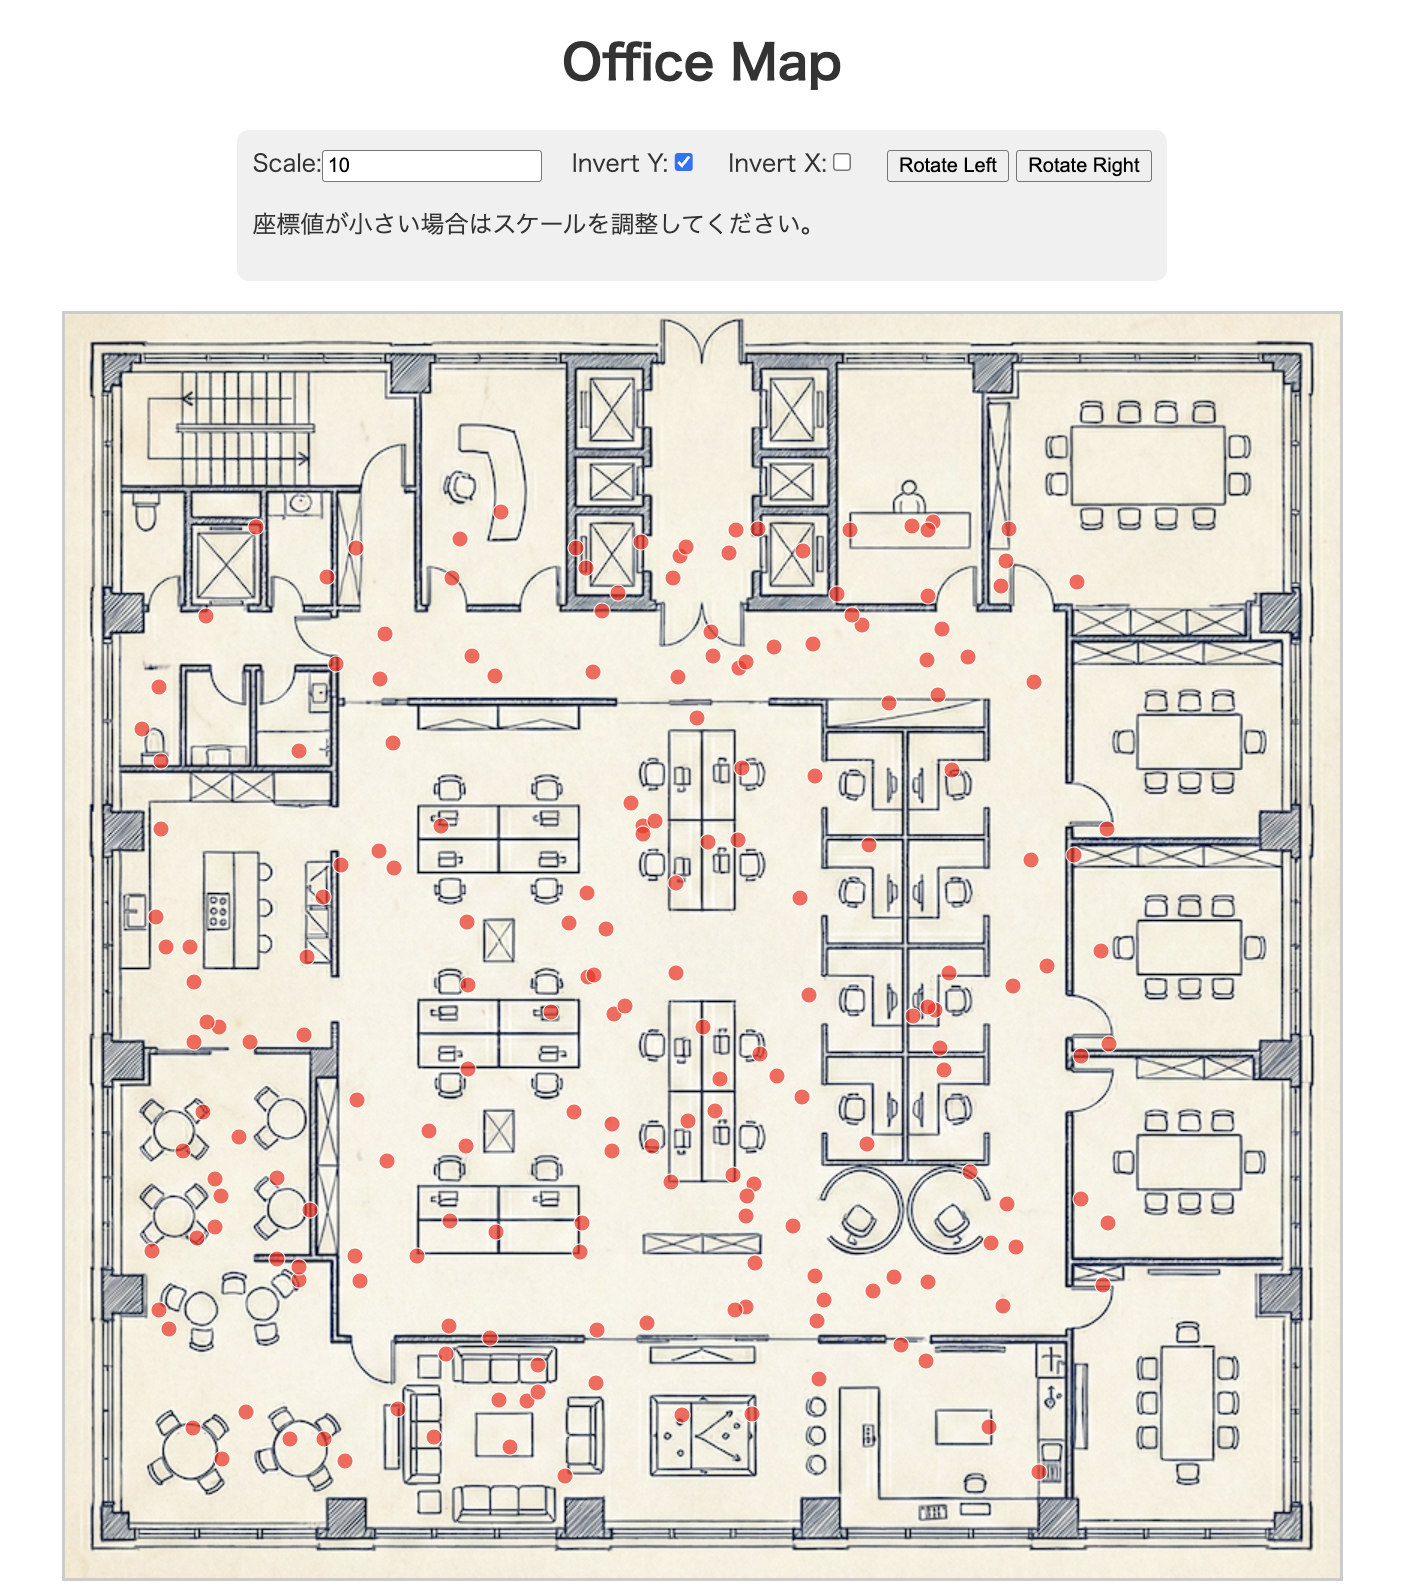
実は画像と上下左右やスケールがバッチリと合わせるのが難しい。よって、それらをUI的に調整できるようにしている。
1回わかってしまえばそういうオフセットを最初から仕込んだ上でのほんちゃんアプリにできるとは思うが、最初はちょっとした細かい調整は必要になると思う。
import { useEffect, useState } from 'react';
import Papa from 'papaparse';
import './App.css';
import type { ClientData } from './types';

function App() {
  const [data, setData] = useState<ClientData[]>([]);
  const [hoveredItem, setHoveredItem] = useState<ClientData | null>(null);
  const [tooltipPosition, setTooltipPosition] = useState<{ x: number; y: number } | null>(null);
  const [scale, setScale] = useState<number>(10); // 座標のスケール調整用 (デフォルト10倍)
  const [invertY, setInvertY] = useState<boolean>(true); // Y軸反転用 (デフォルトtrue)
  const [invertX, setInvertX] = useState<boolean>(false); // X軸反転用
  const [rotation, setRotation] = useState<number>(0); // 回転角度

  useEffect(() => {
    const fetchData = async () => {
      try {
        const response = await fetch('/data.csv');
        const reader = response.body?.getReader();
        const result = await reader?.read();
        const decoder = new TextDecoder('utf-8');
        const csv = decoder.decode(result?.value);

        Papa.parse(csv, {
          header: true,
          dynamicTyping: true,
          skipEmptyLines: true,
          complete: (results) => {
            // x, y が存在するデータのみフィルタリング
            const validData = (results.data as ClientData[]).filter(item => item.x != null && item.y != null);
            setData(validData);
          },
        });
      } catch (error) {
        console.error('Error fetching CSV:', error);
      }
    };

    fetchData();
  }, []);

  const handleMouseEnter = (item: ClientData, e: React.MouseEvent) => {
    setHoveredItem(item);
    setTooltipPosition({ x: e.clientX, y: e.clientY });
  };

  const handleMouseLeave = () => {
    setHoveredItem(null);
    setTooltipPosition(null);
  };

  const handleMouseMove = (e: React.MouseEvent) => {
    if (hoveredItem) {
      setTooltipPosition({ x: e.clientX, y: e.clientY });
    }
  };

  const handleRotateLeft = () => {
    setRotation((prev) => prev - 90);
  };

  const handleRotateRight = () => {
    setRotation((prev) => prev + 90);
  };

  return (
    <div className="app-container">
      <h1>Office Map</h1>
      <div className="controls">
        <label>
          Scale:
          <input
            type="number"
            value={scale}
            onChange={(e) => setScale(Number(e.target.value))}
            step="0.1"
          />
        </label>
        <label style={{ marginLeft: '20px' }}>
          Invert Y:
          <input
            type="checkbox"
            checked={invertY}
            onChange={(e) => setInvertY(e.target.checked)}
          />
        </label>
        <label style={{ marginLeft: '20px' }}>
          Invert X:
          <input
            type="checkbox"
            checked={invertX}
            onChange={(e) => setInvertX(e.target.checked)}
          />
        </label>
        <div style={{ display: 'inline-block', marginLeft: '20px' }}>
          <button onClick={handleRotateLeft}>Rotate Left</button>
          <button onClick={handleRotateRight} style={{ marginLeft: '5px' }}>Rotate Right</button>
        </div>
        <p>座標値が小さい場合はスケールを調整してください。</p>
      </div>
      <div
        className="map-container"
        onMouseMove={handleMouseMove}
        style={{ transform: `rotate(${rotation}deg)`, transition: 'transform 0.3s' }}
      >
        <img src="/office_map.png" alt="Office Map" className="meraki-office-map" />
        {data.map((item, index) => (
          <div
            key={index}
            className="data-point"
            style={{
              left: invertX ? 'auto' : `${item.x * scale}px`,
              right: invertX ? `${item.x * scale}px` : 'auto',
              top: invertY ? 'auto' : `${item.y * scale}px`,
              bottom: invertY ? `${item.y * scale}px` : 'auto',
            }}
            onMouseEnter={(e) => handleMouseEnter(item, e)}
            onMouseLeave={handleMouseLeave}
          />
        ))}
      </div>
      {hoveredItem && tooltipPosition && (
          <div
            className="tooltip"
            style={{
              left: `${tooltipPosition.x + 15}px`,
              top: `${tooltipPosition.y + 15}px`,
            }}
          >
            <p><strong>MAC:</strong> {hoveredItem.clientMac}</p>
            <p><strong>OS:</strong> {hoveredItem.os || 'N/A'}</p>
            <p><strong>Manufacturer:</strong> {hoveredItem.manufacturer || 'N/A'}</p>
            <p><strong>SSID:</strong> {hoveredItem.ssid || 'N/A'}</p>
            <p><strong>X:</strong> {hoveredItem.x.toFixed(2)}, <strong>Y:</strong> {hoveredItem.y.toFixed(2)}</p>
          </div>
        )}
    </div>
  );
}

export default App;
オフィスマップをどうやって手に入れるか
そもそもMerakiにはオフィスマップを仕込んで、その上でAPやクライアントを表示させる機能がある。
そこと同じマップを使うのが一番確実。
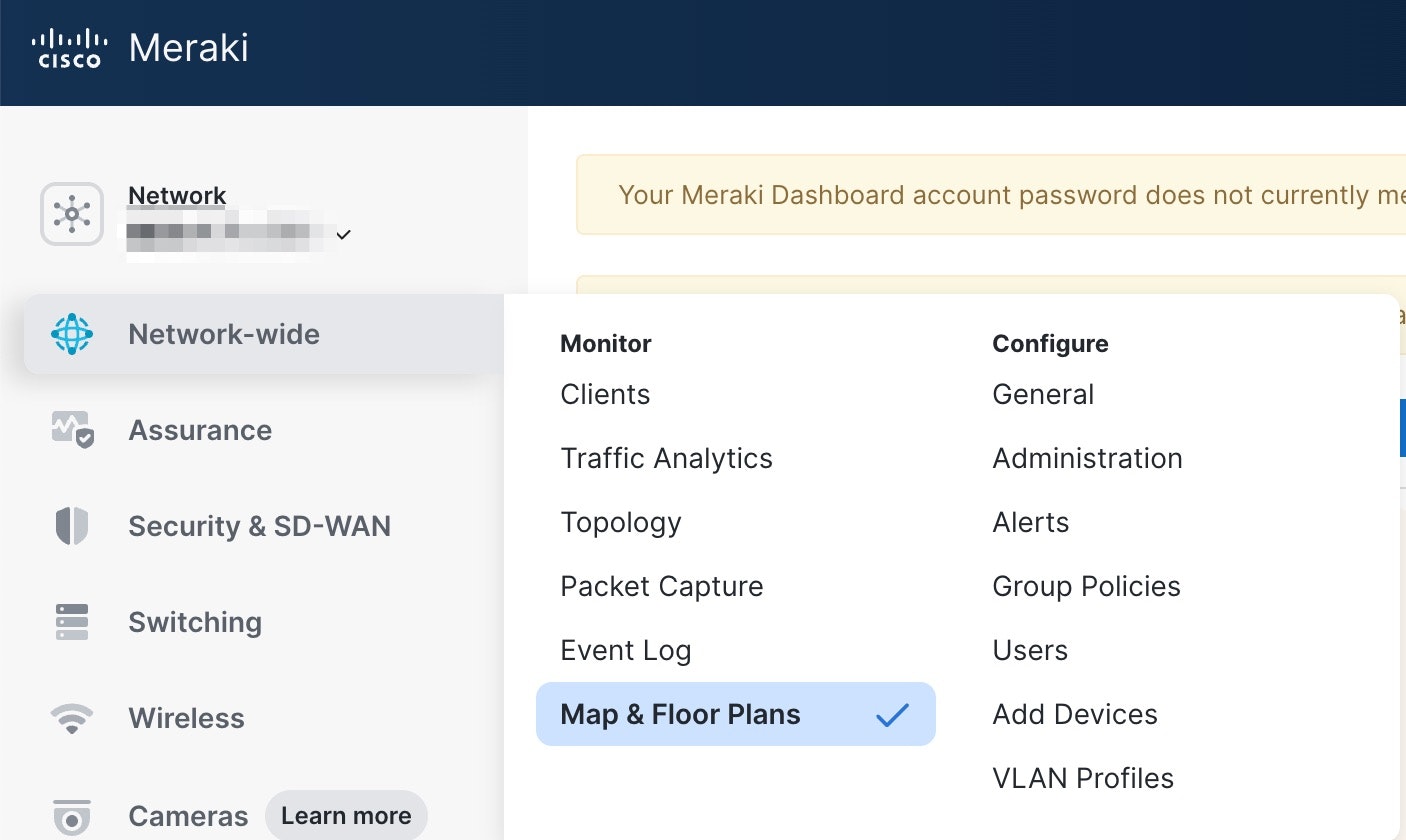
いや、そんな昔に設定したマップ、今更ないよ! という場合には、Network-wide > Map & Floor Plans を見てみると、実はインポートした画像ファイルがそのまま載ってる。
それを右クリ -> 画像を保存すれば、生のファイルが手に入る。あとはそれにXY座標を組み合わせれば結構良い感じになるはず。
サンプルアプリの動作
こんな感じになる。ちなみにこれは上述したGitHubのやつをそのまま動かすとこれになる。さすがにcsvデータもオフィスマップも全部生成AIに作らせたダミーデータである。
が、もちろんこの記事を執筆するにあたっての元ネタ時点では自社のガチデータで試しており、正直驚いた。みなさんも是非やってみてほしいが、思ってるよりも精度よく出る。前編の話の通り、技術的に数mのズレは全然ありえるので、この席に座ってる!みたいな精度は流石に無理。しかし、だいたい会議室HOGEの近くにいるな〜〜 とかそれぐらいの粒度でよければ全然使えるレベルであった。
さいごに
Meraki Scanning API のことは最初は実は知らなかった。Merakiの中を見ていたらたまたま機能に気づき、なんだこれ?と思って試してみたらなかなか面白かった。
元々、BLEやUWBを使ったRTLS技術は割と好きなので興味をそそられた。既存のWi-Fiインフラを使ったこのアプローチはなかなかおもしろいと思う。
MerakiのこのScannin API自体は実はWi-Fiだけでなく、BLEでもやれるらしい。今度、時間があったらそっちのやり方でも試してみたい。