0
0

Delete article

Deleted articles cannot be recovered.

Draft of this article would be also deleted.

Are you sure you want to delete this article?

More than 3 years have passed since last update.

FPGAボード SOY2 で Lチカ ー その2(インプリまで)

Last updated at Posted at 2021-05-16

概要

「その1」 からの続きです。
SOY2 で Lチカ、まとめる時間があまり取れずに、小出しです。。。
今回は、少しだけ進めて、インプリまでです。
(「その3」へつづく)

SiTCP ライブラリ上書き

前回、SOY2出荷時ソースとSiTCPライブラリを入手しました。
SOY2出荷時ソースのディレクトリに、SiTCPライブラリを上書きします。同一ファイルは置き換えます。

Vivado でインプリ

Vivado で、新規プロジェクトを作成

add_source_files.png

*.v と *.edf をソースとして選択します。

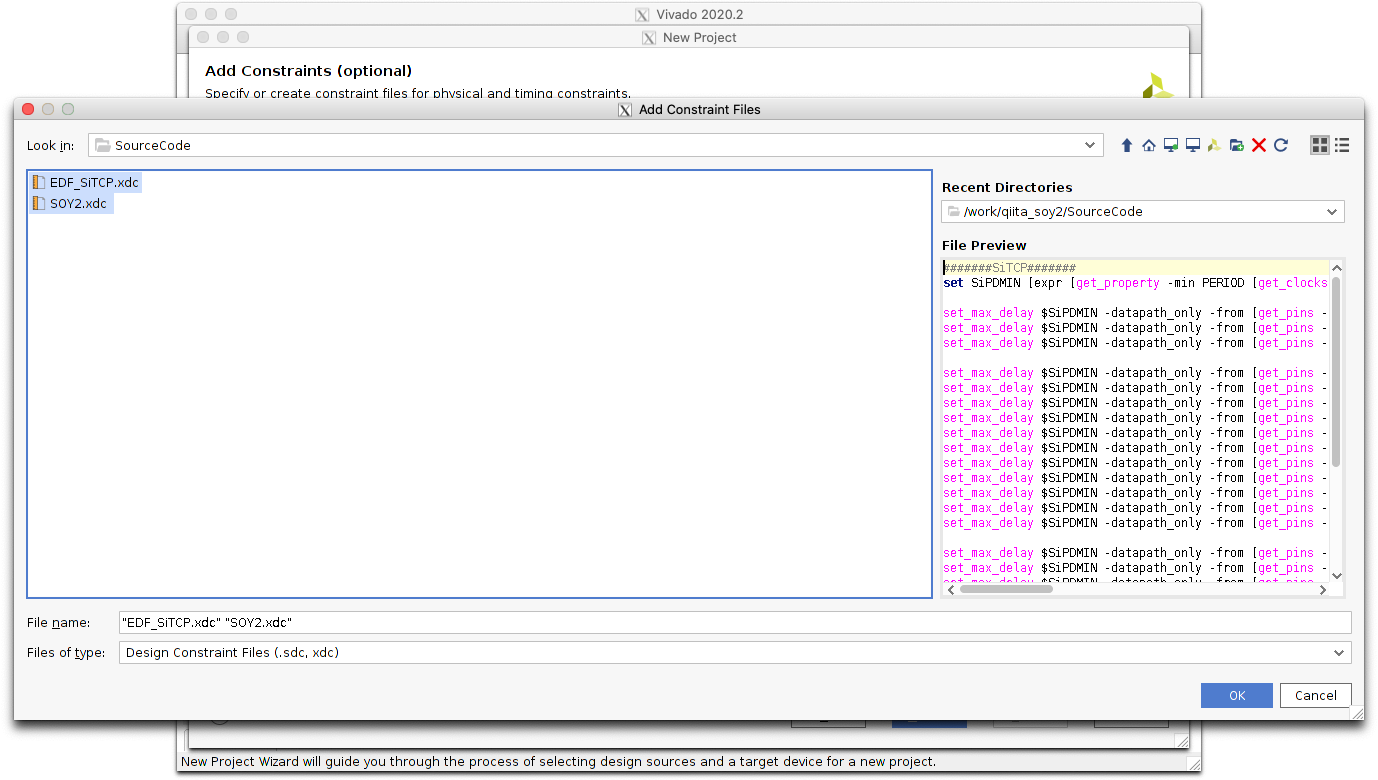
add_constraint_files.png

*.xdc を指定します。
制約ファイルは、SOY2.xdc, EDF_SiTCP.xdc の順番になるようにしてください。

順番が逆になってしまったときは、

edit_constraint.png

[Edit Constraints Sets...] にて、修正できます。

choose_FPGA.png

"xc7s25ftgb196-1" を選択してください。

[Generate Bitstream] をクリックして、bitファイルを生成します。

※ Vivado は、Docker 上で動かしています。
  「Xilinx の開発ツールを Docker コンテナに閉じ込める」 参考にしました。

その後は。。。

生成した bit ファイルを mcs ファイルに変換して、SiTCP ユーティリティを用いて、SOY2 に書き込みます。
そして、動作確認ですが、このあたりは来週にまとめられればと思います。

0
0
0

Register as a new user and use Qiita more conveniently

  1. You get articles that match your needs
  2. You can efficiently read back useful information
  3. You can use dark theme
What you can do with signing up
0
0

Delete article

Deleted articles cannot be recovered.

Draft of this article would be also deleted.

Are you sure you want to delete this article?