カメラモジュールを購入したので,これを使った何か楽しめるものを作ろうと思いました.
そこで,人や物が近づいてきたら写真を撮影する,簡単なおもちゃを作ることにしました.
制作過程
使用した道具
今回は,以下の道具をを使用しました.
- Raspberry Pi 4 Model B
- ブレッドボード,T型GPIO拡張ボード,フラットリボンケーブル,ジャンパー線
- カメラモジュール
- HC-SR04超音波距離センサー
- LED(黄)
- 220Ω抵抗
なお,LEDと抵抗は必須ではありませんが,しっかり動いているか確認できるようにするために用いています.
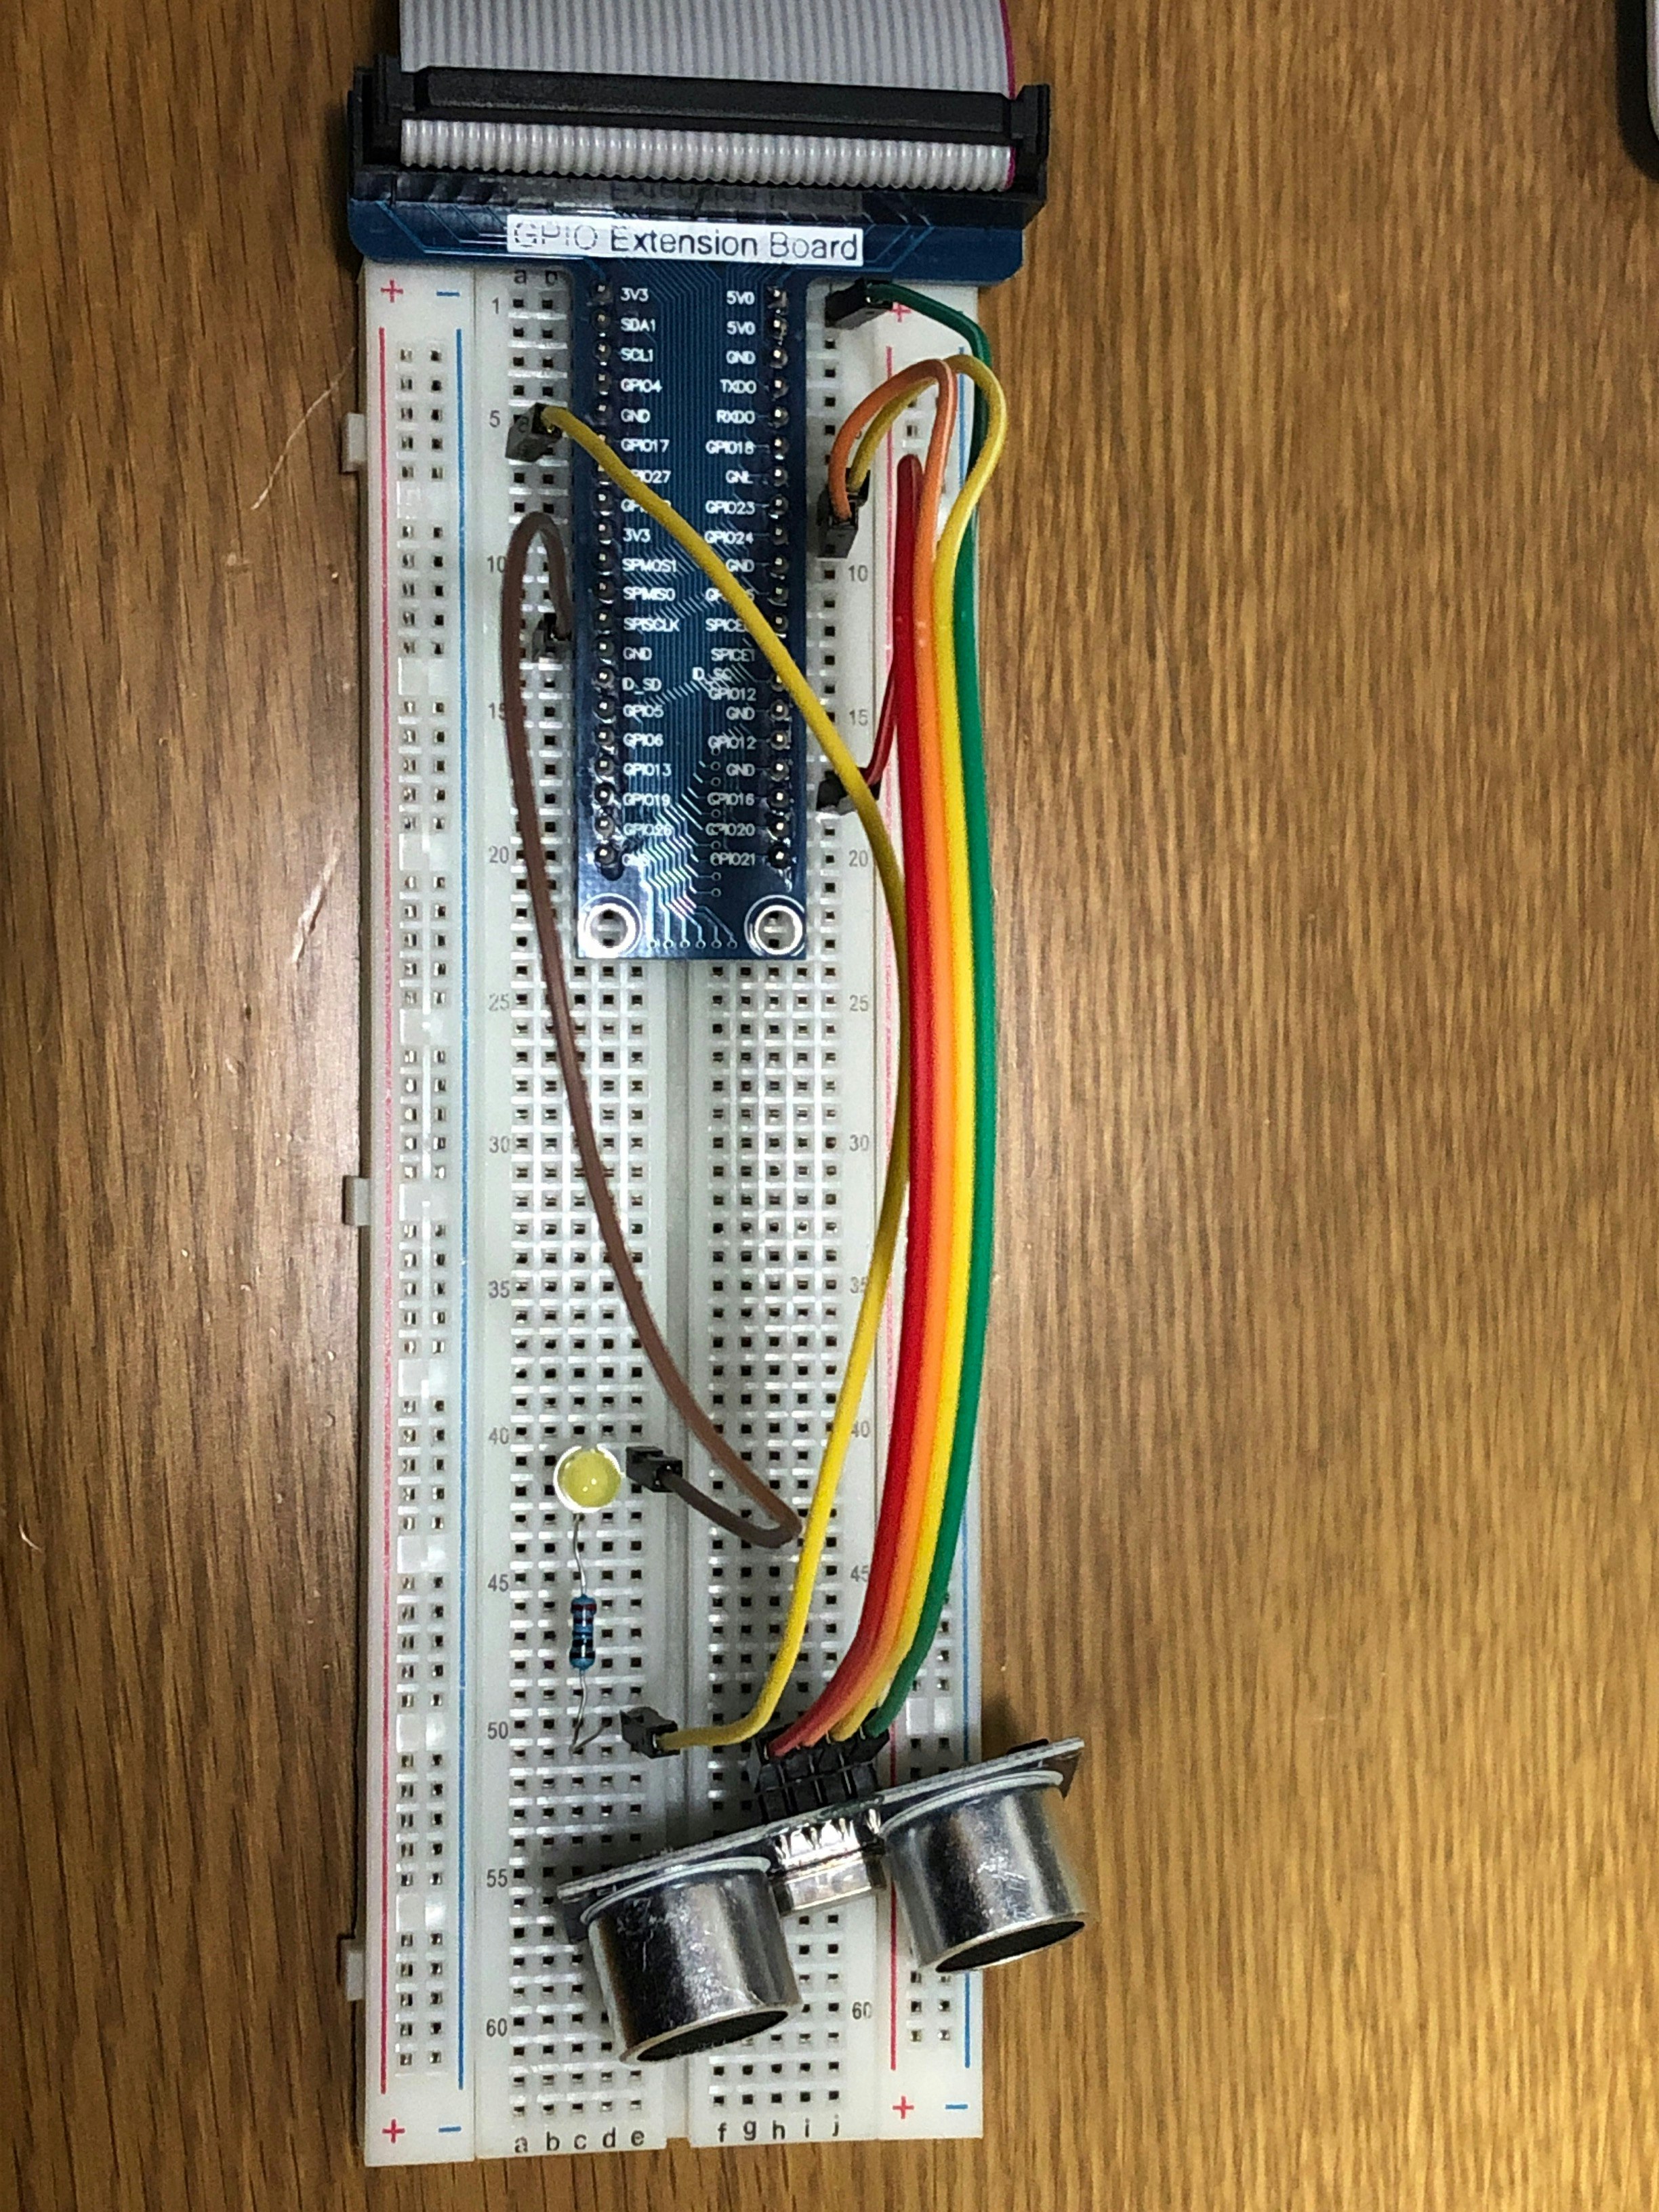
接続例
つなぎ方はいろいろあると思いますが,以下の図のように接続しました.

方針
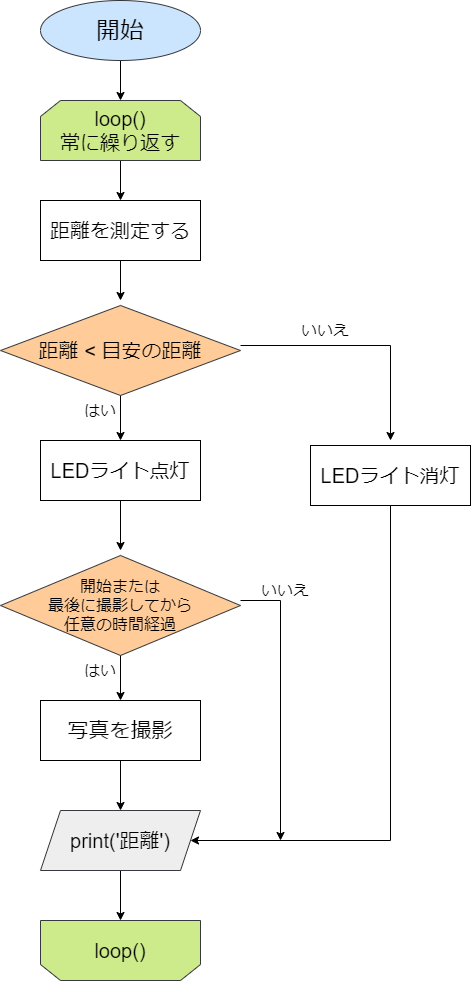
今回の方針をわかりやすく整理するために,以下のようなフローチャートを作りました.(詳細な部分は省いています)

実際には途中でループを抜ける必要があるため,これにループを抜けるための処理を追加します.
結果
ソースコード
import RPi.GPIO as GPIO
import time
from datetime import datetime
from picamera import PiCamera

# 各種変数を定義
trigPin = 16
echoPin = 18
ledPin = 11
MAX_DISTANCE = 220
timeOut = MAX_DISTANCE * 60
shootInterval = 5.0
catchDistance = 50.0

camera = PiCamera()

# 超音波が返ってくる時間を測定
def pulseIn(pin, level, timeOut):
    t0_sensor = time.time()
    while (GPIO.input(pin) != level):
        if ((time.time() - t0_sensor) > timeOut * 0.000001):
            return 0;
    t0_sensor = time.time()
    while (GPIO.input(pin) == level):
        if ((time.time() - t0_sensor) > timeOut * 0.000001):
            return 0;
    pulseTime = (time.time() - t0_sensor) * 1000000
    return pulseTime

# 物体との距離を計算
def getSonar():
    GPIO.output(trigPin, GPIO.HIGH)
    time.sleep(0.00001)
    GPIO.output(trigPin, GPIO.LOW)
    pingTime = pulseIn(echoPin, GPIO.HIGH, timeOut)
    distance = pingTime * 340.0 / 2.0 / 10000.0
    return distance

# 現在時刻を文字列として取得
def get_time_now(t1):
    today = datetime.fromtimestamp(t1)
    return today.strftime('%Y_%m_%d_%H_%M_%S')

# 準備
def setup():
    GPIO.setmode(GPIO.BOARD)
    GPIO.setup(trigPin, GPIO.OUT)
    GPIO.setup(echoPin, GPIO.IN)
    GPIO.setup(ledPin, GPIO.OUT)
    camera.start_preview()

# ループ処理
def loop():
    t0_camera = time.time()
    while True:
        distance = getSonar()
        t1 = time.time()
        if 0.0 < distance and distance < catchDistance:
            GPIO.output(ledPin, GPIO.HIGH)
            if (t1 - t0_camera) >= shootInterval:
                camera.capture('/home/pi/Desktop/images/%s.jpg'%(get_time_now(t1)))
                t0_camera = time.time()
        else:
            GPIO.output(ledPin, GPIO.LOW)
        print('The distance is: %2f cm'%(distance))
        time.sleep(0.5)

# 終了時の処理
def destroy():
    camera.stop_preview()
    GPIO.output(ledPin, GPIO.LOW)
    GPIO.cleanup()

if __name__ == '__main__':
    print('program is starting...')
    setup()
    try:
        loop()
    except KeyboardInterrupt:
        print('STOP!')
        destroy()
コードの説明
やや長いので,一部説明を省きます.
各種変数を定義
trigPin = 16
echoPin = 18
ledPin = 11
MAX_DISTANCE = 220
timeOut = MAX_DISTANCE * 60
shootInterval = 5.0
catchDistance = 50.0

camera = PiCamera()
まずは,必要となるそれぞれの変数を定義します.今回は,MAX_DISTANCEで計測可能な最長距離を定めています.この場合,超音波が距離MAX_DISTANCEを往復するための時間timeOutは
timeOut = 2 * MAX_DISTANCE / 100 / 340 * 100000 ≒ MAX_DISTANCE * 58.8
となります.(わかりやすくするために58.8を60としています.また,音の時間にはすべて1000000を掛けています.)
また,ピンの番号はピンを指す位置により変わります.
距離の測定
# 超音波が返ってくる時間を取得
def pulseIn(pin, level, timeOut):
    t0_sensor = time.time()
    while (GPIO.input(pin) != level):
        if ((time.time() - t0_sensor) > timeOut * 0.000001):
            return 0;
    t0_sensor = time.time()
    while (GPIO.input(pin) == level):
        if ((time.time() - t0_sensor) > timeOut * 0.000001):
            return 0;
    pulseTime = (time.time() - t0_sensor) * 1000000
    return pulseTime

# 物体との距離を計算
def getSonar():
    GPIO.output(trigPin, GPIO.HIGH)
    time.sleep(0.00001)
    GPIO.output(trigPin, GPIO.LOW)
    pingTime = pulseIn(echoPin, GPIO.HIGH, timeOut)
    distance = pingTime * 340.0 / 2.0 / 10000.0
    return distance
pulseIn(pin, level, timeOut)では,超音波が返ってくるまでの時間を取得します.GPIO_LOWが終わる時間とGPIO_HIGHが終わる時間の差を戻り値として返します.距離が任意の距離より離れている場合は,0を戻り値として返します.
また,getSonar()では,pulseIn(pin, level, timeOut)で取得した時間から距離(cm)を計算します.
現在時刻の取得
# 現在時刻を文字列として取得
def get_time_now(t1):
    today = datetime.fromtimestamp(t1)
    return today.strftime('%Y_%m_%d_%H_%M_%S')
「UNIXエポックからの経過秒数」を「ローカルな日付と時刻」に変換します.その後,それらを文字列に変換します.
ループ
# ループ処理
def loop():
    t0_camera = time.time()
    while True:
        distance = getSonar()
        t1 = time.time()
        if 0.0 < distance and distance < catchDistance:
            GPIO.output(ledPin, GPIO.HIGH)
            if (t1 - t0_camera) >= shootInterval:
                camera.capture('/home/pi/Desktop/images/%s.jpg'%(get_time_now(t1)))
                t0_camera = time.time()
        else:
            GPIO.output(ledPin, GPIO.LOW)
        print('The distance is: %2f cm'%(distance))
        time.sleep(0.5)
概ね上のフローチャートの通りです.ただし,distance = 0となった場合を考慮しています.
撮影した画像を保存するためのディレクトリを用意していない場合は,以下のコマンドを使いディレクトリを用意します.
$ cd Desktop
$ mkdir images
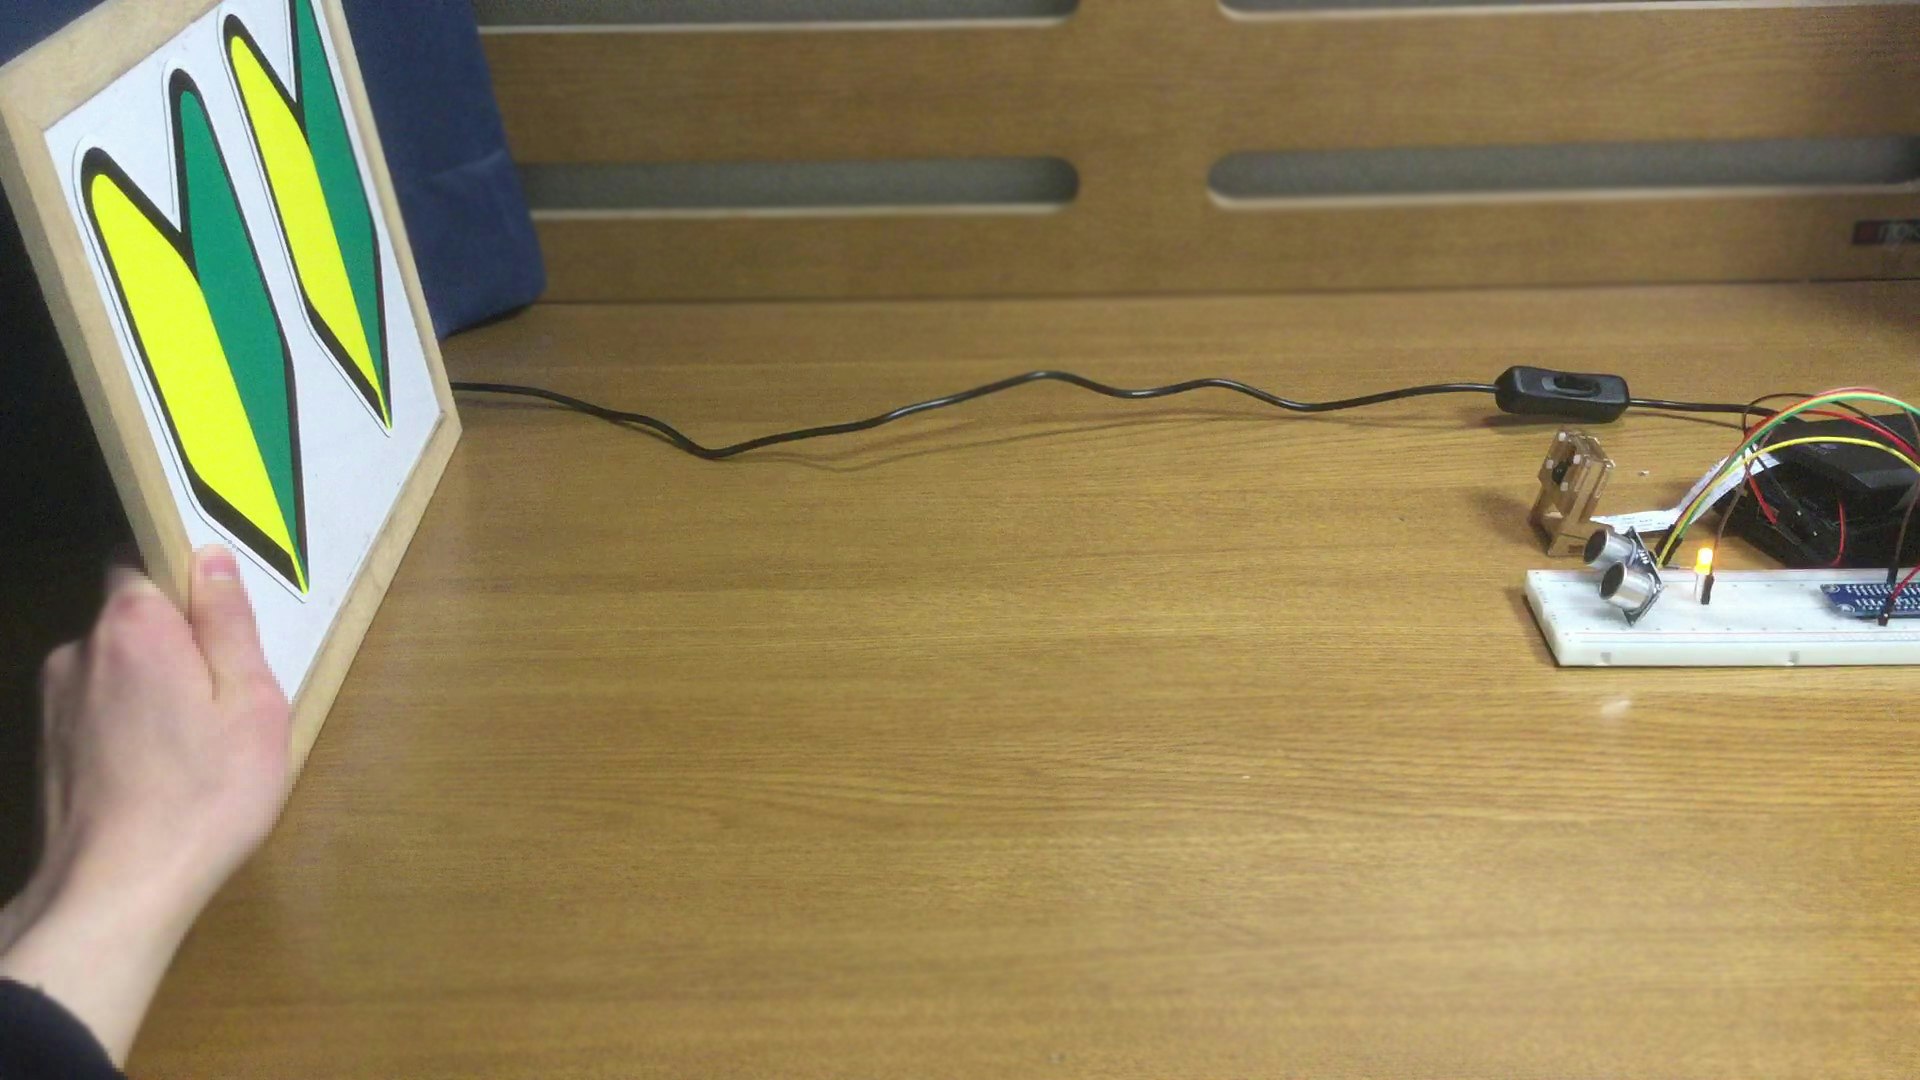
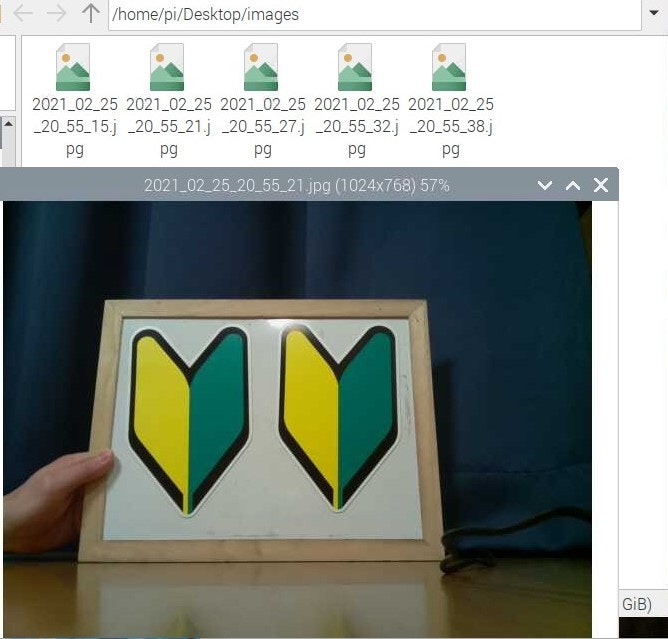
実行結果
想定通りの挙動をするか,実際に試してみます.

所々6秒間隔になっていますが,とりあえず成功です.

まとめ
感想
ほぼ思った通りに動かすことができてよかったです.
今後の展望
最後に,今回作ったおもちゃに付け足したい機能をまとめ,それに対する難易度を自分の主観で3段階で整理しました.(実際にやるかどうかは未定です)
| やりたいこと | 難易度 | 備考 |
|---|---|---|
| 距離によりLEDの色を変える | ★ | LEDの数を増やすだけ |
| 録音機能を付ける | ★★ | マイクを用意する必要あり |
| Gmail等に通知を送る | ★★★ | 過程が多そう |
気になる点があれば,コメントでお知らせください