この記事について
Neo4jを使ったグラフアルゴリズムの実装を紹介してみようという計画「グラフアルゴリズム入門 - javaとNeo4jで学ぶ -」の一部です(どこまで続くか・・・)
サンプルコードはこちらにおいた。
深さ優先探索
グラフの探索と幅優先探索については、こちら。次に深さ優先探索のサンプルプログラムを示す。これは、Neo4jのプロシージャとして書かれている。プロシージャの作り方については、この記事に解説した。入力としてはノードのidをもらい、出力には、到達したノードと、そのノードに至るパスを入れている。到達したノードは探索で訪れた順番ですべて出力される。パスを得る関数と出力のクラスについては幅優先探索の記事にある。
深さ優先探索には、スタックを使うとシンプルに書くことができる。下のプログラムは、幅優先探索でキューを使ったところをスタックに書き換えただけである。Javaのスタックは、ArrayDequeクラスを使えば良い。これはキューにもスタックにも使える双方向に出し入れできる配列である。
深さ優先探索のサンプル
    // sample6_2: DFS
    @Procedure(value = "example.sample6_2")
    @Description("sample6_2: DFS")
    public Stream<Output> sample6_2( @Name("id") Long id )
    {
    	// start node
    	Node start_nd = db.getNodeById(id);
    	// map for keeping Node id and parent relationship
    	Map<Node, Relationship> parent = new HashMap<>();
		// to avoid coming back to start node
		parent.put(start_nd, null);
    	// array for checking whether the node was visited
    	List<Node> visited = new ArrayList<>();
    	// queue
    	Deque<Node> queue = new ArrayDeque<>();
		// current node
		Node c_nd = start_nd;
		// list for result
		List<Output> o_l = new ArrayList<>();
		// end if queue is empty
		while(c_nd != null) {
			Iterable<Relationship> rels = c_nd.getRelationships();
			if(!(visited.contains(c_nd))) {
				for(Relationship rel: rels){
					// if not visited add next node
					Node n_nd = rel.getOtherNode(c_nd);
					if(!parent.containsKey(n_nd)) {
						queue.push(n_nd);
						parent.put(n_nd, rel);
					}
				}
				visited.add(c_nd);
			}
	    	Output o = new Output();
	    	o.node = c_nd;
	    	// get path from start_nd to c_nd
	    	o.path = getPath(start_nd, c_nd, parent);
	    	o_l.add(o);
	    	// get next node from queue
	    	c_nd = queue.poll();
		}
    	return o_l.stream();
    }
幅優先探索のときと同じサンプルでこのプログラムを実行してみよう。以下のサンプルである。
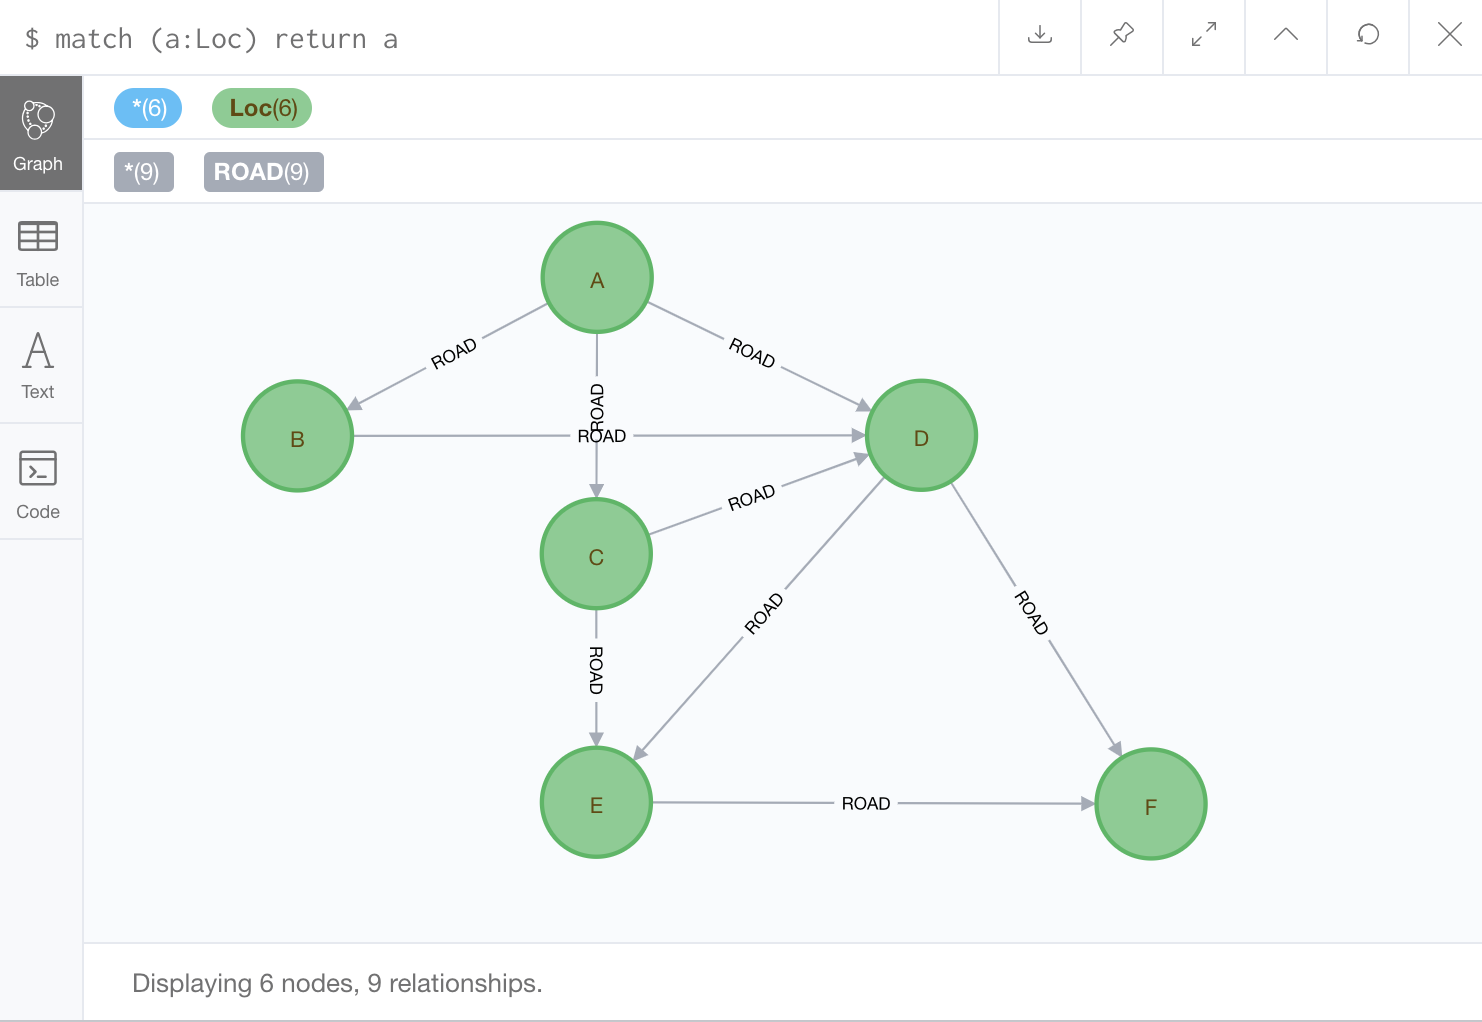
A(idが0)からスタートした実行結果は、
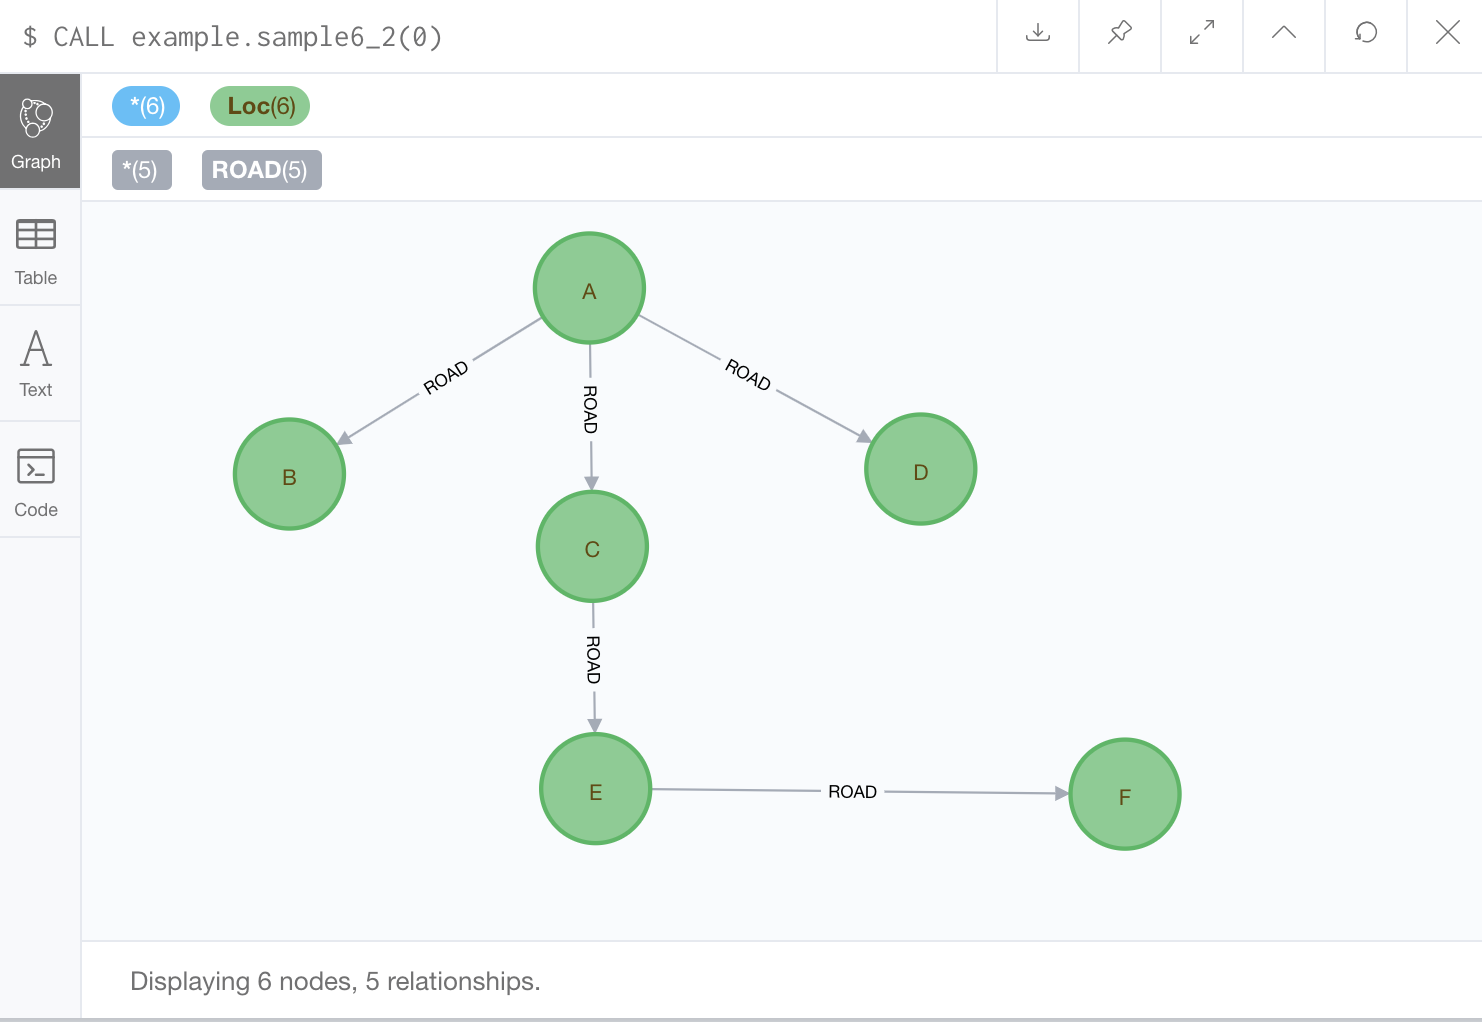
となる。確かに深さ優先でノードが得られている。この結果を表すツリー(木)は、幅優先のときと同様に深さ優先探索木と呼ばれるものである(この表示を得るためには、Neo4j BrowserのオプションをOFFにする必要がある。説明は幅優先の記事を参照)。