Mac で LuaLaTeX の環境構築
大学から LaTeX を使い始めて 2 年目になるが、誰かに教えるときに楽したいので自分用のメモを残しておく.
この記事でできること
- Mac に LuaLaTeX の環境を構築する
- VSCode で LaTeX を書く
環境構築
Homebrew のインストール
Homebrew をすでにインストール済みの場合は飛ばしてよい.
Homebrew は Mac で使えるパッケージ管理ツールである.
LaTeX は Homebrew を使ってインストールするので,まずは Homebrew をインストールする.
/bin/bash -c "$(curl -fsSL https://raw.githubusercontent.com/Homebrew/install/HEAD/install.sh)"
ログの最後の方にnext stepという文言が出てくるので,その通りに進める.
MacOS のバージョンによっては,出なかったり異なることがあるので注意.
でない場合はなにもしなくていいはず.試せないからわからない.
echo 'eval $(/opt/homebrew/bin/brew shellenv)' >> ~/.zshrc
eval $(/opt/homebrew/bin/brew shellenv)
~/.zshrcを再び読み込む.
source ~/.zshrc
exec $SHELL -l
Homebrew のインストールが完了したら,brew doctorでインストールが正常に完了しているか確認する.
brew --version
以下のように表示されれば OK.
$ brew --version
Homebrew 4.1.20-47-g5fa5f3b
Homebrew/homebrew-core (git revision ec87834e8c3; last commit 2023-11-18)
Homebrew/homebrew-cask (git revision c1623436b9; last commit 2023-11-17)
VSCode のインストール
VSCode は Microsoft が開発しているテキストエディタである.
今回は VSCode を使って LaTeX を書く.
brew install --cask visual-studio-code
LaTeX のインストール
Homebrew を使って LaTeX (MacTex) をインストールする.
インストール後にターミナルを再起動する.
brew install --cask mactex-no-gui
exec $SHELL -l
ここは数十分かかるので,この後の作業を同時に進めるといい.
VSCode の設定
拡張機能のインストール
VSCode に以下の拡張機能をインストールする.今回は VSCode の拡張機能等は最低限のみにしておく.日本語パッケージだったり,テーマだったりは自分で好きなものを入れてよい.
setting.jsonの編集
VSCode のsettings.jsonに追記する.
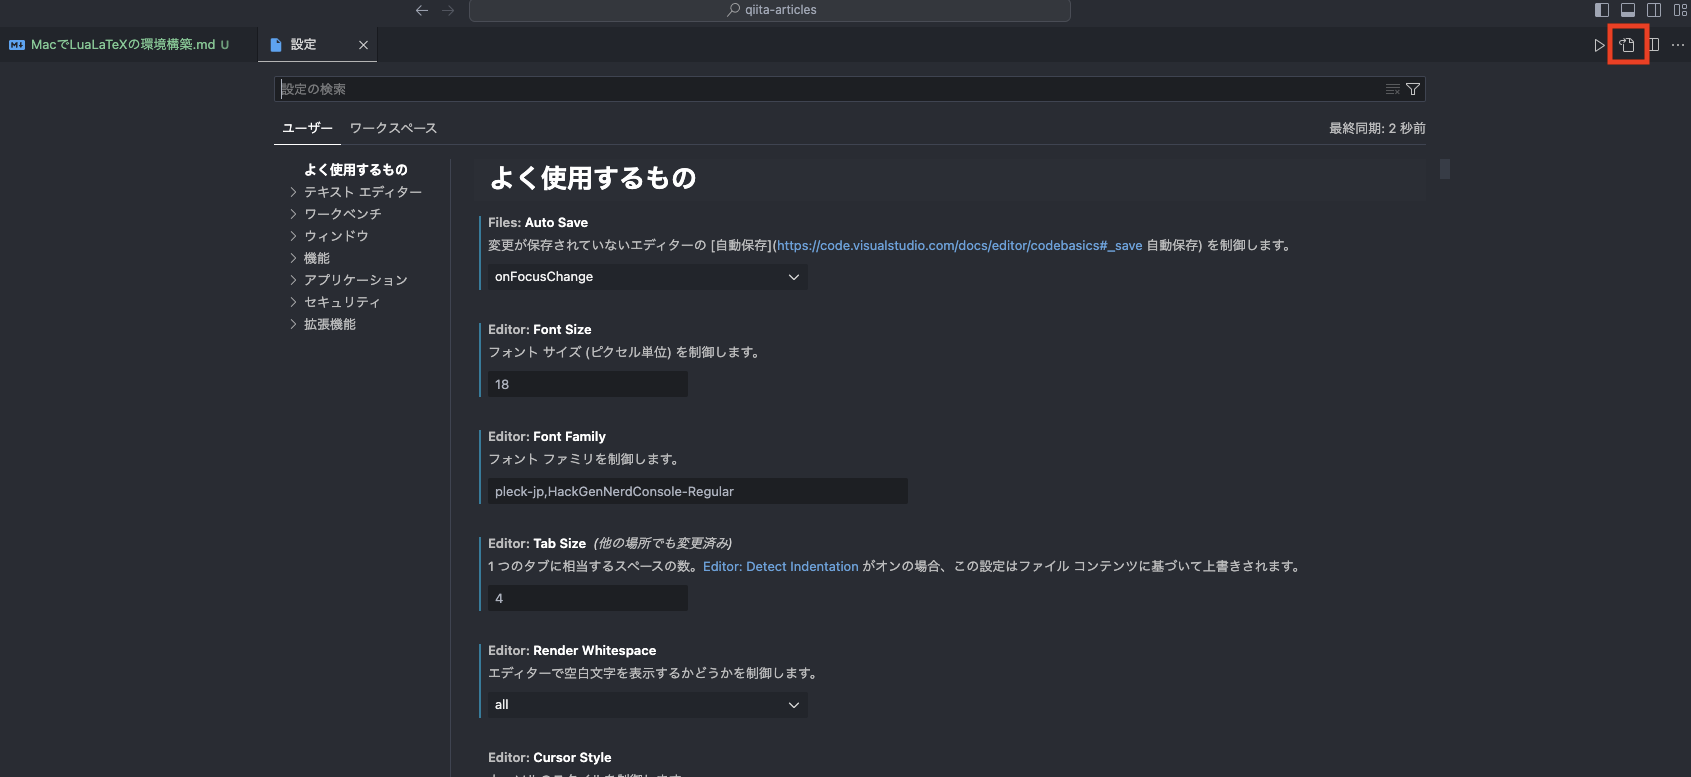
setting.jsonの開き方は,VSCode で Command + , を押して,画像の右上のマークを押して開く.
そこに下の内容を追記する.ただし,{}の数は注意すること.
{
    "latex-workshop.view.pdf.viewer": "tab",
    "latex-workshop.view.pdf.invert": 0,
    "latex-workshop.latex.autoBuild.run": "onSave",
    "latex-workshop.latex.autoBuild.cleanAndRetry.enabled": true,
    "latex-workshop.latex.tools": [
        {
            "name": "latexmk",
            "command": "latexmk",
            "args": ["-r", "%WORKSPACE_FOLDER%/.latexmkrc", "-cd", "%DOC_EXT%"]
        }
    ],
    "latex-workshop.latex.recipes": [
        {
            "name": "lualatex",
            "tools": [
                "latexmk"
            ]
        }
    ],
    "files.exclude": {
        "**/.git": true,
        "**/.svn": true,
        "**/.hg": true,
        "**/CVS": true,
        "**/.DS_Store": true,
        "**/Thumbs.db": true,
        "**/*.dvi": true,
        "**/*.aux": true,
        "**/*.fls": true,
        "**/*.atfi": true,
        "**/*.nav": true,
        "**/*.snm": true,
        "**/*.toc": true,
        "**/*.asv": true,
        "**/*.stderr": true,
        "**/*.stdout": true,
        "**/_minted-*/": true,
        "**/_markdown_*/": true,
        "**/pythontex-files-*/": true,
        "**/*.pytxcode": true,
        "**/*.markdown.in": true,
        "**/*.markdown.lua": true,
        "**/*.fdb_latexmk": true,
        "**/*.synctex.gz": true,
        "**/*.synctex(busy)": true,
        "**/__latexindent_temp.tex": true,
        "**/*.pyg": true,
        "**/*.log": true,
        "**/*.out": true,
        "**/*.bbl": true,
        "**/*.blg": true,
        "**/*.bcf": true,
        "**/*-blx.bib": true,
        "**/*.run.xml": true,
        "**/*.texmfcache": true,
        "**/svg-inkscape*": true
    },
}
今回,PDF を生成する際に生成される一時的なファイルは削除するのではなく,file.excludeで非表示にするようにしている.これは VSCode 上では削除されたように見えるが,実際には削除されていない.Finder で見ると削除されていないことがわかる.一時的なファイルには特定な機能を使用する際に必要となるものがあるため,残すようにしている.
.latexmkrc の作成
LaTeX を使って作業したいフォルダに.latexmkrcを作成する..latexmkrcは LaTeX をコンパイルするときに必要な設定ファイルである..latexmkrcの中身は以下のようにする.
例えば,~/Documents/latex で LaTeX を使いたい場合は,~/Documents/latex/.latexmkrcを作成する.
#!/usr/bin/env perl

# http://mirrors.ctan.org/support/latexmk/latexmk.txt
$lualatex = 'lualatex --shell-escape --halt-on-error';
$lualatex_silent = 'lualatex --shell-escape --halt-on-error --interaction=batchmode';
$max_repeat = 10;
$pdf_mode = 4; # lualatexは4
使い方
ここまでで環境構築は完了した.実際に使ってみよう.
ファイルの作成
~/Documents/latexより下の階層にmain.texを作成する.
今回は~/Documents/latex/sample/に~/Documents/latex/sample/main.texを作成する.
その中に以下の内容を書く.
\documentclass{ltjsarticle}

\begin{document}

Hello, \LaTeX!

\end{document}
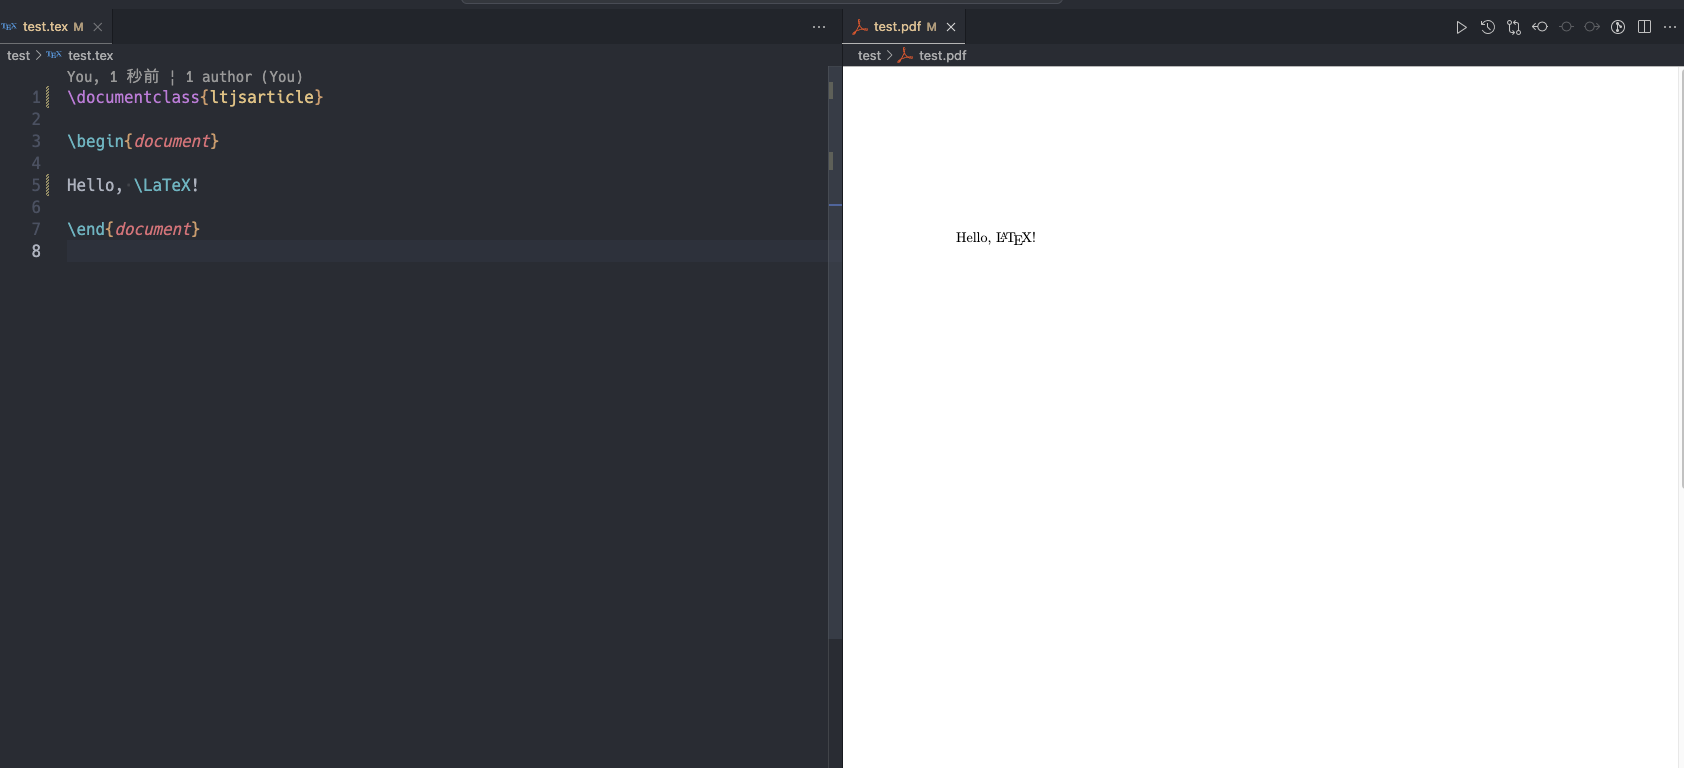
保存すると,自動的に PDF が生成される.生成された pdf を開くには,VSCode でCommand + Option + Vを押す.
下のように表示されれば OK.
これで環境構築は完了した.
あとはそれぞれのファイルを作成して,コンパイルしていく.

