はじめに
- iOS 実機で、Unity の Texture と PCM を動画として録画して保存するアセットを作成しました
- リポジトリはこちら↓
サンプルプロジェクト
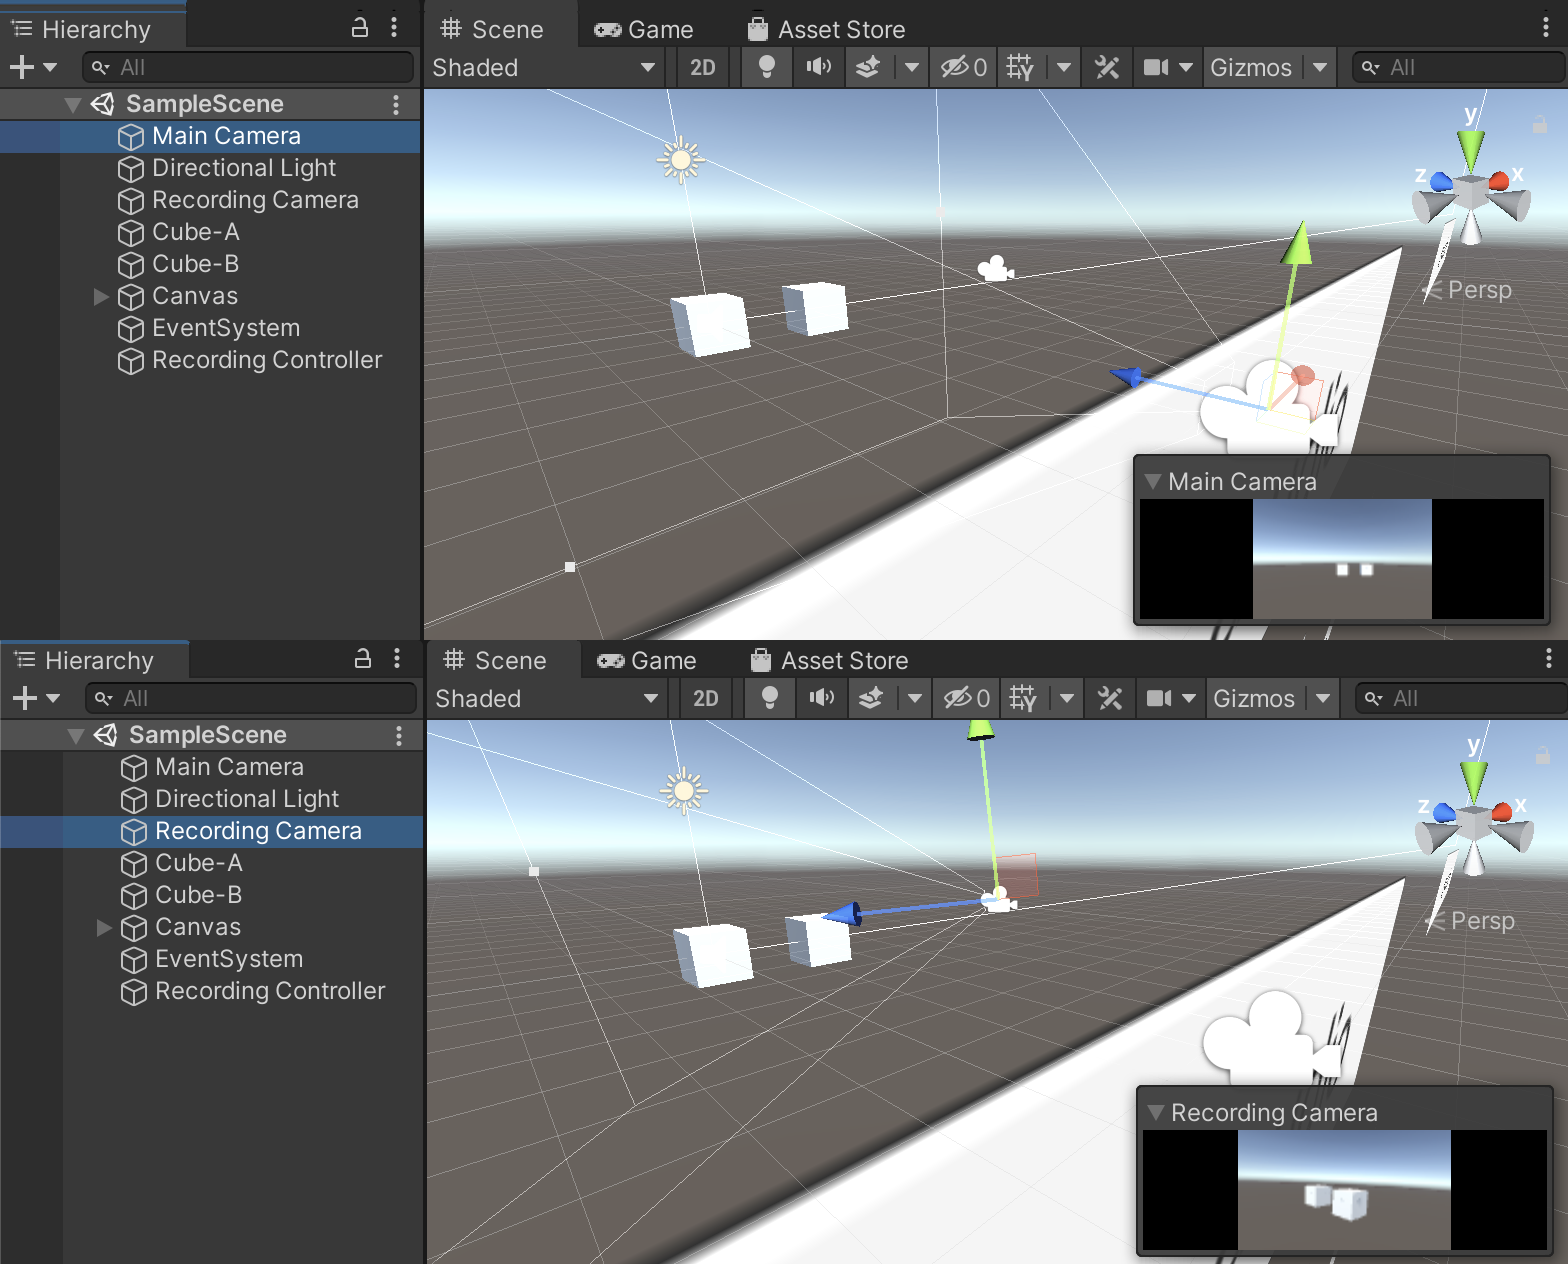
- サンプルプロジェクトの Unity のシーンは下の写真の通りでカメラが2個配置されています
- 1つはメインカメラで、スクリーンに表示されます
- もう1つは録画カメラ用カメラで、このカメラの映像と、本体のマイクの音声を .mov 形式で録画し、写真アプリに保存します
実際に動作している様子
Unityの録画機能を作りました。
— ふじき (@fzkqi) August 17, 2019
ボタンは左から「スタート」「ジャンプ」「ストップ」です。
動画はmp4として、写真に保存されます!#Unity pic.twitter.com/2NKoExxAEY
導入方法
-
リポジトリの
Examples/UnityExample/Assets/Plugin/VideoCreatorをコピーします
使い方
Setup
音声無しの mov ファイルを保存する
- キャッシュパスは絶対パスの必要があります
- コーデックは、"h264"と"hevcWithAlpha"をサポートしています
- もし、アルファチャンネルの保存が必要な場合は、"hevcWithAlpha"を選択する必要があります
- ビデオの幅と高さを指定します
string cachePath = "file://" + Application.temporaryCachePath + "/tmp.mov";
MediaCreator.InitAsMovWithAudio(cachePath, "h264", width, height);
音声有りの mov ファイルを保存する
- 音声無しの場合に加えて、チャンネル数とサンプリング周波数を指定します
string cachePath = "file://" + Application.temporaryCachePath + "/tmp.mov";
MediaCreator.InitAsMovWithAudio(cachePath, "h264", texture.width, texture.height, 1, 48_000);
Live Photos を保存する
- 通常の mov の設定に加えて、uuid を指定します
- Live Photos に使用しない場合は、uuid は絶対に指定しないでください
string uuid = System.Guid.NewGuid().ToString();
string cachePath = "file://" + Application.temporaryCachePath + "/tmp.mov";
MediaCreator.InitAsMovWithAudio(cachePath, "h264", width, height, uuid);
音声を wav ファイルとして保存する
- チャンネル数、サンプリング周波数、ビットデプスを指定します
string cachePath = "file://" + Application.temporaryCachePath + "/tmp.wav";
MediaCreator.InitAsWav(cachePath, 1, 48000, 32);
録画開始
- 入力されるフレームの開始時刻を指定します
- 単位はマイクロ秒です
long startTimeOffset = 0;
MediaCreator.Start(startTimeOffset);
Texture を書き込む
- 書き込む Texture と時刻を渡します
- こちらの時間もマイクロ秒で指定します
Texture texture = Get Texture;
long time = startTimeOffset + Elapsed time from Start;
MediaCreator.WriteVideo(texture, time);
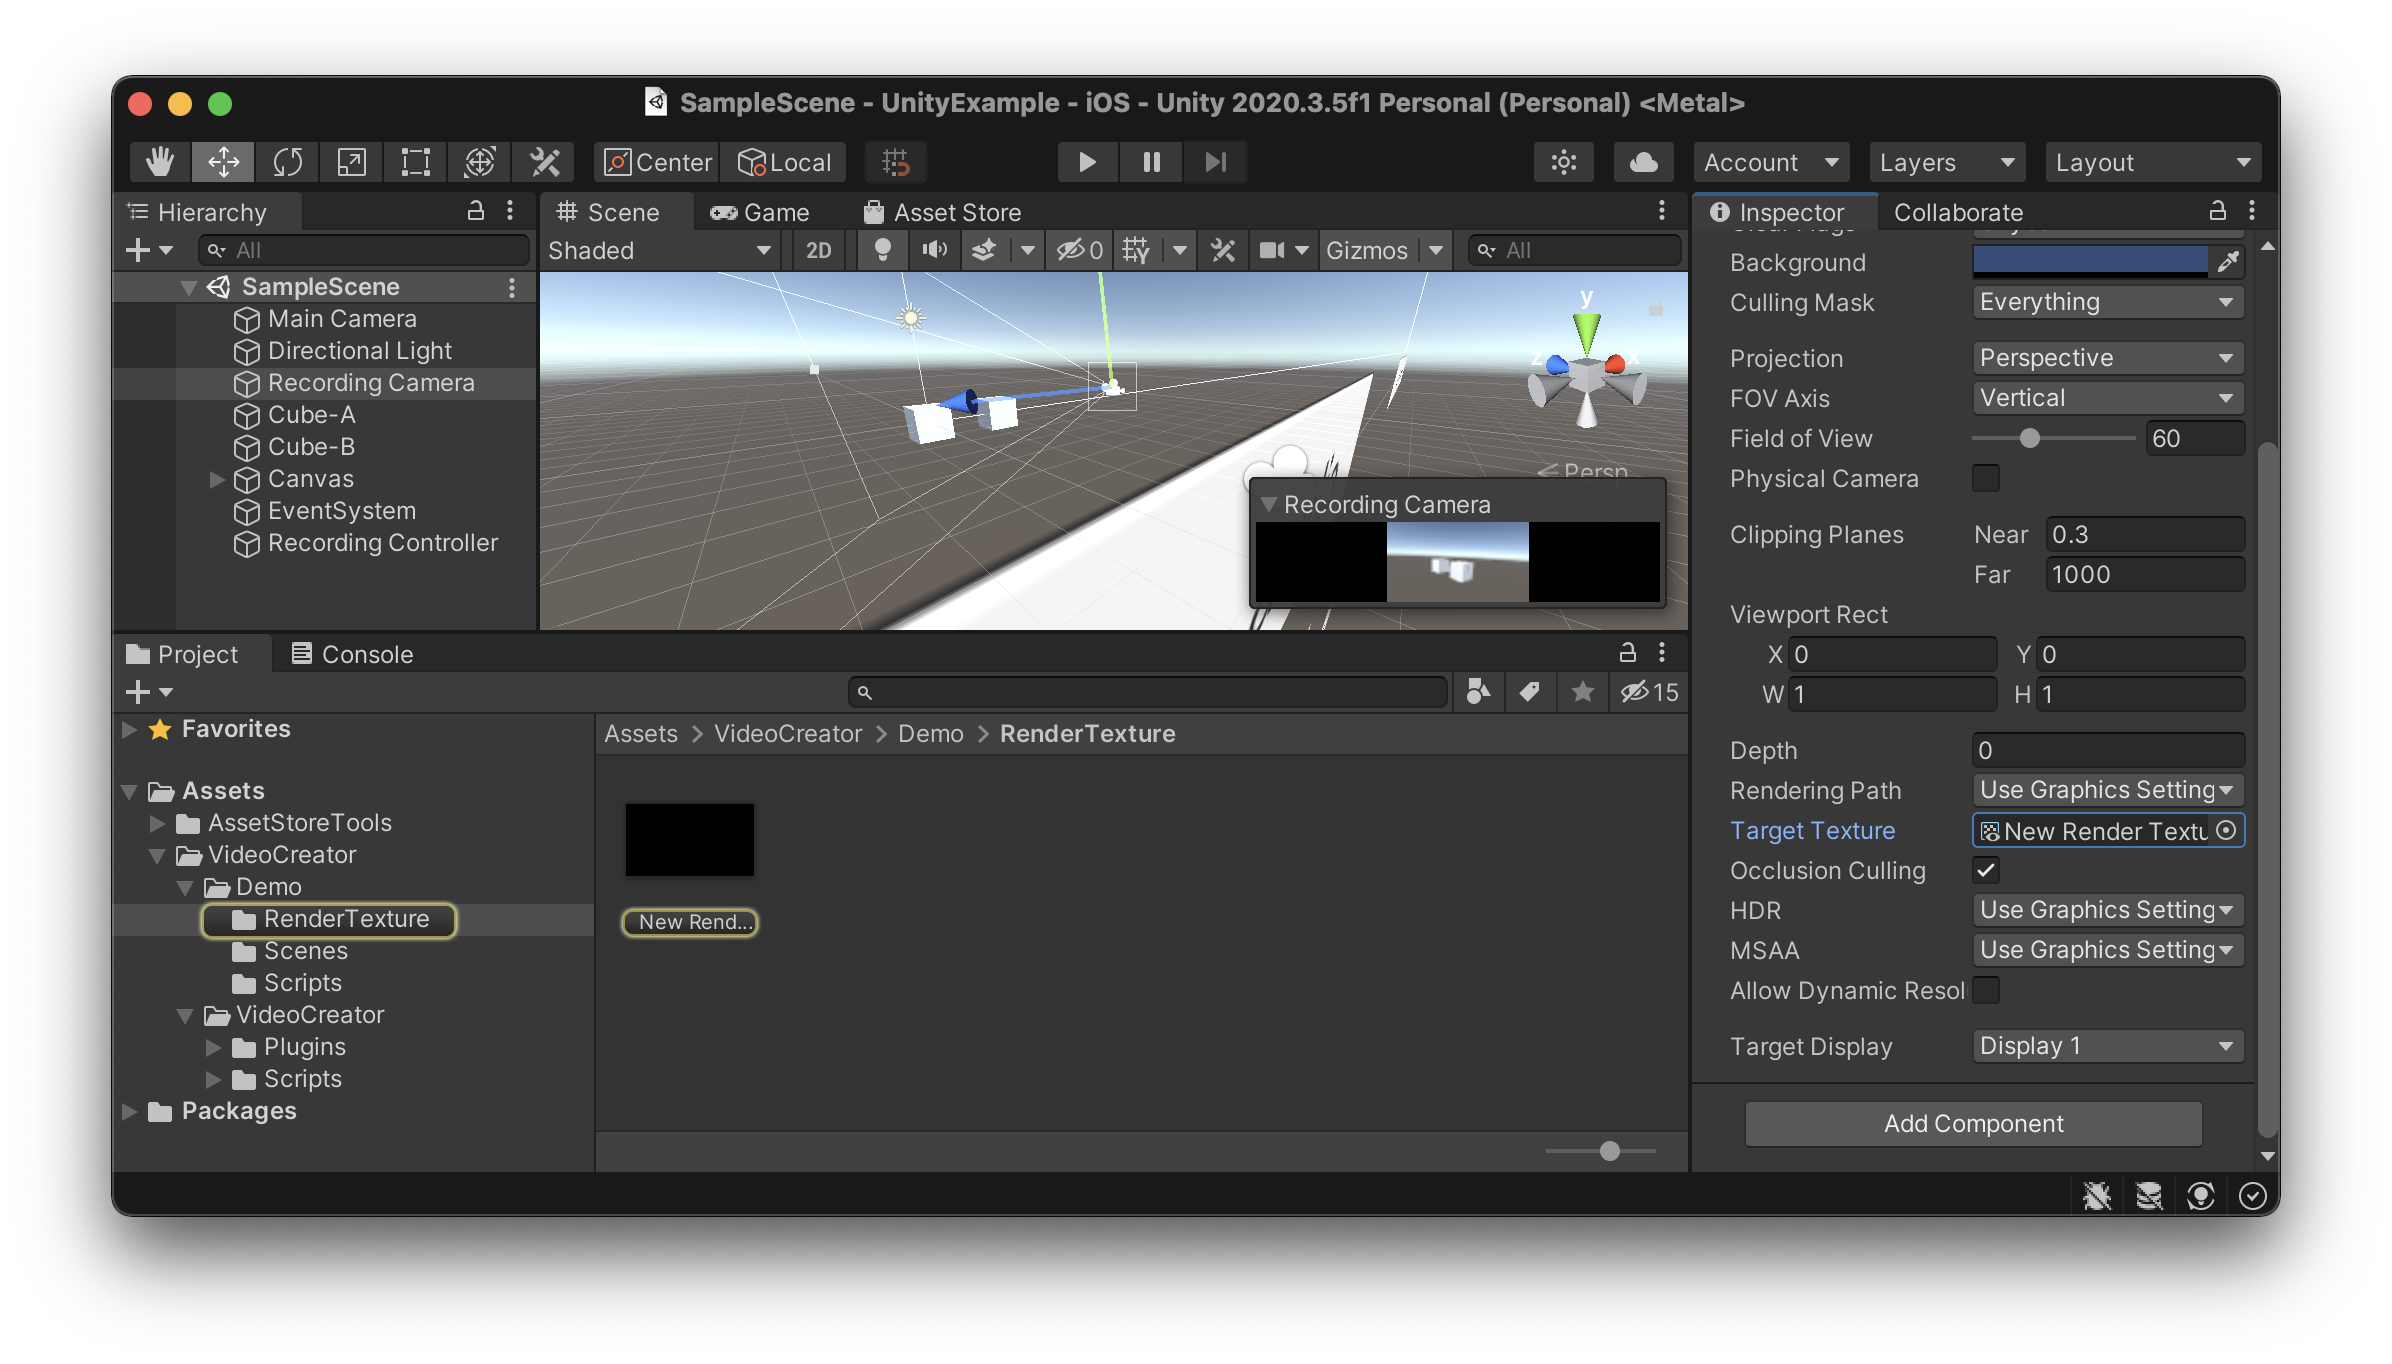
- ここではRenderTextureを作成し、Recording CameraのTargetTextureに設定しています
- このRenderTextureをSerializeFieldのプロパティにも設定しています
PCM を書き込む
- float 配列と時刻を渡します
- こちらの時間もマイクロ秒で指定します
float[] pcm = Get PCM float array;
long time = startTimeOffset + Elapsed time from Start;
MediaCreator.WriteAudio(pcm, time);
- AudioSource を追加し、Microphone のクリップを設定して、playします。
var source = gameObject.AddComponent<AudioSource>();
var clip = Microphone.Start(null, true, 1, 48_000);
source.clip = clip;
source.loop = true;
while (Microphone.GetPosition(null) < 0) { }

source.Play();
- OnAudioFilterRead で pcm の float 配列を取得し、書き込みます
void OnAudioFilterRead(float[] data, int channels)
{
    writeAudio(data, channels);

    for (int i = 0; i < data.Length; i++)
    {
        data[i] = 0;
    }
}
録画終了
- 同期的に録画終了します
- この処理は時間がかかる場合があります
MediaCreator.FinishSync();
動画をアルバムに保存する
- MediaSaver に動画を保存した URL を渡して、アルバムに保存します
MediaSaver.SaveVideo(cachePath);
Live Photos をアルバムに保存する
- Live Photos も MediaSaver を使って保存可能です
- 動画の URL に加えて、サムネイルの画像と、動画を作成する時に使った uuid と同じ文字列を渡します
MediaSaver.SaveLivePhotos(texture, uuid, cachePath);
さいごに
- Native Plugin を実装すると、Native の強力な機能を利用する事ができるようになります
- アルファチャンネル付きで保存したり、Live Photos で保存する事で様々な応用ができそうです
- windows/macOSで動画を保存するには→unity3d-jp/FrameCapturer