はじめに
毎朝PCを起動して、いつものウェブサイトを開いて、必要なアプリを立ち上げて...この繰り返し作業、面倒ですよね?
そんな日々のルーチンワークを完全自動化できる方法をご紹介します。Windowsのバッチファイルとタスクスケジューラを使って、PC起動時やログイン時に自動で必要なサイトやアプリを開く仕組みを作りましょう。
この記事では、コードを書かずに、フォーム入力だけで自動化スクリプトを生成できるWebツールも合わせて紹介します。
作業は自己責任でお願いします。
- 自分の環境でテストしていますが、環境によっては動かない場合があります。
- 勤務先の規則などに十分配慮して利用してください!
🎯 この記事で実現できること
- PC起動時/ログイン時に複数のWebサイトを自動で開く
- 必要なアプリケーション(Slack、Teams、Outlook等)を自動起動
- 毎日決まった時間に自動実行
- 専用のWebツールで簡単にスクリプト生成
🛠️ 必要な知識・環境
- Windows 10/11
- 管理者権限でのコマンドプロンプト実行
- バッチファイルの基本的な理解(なくても大丈夫!)
📋 実装手順
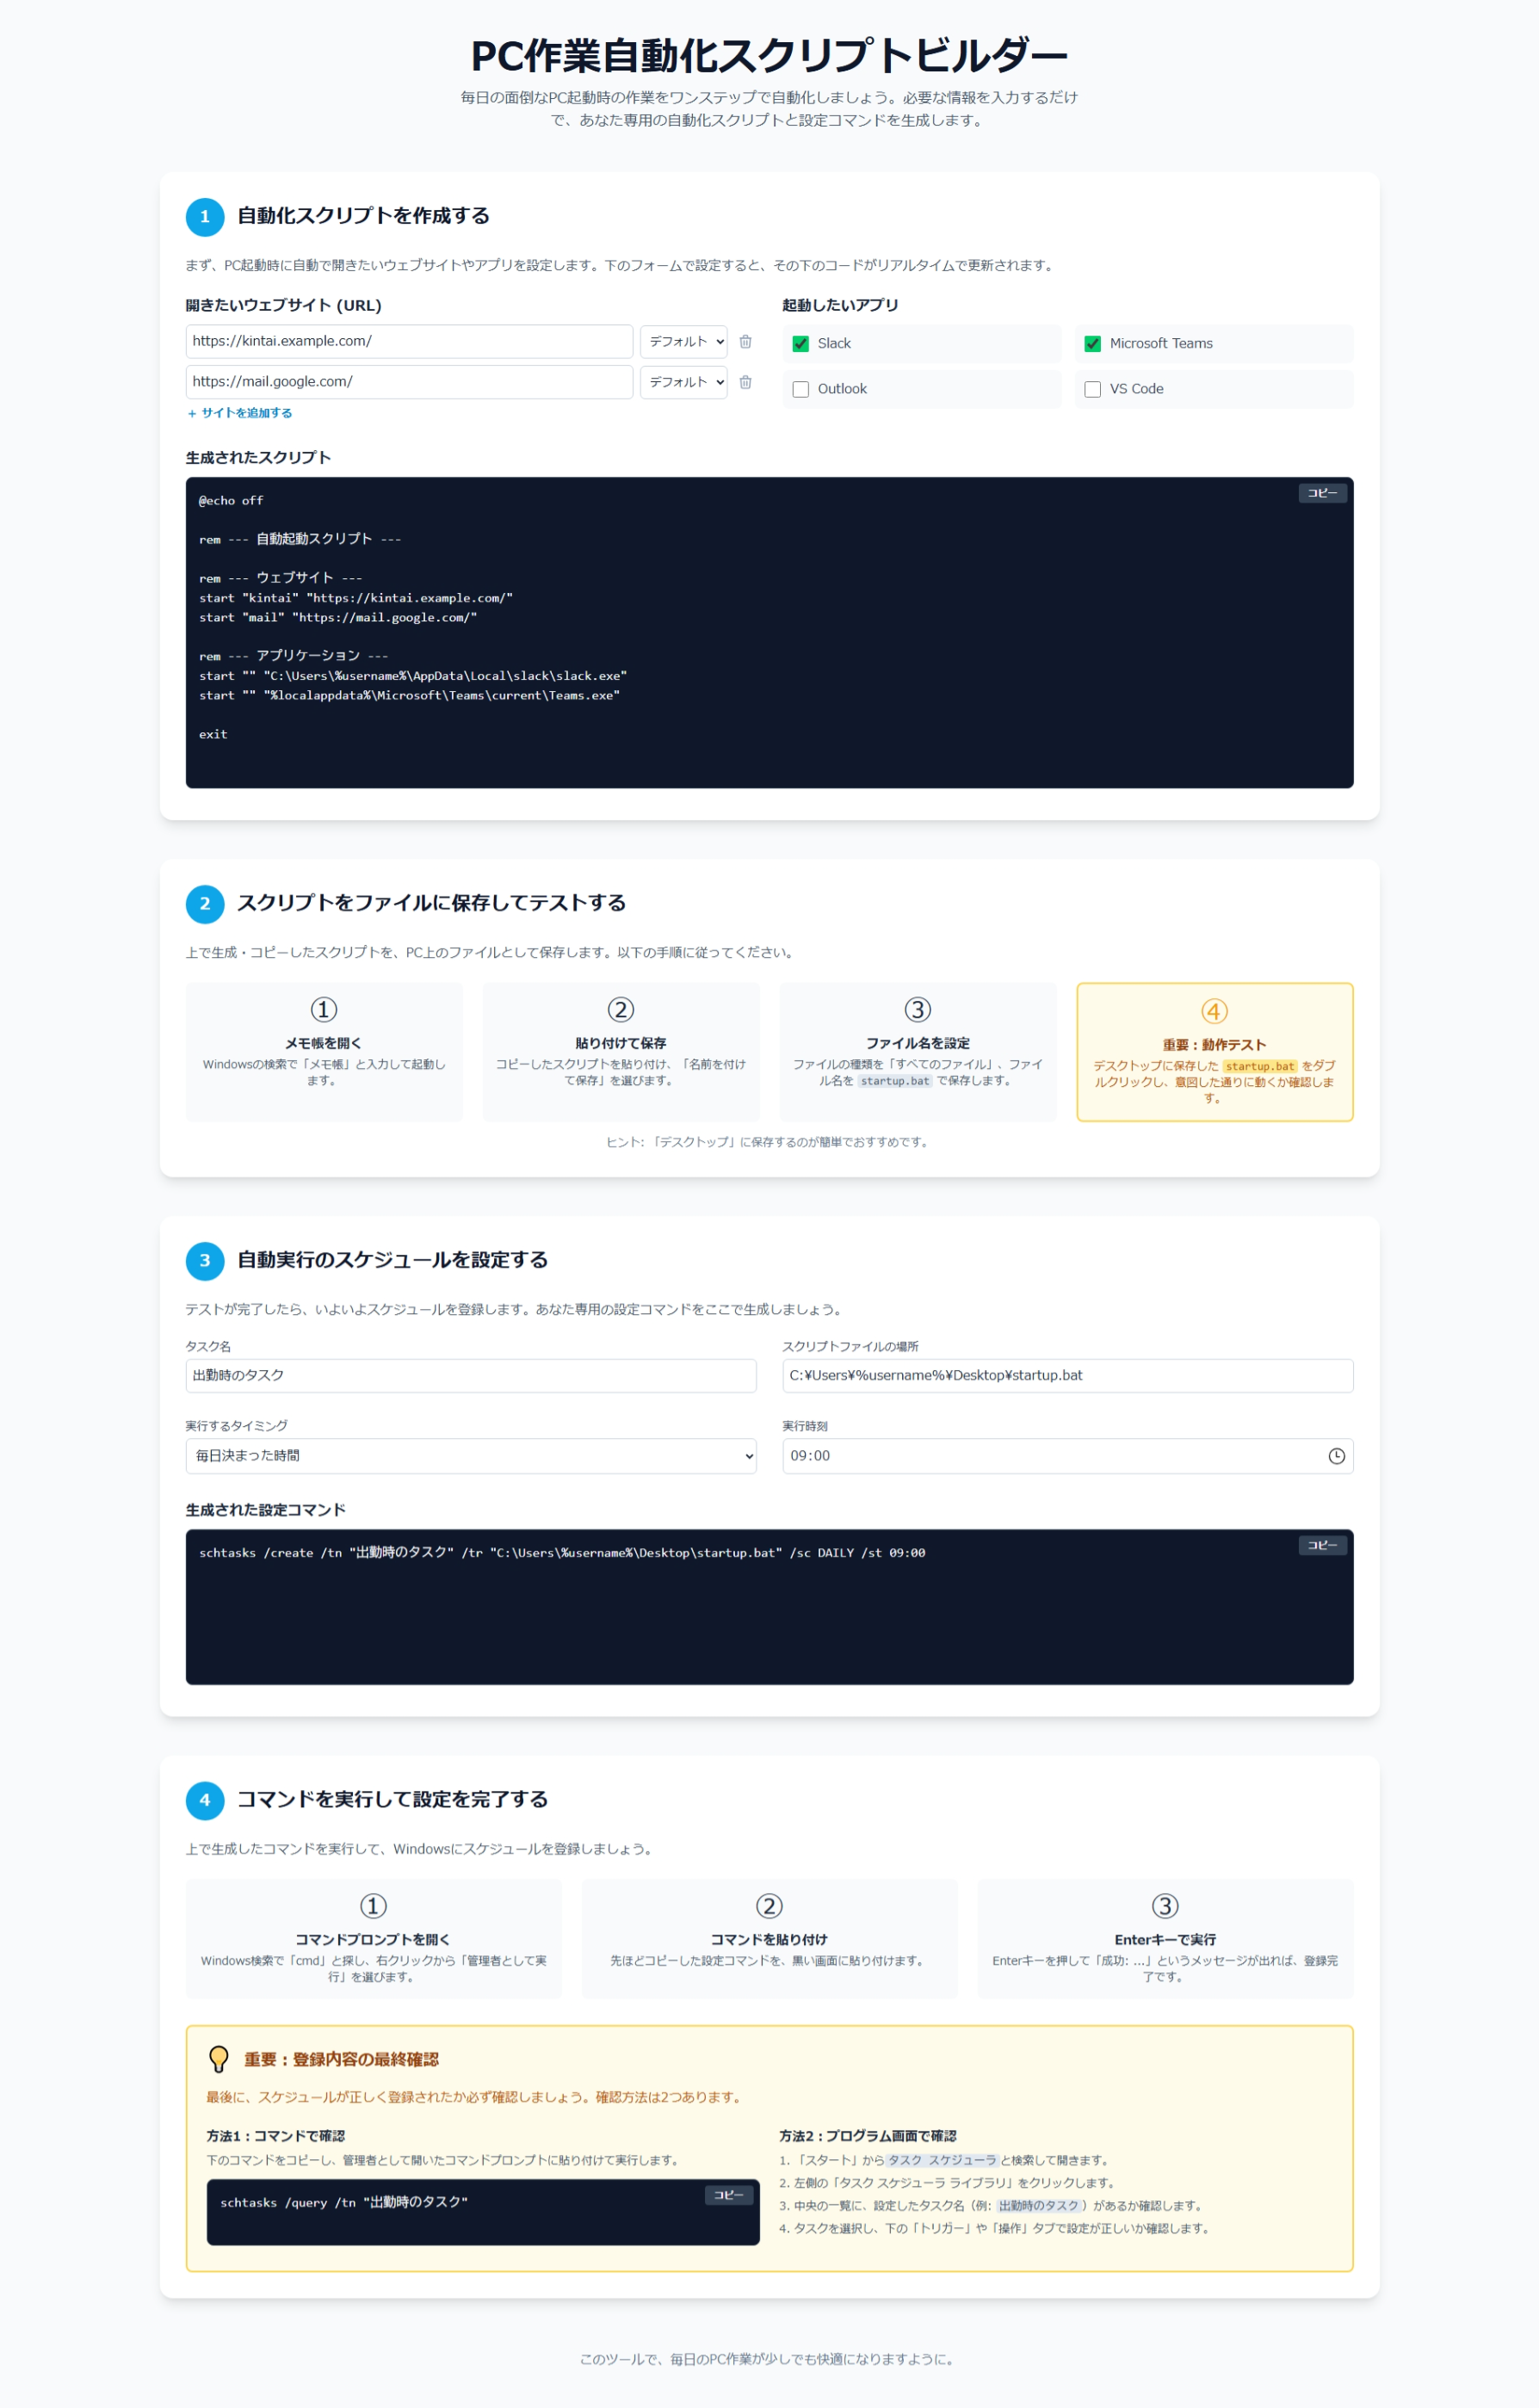
Step 1: 専用ツールをダウンロード
以下のHTMLファイルをコピーして、PCに保存してください。
(例)
メモ帳を新しく開いてコピペします。
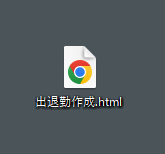
出退勤作成.html という名前でデスクトップに保存してください。
拡張子も .txt から変更してくださいね!
<!DOCTYPE html>
<html lang="ja">
<head>
<meta charset="UTF-8">
<meta name="viewport" content="width=device-width, initial-scale=1.0">
<title>PC作業自動化スクリプトビルダー</title>
<script src="https://cdn.tailwindcss.com"></script>
<style>
body { font-family: 'Inter', 'Noto Sans JP', sans-serif; }
.step-icon { width: 48px; height: 48px; display: flex; align-items: center; justify-content: center; border-radius: 50%; }
.code-block { font-family: 'Menlo', 'Consolas', monospace; white-space: pre; overflow-x: auto; }
.url-input-group, .app-path-input-group { transition: all 0.3s ease-in-out; }
/* 修正点: パス入力フィールドをデフォルトで非表示にするスタイル */
.app-path-input-wrapper {
display: none;
grid-column: span 2 / span 2; /* 2カラムを専有 */
margin-top: -0.5rem; /* 上のチェックボックスとの間隔を詰める */
padding-left: 2.25rem; /* チェックボックスのインデントに合わせる */
}
</style>
</head>
<body class="bg-slate-50 text-slate-800">
<div class="container mx-auto px-4 py-8 md:py-12">
<header class="text-center mb-12">
<h1 class="text-3xl md:text-5xl font-bold text-slate-900 mb-3">PC作業自動化スクリプトビルダー</h1>
<p class="text-md md:text-lg text-slate-600 max-w-3xl mx-auto">毎日の面倒なPC起動時の作業をワンステップで自動化しましょう。必要な情報を入力するだけで、あなた専用の自動化スクリプトと設定コマンドを生成します。</p>
</header>
<main class="space-y-12">
<section id="step1" class="bg-white p-6 md:p-8 rounded-2xl shadow-lg">
<div class="flex items-center mb-6">
<div class="bg-sky-500 text-white text-xl font-bold step-icon mr-4">1</div>
<h2 class="text-2xl font-bold text-slate-900">自動化スクリプトを作成する</h2>
</div>
<p class="text-slate-600 mb-6">まず、PC起動時に自動で開きたいウェブサイトやアプリを設定します。下のフォームで設定すると、その下のコードがリアルタイムで更新されます。</p>
<div class="flex flex-col gap-8">
<div class="grid md:grid-cols-2 gap-8">
<div>
<h3 class="font-semibold text-lg mb-2">開きたいウェブサイト (URL)</h3>
<div id="url-list" class="space-y-2">
</div>
<button id="add-url-btn" class="mt-2 text-sm text-sky-600 hover:text-sky-800 font-semibold flex items-center">
<svg class="w-4 h-4 mr-1" fill="none" stroke="currentColor" viewBox="0 0 24 24" xmlns="http://www.w3.org/2000/svg"><path stroke-linecap="round" stroke-linejoin="round" stroke-width="2" d="M12 6v6m0 0v6m0-6h6m-6 0H6"></path></svg>
サイトを追加する
</button>
</div>
<div>
<h3 class="font-semibold text-lg mb-2">起動したいアプリ</h3>
<div class="grid grid-cols-2 gap-x-4 gap-y-2">
<label class="flex items-center p-3 bg-slate-50 rounded-lg cursor-pointer hover:bg-slate-100 col-span-2">
<input type="checkbox" id="include-slack" class="app-checkbox h-5 w-5 rounded border-gray-300 text-sky-600 focus:ring-sky-500">
<span class="ml-3 text-slate-700">Slack</span>
</label>
<div id="include-slack-path-wrapper" class="app-path-input-wrapper">
<input type="text" id="include-slack-path" class="app-path-input w-full p-2 border border-slate-300 rounded-md text-sm" placeholder="Slackの実行ファイルパスを入力...">
<p class="text-xs text-slate-500 mt-1">
❓ パスの調べ方: デスクトップのSlackアイコンを右クリック →「プロパティ」→「リンク先」をコピーします。
</p>
</div>
<label class="flex items-center p-3 bg-slate-50 rounded-lg cursor-pointer hover:bg-slate-100 col-span-2">
<input type="checkbox" id="include-vscode" class="app-checkbox h-5 w-5 rounded border-gray-300 text-sky-600 focus:ring-sky-500">
<span class="ml-3 text-slate-700">VS Code</span>
</label>
<div id="include-vscode-path-wrapper" class="app-path-input-wrapper">
<input type="text" id="include-vscode-path" class="app-path-input w-full p-2 border border-slate-300 rounded-md text-sm" placeholder="VS Codeの実行ファイルパスを入力...">
<p class="text-xs text-slate-500 mt-1">
❓ パスの調べ方: コマンドプロンプトで <code class="bg-slate-200 px-1 rounded">where code</code> と入力し実行します。
</p>
</div>
<label class="flex items-center p-3 bg-slate-50 rounded-lg cursor-pointer hover:bg-slate-100">
<input type="checkbox" id="include-teams" class="app-checkbox h-5 w-5 rounded border-gray-300 text-sky-600 focus:ring-sky-500">
<span class="ml-3 text-slate-700">Microsoft Teams</span>
</label>
<label class="flex items-center p-3 bg-slate-50 rounded-lg cursor-pointer hover:bg-slate-100">
<input type="checkbox" id="include-outlook" class="app-checkbox h-5 w-5 rounded border-gray-300 text-sky-600 focus:ring-sky-500">
<span class="ml-3 text-slate-700">Outlook</span>
</label>
</div>
</div>
</div>
<div>
<label for="batch-script-output" class="font-semibold text-lg mb-2 block">生成されたスクリプト</label>
<div class="relative">
<textarea id="batch-script-output" readonly class="w-full h-96 p-4 bg-slate-900 text-slate-50 rounded-lg border border-slate-700 resize-none code-block"></textarea>
<button id="copy-script-btn" class="absolute top-2 right-2 bg-slate-700 hover:bg-slate-600 text-white text-xs font-bold py-1 px-3 rounded">コピー</button>
</div>
</div>
</div>
</section>
<section id="step2" class="bg-white p-6 md:p-8 rounded-2xl shadow-lg">
<div class="flex items-center mb-6">
<div class="bg-sky-500 text-white text-xl font-bold step-icon mr-4">2</div>
<h2 class="text-2xl font-bold text-slate-900">スクリプトをファイルに保存してテストする</h2>
</div>
<p class="text-slate-600 mb-6">上で生成・コピーしたスクリプトを、PC上のファイルとして保存します。以下の手順に従ってください。</p>
<div class="grid grid-cols-1 md:grid-cols-4 gap-6 text-center">
<div class="bg-slate-50 p-4 rounded-lg">
<div class="text-4xl mb-2">①</div>
<h3 class="font-semibold mb-1">メモ帳を開く</h3>
<p class="text-sm text-slate-600">Windowsの検索で「メモ帳」と入力して起動します。</p>
</div>
<div class="bg-slate-50 p-4 rounded-lg">
<div class="text-4xl mb-2">②</div>
<h3 class="font-semibold mb-1">貼り付けて保存</h3>
<p class="text-sm text-slate-600">コピーしたスクリプトを貼り付け、「名前を付けて保存」を選びます。</p>
</div>
<div class="bg-slate-50 p-4 rounded-lg">
<div class="text-4xl mb-2">③</div>
<h3 class="font-semibold mb-1">ファイル名を設定</h3>
<p class="text-sm text-slate-600">ファイルの種類を「すべてのファイル」、ファイル名を <code class="bg-slate-200 px-1 rounded">startup.bat</code> で保存します。</p>
</div>
<div class="bg-amber-50 border-2 border-amber-300 p-4 rounded-lg">
<div class="text-4xl text-amber-500 mb-2">④</div>
<h3 class="font-semibold text-amber-800 mb-1">重要:動作テスト</h3>
<p class="text-sm text-amber-700">デスクトップに保存した <code class="bg-amber-200 px-1 rounded">startup.bat</code> をダブルクリックし、意図した通りに動くか確認します。</p>
</div>
</div>
<p class="text-sm text-slate-500 mt-4 text-center">ヒント: 「デスクトップ」に保存するのが簡単でおすすめです。</p>
</section>
<section id="step3" class="bg-white p-6 md:p-8 rounded-2xl shadow-lg">
<div class="flex items-center mb-6">
<div class="bg-sky-500 text-white text-xl font-bold step-icon mr-4">3</div>
<h2 class="text-2xl font-bold text-slate-900">自動実行のスケジュールを設定する</h2>
</div>
<p class="text-slate-600 mb-6">テストが完了したら、いよいよスケジュールを登録します。あなた専用の設定コマンドをここで生成しましょう。</p>
<div class="flex flex-col gap-8">
<div class="grid md:grid-cols-2 gap-8">
<div>
<label for="task-name" class="block text-sm font-medium text-slate-700 mb-1">タスク名</label>
<input type="text" id="task-name" value="出勤時のタスク" class="w-full p-2 border border-slate-300 rounded-md">
</div>
<div>
<label for="script-path" class="block text-sm font-medium text-slate-700 mb-1">スクリプトファイルの場所</label>
<input type="text" id="script-path" value="C:\Users\%username%\Desktop\startup.bat" class="w-full p-2 border border-slate-300 rounded-md">
</div>
<div>
<label for="trigger-type" class="block text-sm font-medium text-slate-700 mb-1">実行するタイミング</label>
<select id="trigger-type" class="w-full p-2 border border-slate-300 rounded-md">
<option value="DAILY">毎日決まった時間</option>
<option value="ONLOGON">PCにサインインした時</option>
</select>
</div>
<div id="time-input-wrapper">
<label for="start-time" class="block text-sm font-medium text-slate-700 mb-1">実行時刻</label>
<input type="time" id="start-time" value="09:00" class="w-full p-2 border border-slate-300 rounded-md">
</div>
</div>
<div>
<label for="scheduler-command-output" class="font-semibold text-lg mb-2 block">生成された設定コマンド</label>
<div class="relative">
<textarea id="scheduler-command-output" readonly class="w-full h-48 p-4 bg-slate-900 text-slate-50 rounded-lg border border-slate-700 resize-none code-block"></textarea>
<button id="copy-command-btn" class="absolute top-2 right-2 bg-slate-700 hover:bg-slate-600 text-white text-xs font-bold py-1 px-3 rounded">コピー</button>
</div>
</div>
</div>
</section>
<section id="step4" class="bg-white p-6 md:p-8 rounded-2xl shadow-lg">
<div class="flex items-center mb-6">
<div class="bg-sky-500 text-white text-xl font-bold step-icon mr-4">4</div>
<h2 class="text-2xl font-bold text-slate-900">コマンドを実行して設定を完了する</h2>
</div>
<p class="text-slate-600 mb-6">上で生成したコマンドを実行して、Windowsにスケジュールを登録しましょう。</p>
<div class="grid grid-cols-1 md:grid-cols-3 gap-6 text-center">
<div class="bg-slate-50 p-4 rounded-lg">
<div class="text-4xl mb-2">①</div>
<h3 class="font-semibold mb-1">コマンドプロンプトを開く</h3>
<p class="text-sm text-slate-600">Windows検索で「cmd」と探し、右クリックから「管理者として実行」を選びます。</p>
</div>
<div class="bg-slate-50 p-4 rounded-lg">
<div class="text-4xl mb-2">②</div>
<h3 class="font-semibold mb-1">コマンドを貼り付け</h3>
<p class="text-sm text-slate-600">先ほどコピーした設定コマンドを、黒い画面に貼り付けます。</p>
</div>
<div class="bg-slate-50 p-4 rounded-lg">
<div class="text-4xl mb-2">③</div>
<h3 class="font-semibold mb-1">Enterキーで実行</h3>
<p class="text-sm text-slate-600">Enterキーを押して「成功: ...」というメッセージが出れば、登録完了です。</p>
</div>
</div>
<div class="mt-8 bg-amber-50 border-2 border-amber-300 p-6 rounded-lg">
<div class="flex items-center mb-4">
<div class="text-3xl text-amber-500 mr-4">💡</div>
<h3 class="font-bold text-xl text-amber-800">重要:登録内容の最終確認</h3>
</div>
<p class="text-amber-700 mb-6">最後に、スケジュールが正しく登録されたか必ず確認しましょう。確認方法は2つあります。</p>
<div class="grid md:grid-cols-2 gap-6">
<div>
<h4 class="font-semibold text-slate-800 mb-2">方法1:コマンドで確認</h4>
<p class="text-sm text-slate-600 mb-3">下のコマンドをコピーし、管理者として開いたコマンドプロンプトに貼り付けて実行します。</p>
<div class="relative">
<textarea id="verification-command-output" readonly class="w-full p-4 bg-slate-900 text-slate-50 rounded-lg border border-slate-700 resize-none code-block"></textarea>
<button id="copy-verification-btn" class="absolute top-2 right-2 bg-slate-700 hover:bg-slate-600 text-white text-xs font-bold py-1 px-3 rounded">コピー</button>
</div>
</div>
<div>
<h4 class="font-semibold text-slate-800 mb-2">方法2:プログラム画面で確認</h4>
<ol class="list-decimal list-inside text-sm text-slate-600 space-y-2">
<li>「スタート」から<code class="bg-slate-200 px-1 rounded">タスク スケジューラ</code>と検索して開きます。</li>
<li>左側の「タスク スケジューラ ライブラリ」をクリックします。</li>
<li>中央の一覧に、設定したタスク名(例: <code class="bg-slate-200 px-1 rounded" id="verify-task-name">出勤時のタスク</code>)があるか確認します。</li>
<li>タスクを選択し、下の「トリガー」や「操作」タブで設定が正しいか確認します。</li>
</ol>
</div>
</div>
</div>
</section>
</main>
<footer class="text-center mt-16">
<p class="text-slate-500">このツールで、毎日のPC作業が少しでも快適になりますように。</p>
</footer>
</div>
<script>
document.addEventListener('DOMContentLoaded', () => {
// 要素の取得
const urlList = document.getElementById('url-list');
const addUrlBtn = document.getElementById('add-url-btn');
const appCheckboxes = document.querySelectorAll('.app-checkbox');
const batchScriptOutput = document.getElementById('batch-script-output');
const copyScriptBtn = document.getElementById('copy-script-btn');
const taskName = document.getElementById('task-name');
const scriptPath = document.getElementById('script-path');
const triggerType = document.getElementById('trigger-type');
const timeInputWrapper = document.getElementById('time-input-wrapper');
const startTime = document.getElementById('start-time');
const schedulerCommandOutput = document.getElementById('scheduler-command-output');
const copyCommandBtn = document.getElementById('copy-command-btn');
const verificationCommandOutput = document.getElementById('verification-command-output');
const copyVerificationBtn = document.getElementById('copy-verification-btn');
const verifyTaskName = document.getElementById('verify-task-name');
// 修正点: パス入力フィールドの要素を取得
const appPathInputs = document.querySelectorAll('.app-path-input');
// 修正点: 固定パスではなく、固定コマンド部分だけを定義
const appCommands = {
'include-teams': 'start "" "%localappdata%\\Microsoft\\Teams\\current\\Teams.exe"',
'include-outlook': 'start outlook',
// SlackとVSCodeはユーザー入力に依存するため、ここからは削除
};
const createUrlInput = () => {
const div = document.createElement('div');
div.className = 'flex items-center space-x-2 url-input-group';
const input = document.createElement('input');
input.type = 'url';
input.className = 'url-input w-full p-2 border border-slate-300 rounded-md';
input.placeholder = 'https://www.google.com';
input.addEventListener('input', updateBatchScript);
const select = document.createElement('select');
select.className = 'browser-select p-2 border border-slate-300 rounded-md bg-white text-sm';
select.innerHTML = `<option value="default">デフォルト</option><option value="msedge">Edge</option><option value="chrome">Chrome</option>`;
select.addEventListener('change', updateBatchScript);
const button = document.createElement('button');
button.innerHTML = `<svg class="w-5 h-5 text-slate-400 hover:text-red-500" fill="none" stroke="currentColor" viewBox="0 0 24 24" xmlns="http://www.w3.org/2000/svg"><path stroke-linecap="round" stroke-linejoin="round" stroke-width="2" d="M19 7l-.867 12.142A2 2 0 0116.138 21H7.862a2 2 0 01-1.995-1.858L5 7m5 4v6m4-6v6m1-10V4a1 1 0 00-1-1h-4a1 1 0 00-1 1v3M4 7h16"></path></svg>`;
button.className = 'remove-url-btn p-1';
button.onclick = () => {
div.remove();
updateBatchScript();
};
div.appendChild(input);
div.appendChild(select);
div.appendChild(button);
urlList.appendChild(div);
return input;
};
const updateBatchScript = () => {
let script = '@echo off\n\n';
script += 'rem --- 自動起動スクリプト ---\n';
const urlInputs = document.querySelectorAll('.url-input-group');
const activeUrlInputs = Array.from(urlInputs).filter(group => group.querySelector('.url-input').value);
if (activeUrlInputs.length > 0) {
script += '\nrem --- ウェブサイト ---\n';
activeUrlInputs.forEach(group => {
const url = group.querySelector('.url-input').value;
const browser = group.querySelector('.browser-select').value;
try {
const urlObj = new URL(url);
const command = browser === 'default' ? 'start ""' : `start ${browser}`;
script += `${command} "${url}"\n`;
} catch (e) {
// 無効なURLは無視
}
});
}
const activeApps = Array.from(appCheckboxes).filter(cb => cb.checked);
if(activeApps.length > 0) {
script += '\nrem --- アプリケーション ---\n';
activeApps.forEach(app => {
// 修正点: ユーザーがパスを入力するアプリと、固定コマンドのアプリで処理を分岐
if (app.id === 'include-slack' || app.id === 'include-vscode') {
const pathInput = document.getElementById(`${app.id}-path`);
const path = pathInput.value.trim();
if (path) {
script += `start "" "${path}"\n`;
}
} else if (appCommands[app.id]) {
script += `${appCommands[app.id]}\n`;
}
});
}
script += '\nexit';
batchScriptOutput.value = script;
};
// 修正点: チェックボックスの状態に応じてパス入力欄の表示/非表示を切り替える関数
const togglePathInput = (checkbox) => {
const wrapper = document.getElementById(`${checkbox.id}-path-wrapper`);
if (wrapper) {
wrapper.style.display = checkbox.checked ? 'block' : 'none';
}
updateBatchScript();
};
const updateSchedulerCommand = () => {
const tn = `"${taskName.value}"`;
const tr = `"${scriptPath.value}"`;
const sc = triggerType.value;
let command = `schtasks /create /tn ${tn} /tr ${tr} /sc ${sc} /f`; // /f を追加して上書きを許可
if (sc === 'DAILY') {
timeInputWrapper.style.display = 'block';
const st = startTime.value;
command += ` /st ${st}`;
} else {
timeInputWrapper.style.display = 'none';
}
schedulerCommandOutput.value = command;
verificationCommandOutput.value = `schtasks /query /tn ${tn}`;
verifyTaskName.textContent = taskName.value;
};
const copyToClipboard = (elementId, button) => {
const textarea = document.getElementById(elementId);
navigator.clipboard.writeText(textarea.value).then(() => {
const originalText = button.textContent;
button.textContent = 'コピー完了!';
button.classList.add('bg-green-500', 'hover:bg-green-500');
setTimeout(() => {
button.textContent = originalText;
button.classList.remove('bg-green-500', 'hover:bg-green-500');
}, 2000);
});
};
// イベントリスナーの設定
addUrlBtn.addEventListener('click', () => {
const newInput = createUrlInput();
newInput.focus();
});
appCheckboxes.forEach(cb => {
// 修正点: togglePathInput を呼び出すように変更
cb.addEventListener('change', () => togglePathInput(cb));
});
// 修正点: パス入力フィールドの変更もスクリプト更新のトリガーにする
appPathInputs.forEach(input => input.addEventListener('input', updateBatchScript));
taskName.addEventListener('input', updateSchedulerCommand);
scriptPath.addEventListener('input', updateSchedulerCommand);
triggerType.addEventListener('change', updateSchedulerCommand);
startTime.addEventListener('input', updateSchedulerCommand);
copyScriptBtn.addEventListener('click', () => copyToClipboard('batch-script-output', copyScriptBtn));
copyCommandBtn.addEventListener('click', () => copyToClipboard('scheduler-command-output', copyCommandBtn));
copyVerificationBtn.addEventListener('click', () => copyToClipboard('verification-command-output', copyVerificationBtn));
// 初期化処理
const init = () => {
createUrlInput().value = "https://kintai.example.com/";
createUrlInput().value = "https://mail.google.com/";
document.getElementById('include-slack').checked = true;
document.getElementById('include-teams').checked = true;
// 修正点: チェックボックスの状態に合わせて初期表示を更新
appCheckboxes.forEach(togglePathInput);
updateBatchScript();
updateSchedulerCommand();
};
init();
});
</script>
</body>
</html>
🔧 トラブルシューティング
よくある問題と解決方法
1. バッチファイルが実行されない
- ファイルの拡張子が
.batになっているか確認 - 管理者権限で実行してみる
2. アプリケーションが起動しない
- アプリケーションのパスが正しいか確認
- アプリケーションがインストールされているか確認
3. タスクスケジューラに登録できない
- コマンドプロンプトを管理者として実行しているか確認
- スクリプトファイルのパスが正しいか確認
4. 設定した時間に実行されない
- PCの電源がその時間に入っているか確認
- タスクスケジューラの設定で「コンピューターがAC電源で動作している場合のみ実行」のチェックを外す
- 調査中ですが、メインディスプレイが別にあるノートPCでは接続されていないときに実行されないことがある??
📝 まとめ
この自動化の仕組みを導入することで:
- 毎朝の作業時間を大幅短縮
- 開き忘れやミスを防止
- 一貫した作業環境を構築
特に、専用のWebツールを使えば、プログラミング知識がなくても簡単に自分専用の自動化スクリプトを作成できます。
毎日の小さな積み重ねが大きな効率化につながります。ぜひ試してみてください!