去年AWSを触っていたので今回は寺尾さんに触ってみて~とお勧めいただいたのもあり、Alibaba CloudのIoT Platformを使ってみました。
参考にした記事:
- Alibaba Cloud blog Connecting Raspberry Pi to the Alibaba Cloud IoT Platform Using Python
- 上記からリンクされているエントリ Python设备接入
正直なところ、クイックスタートの手順を試した後にやったのでどこがどういう風に効いているのかいまいちよくわかりません。でも日本語で書いてあるページが少ないようだったので何かの参考になれば幸いです。クイックスタートで使ったNode.jsを生かしてそのまま何か作る方が簡単なのではないかと思うのですが、Node.jsの知識がない&時間がなかったため、今回は研究できませんでした。。
準備
RaspberryPi上で何かのセンサーから値を取得するプログラムをPythonで書いておく。
手順
1. Alibaba Cloud IoT Platformのトップから左側のメニューの一番上「クイックスタート」の手順を行う。
→これでデバイスの登録などをやってしまいました。
2. 参考サイト2を参照してその通り進める。
参考サイト2のソースコードで書き換える値は下記の通りです。
你的productKey / 你的deviceName / 你的deviceSecret :三つ一気に確認するには、
デバイス管理>デバイス>デバイス情報
'regionId':'cn-shanghai' →自分のリージョンに合わせて変更(リージョンとゾーンを参照)
thermometer.py
# -*- coding: utf-8 -*-
import paho.mqtt.client as mqtt
import time
import hashlib
import hmac
import random
import json

# 自分の情報に書き換えるところ
options = {
    'productKey':'你的productKey',
    'deviceName':'你的deviceName',
    'deviceSecret':'你的deviceSecret',
    'regionId':'cn-shanghai'
}

HOST = options['productKey'] + '.iot-as-mqtt.'+options['regionId']+'.aliyuncs.com'
PORT = 1883
PUB_TOPIC = "/sys/" + options['productKey'] + "/" + options['deviceName'] + "/thing/event/property/post";


# The callback for when the client receives a CONNACK response from the server.
def on_connect(client, userdata, flags, rc):
    print("Connected with result code "+str(rc))
    # client.subscribe("the/topic")

# The callback for when a PUBLISH message is received from the server.
def on_message(client, userdata, msg):
    print(msg.topic+" "+str(msg.payload))

def hmacsha1(key, msg):
    return hmac.new(key.encode(), msg.encode(), hashlib.sha1).hexdigest()

def getAliyunIoTClient():
  timestamp = str(int(time.time()))
  CLIENT_ID = "paho.py|securemode=3,signmethod=hmacsha1,timestamp="+timestamp+"|"
  CONTENT_STR_FORMAT = "clientIdpaho.pydeviceName"+options['deviceName']+"productKey"+options['productKey']+"timestamp"+timestamp
  # set username/password.
  USER_NAME = options['deviceName']+"&"+options['productKey']
  PWD = hmacsha1(options['deviceSecret'],CONTENT_STR_FORMAT)
  client = mqtt.Client(client_id=CLIENT_ID, clean_session=False)
  client.username_pw_set(USER_NAME, PWD)
  return client


if __name__ == '__main__':

  client = getAliyunIoTClient()
  client.on_connect = on_connect
  client.on_message = on_message

  client.connect(HOST, 1883, 300)

# ここでサンプルプログラムでは気温と湿度をべた書きで送っている
  payload_json = {
    'id': int(time.time()),
    'params': {
      'temperature': random.randint(20, 30),
            'humidity': random.randint(40, 50)
    },
      'method': "thing.event.property.post"
  }
  print('send data to iot server: ' + str(payload_json))

  client.publish(PUB_TOPIC,payload=str(payload_json),qos=1)
# ループの中に書く場合は↓を適宜変える。
  client.loop_forever()
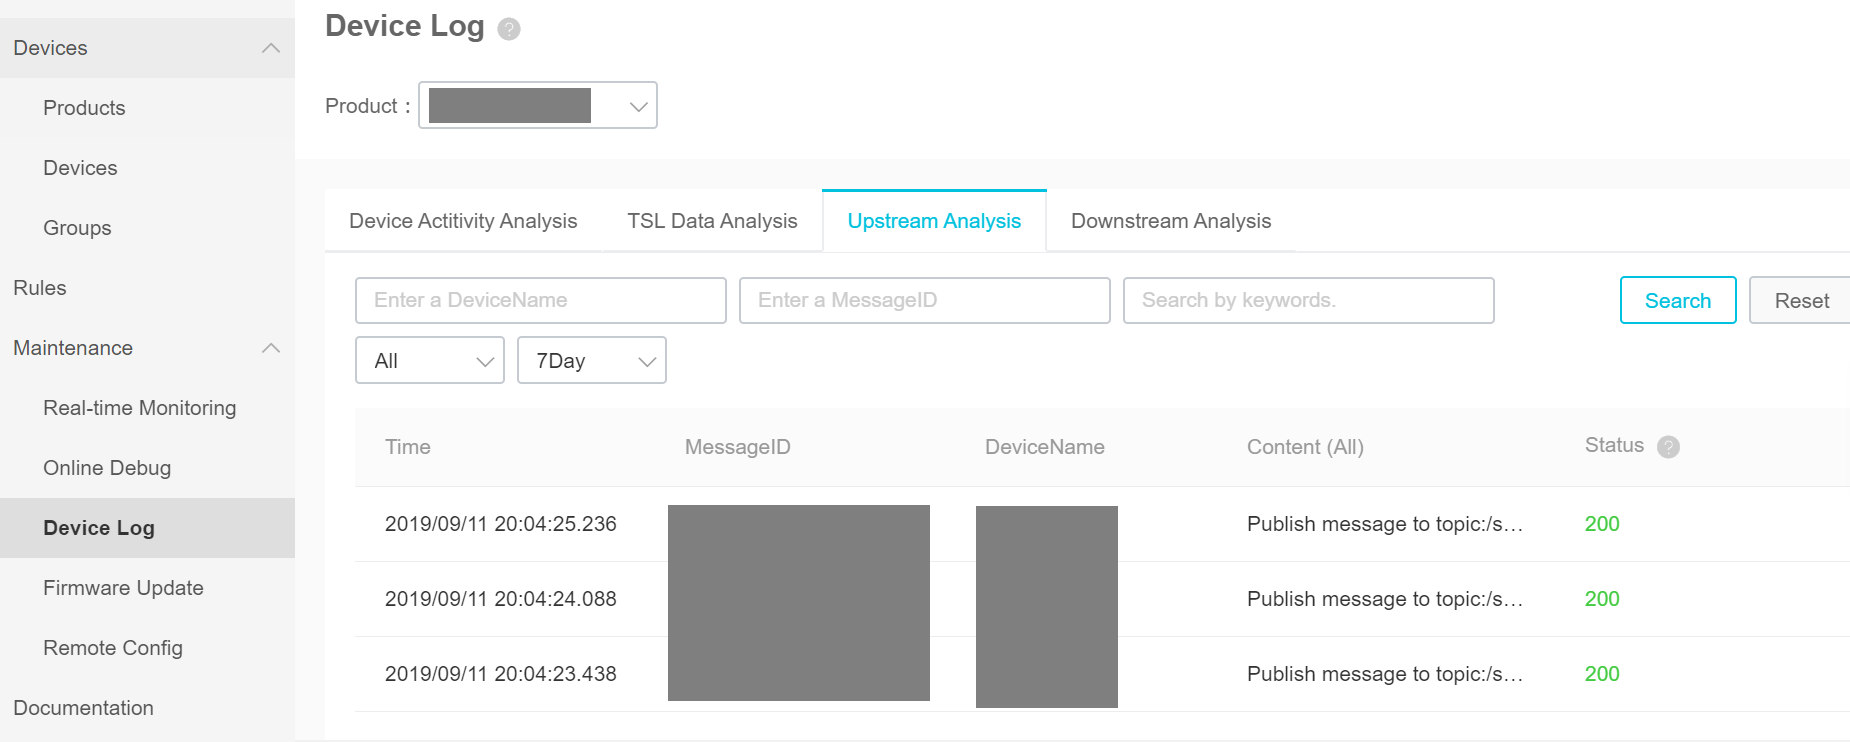
3. データ送達確認
確認方法はメンテナンス>デバイスログ>upstream analysis
4. 何かしらデータが来たら「ルールエンジン」の設定をする
ここでメール通知を設定したかったのですが、AWSと違ってeメール通知機能が見当たりませんでした…無念!!
ところどころ確認ウインドウがいきなり中国語になったりしてびっくりしたんですけど、「ルールエンジン」のSQL作成ウィザードとかはAWSにない機能でいいなーと思ったので、今回またもらった10周年クーポンなど使って引き続き触ってみたいと思います。