Outline
昨年、MacでiOS,Androidのスマホ実機のテスト自動化の構築手順を作成した
iOS,Android,MacOSなどなど、バージョンアップしたこともあり改めてテスト環境を構築した(OS reflesh)
その最新テスト環境の構築手順になる
Environment
用意するもの
- Mac (mojave 10.14.6)
- iPhone (iOS 13.x)
- Android (Android 10)
- USBケーブル
- apple developer account
設定
1. JDK
install
Java SE Development Kit 8 をdownloadして、インストールする
インストール時のversionは 1.8.0_211 を使った
download
http://www.oracle.com/technetwork/java/javase/downloads/jdk8-downloads-2133151.html
環境変数
環境変数に以下を設定する
Mac環境次第ですが、例えば .bashrc
| 変数 | 意味 |
|---|---|
| JAVA_HOME | Javaのinstall path (ex. export JAVA_HOME=`/usr/libexec/java_home` ) |
| Path | 実行フォルダのパス (ex. export PATH=\${JAVA_HOME}/bin:$PATH ) |
実行確認
コマンドプロンプトを起動し、パスを確認する
java -version
2. Android Studio
install
Android Stduioをdownloadして、インストールする
https://developer.android.com/studio/?hl=ja
インストール時の android studioのversionは 3.5 を用いた
環境変数
環境変数に以下を設定する
| 変数 | 意味 |
|---|---|
| ANDROID_HOME | androidのSDKのinstall path 「File」>「Other Settings」>「Default Setting Structure…」の"SDK location" (ex. export ANDROID_HOME=$HOME/Library/Android/sdk ) |
| Path | adb等の実行フォルダのパス (ex. export PATH=\$PATH:$ANDROID_HOME/platform-tools) |
実行確認
コマンドプロンプトを起動し、パスを確認する
adb
4. Android Deviceの設定
appiumからandroid deviceへ接続許可設定をする
1 開発者モードにする
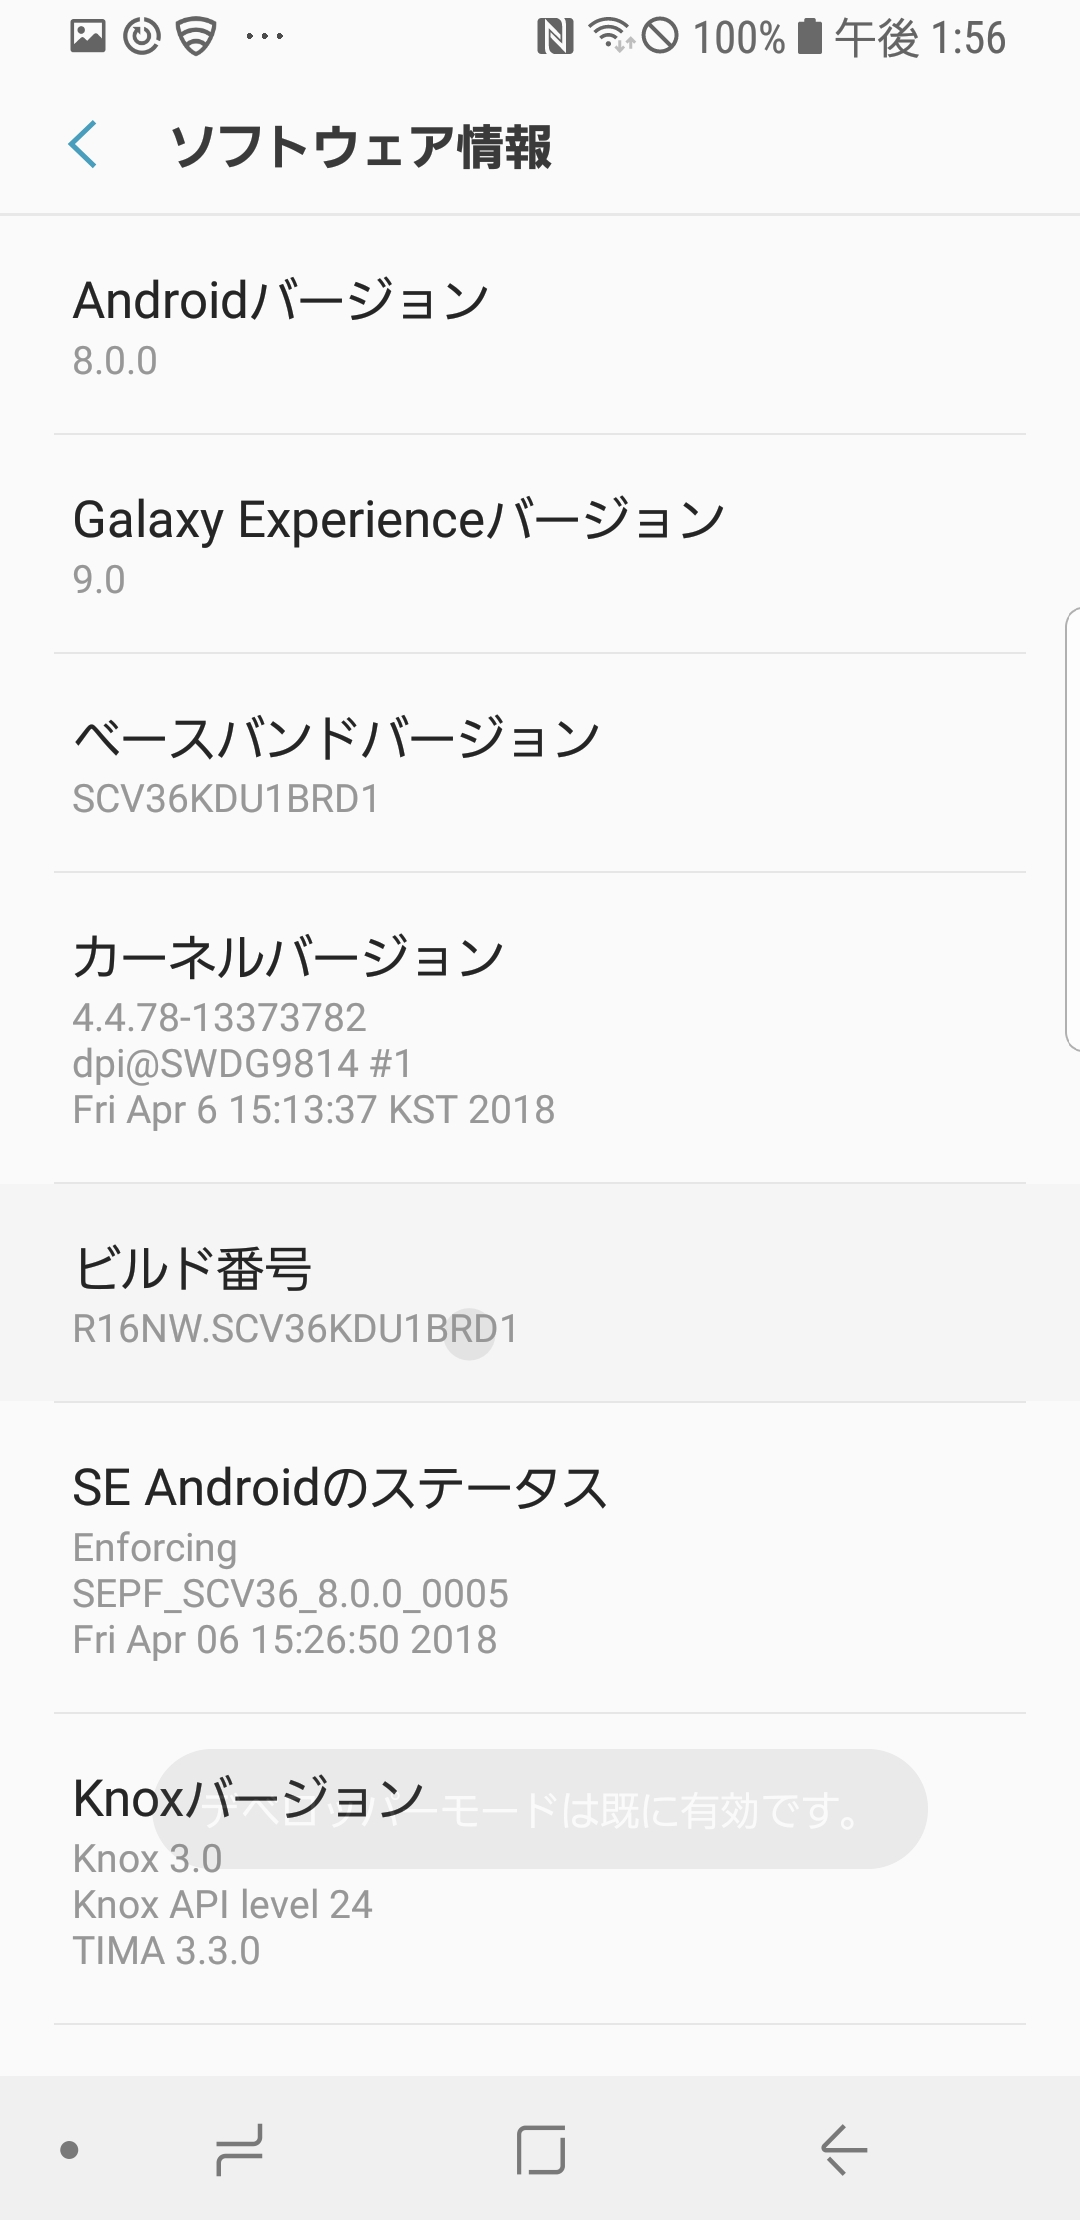 ビルド番号を数回タップすると、デベロッパーモードに切り替わる
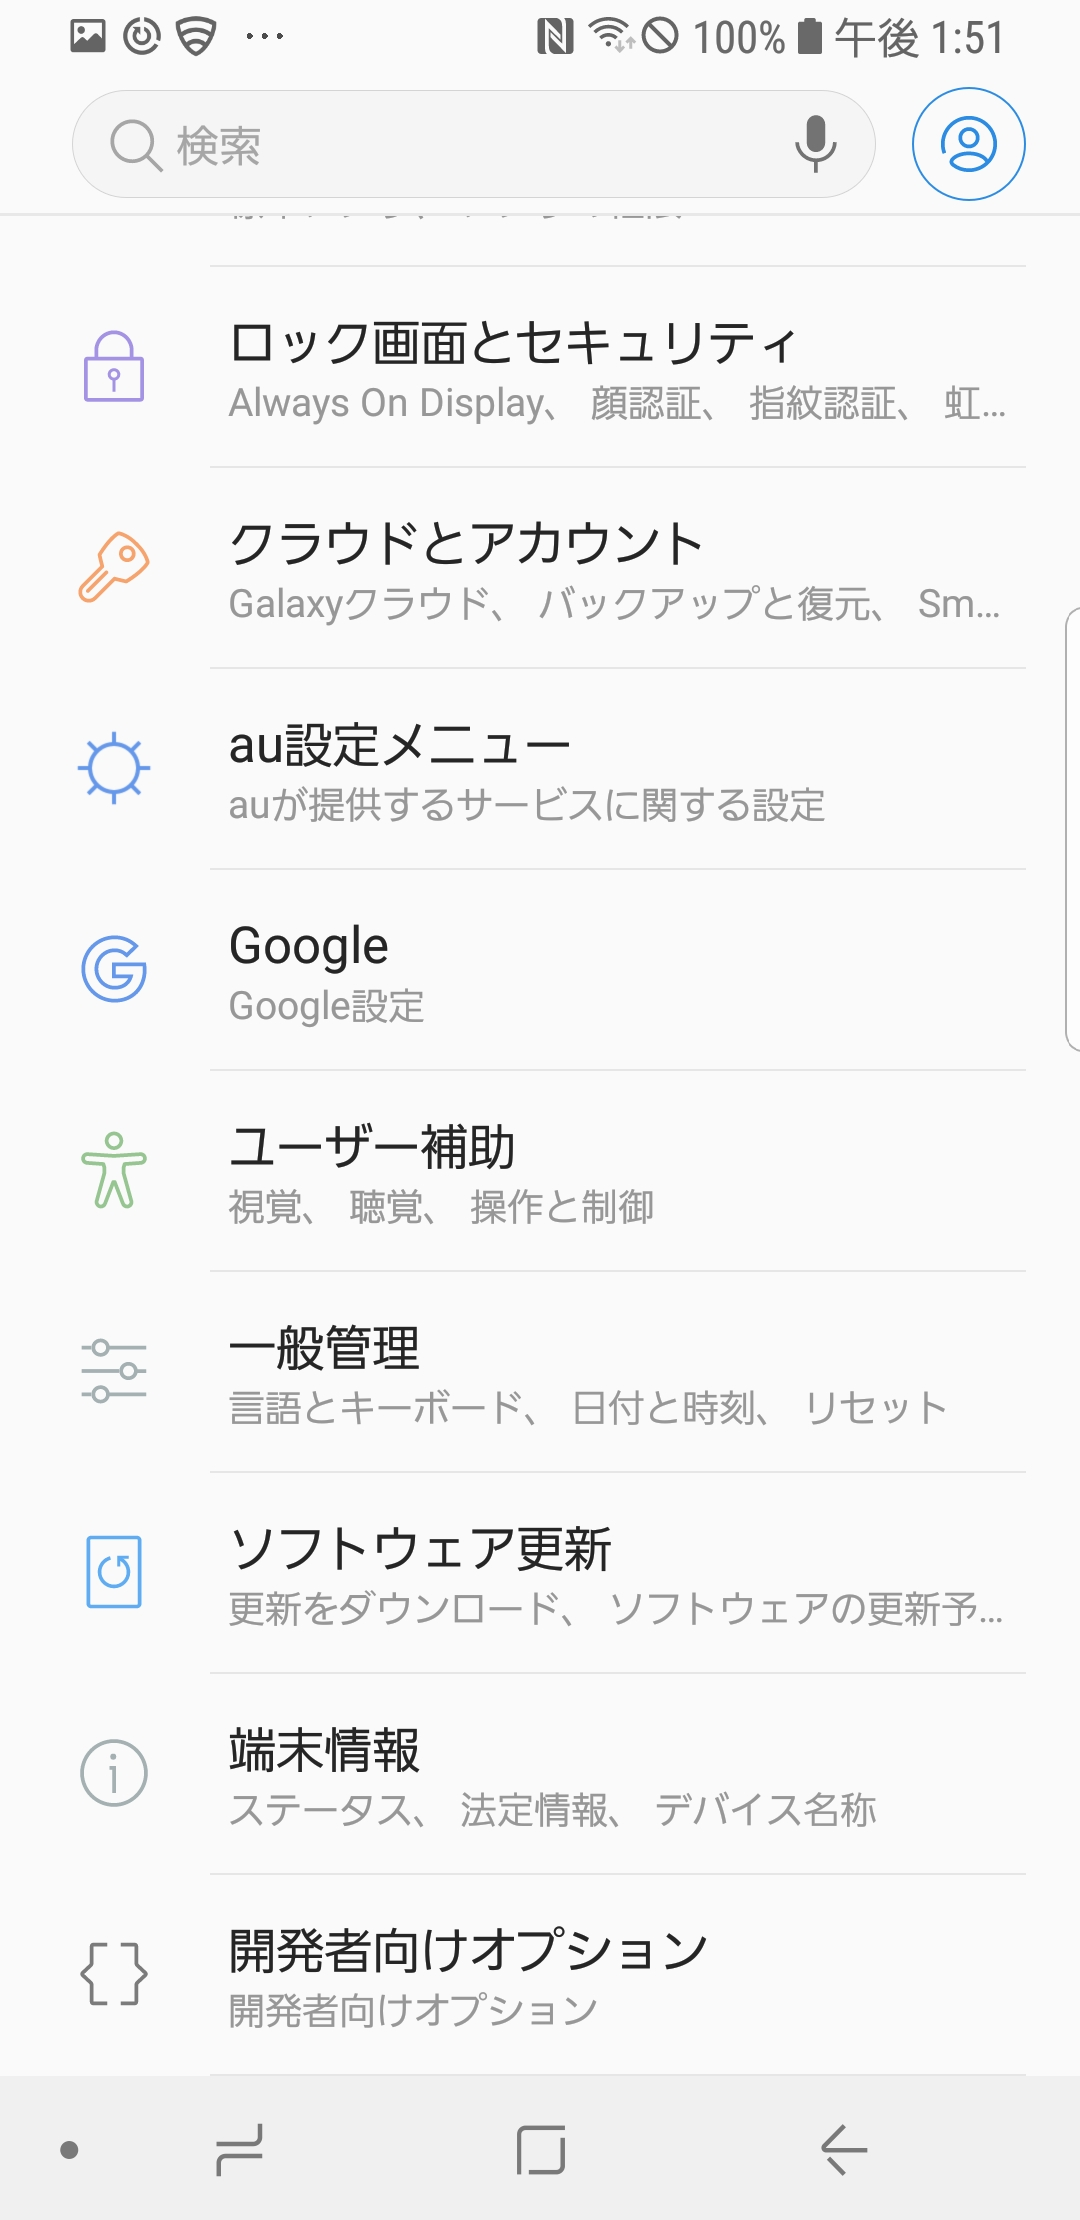
2 開発者向けオプションを開く
3 USB接続の設定
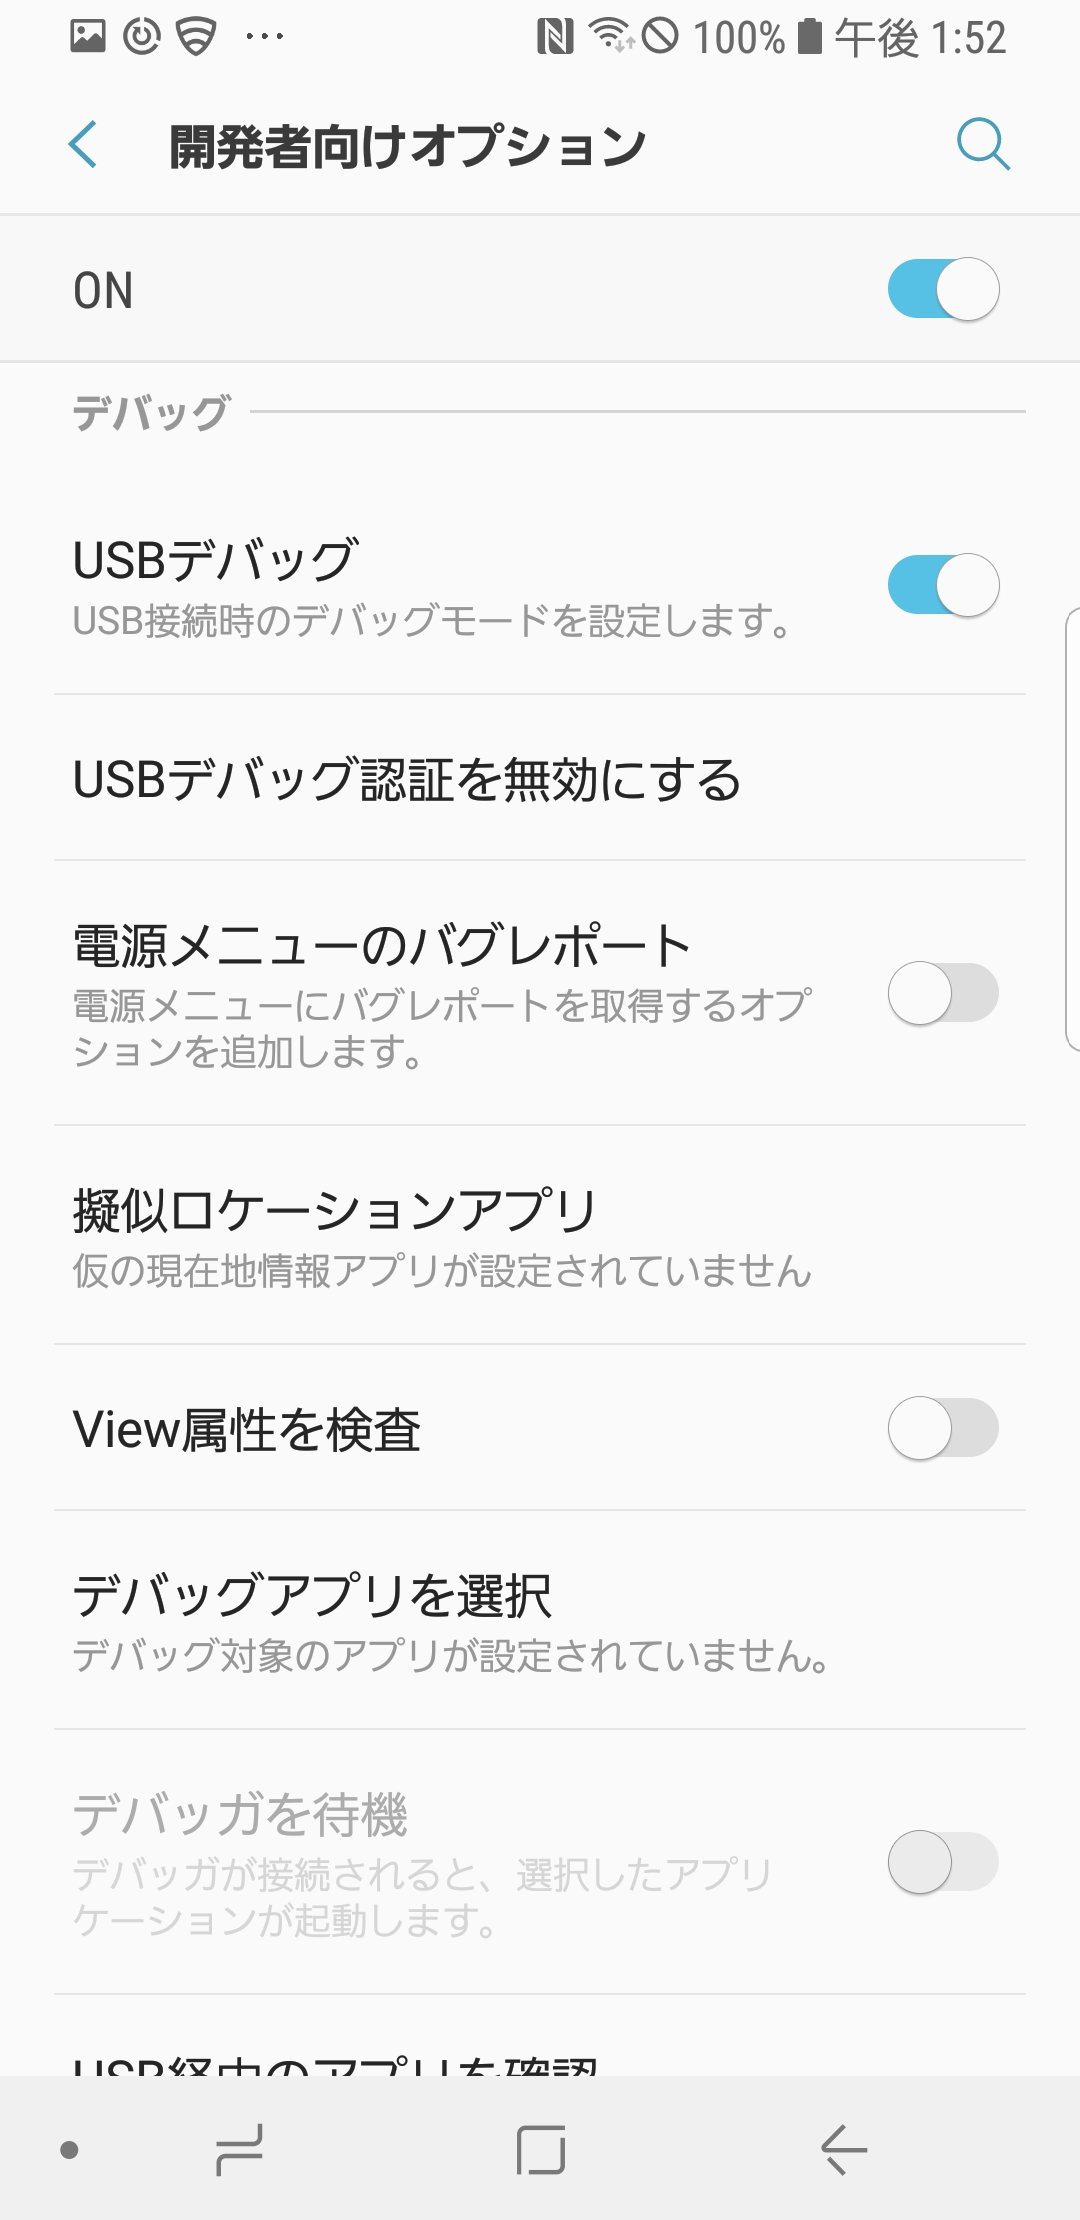 USBデバッグ、スリープモード非設定(※任意)をOnにする
4 USB接続
USBで接続後、android device側で接続承認の確認が出てくるので、OKにする。
5 adb server 起動
コマンドプロンプトを立ち上げて、以下コマンドを実行する
adb devices
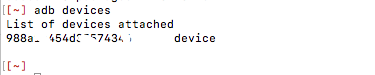
これにより、接続したandroid deviceが正しく接続されていることを確認する
6 chrome version 固定
chromedriverのversionに依存するため、chromeのアプリバージョンアップを停止したほうがよい。
GooglePlayで自動更新を停止しておいたほうが良い。
今回、chromeのversionは 75.0.3770 を使用する
5. Xcode
install
XcodeをApp Storeからインストールしてもよいが、appiumとxcodeの相性がある
そのため、version指定してインストールする場合、以下サイトから対象のversionをダウンロード、インストールする。
https://developer.apple.com/downloads/index.action#
※自分が構築時、Xcode 10.2.1
xcode-select
Xcodeのcommand line実施時のversionを指定する
xcode-select --install
sudo xcode-select --switch /Applications/Xcode.app
もし複数versionをインストールしている場合、該当versionのXcodeのpathを指定する
※以降の手順でインストール時にエラーが出る可能性があるため、xcodeを一度起動し、同意規約をすませておく
6. brew & npm
appiumをinstallするとき、npmコマンドを利用する。
defaultではmacに入っていないので、使えるようにする
install brew
以下コマンドを実施
/usr/bin/ruby -e "$(curl -fsSL https://raw.githubusercontent.com/Homebrew/install/master/install)"
動作確認
brew -v
install npm
brew install nodebrew

nodebrew install-binary latest
※ 初めての時、Failed to create xxxx のエラーが起きる場合がある。その時はmkdirしよう
別のバージョンをinstallしたい場合、以下手順でinstallする
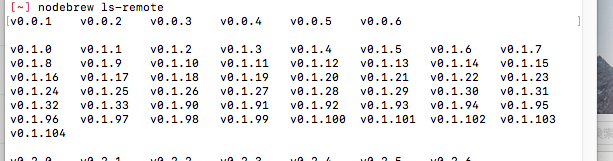
1 対応可能versionの確認
nodebrew ls-remote
実行例
2 version指定のinstall
nodebrew install v0.1.0
nodebrewのversion指定
nodebrew list
ここで出てきたversion(もし別のバージョンを使う場合、それをinstallする)を確認
nodebrew use v12.11.0
実際に設定されてるかの確認
ls -l .nodebrew/
実行例

currentのsymbolic linkが希望したversionになっていることを確認できる
pathの設定
pathを通す
ex. export PATH=$PATH:$HOME/.nodebrew/current/bin
パスの確認
npm -v
npm init
以降のlibrary installでjsonが存在しないエラーが出る時がある
それを回避するため、npmの初期化を行う。json定義の項目はdefaultのままでよい
npm init
7. library 等
install
以下パッケージをインストールする
| package | version (インストールしたときのもの。それでないといけないわけではないと思う) | Memo |
|---|---|---|
| libtool | 2.4.6 | - |
| xquartz | - | - |
| automake | 1.16.1 | - |
| pkg-config | 0.29.2 | - |
| usbmuxd | 1.0.10 | - |
| libimobiledevice | 1.2.0 | - |
| ios-webkit-debug-proxy | 1.8.5 | - |
| ideviceinstaller | 1.1.0 | - |
| carthage | 0.33.0 | - |
| ios-deploy | 1.9.4 | - |
| deviceconsole | 1.0.1 | - |
| xcpretty | 0.3.0 | - |
| authorize-ios | 1.2.1 | - |
| applesimutils | 0.7.0 | Option |
| opencv4nodejs | 5.1.0 | Option |
| idevicelocation | xxx | Option |
brew install libtool
brew link libtool
brew info libtool
brew cask install xquartz
brew install automake
brew info automake
brew install pkg-config
brew info pkg-config
※usbmuxd , libimobiledevice , ios-webkit-debug-proxy , ideviceinstaller , ios-deploy は以下の順でinstallしないと、WebDriverAgent の設定作業やios-webkit-debug-proxyでデバイス認識が上手くいかなかった。
[bin] ios_webkit_debug_proxy -c "$UID:27751" -d
ss.add_fd(3)
ss.recv fd=3 len=294
ss.recv fd=3 len=1656
ss.add_server_fd(4)
Abort trap: 6
その場合、いったん関連するlibraryをuninstallして再度入れ直す必要がある。
brew uninstall ideviceinstaller
brew uninstall ios-webkit-debug-proxy
brew uninstall libimobiledevice
brew uninstall usbmuxd

brew install --HEAD usbmuxd
brew install --HEAD libimobiledevice
brew install --HEAD ideviceinstaller
brew install --HEAD ios-webkit-debug-proxy
brew install usbmuxd --HEAD
brew info  usbmuxd
brew install libimobiledevice --HEAD
brew info  libimobiledevice
brew install ios-webkit-debug-proxy
ios_webkit_debug_proxy -V
brew install ideviceinstaller
brew info  ideviceinstaller
brew install carthage
brew info  carthage
npm install -g ios-deploy
ios-deploy -V
npm install -g deviceconsole
npm list --depth=0 -g
gem install xcpretty
npm install -g authorize-ios
npm list --depth=0 -g
brew tap wix/brew
brew install applesimutils
idevicelocation のinstall 参考
opencv4nodejs のinstall 参考
chromedriver
appium 1.15.0 , android chrome 75.0.3770 の環境で実施した
この場合、appium側でエラーになった
No Chromedriver found that can automate Chrome '75.0.3770'.
See https://github.com/appium/appium/blob/master/docs/en/writing-running-appium/web/chromedriver.md for more details.
You could also try to enable automated chromedrivers download server feature
どうやら、このセットではこのままでは動かないようだ。
そのため、chromedriverをdownloadしてくる
今回は75.0.3770.140のchromedriver_mac64.zipを使用する
8. appium
install
androidに関しては、最新版のappiumで問題はない。
ただ、iOSもテストする環境として考えている場合、versionを注意したほうが良い。
自分が当時試したとき、最新版では動作しなかったのでversion指定でinstallした。
npm install -g appium@1.15.0
npm install -g appium-doctor
※ version指定しない場合
npm install -g appium
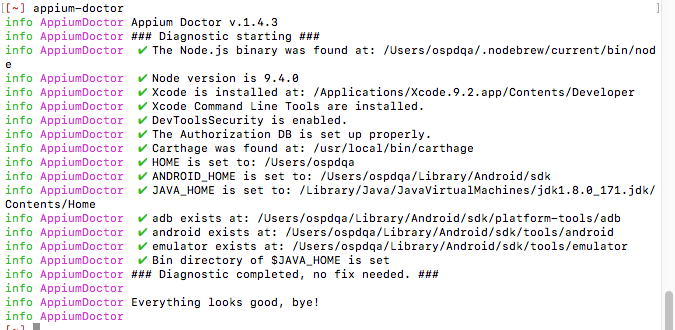
動作確認
appium-doctor
実行例
実行
appium --chromedriver-executable chromedriver
※chromedriverは先ほどダウンロードしてきたchromedriverのpathを指定する
※起動オプションはこちら
http://appium.io/docs/en/writing-running-appium/server-args/
よく使うオプションとしては以下の通り
| option | mean |
|---|---|
| -p xxxxx | port指定 |
実行例
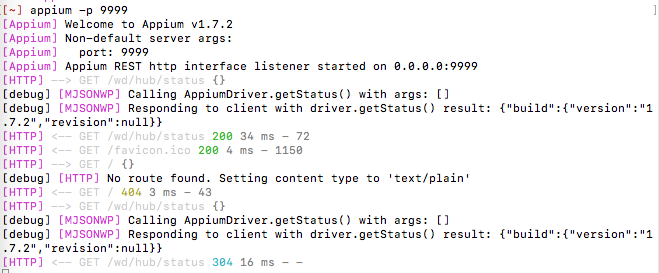
WEB経由でアクセスして、API状況を確認できる
ex) http://localhost:9999/wd/hub/status
9. WebDriverAgent 設定
appiumからiOS端末にsafariへアクセスするとき、WebDriverAgent を利用する。
これはappiumをinstallしたときにprojectはセットでインストールされる
パスは以下
~/.nodebrew/current/lib/node_modules/appium/node_modules/appium-webdriveragent/
※ 1.15.0 からpathが変更されてます。 appium-xcuitest-driver -> appium-webdriveragent
これがコンパイルされ、かつiOS端末に正しく稼働するように、大きく以下3点実施する必要がある。
-project source codeの依存解消
-signingの解消
-test run
project source codeの依存解消
source codeの依存解消のscriptを実施する
cd  ~/.nodebrew/current/lib/node_modules/appium/node_modules/appium-webdriveragent/

bash Scripts/bootstrap.sh -d
bash Scripts/bootstrap.sh
※appiumのinstallされたpathが異なる場合、そこのpathに変更して実施のこと。
signingの解消
Xcodeを起動して、そのprojectを開く。
WebDriverAgent.xcodeproj
buildをすると、失敗する。2か所のsigningがエラーになっているのでそれを解消させる
-WebDriverAgent
-WebDriverAgentRunner
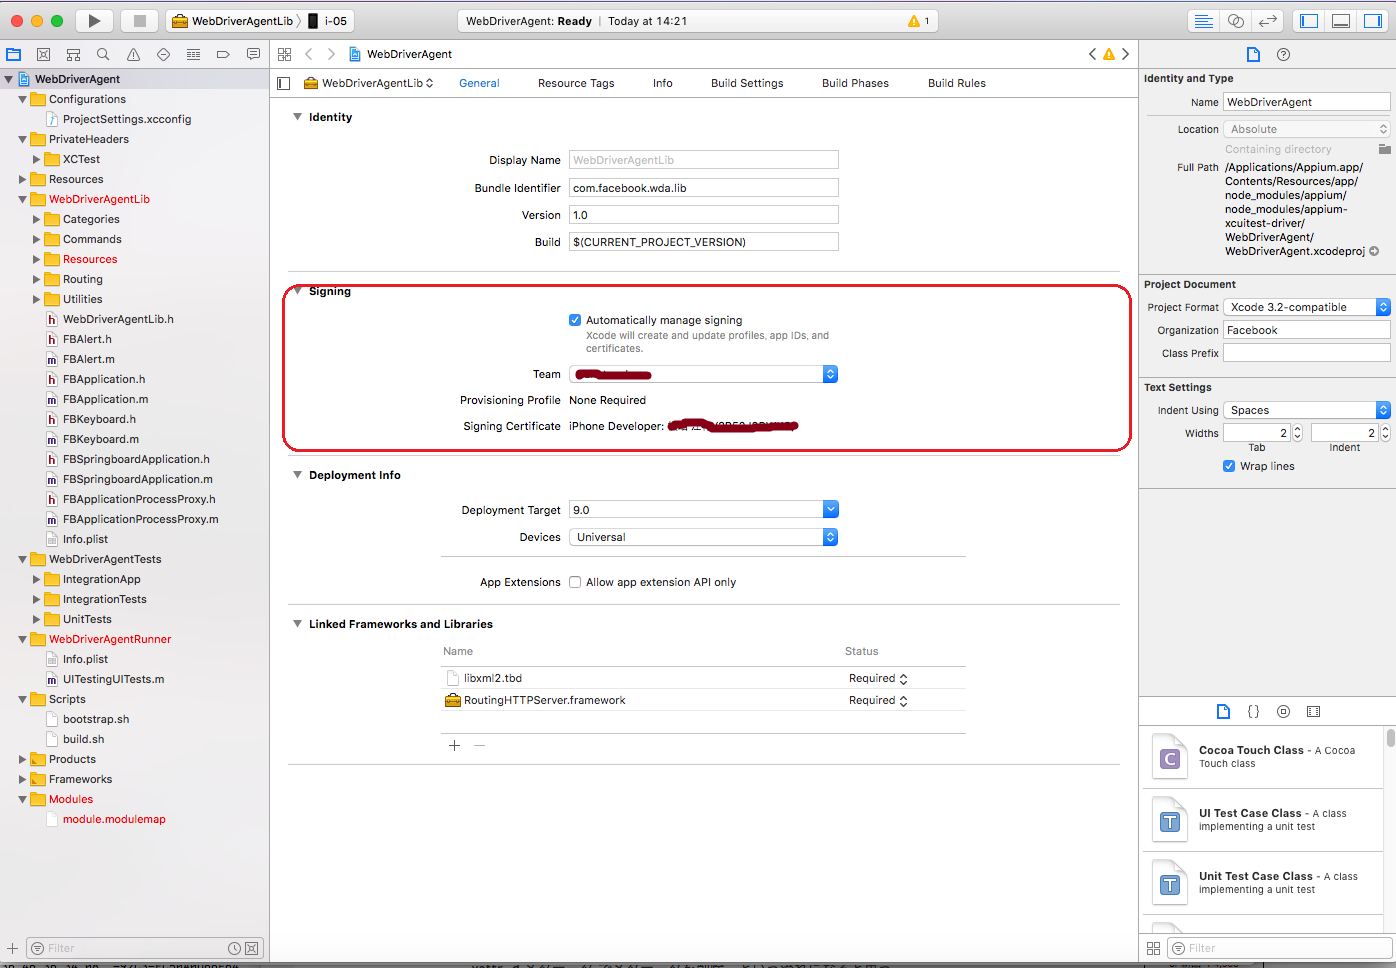 ここで、自身のSigning Certificationを設定する
その後、改めてxcodeでbuild
ここで、自身のSigning Certificationを設定する
その後、改めてxcodeでbuild
test run
iOS端末に実際に接続できるかを確認する
WebDriverAgentのあるpathに移動し、build & test runを下記のように行う
尚、$udidは接続するiphoneのUDID番号である。
これはiTunesで取得することができる
xcodebuild -project WebDriverAgent.xcodeproj -scheme WebDriverAgentRunner -destination 'id=$udid' test
うまくいけば、failが出ず、以下のような画面になる。
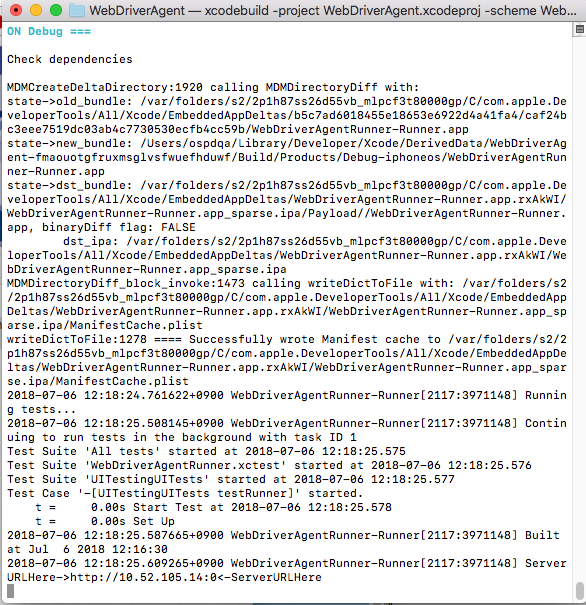
xcode と appiumのバージョンの相性が悪いとここでfailする
10. iOSデバイスの設定
safariにdebbugerがアクセスできるようにする

11. iOS debbuger 起動
iosのsafariの表示内容を取得するツール
これを常駐させる
ios_webkit_debug_proxy -c $udid:27753 -d
$udidは接続するiphoneのUDID番号
27753はios_webkit_debug_proxyの起動port。
任意の番号でよいはずだが、たまにappiumと接続がうまくいかず、27753がdefaultでよい(らしい)
▼▼▼▼▼▼
上記完了後、appium経由でiOSのsafariへテストができるようになる。