4
6

Delete article

Deleted articles cannot be recovered.

Draft of this article would be also deleted.

Are you sure you want to delete this article?

More than 3 years have passed since last update.

AWS IOT の簡単な使い方

Last updated at Posted at 2017-12-01

AWS IOT の簡単な使い方です。ブラウザーから、ラズベリーパイなどへ、メッセージを送ります。

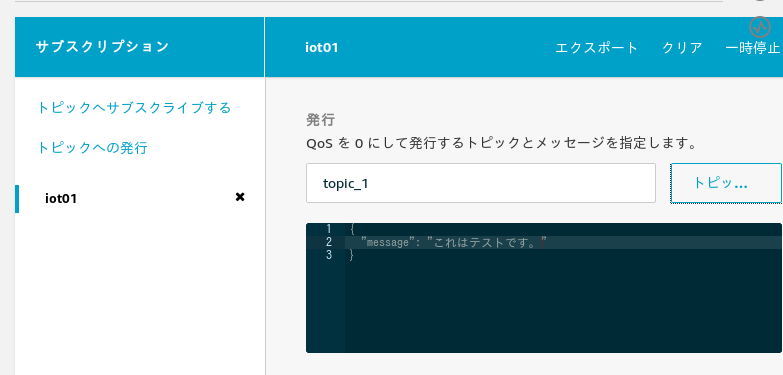
ブラウザーの画面 (送信側)
「これはテストです。」というメッセージを送信します。

mqtt_dec01.png

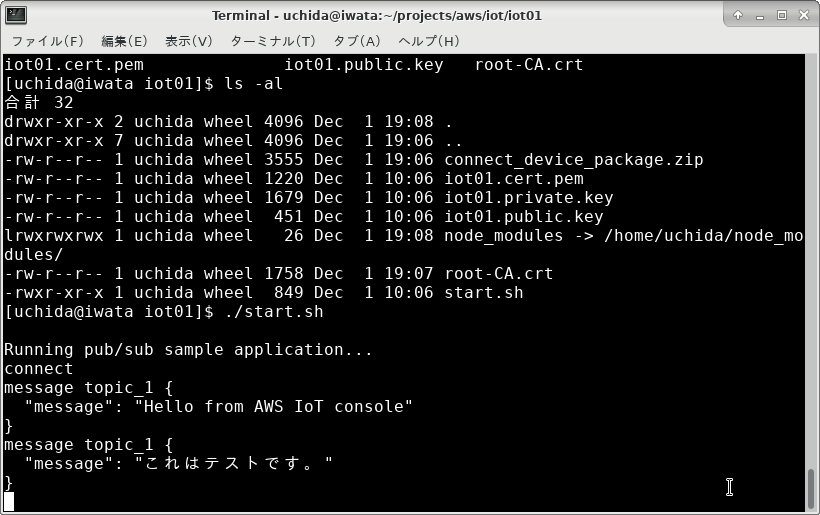
デバイス (ラズベリーパイなど)の画面 (受信側)
「これはテストです。」というメッセージを受信します。

mqtt_dec02.png

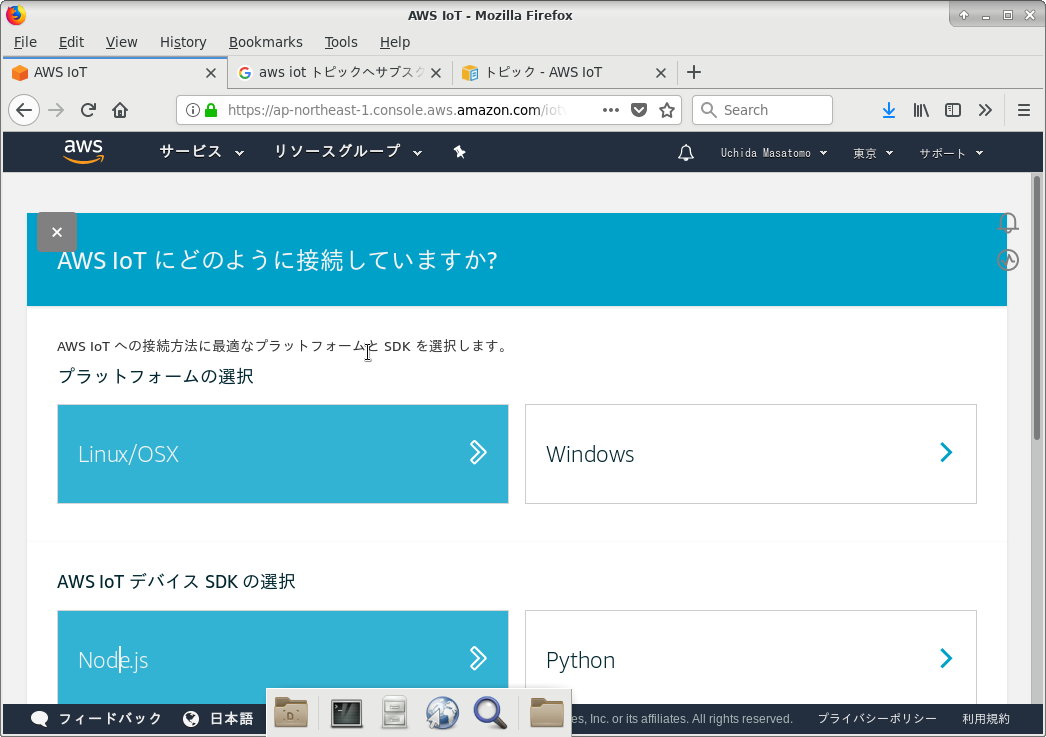
環境の作成は、AWS Console にログインして AWS IoT のサービスから、
「学習」--> AWS IoT に接続する --> デバイスの設定 とすすみます。

そして、Linux/OSX Node.js を選択します。

iot_dec0101.png

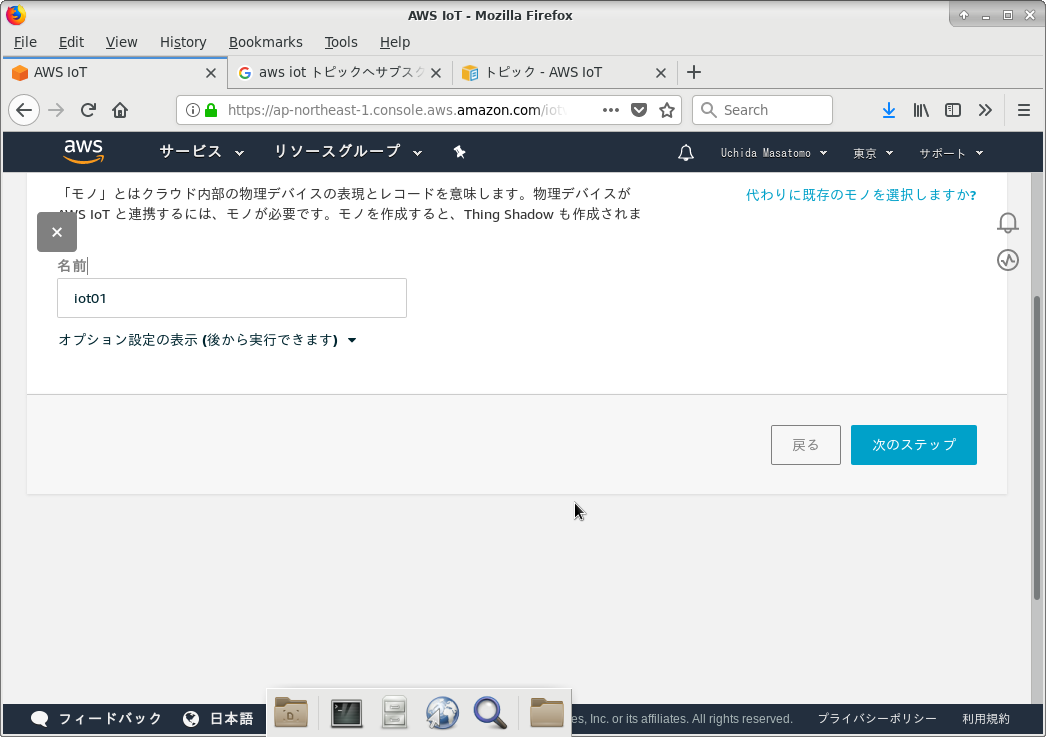
名前として、例えば iot01 と入れます。

iot_dec0102.png

そして、接続キットをダウンロードします。

ここからは、クライアント (ラズベリーパイなど)の設定です。

connect_device_package.zip を解凍します。

Node.js と、npm が必要です。
私が動作を確認したのは、
Arch Linux
node v9.2.0
npm 5.5.1

Raspbian
node v8.0.0
npm 5.6.0
です。

前提ソフトが入っていれば、
sudo ./start.sh で、クライアントソフトは動きます。

クライアントが動いたら、また AWS コンソールの AWS Iot サービスに入り、テストを選びます。
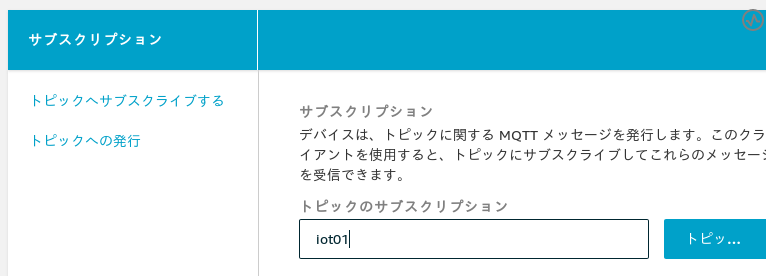
トピックのサブスクリプションで、iot01 と入れます。

mqtt_dec03.png

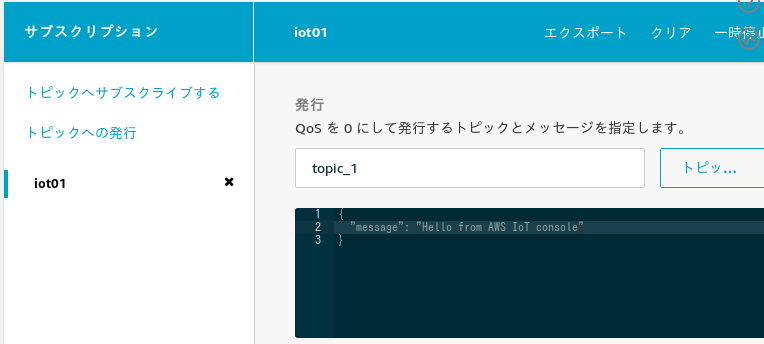
発行に、topic_1 と入れます。

mqtt_dec04.png

メッセージを変更して発行すると、それがクライアントに送られます。
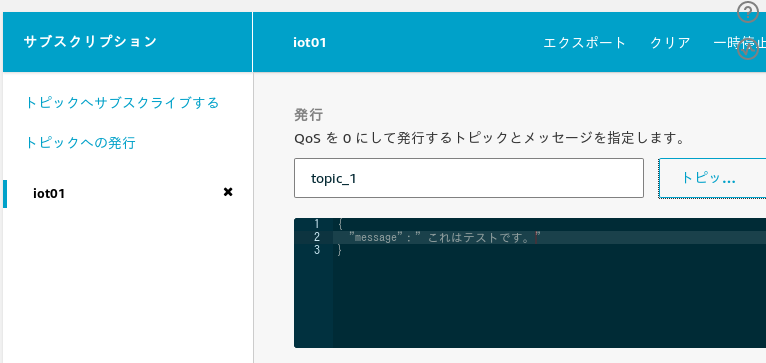
mqtt_dec05.png

4
6
0

Register as a new user and use Qiita more conveniently

  1. You get articles that match your needs
  2. You can efficiently read back useful information
  3. You can use dark theme
What you can do with signing up
4
6

Delete article

Deleted articles cannot be recovered.

Draft of this article would be also deleted.

Are you sure you want to delete this article?