初めに
前回は極座標を用いて線を回転させるプログラムを書きました。
極座標での回転では「点」や「線」単体の操作にしか向かず、図形全体の回転などには応用しづらいという問題がありました。
そこで今回は、より汎用的に扱える回転行列を使って回転処理を行います。
前回の記事
極座標を用いた簡単2D回転実験
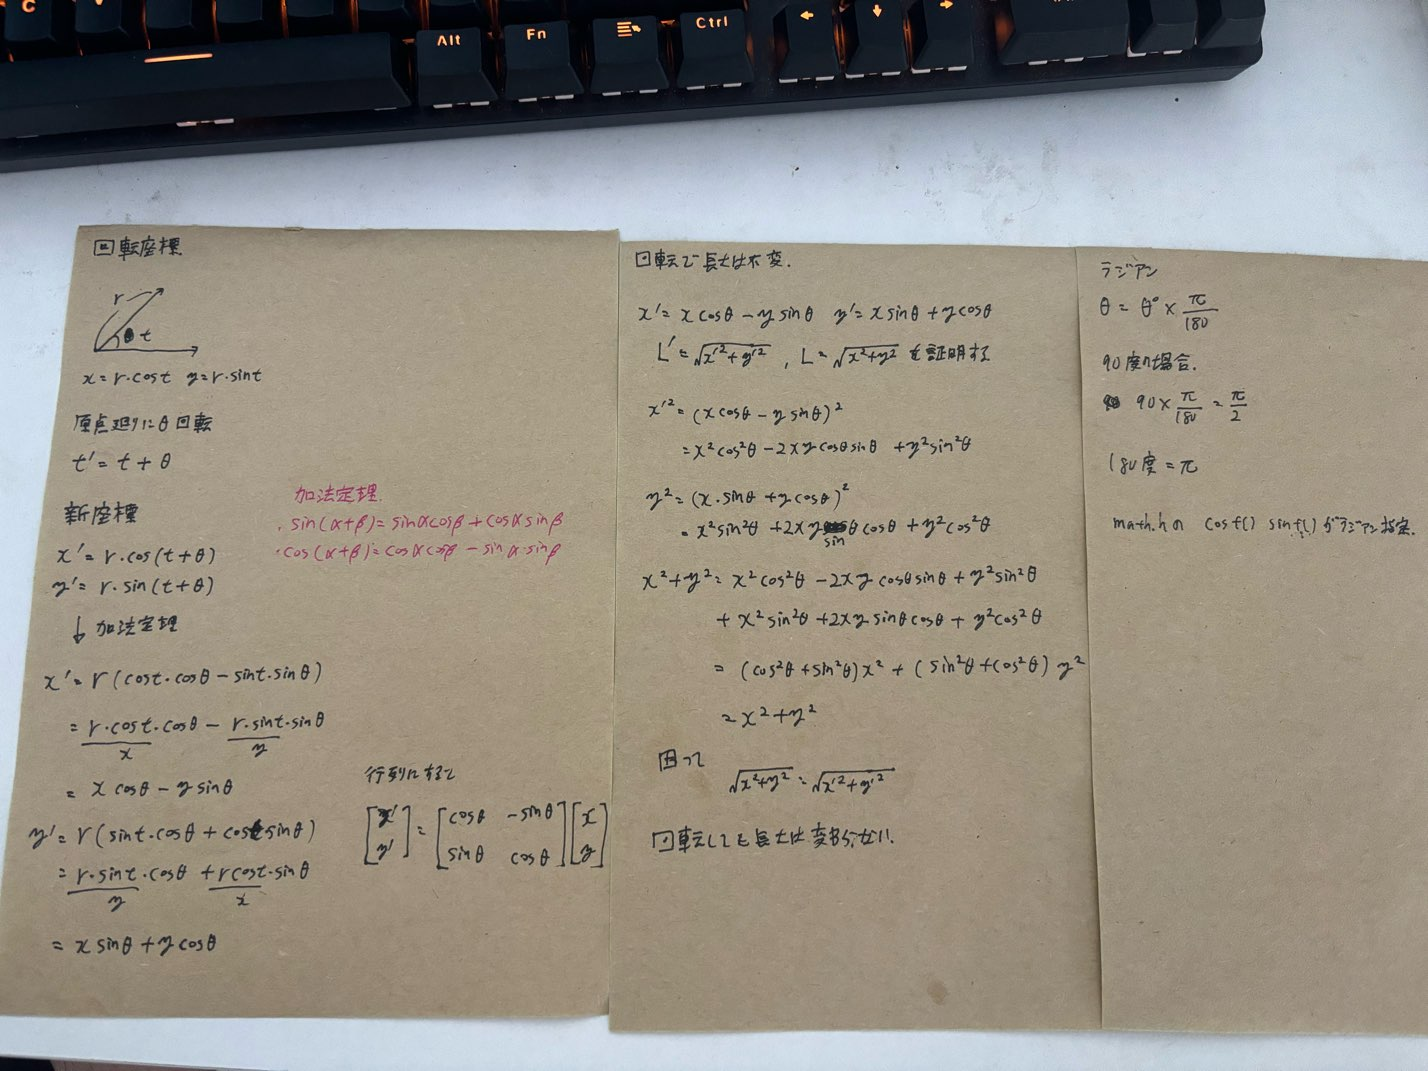
回転行列の導出
回転行列を先に導出しておくことで、コード中で何をしているのか理解しやすくなります。
以下は手書きで整理した導出過程です。
C言語で実装
test2d.c
// gcc test2d.c -o test2d.exe -lgdi32
#include <windows.h>
#include <math.h>

#define WIDTH 800
#define HEIGHT 600

float theta = 0.0f;     // 回転角度
float length = 100.0f;  // 棒の長さ

// 描画処理
LRESULT CALLBACK WndProc(HWND hwnd, UINT msg, WPARAM wParam, LPARAM lParam) {
    static HDC hdc;
    static PAINTSTRUCT ps;
    static RECT rect;

    switch (msg) {
    case WM_PAINT: {
        hdc = BeginPaint(hwnd, &ps);
        GetClientRect(hwnd, &rect);

        float cx = rect.right / 2.0f;   // 画面中心X
        float cy = rect.bottom / 2.0f;  // 画面中心Y

        // 棒の初期ベクトル(右向き)
        float x = length;
        float y = 0.0f;

        // --- 回転行列を適用 ---
        // [x']   [cosθ  -sinθ] [x]
        // [y'] = [sinθ   cosθ] [y]
        float x_rot = x * cos(theta) - y * sin(theta);
        float y_rot = x * sin(theta) + y * cos(theta);

        // --- 線を描画 ---
        MoveToEx(hdc, (int)cx, (int)cy, NULL);
        LineTo(hdc, (int)(cx + x_rot), (int)(cy + y_rot));

        EndPaint(hwnd, &ps);
        break;
    }
    case WM_DESTROY:
        PostQuitMessage(0); // 終了
        break;
    default:
        return DefWindowProc(hwnd, msg, wParam, lParam);
    }
    return 0;
}

// 入口
int WINAPI WinMain(HINSTANCE hInstance, HINSTANCE hPrevInstance,
    LPSTR lpCmdLine, int nCmdShow) {

    const char CLASS_NAME[] = "RotateMatrixClass";

    // --- ウィンドウクラス登録 ---
    WNDCLASS wc = { 0 };
    wc.lpfnWndProc = WndProc;
    wc.hInstance = hInstance;
    wc.lpszClassName = CLASS_NAME;

    RegisterClass(&wc);

    // --- ウィンドウ作成 ---
    HWND hwnd = CreateWindowExA(
        0, CLASS_NAME, "2D Rotation (Matrix Version)",
        WS_OVERLAPPEDWINDOW, CW_USEDEFAULT, CW_USEDEFAULT,
        WIDTH, HEIGHT, NULL, NULL, hInstance, NULL);

    ShowWindow(hwnd, nCmdShow);
    UpdateWindow(hwnd);

    MSG msg;
    while (1) {
        if (PeekMessage(&msg, NULL, 0, 0, PM_REMOVE)) {
            if (msg.message == WM_QUIT) break;
            TranslateMessage(&msg);
            DispatchMessage(&msg);
        } else {
            theta += 0.02f; // 回転速度
            if (theta > 2 * M_PI) theta -= 2 * M_PI;

            InvalidateRect(hwnd, NULL, TRUE); // 再描画要求
            Sleep(16); // 約60fps
        }
    }
    return 0;
}
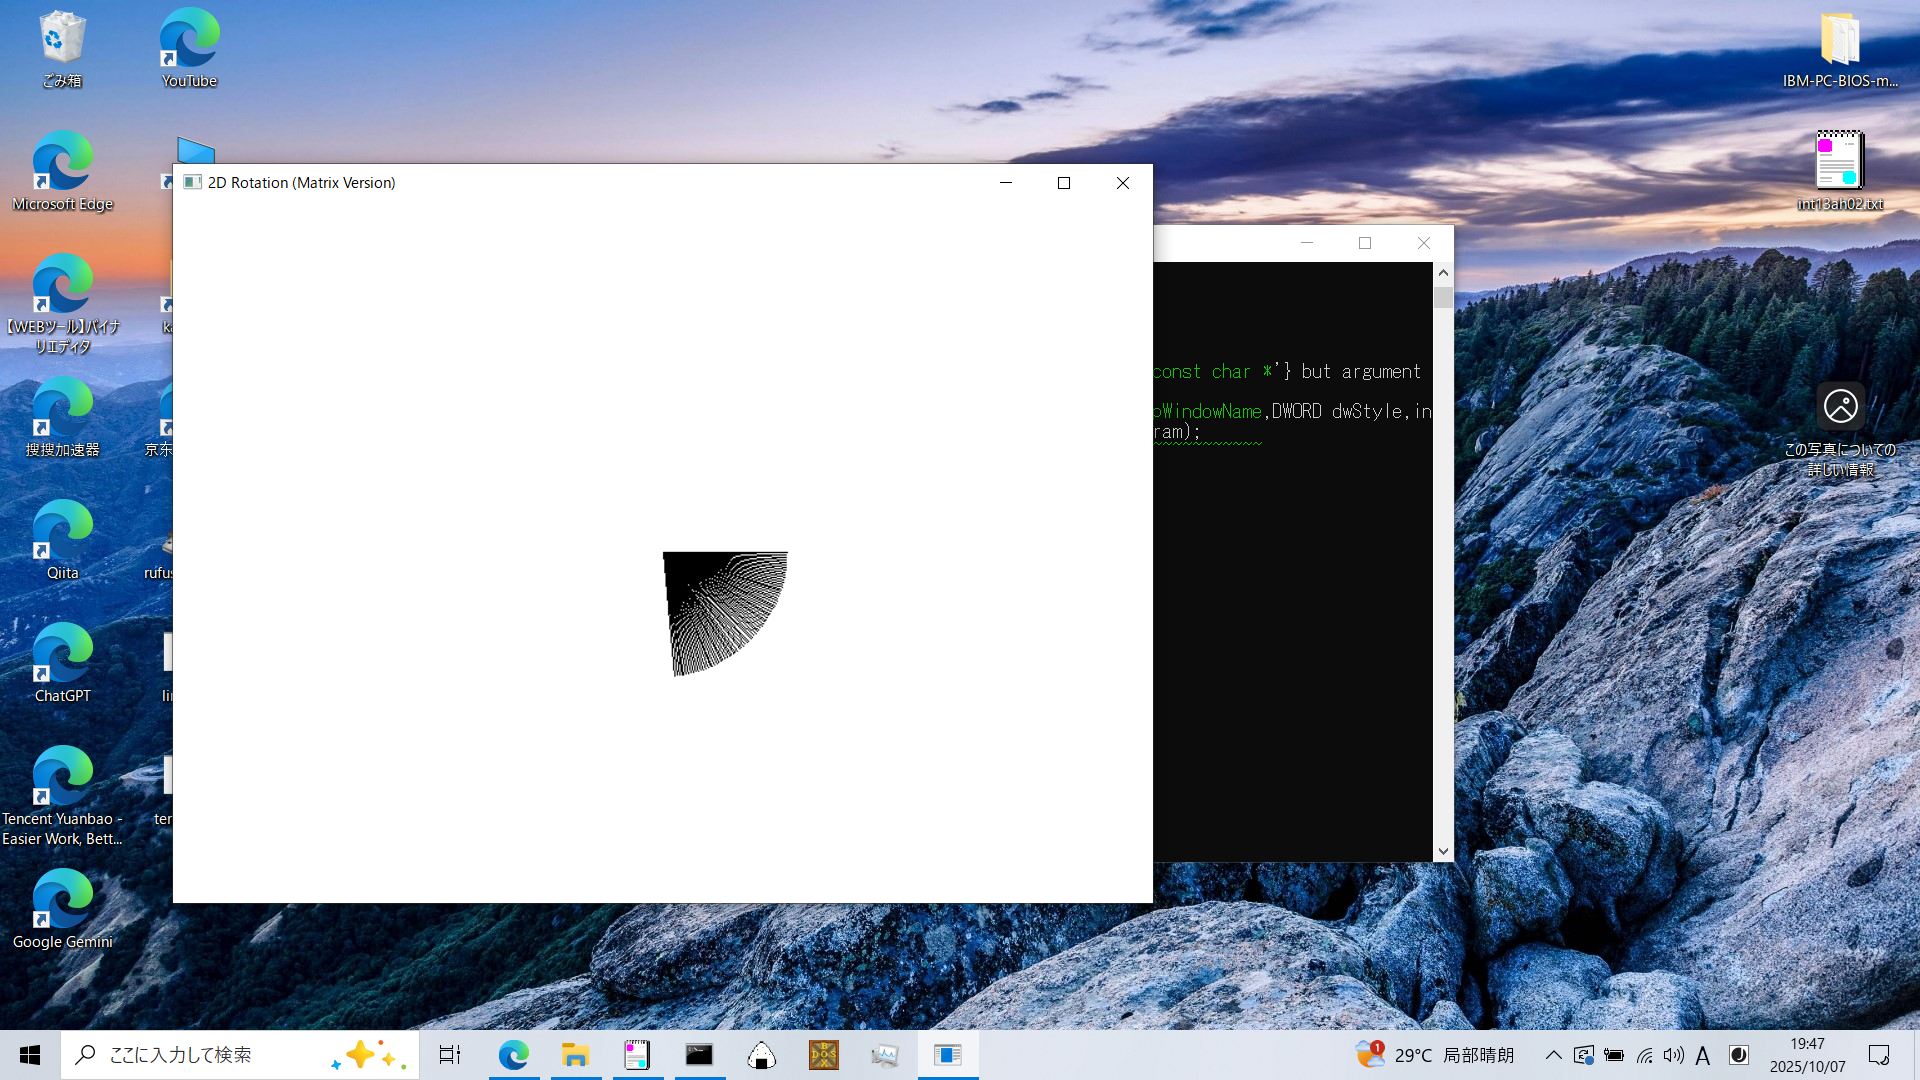
動作確認
中心を軸にして棒が時計回りに回転していることが確認できます。