はじめに
今更ながら、UIStackView(iOS9〜)を使い始めました。
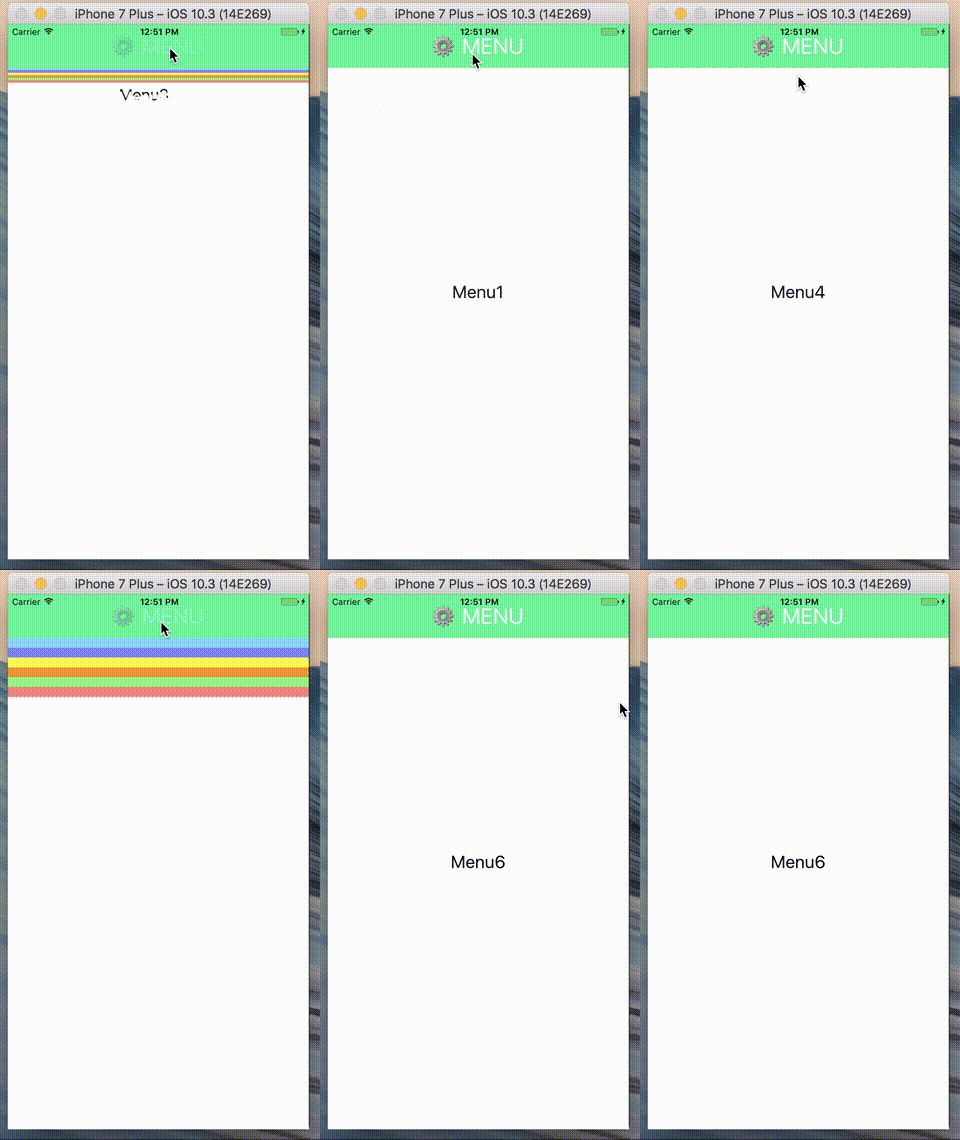
isHiddenのプロパティを使うと、良い感じにアニメーションできることがわかりましたので、共有します。
完成イメージ
実装方針
①StackViewのAxisをVerticalにし、メニューを縦に配置する
②StackViewのDestributonをFill Equallyにし、高さを均一にする
③ボタンの選択に合わせて、メニューのViewのisHiddenをtrue or falseで切り替える
サンプル
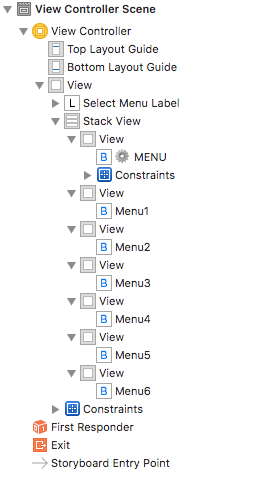
デザインのイメージ
StackView内にUIViewを縦に配置します。
また、そのUIView内にUIButtonを配置します。
ソースコード
ポイントは、isHiddenをtrue or falseに変える点です。
ViewController.swift
import UIKit

final class ViewController: UIViewController {

    @IBOutlet weak var selectMenuLabel: UILabel!
    @IBOutlet var menuView: [UIView]! {

        didSet {
            menuView.forEach {
                $0.isHidden = true
            }
        }
    }

    override func viewDidLoad() {
        super.viewDidLoad()
    }

    /// メニューボタンが選択されたとき
    @IBAction func didTapMenu(_ sender: UIButton) {
        toggleMenu()
        selectMenuLabel.text = ""
    }

    /// 各メニューが選択されたとき
    @IBAction func didSelectedMenu(_ sender: UIButton) {
        toggleMenu()
        selectMenuLabel.text = sender.titleLabel?.text
    }

    func toggleMenu() {
        UIView.animate(withDuration: 0.3) {
            self.menuView.forEach {
                $0.isHidden = !$0.isHidden
            }
        }
    }
}
まとめ
UIStackViewは、レイアウト以外にも色々メリットがありそうですね。
入力画面のバリデーションチェックで、
エラーだった場合に各フォームの付近にエラーメッセージを使う等で
活用しているという事例も聞きました。
完成版のソースコードは、こちらです。

