簡単に地形生成してUNITYに持ってくる!
こういうソフトがありまして。
https://3dnchu.com/archives/terresculptor-2-free/
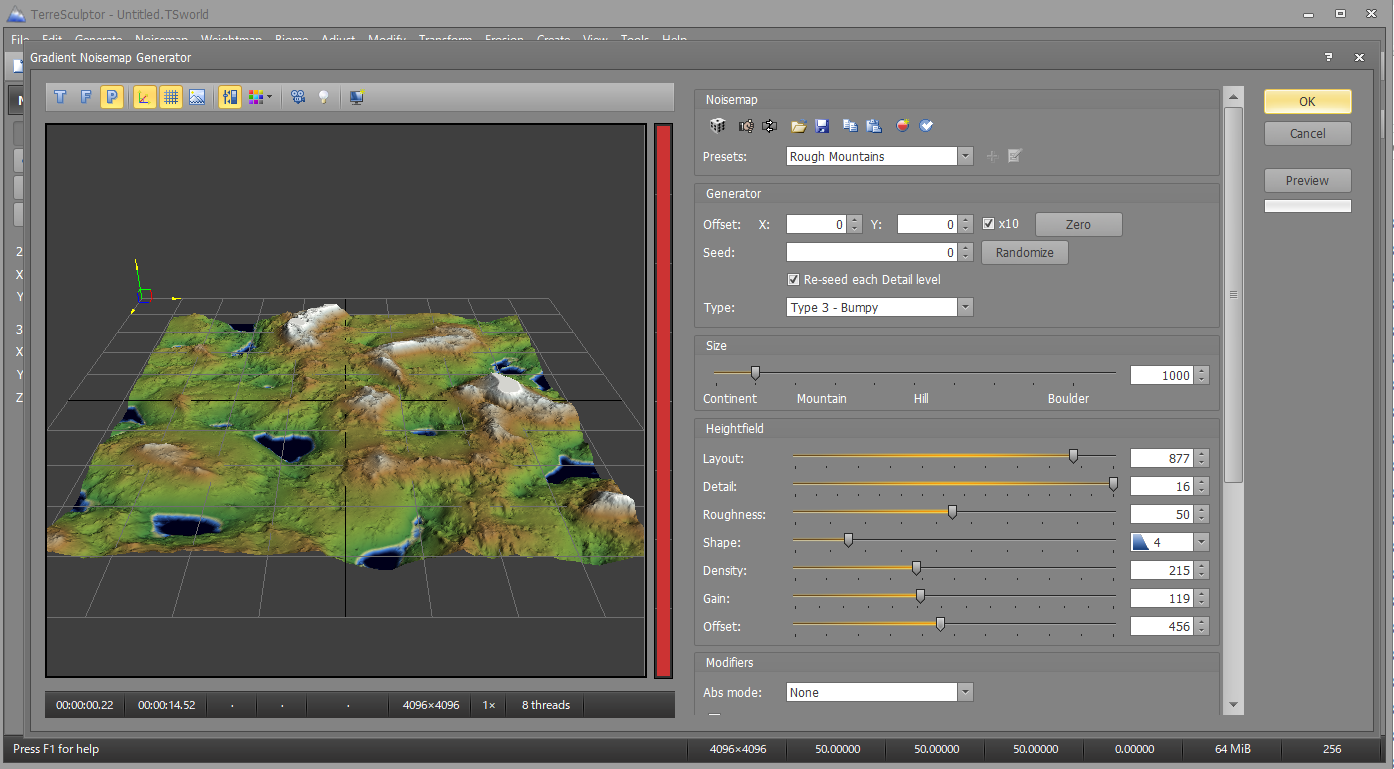
リアルな地形を生成するソフトです。
TerreSculptor2というフリーのソフトなんですが。
UE4に取り込むフローは書いてあるけど、UNITYに取り込むフローは書いてない!
ということで作りました。
下記のファイルを作って、Editorフォルダ内に入れてください。
//#define TSMAP_SUPPORT_COMPRESS

using System;
using System.Collections;
using System.Collections.Generic;
using System.Text;
using System.IO;
using UnityEngine;
using UnityEditor;
# if TSMAP_SUPPORT_COMPRESS
using Ionic.Zlib;
# endif

public class TSMapImporter
{
    [MenuItem("Assets/ImportTSMap")]
    public static void ImportTSMap()
    {
        string folderPath = System.Environment.GetFolderPath(System.Environment.SpecialFolder.MyDocuments);
        var openPath = EditorUtility.OpenFilePanel("open TerreSculptor map", folderPath, "TSmap");
        var td = importTSMap(openPath);

        // create object
        if (td != null)
        {
            //            Terrain.CreateTerrainGameObject(td);

            int instanceID = Selection.activeInstanceID;
            string path = AssetDatabase.GetAssetPath(instanceID);
            string fullPath = System.IO.Path.GetFullPath(path);

            var exportFileName = EditorUtility.SaveFilePanelInProject("save Terrain data", "TerrainFromTS", "asset", "Terrain data", fullPath);
            AssetDatabase.CreateAsset(td, exportFileName);
            AssetDatabase.SaveAssets();
        }
    }

    static TerrainData importTSMap(string openPath)
    {
        string tsName = Path.GetFileNameWithoutExtension(openPath);
        using (var fs = new FileStream(openPath, FileMode.Open))
        {
            using (var br = new BinaryReader(fs))
            {
                var headFileType = br.ReadBytes(16);    // TerreSculptor
                var headDataType = br.ReadBytes(16);    // TSmap
                var version = br.ReadInt32();   // 0x0100
                var width = br.ReadInt32();   // width
                var length = br.ReadInt32();   // length
                var isCompress = br.ReadInt32();// isCompress 1:true 0:false
                br.ReadBytes(16);   // ?

                // check header string
                string strFileType = Encoding.UTF8.GetString(headFileType).TrimEnd('\0');
                string strDataType = Encoding.UTF8.GetString(headDataType).TrimEnd('\0');
                if ((strFileType == "TerreSculptor")
                    && (strDataType == "TSmap"))
                {
                    float[,] heightMap = new float[width + 1, length + 1];
                    float maxHeight = 0f;
                    if (isCompress != 0)
                    {
# if TSMAP_SUPPORT_COMPRESS
                        // 圧縮バージョン
                        int numUnknown = br.ReadInt32();
                        int numUnknown2 = br.ReadInt32();
                        int numUnknown3 = br.ReadInt16();

                        // ZIP展開
                        int zipLen = (int)(fs.Length - fs.Position);
                        byte[] buf = new byte[width * length * 4];
                        using (DeflateStream s = new DeflateStream(fs, CompressionMode.Decompress))
                        {
                            s.Read(buf, 0, buf.Length);
                        }

                        // ハイトの設定
                        for (int y = 0; y < length; ++y)
                        {
                            for (int x = 0; x < width; ++x)
                            {
                                int idx = (x + (y * width))*4;
                                heightMap[x, y] = BitConverter.ToSingle(buf,idx);
                                maxHeight = Mathf.Max(maxHeight, heightMap[x, y]);
                            }
                        }
# else
                        Debug.Log("NOT SUPPORT COMPRESS TSMAP");
                        return null;
# endif
                    }
                    else
                    {
                        // ハイトの設定
                        for (int y = 0; y < length; ++y)
                        {
                            for (int x = 0; x < width; ++x)
                            {
                                heightMap[x, y] = br.ReadSingle();
                                maxHeight = Mathf.Max(maxHeight, heightMap[x, y]);
                            }
                        }
                    }
                    // 正規化する
                    for (int y = 0; y < length; ++y)
                    {
                        for (int x = 0; x < width; ++x)
                        {
                            heightMap[x, y] /= maxHeight;
                        }
                    }
                    // add 1 pixel
                    // UNITYは、2のべき乗の数+1でハイトマップが作られるので合わせる
                    for (int x = 0; x < width; ++x)
                    {
                        heightMap[x, length] = heightMap[x, length - 1];
                    }
                    for (int x = 0; x < length + 1; ++x)
                    {
                        heightMap[width, x] = heightMap[width - 1, x];
                    }

                    // modifyResolution
                    int heightRes = Mathf.ClosestPowerOfTwo(Mathf.Max(width, length)) + 1;
                    if ((heightMap.GetLength(0) != heightRes)
                        || (heightMap.GetLength(1) != heightRes))
                    {
                        heightMap = modifyResolution(heightMap, heightRes, heightRes);
                    }

                    // スケール(適当)
                    float scale = 10f / (heightRes-1);

                    // create TerrainData
                    TerrainData td = new TerrainData();
                    td.size = new Vector3(width * scale, maxHeight, length * scale);
                    td.heightmapResolution = heightRes;
                    td.SetDetailResolution(width, 16);
                    td.SetHeights(0, 0, heightMap);

                    return td;
                }
            }
        }
        return null;
    }

    // 解像度を変更
    static float[,] modifyResolution(float[,] src,int targetWidth,int targetLength)
    {
        int srcW = src.GetLength(0);
        int srcL = src.GetLength(1);
        float[,] dst = new float[targetWidth, targetLength];
        for(int y=0;y<targetLength;++y)
        {
            for (int x = 0; x < targetWidth; ++x)
            {
                float fx = (x * srcW) / (float)targetWidth;
                float fy = (y * srcL) / (float)targetLength;
                int x0 = Mathf.Min(Mathf.CeilToInt(fx), srcW - 1);
                int y0 = Mathf.Min(Mathf.CeilToInt(fy), srcL - 1);
                int x1 = Mathf.Min(x0 + 1, srcW-1);
                int y1 = Mathf.Min(y0 + 1, srcL-1);
                float ax = fx - x0;
                float ay = fy - y0;
                // four sample
                var s0 = Mathf.Lerp(src[x0, y0],src[x1, y0], fx);
                var s1 = Mathf.Lerp(src[x0, y1], src[x1, y1], fx);
                dst[x, y] = Mathf.Lerp(s0, s1, fy);
            }
        }
        return dst;
    }
}
そうすると、TerreSculptor2から書き出せるTSmapファイルを読み込んでUNITYにインポートできるようになります。
使い方
TerreSculptorからFile->Save Terrain Asを選び、TSmapファイルを書き出します。
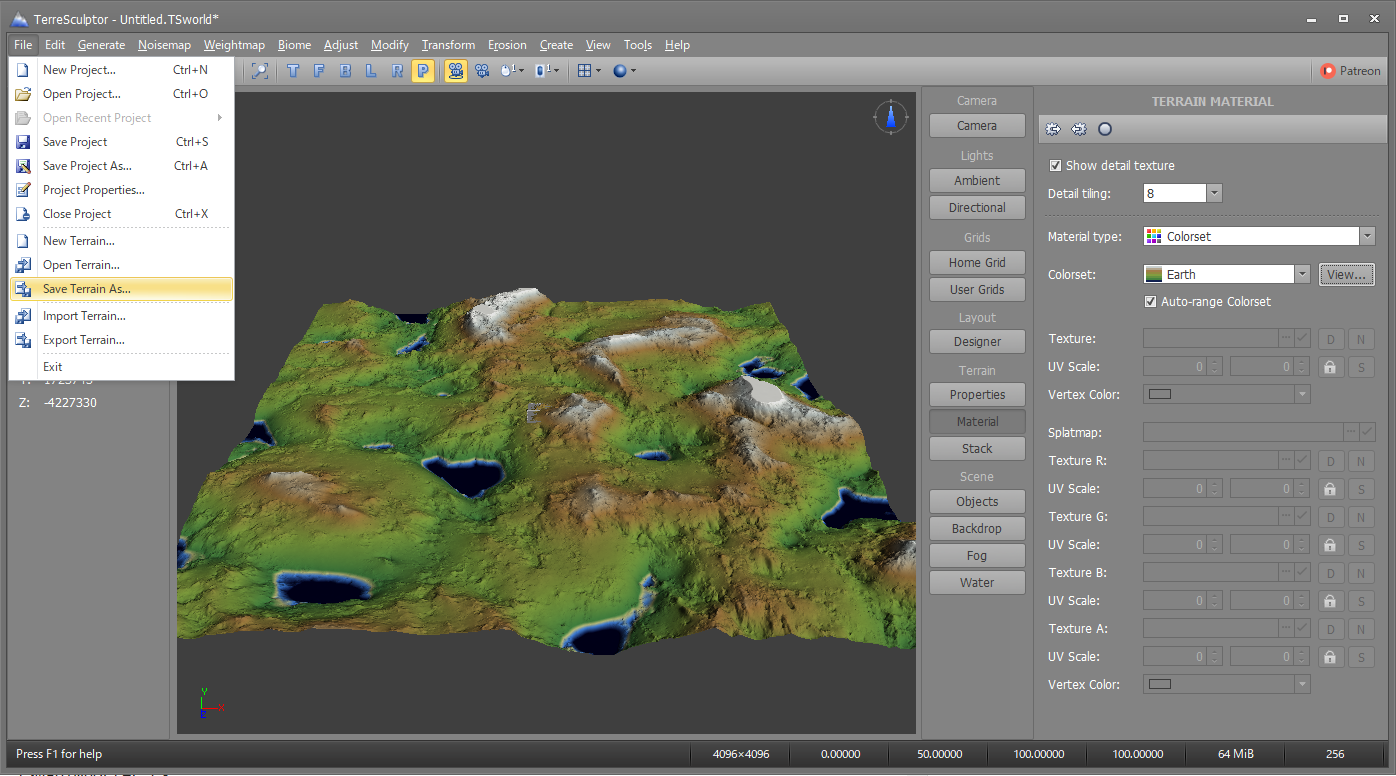
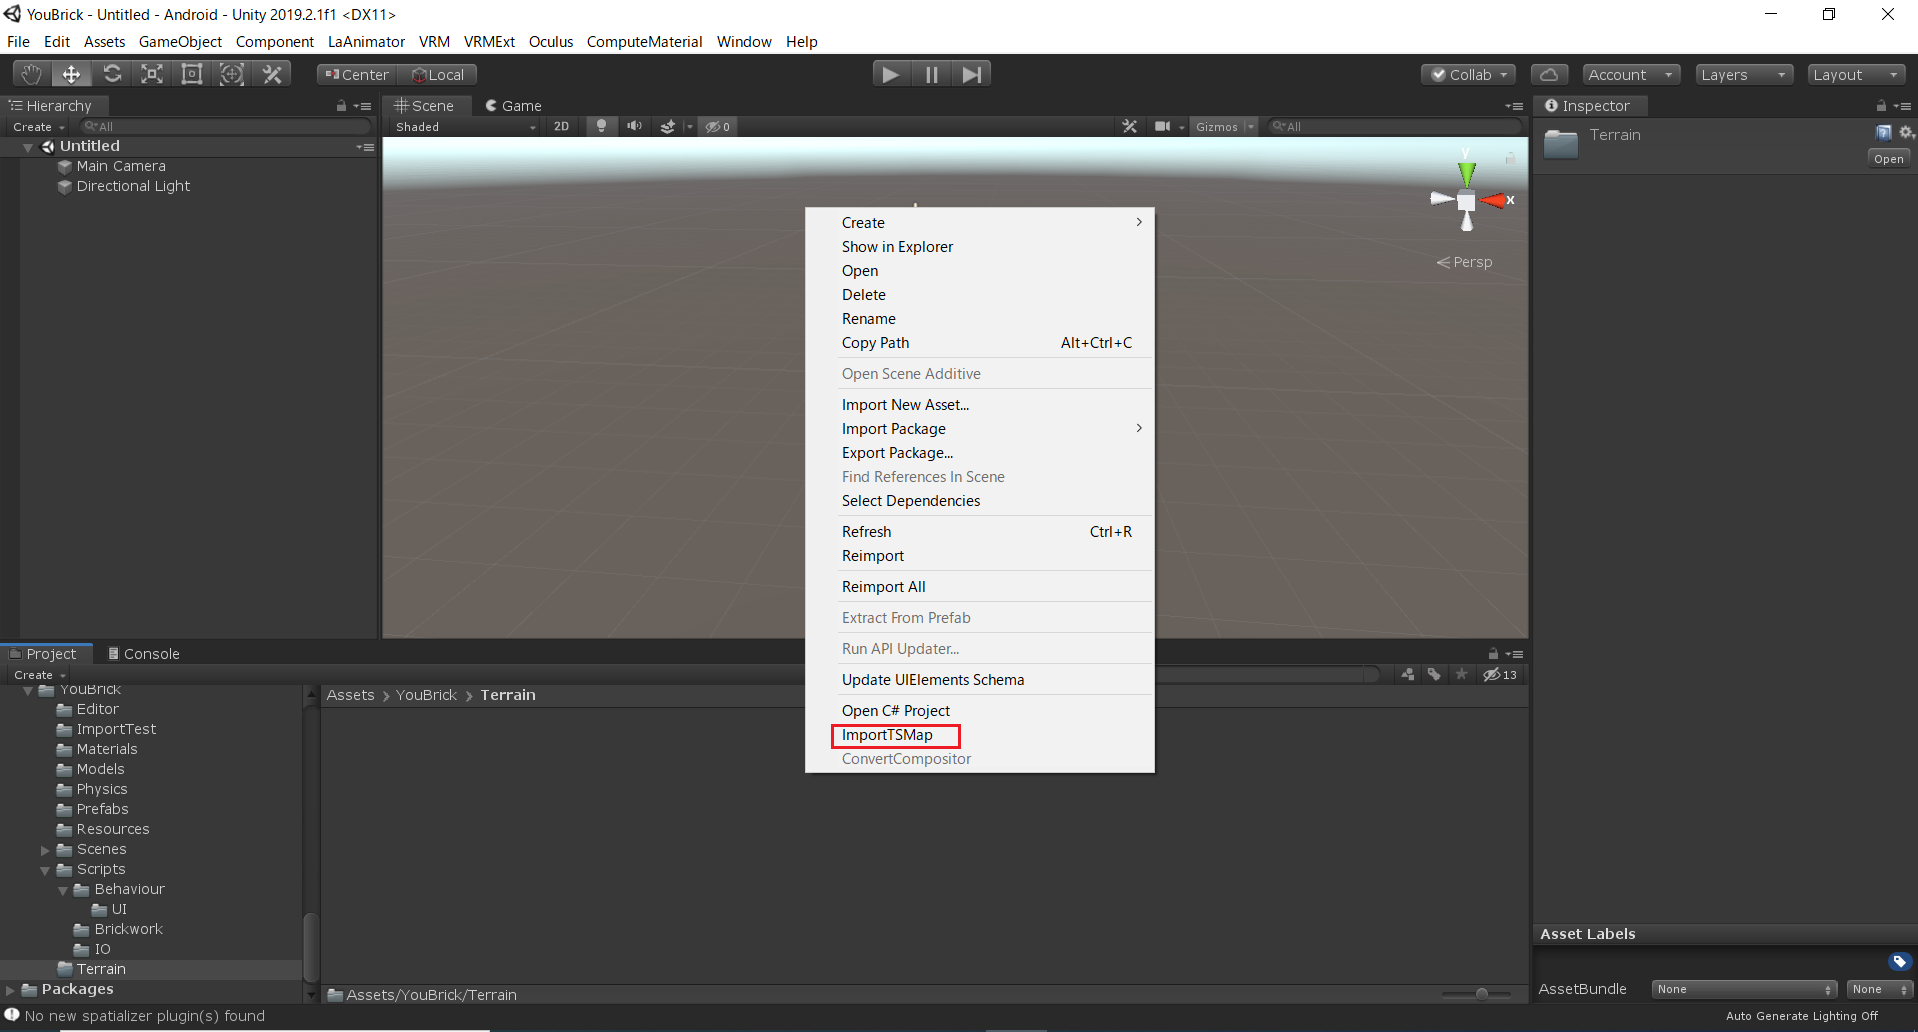
UNITYを立ち上げ、上記のスクリプトをEditorフォルダに入れると、アセットが置いてある、Projectウィンドウで右クリックすると、ImportTSMapというメニューが追加されています。
それを実行して、TSmapファイルを選び、続いて保存先を選ぶとTerrainデータが作られます。
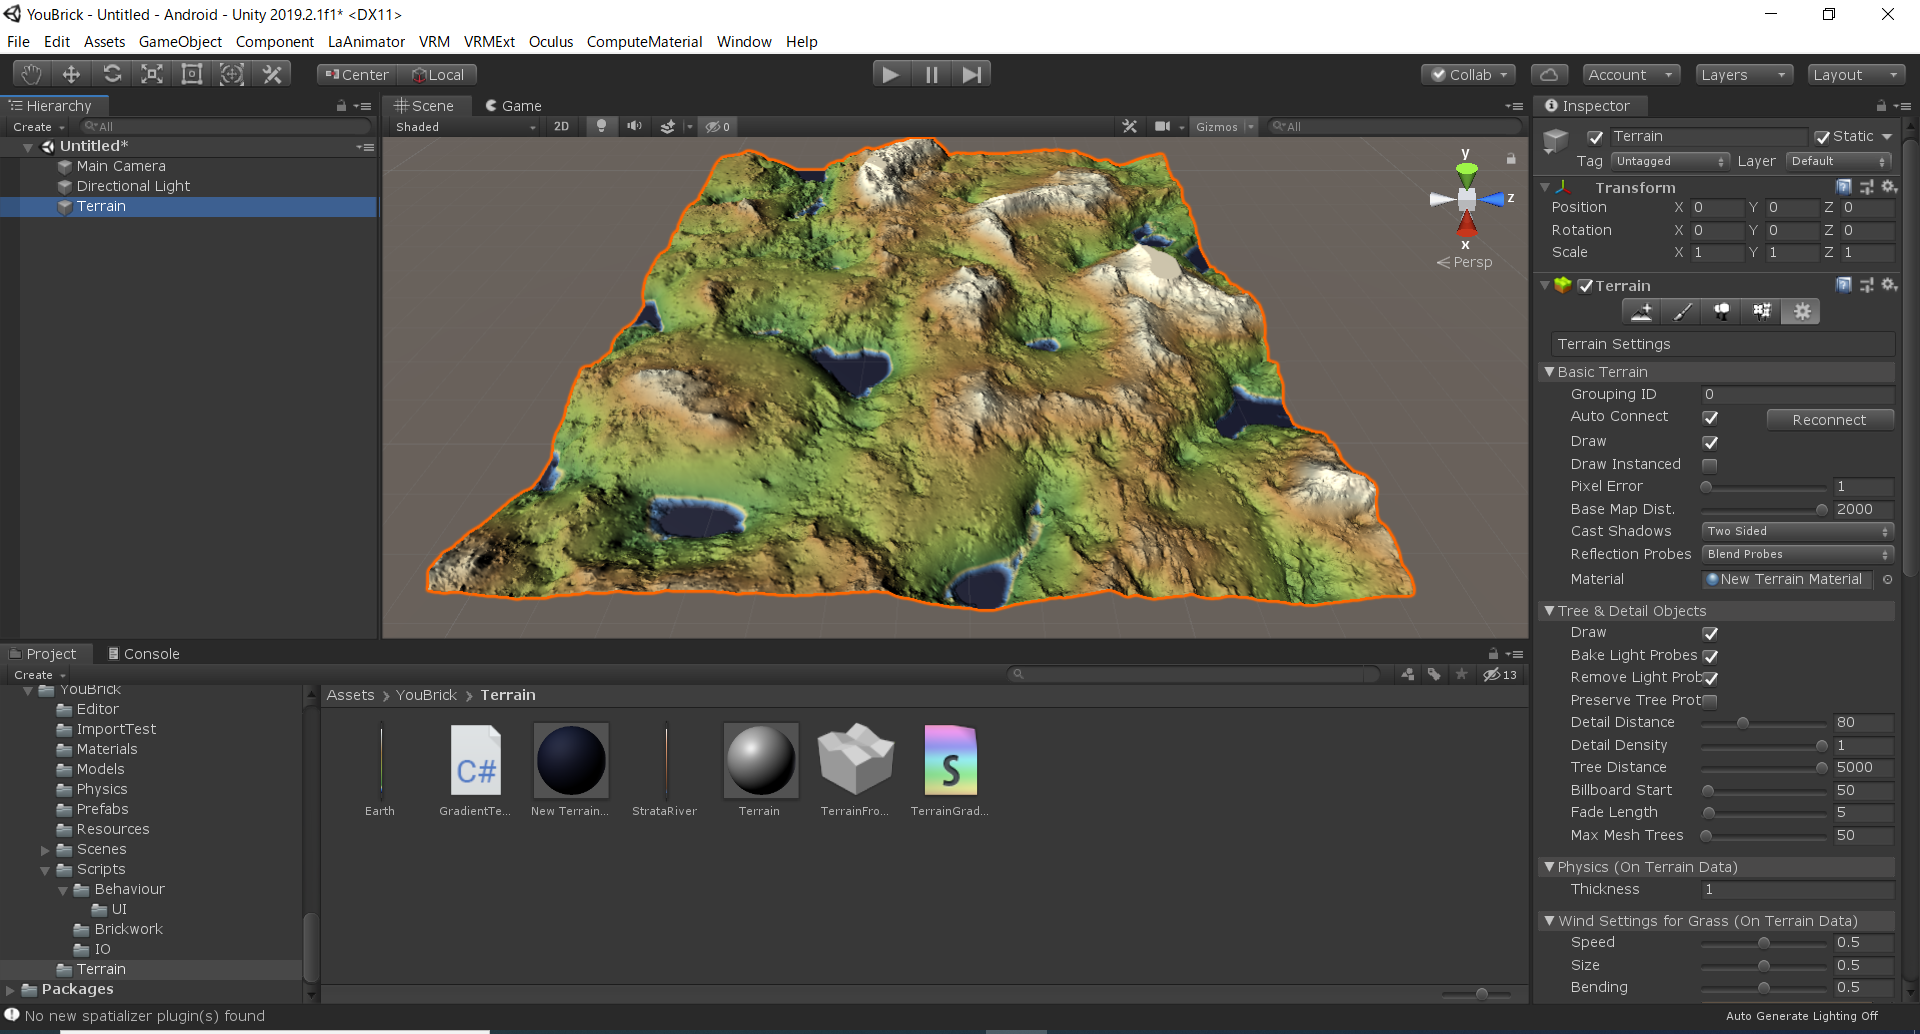
Terrainデータをシーン上にドラッグアンドドロップすると、地形をシーン上に配置することができます。
TSmapは圧縮フォーマットもありますが、それに対応したい場合は、DotNetZipが必要になります。
https://github.com/DinoChiesa/DotNetZip
これを入れていれば、ZIP圧縮、解凍ができるようになります。
入れた後に、一行目のdefine TSMAP_SUPPORT_COMPRESSを定義してもエラーがでなくなります。
見た目をよりよくしよう
上記のキャプチャー画像いまいちクォリティーが低く見えます。
もう少し、調整してみましょう。

Terrainのインスペクタから、Pixel Errorの値を1にしてみましょう。
そうすると、ポリゴン数が多くなりクォリティーが上がります。
シェーダーも書いてみます。
Shader "Custom/TerrainGradient"
{
    Properties
    {
        _Color ("Color", Color) = (1,1,1,1)
		_MainTex("Albedo (RGB)", 2D) = "white" {}
		_ColorsetTex ("Colorset (RGB)", 2D) = "white" {}
		_Height("Height", Range(0,1000)) = 100.0
		_Glossiness ("Smoothness", Range(0,1)) = 0.5
		_Metallic("Metallic", Range(0,1)) = 0.0
    }
    SubShader
    {
        Tags { "RenderType"="Opaque" }
        LOD 200

        CGPROGRAM
        // Physically based Standard lighting model, and enable shadows on all light types
        #pragma surface surf Standard fullforwardshadows

        // Use shader model 3.0 target, to get nicer looking lighting
        #pragma target 3.0

        sampler2D _MainTex;

		sampler2D _ColorsetTex;
		half _Height;

        struct Input
        {
            float2 uv_MainTex;
			float3 worldPos;
        };

        half _Glossiness;
        half _Metallic;
        fixed4 _Color;

        // Add instancing support for this shader. You need to check 'Enable Instancing' on materials that use the shader.
        // See https://docs.unity3d.com/Manual/GPUInstancing.html for more information about instancing.
        // #pragma instancing_options assumeuniformscaling
        UNITY_INSTANCING_BUFFER_START(Props)
            // put more per-instance properties here
        UNITY_INSTANCING_BUFFER_END(Props)

        void surf (Input IN, inout SurfaceOutputStandard o)
        {
            // Albedo comes from a texture tinted by color
            fixed4 c = tex2D (_MainTex, IN.uv_MainTex) * _Color;
			c = c * tex2D(_ColorsetTex, float2(0, IN.worldPos.y / _Height));
            o.Albedo = c.rgb;
            // Metallic and smoothness come from slider variables
            o.Metallic = _Metallic;
            o.Smoothness = _Glossiness;
            o.Alpha = c.a;
        }
        ENDCG
    }
    FallBack "Diffuse"
}
_ColorsetTexに縦方向へのグラデーションテクスチャを設定すると高さに応じて色が変わるようにしました。
_Heightパラメータの操作で、高さに応じたUVの調整ができます。
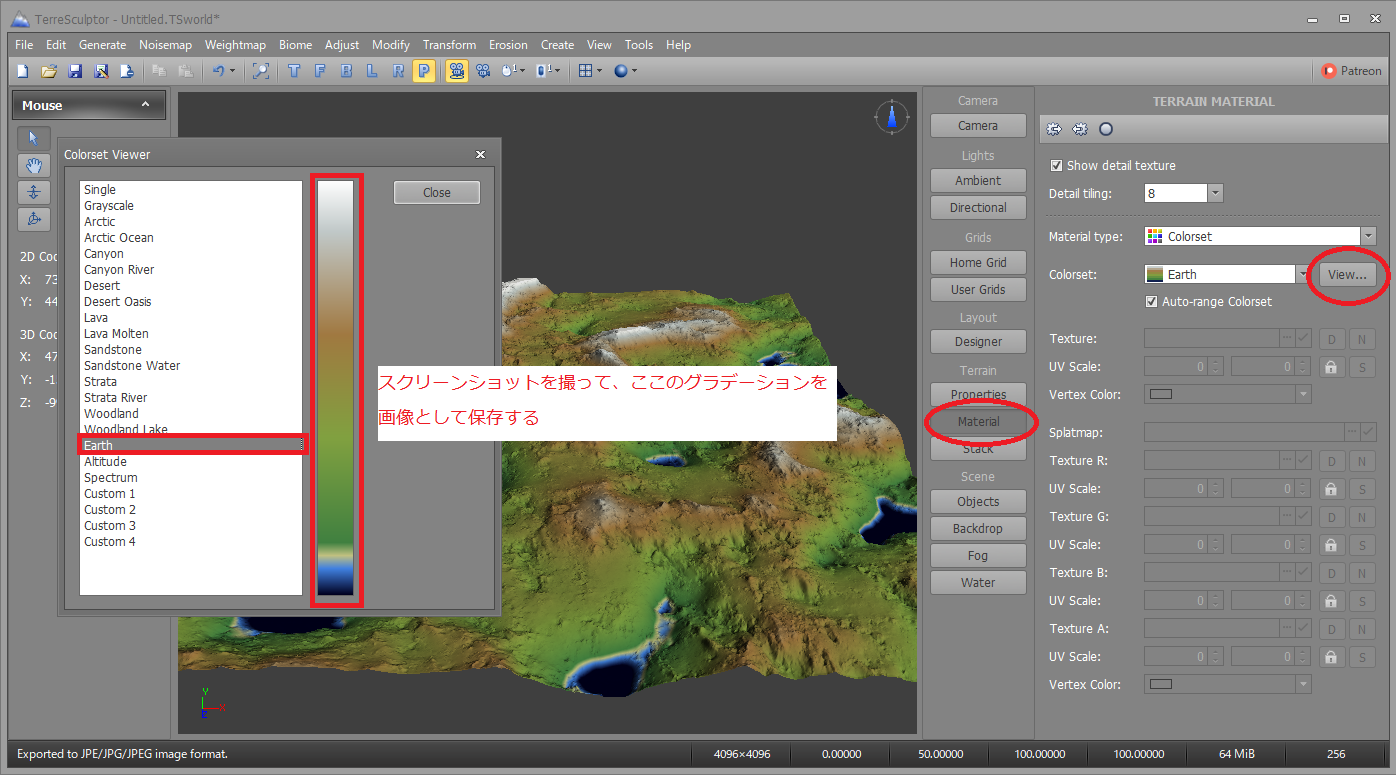
_ColorsetTexの画像は、下記の画像を参考に作ります。
TerraSculpterのMaterialボタンを押します。
その右のMaterial typeをColorsetにして、その下のViewボタンを押します。
ダイアログが現れるので、Colorsetを選んでPrintScreenを押すなどしてキャプチャーします。
ペイントソフトなどで、切り抜いて、サイズは1x256などにして保存します。
これをUNITYで_ColorsetTexに設定してください。
テクスチャのWrapModeはClampにしておきましょう。
UNITYでマテリアルを作って、上記シェーダーを設定し、このテクスチャを_ColorsetTexの項目に設定します。
Terrainにマテリアルを設定すると、下記のように表示されるようになりました。
少しライトや、Smoothnessなどを調整しています。
見た目も、ほぼ同じにできたのではないでしょうか。
おわりに
ファイルフォーマットが結構簡単に解析できたので、対応しました。
ということで、UE4だけでなく、UNITYでも容易に扱えます。
3dnchu様の記事でも、この記事を紹介していただけました!
https://3dnchu.com/archives/terresculptor-2-free/
ありがとうございます。
