
前回はストリーミング応答とマルチモーダル入力を実装しました。
今回は会話履歴を保存して、文脈を理解した応答ができるようにします。どすこい。
私の環境
- macOS 14.6
- JDK 21
- Spring Boot 3.5.7
- Spring AI 1.1.0
やること
- なぜ会話履歴が必要か理解する
- Chat Memory の仕組みを学ぶ
- 会話履歴を保存する機能を実装する
- 動作確認
- 前回作ったコントローラーにも機能を適用する
使用するモデル
- amazon.nova-lite-v1:0
なぜ会話履歴が必要か
こちらは理解している方も多いですが、自分の中での理解として改めて言語化してみたいと思います。
基本的にLLMとの会話はChatGPTなどとの会話では裏で実装されているだけで、ステートレス(状態を持たない)です。
なので、毎回のリクエストが独立していて、前の会話は覚えていません。
前回まで実装してきた機能だけだと下記のようなケースになります。
-
ユーザー「私の名前はどすこいはんぺんです」→ AI「素敵なお名前ですね、どすこいはんぺんさん!」
-
ユーザー「私の名前は何ですか?」→ AI「すみません、まだお名前を伺っていないようです」
せっかく名乗ったのに忘れられるの悲しすぎますね。どすこい。
会話履歴を保存し、毎回のリクエストに含めることで、文脈を理解した応答ができるようになります。そして悲しみを乗り越えられます(?)
Chat Memory の仕組み
Spring AIではChatMemoryとMessageChatMemoryAdvisorを使って会話履歴を管理できるようです。
ChatMemory: https://spring.pleiades.io/spring-ai/reference/api/chat-memory.html
仕組みについては下記です:
- ユーザーのメッセージとAIの応答を履歴として保存
- 次のリクエスト時に保存した履歴を取得してプロンプトに含める
- AIは履歴を含めたプロンプトの文脈を見て、理解した応答を返す
ChatMemory主要なコンポーネントは2つあります:
- ChatMemory - 会話履歴を保存・取得するインターフェース
実装には MessageWindowChatMemory(メモリ保存)や JdbcChatMemoryRepository(DB保存)などがあります。 - MessageChatMemoryAdvisor
ChatClient に設定するアドバイザー
リクエスト時、自動で履歴を取得してプロンプトに含め、レスポンス後、履歴を保存してくれます。
今回はシンプルに実装しちゃいたいので、MessageWindowChatMemoryを使い、メモリ上に会話履歴を保存する形で実装していきます。
会話履歴を保存する機能を実装する
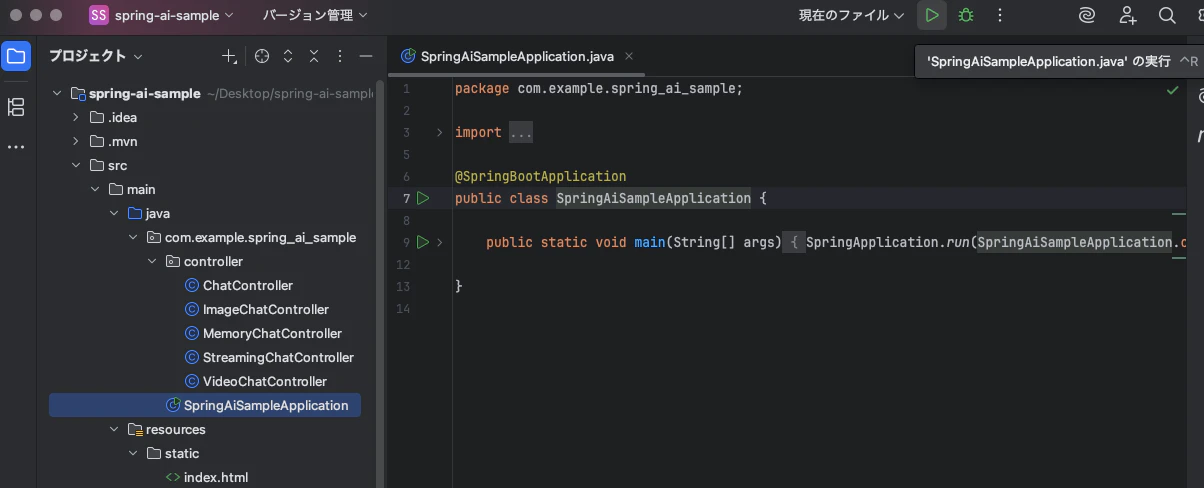
src/main/java/com/example/spring_ai_sample/controllerにMemoryChatController.javaを作成します。
package com.example.spring_ai_sample.controller;

import org.springframework.ai.chat.client.ChatClient;
import org.springframework.ai.chat.client.advisor.MessageChatMemoryAdvisor;
import org.springframework.ai.chat.memory.ChatMemory;
import org.springframework.ai.chat.memory.MessageWindowChatMemory;
import org.springframework.beans.factory.annotation.Autowired;
import org.springframework.web.bind.annotation.GetMapping;
import org.springframework.web.bind.annotation.RequestParam;
import org.springframework.web.bind.annotation.RestController;

/**
 * 会話履歴を保持するコントローラー
 */
@RestController
public class MemoryChatController {

    private final ChatClient chatClient;

    @Autowired
    public MemoryChatController(ChatClient.Builder chatClientBuilder) {
        // MessageWindowChatMemory で会話履歴をメモリに保存
        ChatMemory chatMemory = MessageWindowChatMemory.builder().build();

        this.chatClient = chatClientBuilder
                .defaultAdvisors(MessageChatMemoryAdvisor.builder(chatMemory).build())
                .build();
    }

    /**
     * /memory-chat エンドポイント
     * 会話履歴を保持しながら応答を返す
     */
    @GetMapping("/memory-chat")
    public String memoryChat(
            @RequestParam String prompt,
            @RequestParam(defaultValue = "default") String conversationId) {

        return chatClient.prompt()
                .user(prompt)
                .advisors(a -> a.param(ChatMemory.CONVERSATION_ID, conversationId))
                .call()
                .content();
    }
}
ポイントは以下の3つです:
- MessageWindowChatMemory
会話履歴をメモリに保存
デフォルトで最新20件を保持し、超えると古いメッセージから削除されます。
保存件数は.maxMessages(任意の数値)で変更可能です。 - MessageChatMemoryAdvisor
リクエスト時に自動で履歴を取得・保存してくれます。 - conversationId
会話を識別するID(ユーザーごとで分けたい場合に使用)
MessageWindowChatMemoryの注意点
今回使用したMessageWindowChatMemoryは、シンプルに実装できるのですが、メモリ上に保存することから以下のデメリットがあります。
- アプリ再起動で消える
- 複数のインスタンス(サーバー)で共有できない
- メモリを消費し続ける※
※ 会話ID(conversationId)ごとに履歴を20件(デフォルトの場合)保持するので、ユーザーが増え続けると会話IDの数だけメモリを消費し続けます。
上記の理由から、本番環境で使用する場合はJdbcChatMemoryRepository(PostgreSQL、MySQL など)や CassandraChatMemoryRepository、Neo4jChatMemoryRepositoryを使って永続化することをおすすめします。
DynamoDBなど組み込みで提供されていないストレージを使いたい場合は、ChatMemoryRepositoryインターフェースを実装することで実現できそうです。
動作確認
SpringAiSampleApplicationを実行してアプリケーションを起動しましょう。
会話履歴が保持されるかcurlコマンドで確認してみましょう
# 1回目:名前を伝える
curl -G "http://localhost:8080/memory-chat" \
  --data-urlencode "prompt=私の名前はどすこいはんぺんです" \
  --data-urlencode "conversationId=user1"

# 2回目:名前を聞く
curl -G "http://localhost:8080/memory-chat" \
  --data-urlencode "prompt=私の名前は何ですか?" \
  --data-urlencode "conversationId=user1"
名前を覚えてくれていました!
あなたの名前は「どすこいはんぺん」さんです。このやり取りの中で、あなたが「どすこいはんぺん」と名乗りましたよね。何か他にお手伝いできることはありますか?
次に会話IDを変えると履歴が共有されないことを確認してみましょう
# 別の会話IDで名前を聞く
curl -G "http://localhost:8080/memory-chat" \
  --data-urlencode "prompt=私の名前は何ですか?" \
  --data-urlencode "conversationId=user2"
下記のような回答になりました!
会話IDで履歴管理ができていますね!
申し訳ありませんが、あなたの名前は私にはわかりません。あなたがどのような名前を希望しているのか、または特定のニックネームや名前の候補について話し合いたい場合は、ぜひ教えてください。また、あなたが興味を持っている話題や質問があれば、それについてもお話しできます
前回作ったコントローラーにも機能を適用する
問題なく機能していることを確認できたので、前回作ったテキストチャット、画像分析、動画分析のコントローラーにもChat Memoryを適用していきましょう!
StreamingChatController(テキストチャット)
Chat Memoryを適用するために以下を追加します:
-
MessageWindowChatMemoryとMessageChatMemoryAdvisorの設定 -
conversationIdパラメータの追加
package com.example.spring_ai_sample.controller;

import org.springframework.ai.chat.client.ChatClient;
import org.springframework.ai.chat.client.advisor.MessageChatMemoryAdvisor; // 追加
import org.springframework.ai.chat.memory.ChatMemory; // 追加
import org.springframework.ai.chat.memory.MessageWindowChatMemory; // 追加
import org.springframework.beans.factory.annotation.Autowired;
import org.springframework.http.MediaType;
import org.springframework.web.bind.annotation.GetMapping;
import org.springframework.web.bind.annotation.RequestParam;
import org.springframework.web.bind.annotation.RestController;
import reactor.core.publisher.Flux;

/**
 * ストリーミング応答を返すコントローラー
 */
@RestController
public class StreamingChatController {

    private final ChatClient chatClient;

    @Autowired
    public StreamingChatController(ChatClient.Builder chatClientBuilder) {
        ChatMemory chatMemory = MessageWindowChatMemory.builder().build(); // 追加

        this.chatClient = chatClientBuilder
                .defaultAdvisors(MessageChatMemoryAdvisor.builder(chatMemory).build()) // 追加
                .build();
    }

    /**
     * /stream-chat エンドポイント
     * Server-Sent Events (SSE) でストリーミング応答を返す
     */
    @GetMapping(value = "/stream-chat", produces = MediaType.TEXT_EVENT_STREAM_VALUE)
    public Flux<String> streamingChat(
            @RequestParam String prompt,
            @RequestParam(defaultValue = "default") String conversationId) { // 追加

        return chatClient.prompt()
                .user(prompt)
                .advisors(a -> a.param(ChatMemory.CONVERSATION_ID, conversationId)) // 追加
                .stream()
                .content();
    }
}
ImageChatController(画像分析)
Chat Memoryを適用するために以下を追加します:
-
MessageWindowChatMemoryとMessageChatMemoryAdvisorの設定 -
conversationIdパラメータの追加 -
imageパラメータをrequired = falseに変更(画像なしでも会話継続できるようにするため)
package com.example.spring_ai_sample.controller;

import org.springframework.ai.chat.client.ChatClient;
import org.springframework.ai.chat.client.advisor.MessageChatMemoryAdvisor; // 追加
import org.springframework.ai.chat.memory.ChatMemory; // 追加
import org.springframework.ai.chat.memory.MessageWindowChatMemory; // 追加
import org.springframework.beans.factory.annotation.Autowired;
import org.springframework.core.io.ByteArrayResource;
import org.springframework.util.MimeTypeUtils;
import org.springframework.web.bind.annotation.PostMapping;
import org.springframework.web.bind.annotation.RequestParam;
import org.springframework.web.bind.annotation.RestController;
import org.springframework.web.multipart.MultipartFile;

import java.io.IOException;

/**
 * 画像分析用コントローラー
 */
@RestController
public class ImageChatController {

    private final ChatClient chatClient;

    @Autowired
    public ImageChatController(ChatClient.Builder chatClientBuilder) {
        ChatMemory chatMemory = MessageWindowChatMemory.builder().build(); // 追加

        this.chatClient = chatClientBuilder
                .defaultAdvisors(MessageChatMemoryAdvisor.builder(chatMemory).build()) // 追加
                .build();
    }

    /**
     * /image-chat エンドポイント
     * 画像とテキストを受け取り、分析結果を返す
     * 画像なしの場合は会話履歴を使って応答
     */
    @PostMapping("/image-chat")
    public String imageChat(
            @RequestParam("prompt") String prompt,
            // 変更: required = false を追加して画像をオプショナルに
            // これにより「さっきの画像について詳しく教えて」のような追加質問が可能になる
            @RequestParam(value = "image", required = false) MultipartFile image,
            @RequestParam(defaultValue = "default") String conversationId) throws IOException { // 追加

        // 画像がある場合:画像付きでAIに問い合わせ
        if (image != null && !image.isEmpty()) {
            byte[] imageBytes = image.getBytes();

            return chatClient.prompt()
                    .user(u -> u.text(prompt)
                            .media(MimeTypeUtils.IMAGE_PNG, new ByteArrayResource(imageBytes)))
                    .advisors(a -> a.param(ChatMemory.CONVERSATION_ID, conversationId)) // 追加
                    .call()
                    .content();
        }

        // 画像がない場合:テキストのみでAIに問い合わせ(会話履歴から画像の内容を参照できる)
        return chatClient.prompt()
                .user(prompt)
                .advisors(a -> a.param(ChatMemory.CONVERSATION_ID, conversationId)) // 追加
                .call()
                .content();
    }
}
VideoChatController(動画分析)
Chat Memoryを適用するために以下を追加します:
-
MessageWindowChatMemoryとMessageChatMemoryAdvisorの設定 -
conversationIdパラメータの追加 -
videoパラメータをrequired = falseに変更(動画なしでも会話継続できるようにするため)
package com.example.spring_ai_sample.controller;

import org.springframework.ai.chat.client.ChatClient;
import org.springframework.ai.chat.client.advisor.MessageChatMemoryAdvisor; // 追加
import org.springframework.ai.chat.memory.ChatMemory; // 追加
import org.springframework.ai.chat.memory.MessageWindowChatMemory; // 追加
import org.springframework.beans.factory.annotation.Autowired;
import org.springframework.core.io.ByteArrayResource;
import org.springframework.util.MimeTypeUtils;
import org.springframework.web.bind.annotation.PostMapping;
import org.springframework.web.bind.annotation.RequestParam;
import org.springframework.web.bind.annotation.RestController;
import org.springframework.web.multipart.MultipartFile;

import java.io.IOException;

/**
 * 動画分析用コントローラー
 */
@RestController
public class VideoChatController {

    private final ChatClient chatClient;

    @Autowired
    public VideoChatController(ChatClient.Builder chatClientBuilder) {
        ChatMemory chatMemory = MessageWindowChatMemory.builder().build(); // 追加

        this.chatClient = chatClientBuilder
                .defaultAdvisors(MessageChatMemoryAdvisor.builder(chatMemory).build()) // 追加
                .build();
    }

    /**
     * /video-chat エンドポイント
     * 動画とテキストを受け取り、分析結果を返す
     * 動画なしの場合は会話履歴を使って応答
     */
    @PostMapping("/video-chat")
    public String videoChat(
            @RequestParam("prompt") String prompt,
            // 変更: required = false を追加して動画をオプショナルに
            // これにより「さっきの動画について詳しく教えて」のような追加質問が可能になる
            @RequestParam(value = "video", required = false) MultipartFile video,
            @RequestParam(defaultValue = "default") String conversationId) throws IOException { // 追加

        // 動画がある場合:動画付きでAIに問い合わせ
        if (video != null && !video.isEmpty()) {
            byte[] videoBytes = video.getBytes();

            return chatClient.prompt()
                    .system("あなたは日本語で回答するアシスタントです。")
                    .user(u -> u.text(prompt)
                            .media(MimeTypeUtils.parseMimeType("video/mp4"), new ByteArrayResource(videoBytes)))
                    .advisors(a -> a.param(ChatMemory.CONVERSATION_ID, conversationId)) // 追加
                    .call()
                    .content();
        }

        // 動画がない場合:テキストのみでAIに問い合わせ(会話履歴から動画の内容を参照できる)
        return chatClient.prompt()
                .system("あなたは日本語で回答するアシスタントです。")
                .user(prompt)
                .advisors(a -> a.param(ChatMemory.CONVERSATION_ID, conversationId)) // 追加
                .call()
                .content();
    }
}
HTML(フロントエンド)の修正
そのままだとやりとりしている感がなくて楽しくないので、UIを改修し、以下を追加・変更します:
- 各タブにチャット履歴表示エリアを追加
- 送信メッセージと返答が履歴として表示されるように変更
-
conversationIdを各リクエストに追加 - 「履歴クリア」ボタンを追加(サーバー側の履歴もリセット)
- 画像・動画のサムネイル表示に対応
会話IDはフロントエンド側で生成しています。
今回は検証なのでタブごとに固定値(text-session、image-session、video-session)を使い、「履歴クリア」時にタイムスタンプ付きの新しいIDを生成することでサーバー側の履歴もリセットしています。
本番では、ユーザー認証を行い、ユーザーIDを会話IDとして使用するようにする方が良いかと思います。
コード全文
<!DOCTYPE html>
<html lang="ja">
<head>
    <meta charset="UTF-8">
    <meta name="viewport" content="width=device-width, initial-scale=1.0">
    <title>Spring AI Chat Demo</title>
    <style>
        * {
            margin: 0;
            padding: 0;
            box-sizing: border-box;
        }

        body {
            font-family: 'Segoe UI', Tahoma, Geneva, Verdana, sans-serif;
            background: linear-gradient(135deg, #667eea 0%, #764ba2 100%);
            min-height: 100vh;
            display: flex;
            justify-content: center;
            align-items: center;
            padding: 20px;
        }

        .container {
            background: white;
            border-radius: 20px;
            box-shadow: 0 20px 60px rgba(0, 0, 0, 0.3);
            max-width: 800px;
            width: 100%;
            overflow: hidden;
        }

        .header {
            background: linear-gradient(135deg, #667eea 0%, #764ba2 100%);
            color: white;
            padding: 30px;
            text-align: center;
        }

        .header h1 {
            font-size: 28px;
            margin-bottom: 10px;
        }

        .tabs {
            display: flex;
            background: #f8f9fa;
            border-bottom: 2px solid #e9ecef;
        }

        .tab {
            flex: 1;
            padding: 15px;
            text-align: center;
            cursor: pointer;
            background: #f8f9fa;
            border: none;
            font-size: 16px;
            transition: all 0.3s;
        }

        .tab:hover {
            background: #e9ecef;
        }

        .tab.active {
            background: white;
            border-bottom: 3px solid #667eea;
            font-weight: bold;
        }

        .tab-content {
            display: none;
            padding: 30px;
        }

        .tab-content.active {
            display: block;
        }

        .chat-container {
            height: 400px;
            overflow-y: auto;
            border: 2px solid #e9ecef;
            border-radius: 8px;
            padding: 15px;
            margin-bottom: 20px;
            background: #f8f9fa;
        }

        .message {
            margin-bottom: 15px;
            padding: 12px 16px;
            border-radius: 12px;
            max-width: 80%;
            word-wrap: break-word;
            white-space: pre-wrap;
            line-height: 1.5;
        }

        .message.user {
            background: linear-gradient(135deg, #667eea 0%, #764ba2 100%);
            color: white;
            margin-left: auto;
            border-bottom-right-radius: 4px;
        }

        .message.assistant {
            background: white;
            color: #333;
            border: 1px solid #e9ecef;
            border-bottom-left-radius: 4px;
        }

        .message.assistant.streaming {
            border-left: 3px solid #667eea;
        }

        .message .attachment {
            font-size: 12px;
            opacity: 0.8;
            margin-top: 5px;
        }

        .message img.thumbnail {
            max-width: 200px;
            max-height: 150px;
            border-radius: 8px;
            margin-top: 8px;
            display: block;
        }

        .message video.thumbnail {
            max-width: 200px;
            max-height: 150px;
            border-radius: 8px;
            margin-top: 8px;
            display: block;
        }

        .input-area {
            display: flex;
            gap: 10px;
            align-items: flex-end;
        }

        .input-area.with-file {
            flex-wrap: wrap;
        }

        .input-group {
            flex: 1;
        }

        .input-group input[type="text"],
        .input-group textarea {
            width: 100%;
            padding: 12px;
            border: 2px solid #e9ecef;
            border-radius: 8px;
            font-size: 16px;
            transition: border-color 0.3s;
            resize: none;
        }

        .input-group input[type="text"]:focus,
        .input-group textarea:focus {
            outline: none;
            border-color: #667eea;
        }

        .file-input {
            display: none;
        }

        .file-label {
            display: inline-flex;
            align-items: center;
            justify-content: center;
            width: 48px;
            height: 48px;
            background: #6c757d;
            color: white;
            border-radius: 8px;
            cursor: pointer;
            transition: background 0.3s;
            font-size: 20px;
        }

        .file-label:hover {
            background: #5a6268;
        }

        .file-label.has-file {
            background: #28a745;
        }

        .btn {
            padding: 12px 24px;
            background: linear-gradient(135deg, #667eea 0%, #764ba2 100%);
            color: white;
            border: none;
            border-radius: 8px;
            font-size: 16px;
            font-weight: bold;
            cursor: pointer;
            transition: transform 0.2s;
            height: 48px;
        }

        .btn:hover {
            transform: translateY(-2px);
        }

        .btn:disabled {
            background: #6c757d;
            cursor: not-allowed;
            transform: none;
        }

        .file-info {
            width: 100%;
            font-size: 12px;
            color: #6c757d;
            margin-top: 8px;
        }

        .clear-btn {
            background: #dc3545;
            padding: 8px 16px;
            font-size: 14px;
            height: auto;
            margin-bottom: 10px;
        }

        .error {
            color: #dc3545;
            background: #f8d7da;
            padding: 10px;
            border-radius: 8px;
            margin-bottom: 10px;
        }
    </style>
</head>
<body>
<div class="container">
    <div class="header">
        <h1>🤖 Spring AI Chat Demo</h1>
        <p>Amazon Bedrock Nova Lite を使用</p>
    </div>

    <div class="tabs">
        <button class="tab active" onclick="switchTab('text')">💬 テキストチャット</button>
        <button class="tab" onclick="switchTab('image')">🖼️ 画像分析</button>
        <button class="tab" onclick="switchTab('video')">🎥 動画分析</button>
    </div>

    <!-- テキストチャット -->
    <div id="text-tab" class="tab-content active">
        <button class="btn clear-btn" onclick="clearChat('text')">🗑️ 履歴クリア</button>
        <div id="text-chat" class="chat-container"></div>
        <div class="input-area">
            <div class="input-group">
                <input type="text" id="text-prompt" placeholder="メッセージを入力..." onkeypress="handleKeyPress(event, 'text')">
            </div>
            <button class="btn" onclick="sendTextChat()">送信</button>
        </div>
    </div>

    <!-- 画像分析 -->
    <div id="image-tab" class="tab-content">
        <button class="btn clear-btn" onclick="clearChat('image')">🗑️ 履歴クリア</button>
        <div id="image-chat" class="chat-container"></div>
        <div class="input-area with-file">
            <input type="file" id="image-file" class="file-input" accept="image/*" onchange="updateFileLabel('image')">
            <label for="image-file" id="image-file-label" class="file-label">📎</label>
            <div class="input-group">
                <input type="text" id="image-prompt" placeholder="画像について質問..." onkeypress="handleKeyPress(event, 'image')">
            </div>
            <button class="btn" onclick="sendImageChat()">送信</button>
            <div id="image-file-info" class="file-info"></div>
        </div>
    </div>

    <!-- 動画分析 -->
    <div id="video-tab" class="tab-content">
        <button class="btn clear-btn" onclick="clearChat('video')">🗑️ 履歴クリア</button>
        <div id="video-chat" class="chat-container"></div>
        <div class="input-area with-file">
            <input type="file" id="video-file" class="file-input" accept="video/*" onchange="updateFileLabel('video')">
            <label for="video-file" id="video-file-label" class="file-label">📎</label>
            <div class="input-group">
                <input type="text" id="video-prompt" placeholder="動画について質問..." onkeypress="handleKeyPress(event, 'video')">
            </div>
            <button class="btn" onclick="sendVideoChat()">送信</button>
            <div id="video-file-info" class="file-info"></div>
        </div>
    </div>
</div>

<script>
    // 会話IDを生成(タブごとに固定)
    const conversationIds = {
        text: 'text-session',
        image: 'image-session',
        video: 'video-session'
    };

    // タブ切り替え
    function switchTab(tab) {
        document.querySelectorAll('.tab').forEach(t => t.classList.remove('active'));
        document.querySelectorAll('.tab-content').forEach(c => c.classList.remove('active'));

        event.target.classList.add('active');
        document.getElementById(tab + '-tab').classList.add('active');
    }

    // Enterキーで送信
    function handleKeyPress(event, type) {
        if (event.key === 'Enter') {
            if (type === 'text') sendTextChat();
            else if (type === 'image') sendImageChat();
            else if (type === 'video') sendVideoChat();
        }
    }

    // ファイル選択時のラベル更新
    function updateFileLabel(type) {
        const fileInput = document.getElementById(type + '-file');
        const fileLabel = document.getElementById(type + '-file-label');
        const fileInfo = document.getElementById(type + '-file-info');

        if (fileInput.files[0]) {
            fileLabel.classList.add('has-file');
            fileLabel.textContent = '✓';
            fileInfo.textContent = '選択中: ' + fileInput.files[0].name;
        } else {
            fileLabel.classList.remove('has-file');
            fileLabel.textContent = '📎';
            fileInfo.textContent = '';
        }
    }

    // チャット履歴クリア
    function clearChat(type) {
        document.getElementById(type + '-chat').innerHTML = '';
        // 新しい会話IDを生成してサーバー側の履歴もリセット
        conversationIds[type] = type + '-session-' + Date.now();
    }

    // メッセージを追加
    function addMessage(chatId, content, isUser, attachment = null) {
        const chatContainer = document.getElementById(chatId);
        const messageDiv = document.createElement('div');
        messageDiv.className = 'message ' + (isUser ? 'user' : 'assistant');

        let html = content;
        if (attachment) {
            if (attachment.type === 'image') {
                html += `<img src="${attachment.url}" class="thumbnail" alt="添付画像">`;
            } else if (attachment.type === 'video') {
                html += `<video src="${attachment.url}" class="thumbnail" controls></video>`;
            }
        }

        messageDiv.innerHTML = html;
        chatContainer.appendChild(messageDiv);
        chatContainer.scrollTop = chatContainer.scrollHeight;

        return messageDiv;
    }

    // ストリーミング用のメッセージを追加
    function addStreamingMessage(chatId) {
        const chatContainer = document.getElementById(chatId);
        const messageDiv = document.createElement('div');
        messageDiv.className = 'message assistant streaming';
        messageDiv.textContent = '';
        chatContainer.appendChild(messageDiv);
        chatContainer.scrollTop = chatContainer.scrollHeight;
        return messageDiv;
    }

    // テキストチャット(ストリーミング)
    async function sendTextChat() {
        const promptInput = document.getElementById('text-prompt');
        const prompt = promptInput.value.trim();

        if (!prompt) {
            alert('メッセージを入力してください');
            return;
        }

        // ユーザーメッセージを追加
        addMessage('text-chat', prompt, true);
        promptInput.value = '';

        // AIの返答用メッセージを追加
        const responseDiv = addStreamingMessage('text-chat');

        const eventSource = new EventSource(`/stream-chat?prompt=${encodeURIComponent(prompt)}&conversationId=${conversationIds.text}`);

        eventSource.onmessage = (event) => {
            responseDiv.textContent += event.data;
            document.getElementById('text-chat').scrollTop = document.getElementById('text-chat').scrollHeight;
        };

        eventSource.onerror = () => {
            eventSource.close();
            responseDiv.classList.remove('streaming');
        };
    }

    // 画像チャット
    async function sendImageChat() {
        const promptInput = document.getElementById('image-prompt');
        const fileInput = document.getElementById('image-file');
        const prompt = promptInput.value.trim();

        if (!prompt) {
            alert('メッセージを入力してください');
            return;
        }

        // 添付ファイルの処理
        let attachment = null;
        if (fileInput.files[0]) {
            attachment = {
                type: 'image',
                url: URL.createObjectURL(fileInput.files[0])
            };
        }

        // ユーザーメッセージを追加
        addMessage('image-chat', prompt, true, attachment);

        // 入力をクリア
        promptInput.value = '';

        // AIの返答用メッセージを追加
        const responseDiv = addMessage('image-chat', '分析中...', false);

        const formData = new FormData();
        formData.append('prompt', prompt);
        if (fileInput.files[0]) {
            formData.append('image', fileInput.files[0]);
        }
        formData.append('conversationId', conversationIds.image);

        try {
            const response = await fetch('/image-chat', {
                method: 'POST',
                body: formData
            });
            const result = await response.text();
            responseDiv.textContent = result;
        } catch (error) {
            responseDiv.innerHTML = '<span class="error">エラーが発生しました: ' + error.message + '</span>';
        }

        // ファイル選択をリセット
        fileInput.value = '';
        updateFileLabel('image');
    }

    // 動画チャット
    async function sendVideoChat() {
        const promptInput = document.getElementById('video-prompt');
        const fileInput = document.getElementById('video-file');
        const prompt = promptInput.value.trim();

        if (!prompt) {
            alert('メッセージを入力してください');
            return;
        }

        // 添付ファイルの処理
        let attachment = null;
        if (fileInput.files[0]) {
            attachment = {
                type: 'video',
                url: URL.createObjectURL(fileInput.files[0])
            };
        }

        // ユーザーメッセージを追加
        addMessage('video-chat', prompt, true, attachment);

        // 入力をクリア
        promptInput.value = '';

        // AIの返答用メッセージを追加
        const responseDiv = addMessage('video-chat', '分析中...(動画処理には時間がかかる場合があります)', false);

        const formData = new FormData();
        formData.append('prompt', prompt);
        if (fileInput.files[0]) {
            formData.append('video', fileInput.files[0]);
        }
        formData.append('conversationId', conversationIds.video);

        try {
            const response = await fetch('/video-chat', {
                method: 'POST',
                body: formData
            });
            const result = await response.text();
            responseDiv.textContent = result;
        } catch (error) {
            responseDiv.innerHTML = '<span class="error">エラーが発生しました: ' + error.message + '</span>';
        }

        // ファイル選択をリセット
        fileInput.value = '';
        updateFileLabel('video');
    }
</script>
</body>
</html>
ためしてみる
まずはテキストチャットでためしてみましょう。
問題なさそうですね。
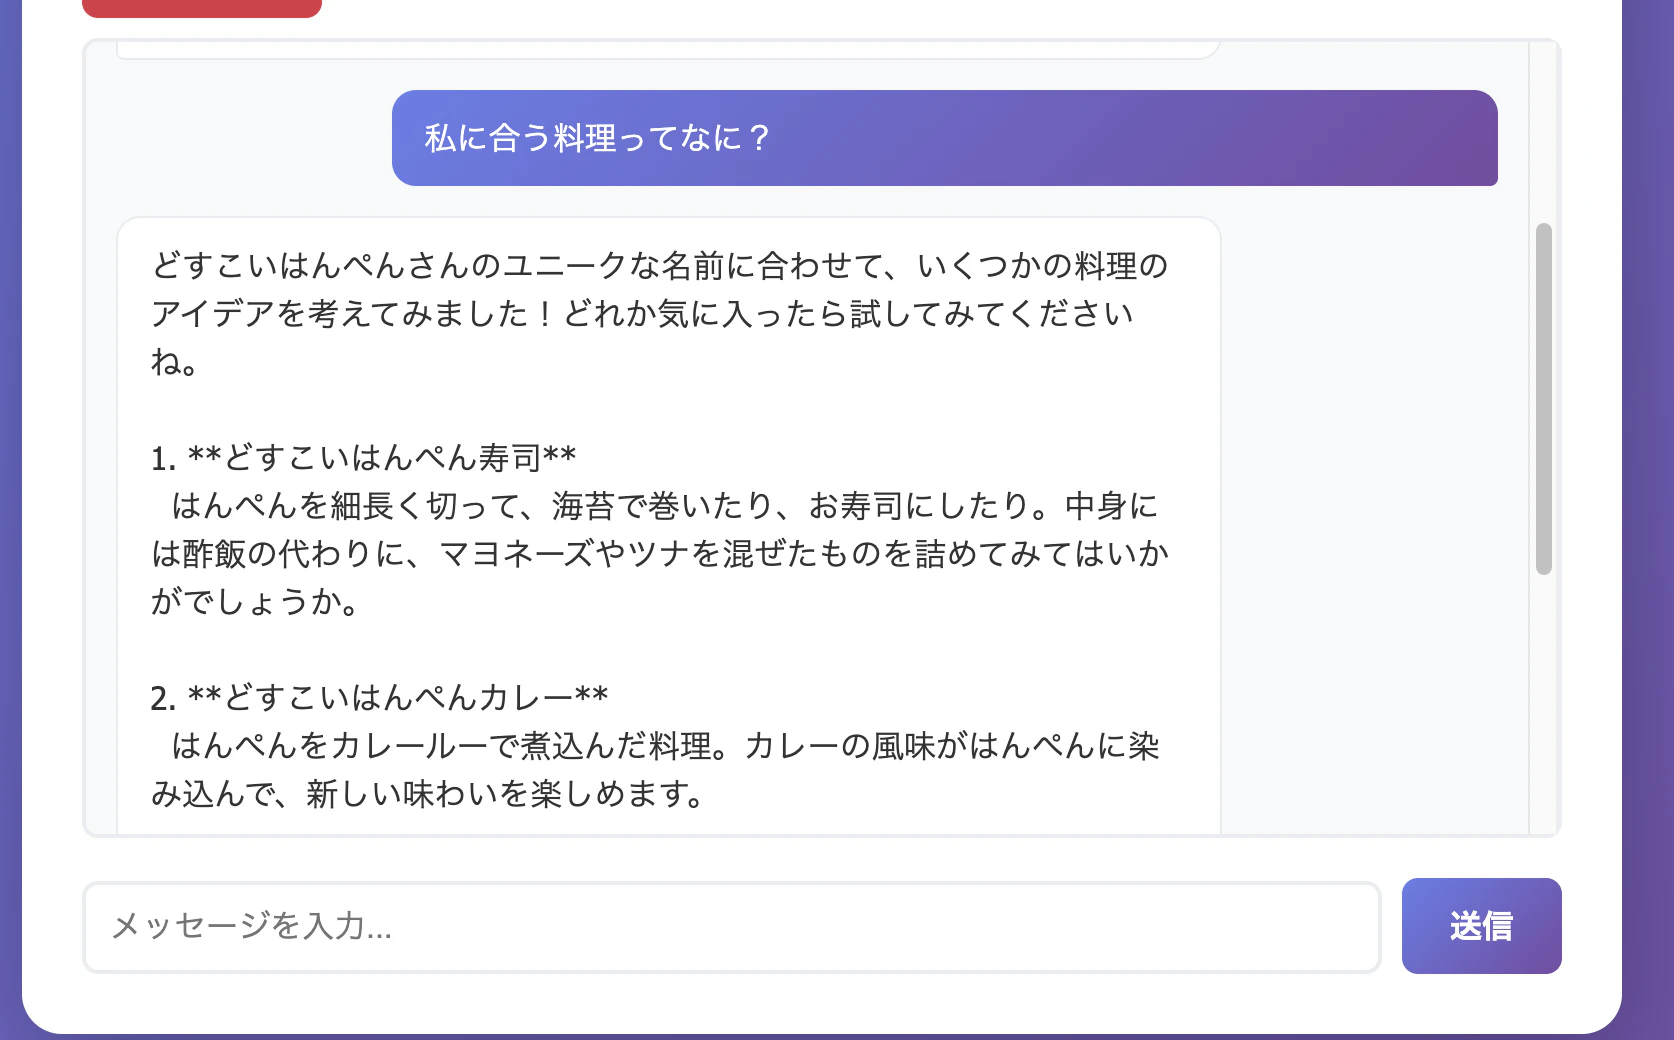
料理のアイデア教えてくれるらしいです...!
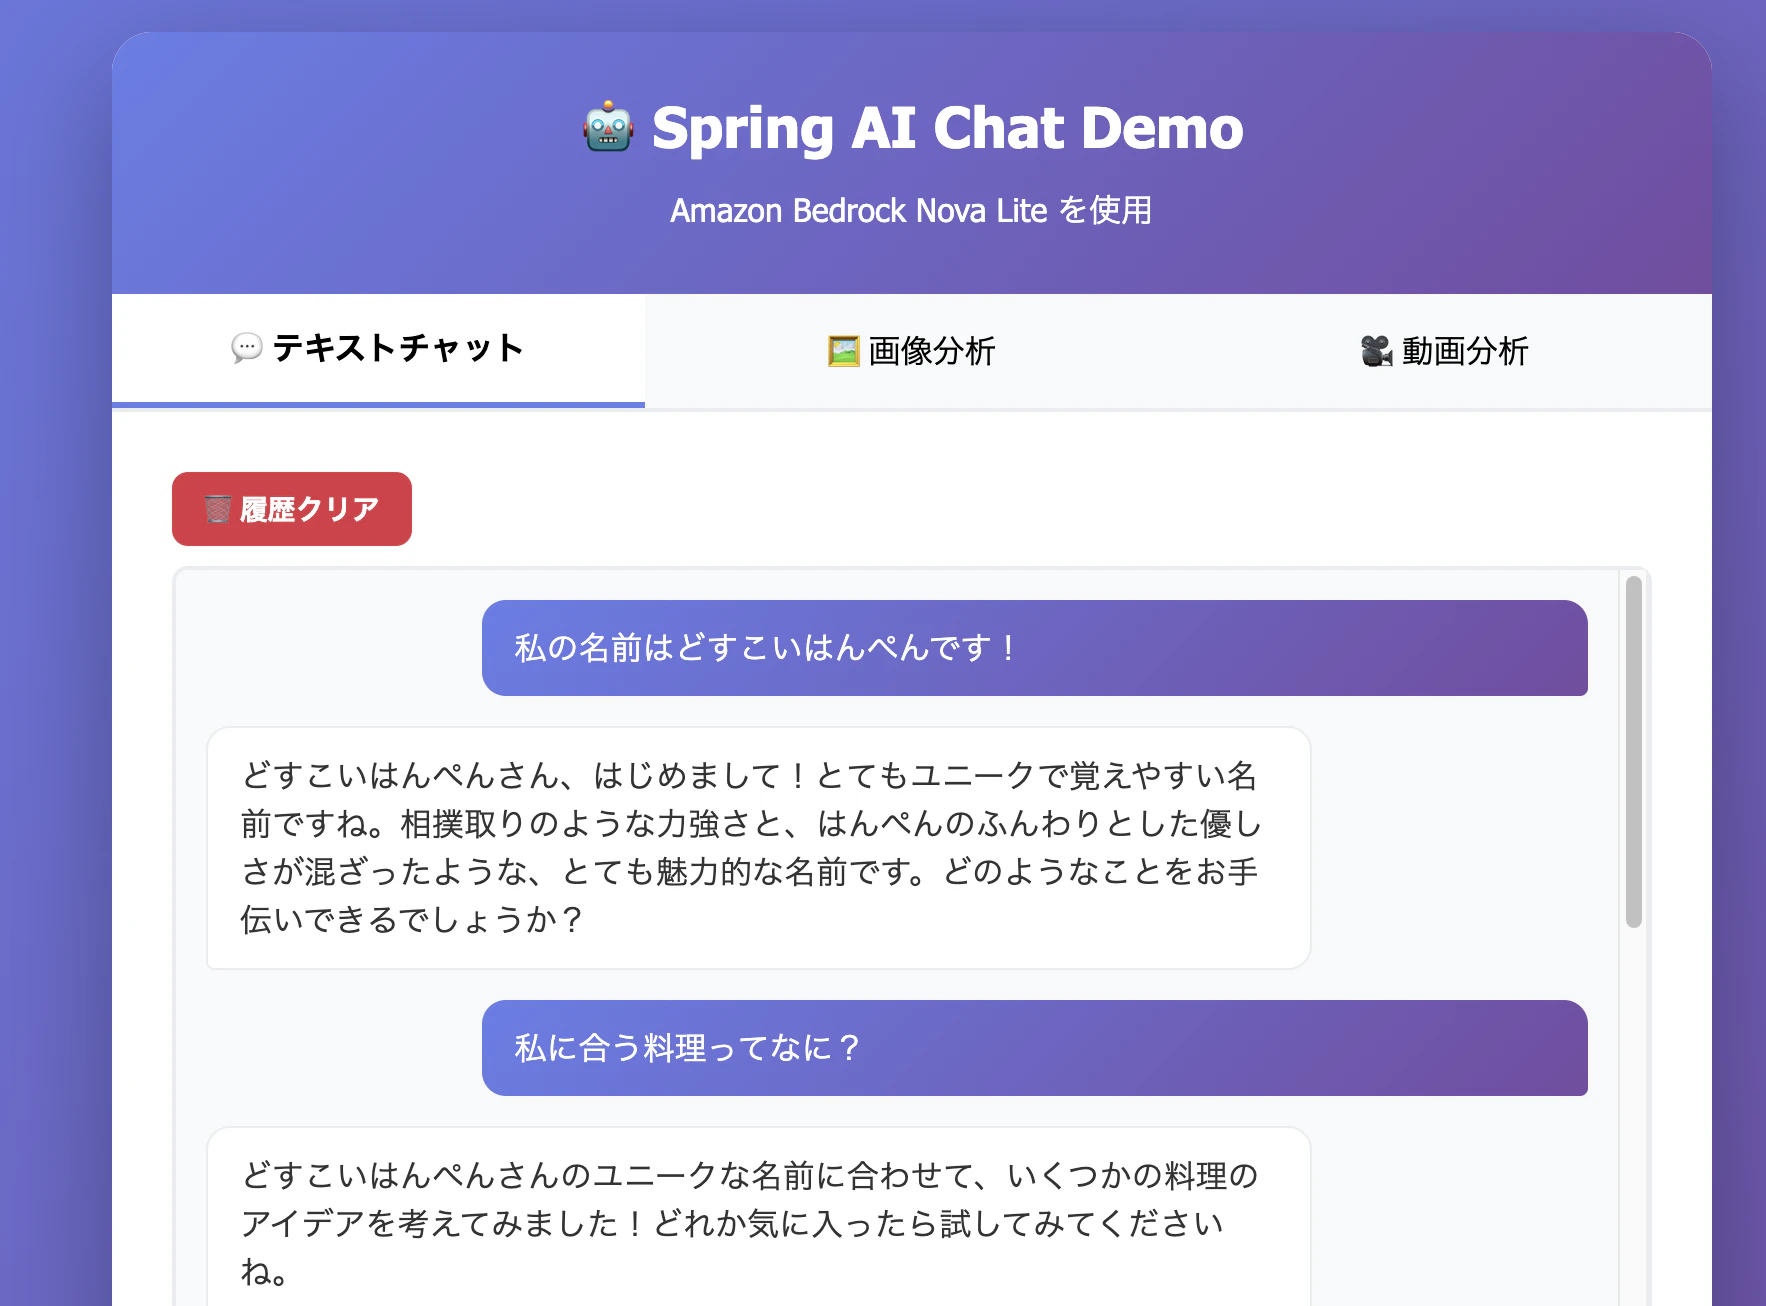
どうやら私自身を加工して料理するようです。。。
では次に画像を試してみましょう
相変わらずおにぎり判定されるし、「超好き」とも書いていないですがまあよしとしましょう...。
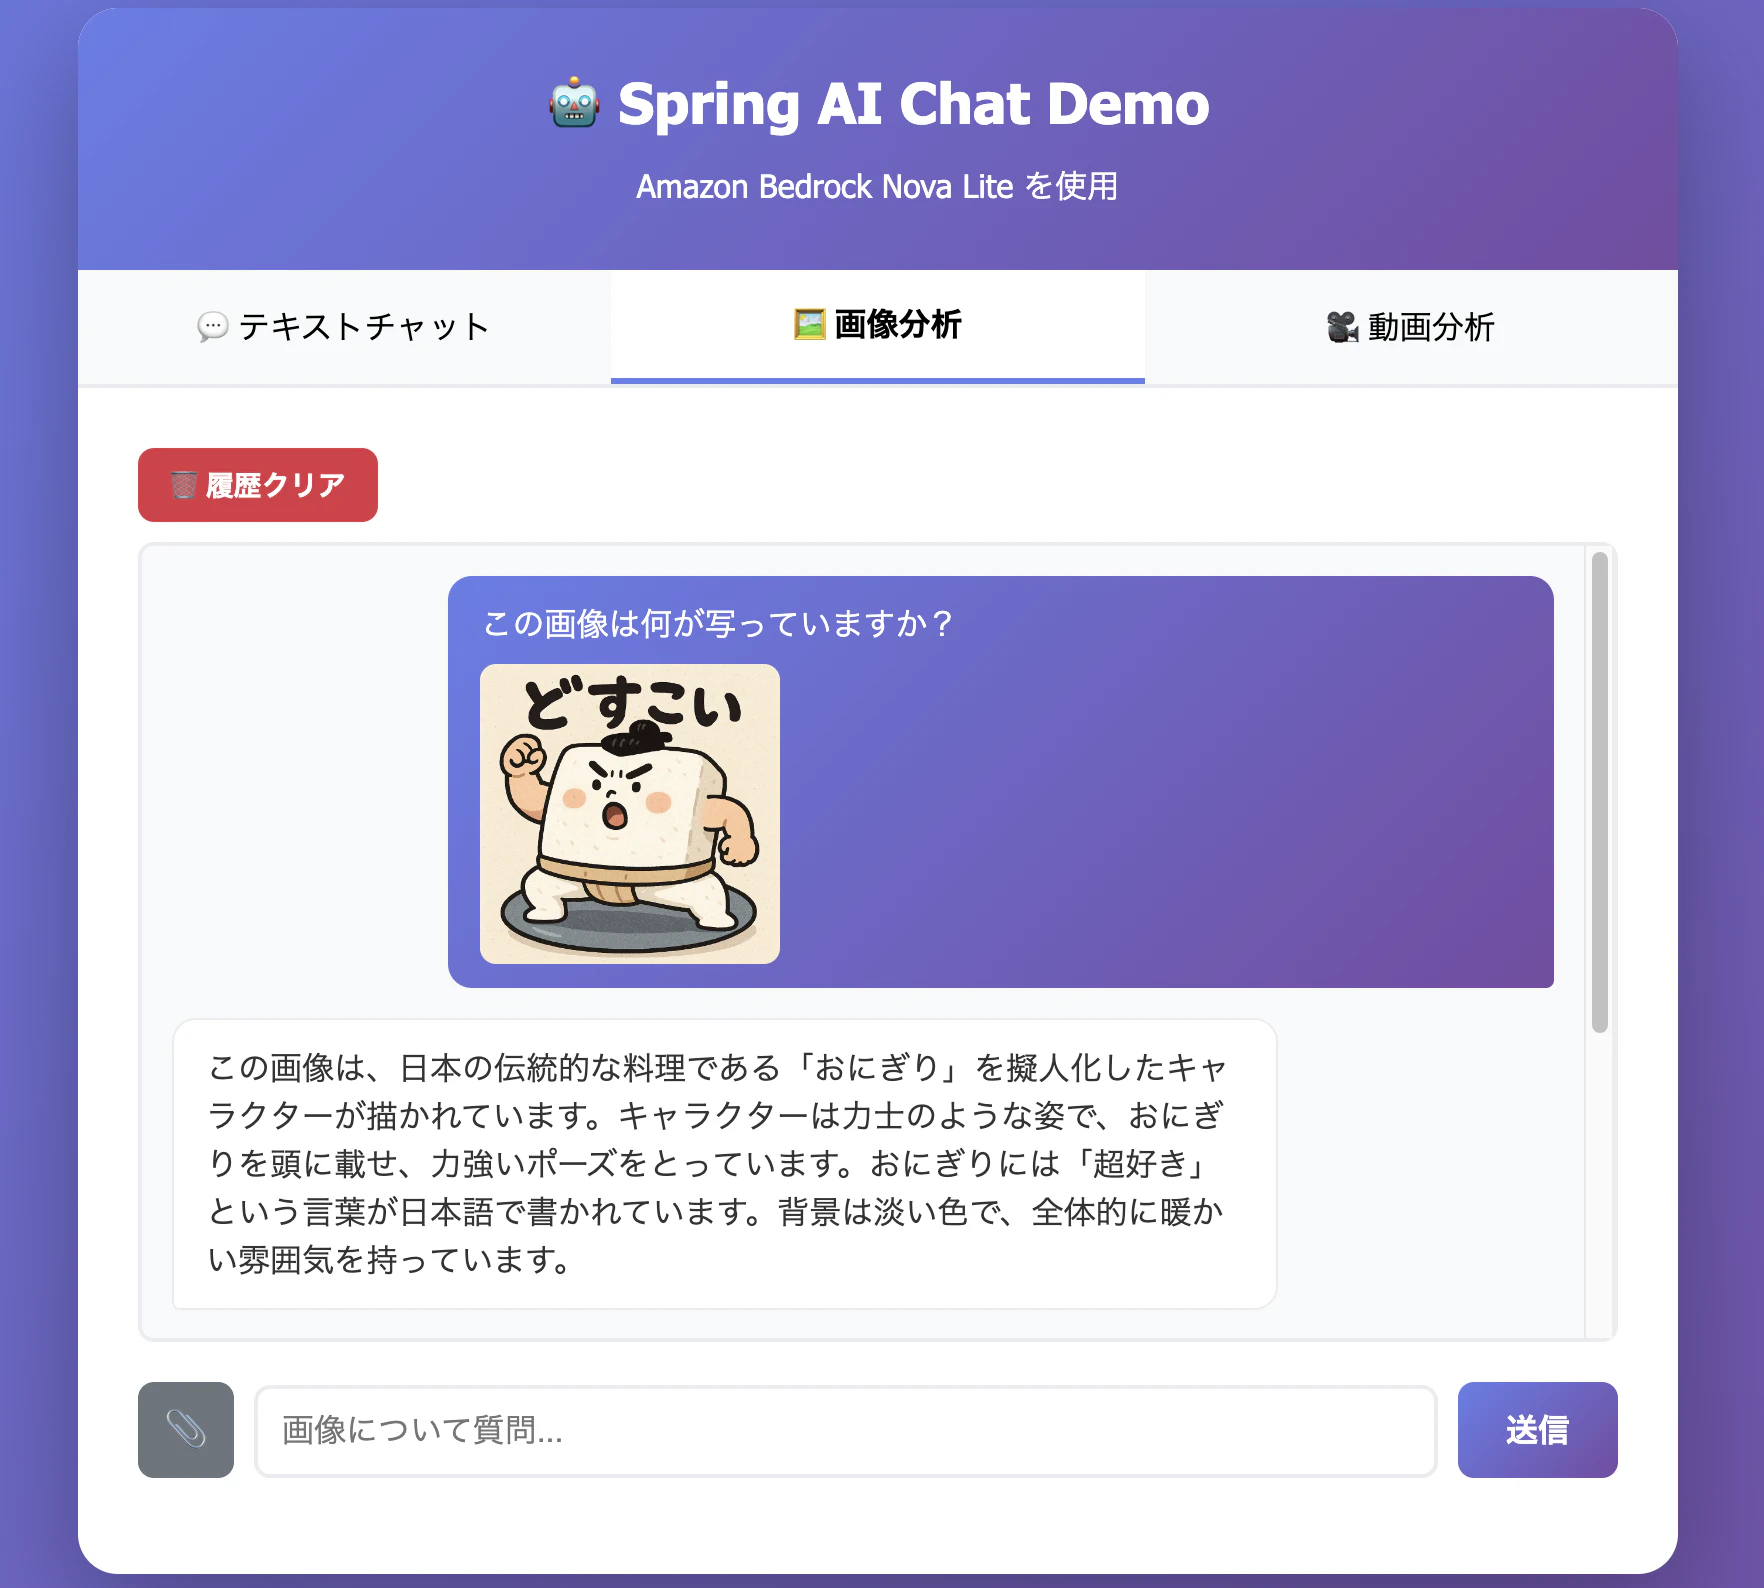
怒っているかどうか聞いてみました。
問題なく記憶できてそうですね。
頭のまげはおにぎりとして認識されてますけど。。

動画はご自身でためしてみてください!
おわりに
今回はChat Memoryを使って会話履歴を保存する機能を実装しました。
MessageChatMemoryAdvisorを使うだけで、会話履歴の保存・取得を自動でやってくれるので、実装はとてもシンプルですね。
次回はRAG(Retrieval Augmented Generation)を試して、外部ドキュメントを参照した応答ができるようにしてみます!
では、ここで一旦まわしを締め直して終わりとします。どすこい。