
この記事ではSpring AIを検証するための下準備を行なっていきます。
私の環境
macOS 14.6
やること
- IntelliJ IDEA Community のインストール
- JDK 21 のインストール
- Spring Initializr を使ったプロジェクトの作成
- Spring AI の依存関係を追加
- IntelliJ IDEA プロジェクト設定、動作確認
IntelliJ IDEA Community のインストール
Homebrewでインストールを実施
brew install --cask intellij-idea-ce
JetBrains公式サイトからCommunity版をダウンロードしてインストールすることも可能です。
https://www.jetbrains.com/idea/download/?section=mac
JDK 21 のインストール
こちらもHomebrewを使用してインストールします。
brew install openjdk@21
次にmacOSがJDKを認識できるようにシンボリックリンクを作成します。(こちらはコマンド入力パスワード入力を求められます)
sudo ln -sfn /opt/homebrew/opt/openjdk@21/libexec/openjdk.jdk /Library/Java/JavaVirtualMachines/openjdk-21.jdk
下記コマンドを実行し、バージョンが表示されていれば問題ありません。
java --version
実行すると下記のように表示されるかと思います。
openjdk 21.0.9 2025-10-21
OpenJDK Runtime Environment Homebrew (build 21.0.9)
OpenJDK 64-Bit Server VM Homebrew (build 21.0.9, mixed mode, sharing)
Spring Initializr でプロジェクト作成
https://start.spring.io/ にアクセスし、Spring Bootのプロジェクトを作成します。
今回は下記のように作成します:
- Project:Maven
- Language:Java
- Spring Boot:3.5.7
- Java:21
- Project Metadata:(デフォルトのままでも可)
- Group: com.example
- Artifact: spring-ai-sample
- Name: spring-ai-sample
- Description: Spring AI sample project
- Package name: com.example.springaisample
- Dependencies:Spring Web, Spring Boot DevTools, Lombok
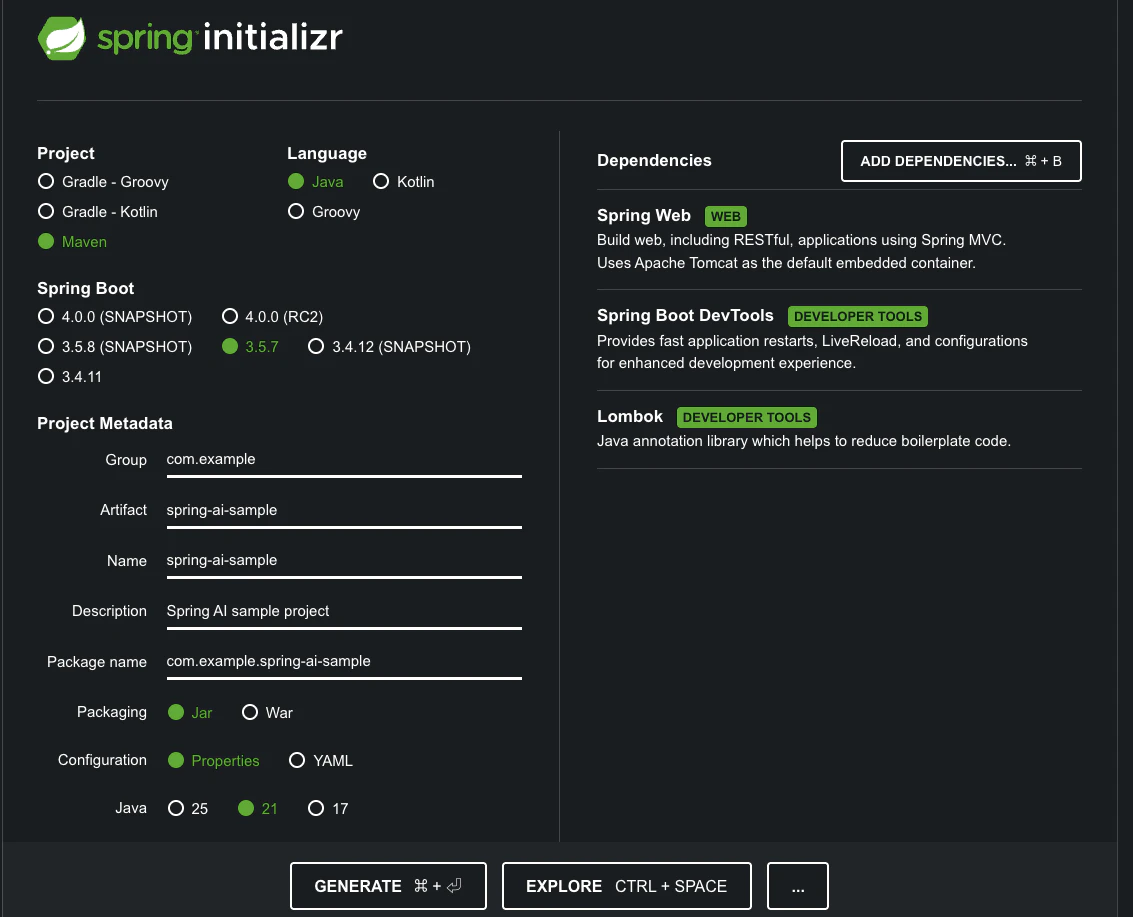
GENERATE ボタンを押してZipをダウンロードし、解凍します。
Spring AI の依存関係を追加
Spring Initializr には Spring AI の依存関係が含まれていないため、手動で追加します。
解凍したプロジェクトフォルダ内の pom.xml をテキストエディタで開きます。
1. Spring AI のバージョンを定義
<properties> セクションに以下を追加します。
<spring-ai.version>1.1.0</spring-ai.version>
2. Spring AI BOM を追加
<properties> の直後に <dependencyManagement> セクションを追加します。
<dependencyManagement>
    <dependencies>
        <dependency>
            <groupId>org.springframework.ai</groupId>
            <artifactId>spring-ai-bom</artifactId>
            <version>${spring-ai.version}</version>
            <type>pom</type>
            <scope>import</scope>
        </dependency>
    </dependencies>
</dependencyManagement>
3. Bedrock Converse の依存関係を追加
<dependencies> セクションに以下を追加します。
今回使用するのは Amazon Bedrock Converse API 版の依存関係です。
<dependency>
    <groupId>org.springframework.ai</groupId>
    <artifactId>spring-ai-starter-model-bedrock-converse</artifactId>
</dependency>
ChatGPT(OpenAI)など別のプロバイダを利用する場合は依存関係が異なります。
詳細は下記の公式ドキュメントを参照してください。
https://docs.spring.io/spring-ai/reference/api/chatmodel.html
pom.xml記載例
<?xml version="1.0" encoding="UTF-8"?>
<project xmlns="http://maven.apache.org/POM/4.0.0" xmlns:xsi="http://www.w3.org/2001/XMLSchema-instance"
	xsi:schemaLocation="http://maven.apache.org/POM/4.0.0 https://maven.apache.org/xsd/maven-4.0.0.xsd">
	<modelVersion>4.0.0</modelVersion>
	<parent>
		<groupId>org.springframework.boot</groupId>
		<artifactId>spring-boot-starter-parent</artifactId>
		<version>3.5.7</version>
		<relativePath/> <!-- lookup parent from repository -->
	</parent>
	<groupId>com.example</groupId>
	<artifactId>spring-ai-sample</artifactId>
	<version>0.0.1-SNAPSHOT</version>
	<name>spring-ai-sample</name>
	<description>Spring AI sample project</description>
	<url/>
	<licenses>
		<license/>
	</licenses>
	<developers>
		<developer/>
	</developers>
	<scm>
		<connection/>
		<developerConnection/>
		<tag/>
		<url/>
	</scm>
	<properties>
		<java.version>21</java.version>
        <spring-ai.version>1.1.0</spring-ai.version>
	</properties>
    <dependencyManagement>
        <dependencies>
            <dependency>
                <groupId>org.springframework.ai</groupId>
                <artifactId>spring-ai-bom</artifactId>
                <version>${spring-ai.version}</version>
                <type>pom</type>
                <scope>import</scope>
            </dependency>
        </dependencies>
    </dependencyManagement>
	<dependencies>
		<dependency>
			<groupId>org.springframework.boot</groupId>
			<artifactId>spring-boot-starter-web</artifactId>
		</dependency>
		<dependency>
			<groupId>org.springframework.boot</groupId>
			<artifactId>spring-boot-devtools</artifactId>
			<scope>runtime</scope>
			<optional>true</optional>
		</dependency>
		<dependency>
			<groupId>org.projectlombok</groupId>
			<artifactId>lombok</artifactId>
			<optional>true</optional>
		</dependency>
		<dependency>
			<groupId>org.springframework.boot</groupId>
			<artifactId>spring-boot-starter-test</artifactId>
			<scope>test</scope>
		</dependency>
        <dependency>
            <groupId>org.springframework.ai</groupId>
            <artifactId>spring-ai-starter-model-bedrock-converse</artifactId>
        </dependency>
	</dependencies>
	<build>
		<plugins>
			<plugin>
				<groupId>org.apache.maven.plugins</groupId>
				<artifactId>maven-compiler-plugin</artifactId>
				<configuration>
					<annotationProcessorPaths>
						<path>
							<groupId>org.projectlombok</groupId>
							<artifactId>lombok</artifactId>
						</path>
					</annotationProcessorPaths>
				</configuration>
			</plugin>
			<plugin>
				<groupId>org.springframework.boot</groupId>
				<artifactId>spring-boot-maven-plugin</artifactId>
				<configuration>
					<excludes>
						<exclude>
							<groupId>org.projectlombok</groupId>
							<artifactId>lombok</artifactId>
						</exclude>
					</excludes>
				</configuration>
			</plugin>
		</plugins>
	</build>
</project>
入力後、保存して完了です。
IntelliJ IDEA プロジェクト設定、動作確認
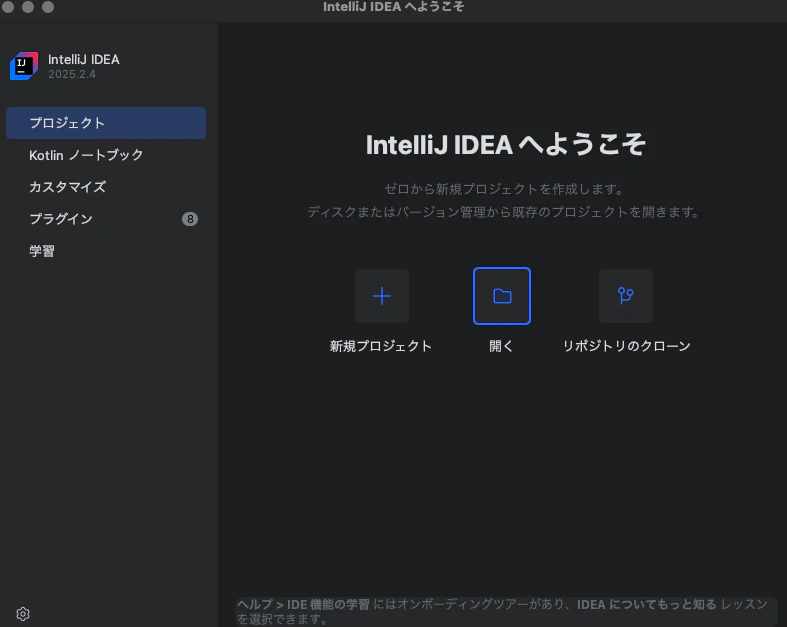
IntelliJ IDEAを開き開くから先ほど解凍したフォルダを開く
IntelliJ が Maven プロジェクトとして認識し、依存関係をダウンロード(自動)
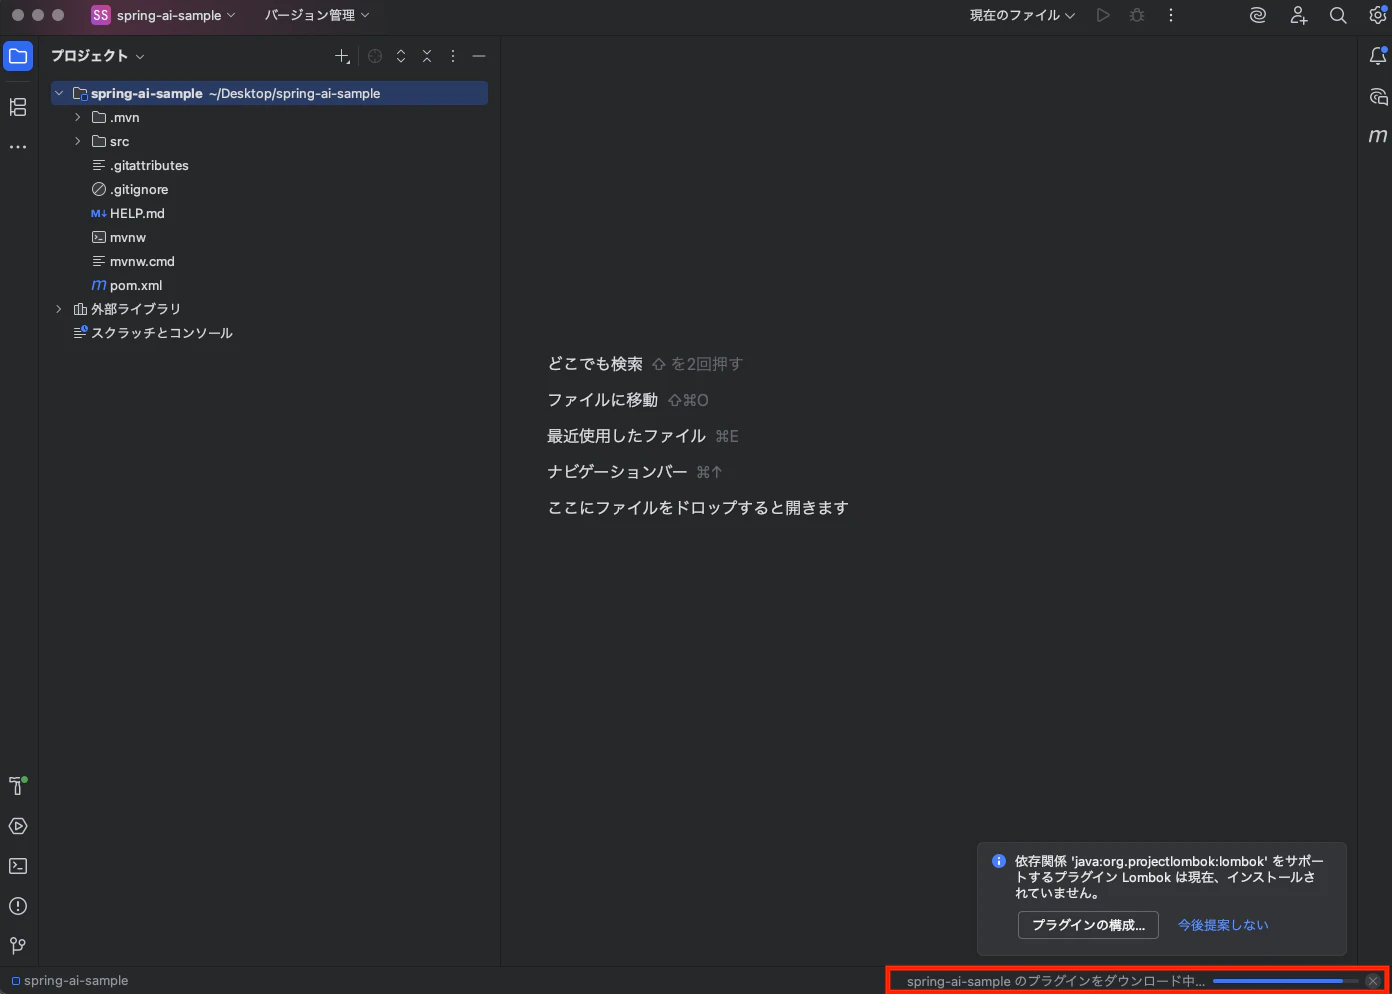
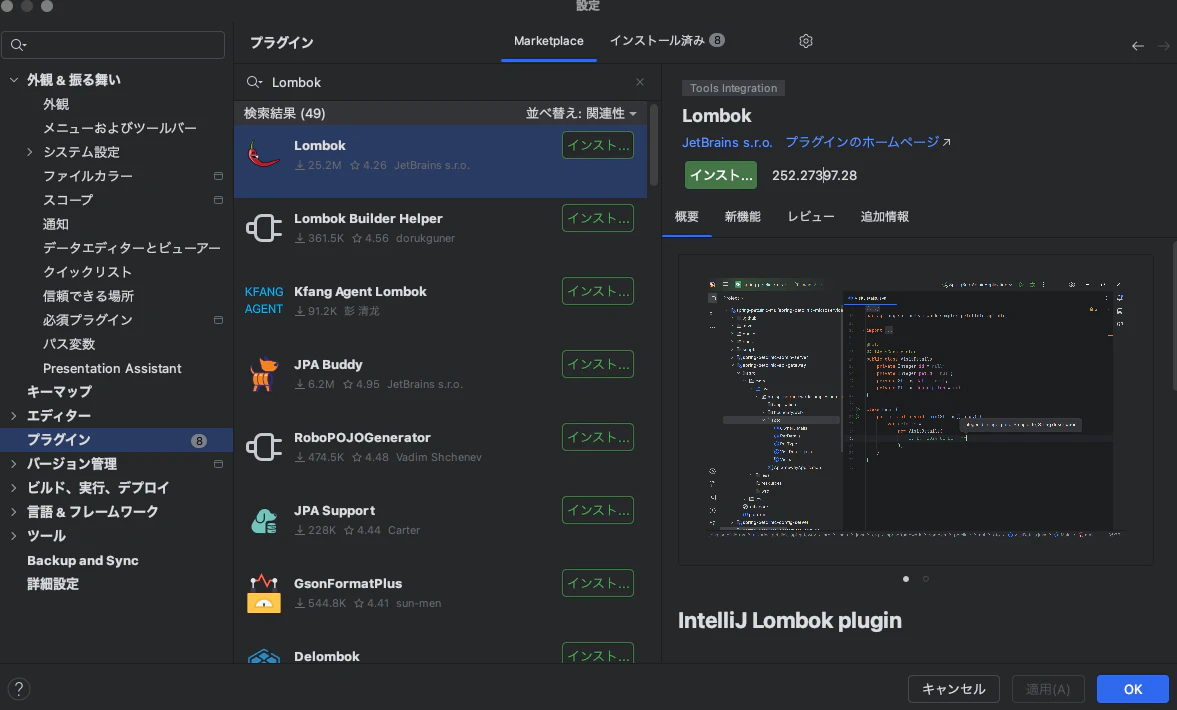
Lombok プラグインのインストール
IntelliJ IDEA > 設定
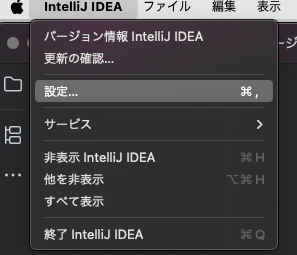
プラグイン > lombokで検索 > インストール
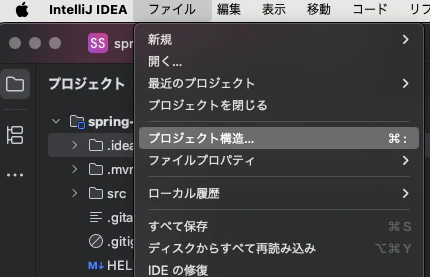
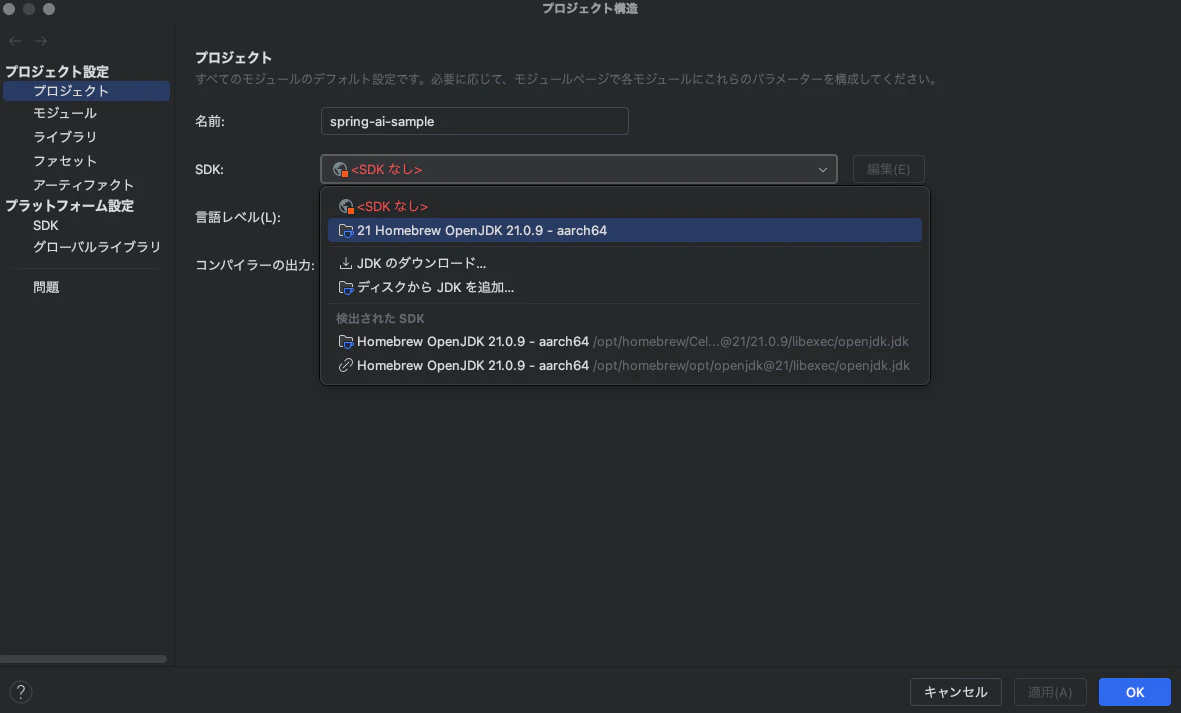
プロジェクト設定でSDKを設定する
ファイル > プロジェクト構造を開く
SDKの欄でJDK21を設定 > 適用(A)
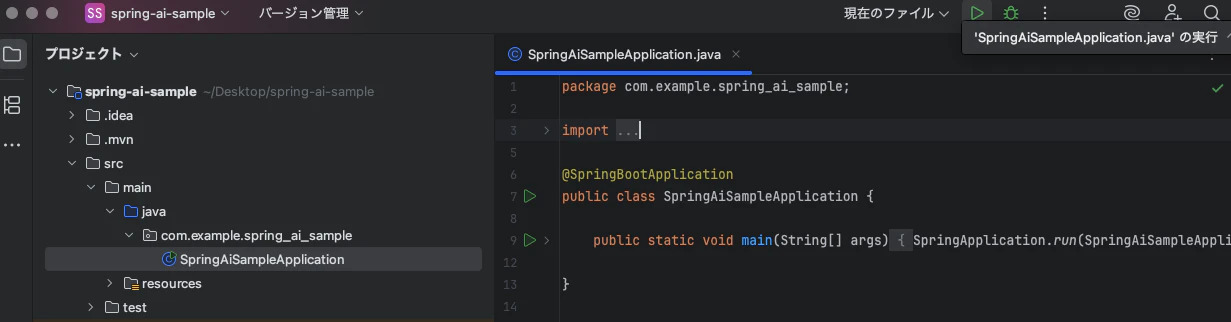
動作確認
SpringAiSampleApplicationを選択し、実行をクリック
特にエラーが発生しなければ、環境構築は完了です。
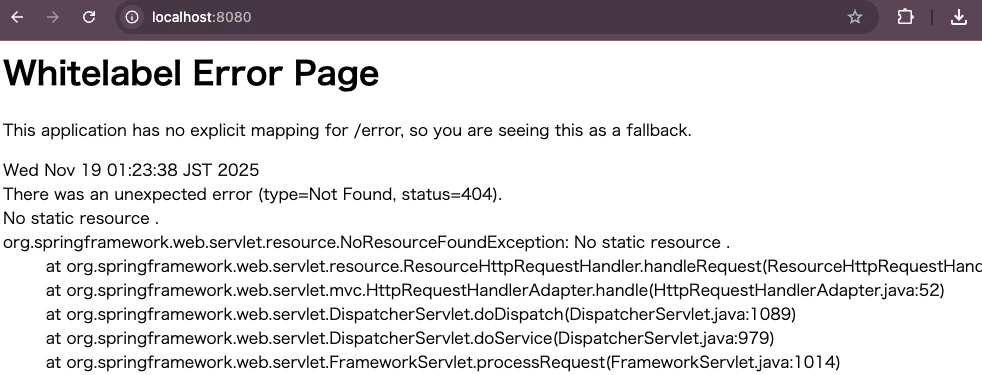
ちなみに特に設定していなければポート8080で起動しますが、アクセスしてもルートパス(/)にエンドポイントを定義していないため、404 エラーページが表示されます。
おわりに
この記事では、Spring AI を使用するための開発環境構築手順を紹介しました。
次回は実際にAmazon Bedrockが呼び出せるように設定していきます。
では、ここで一旦まわしを締め直して終わりとします。どすこい。