
前回はAmazon Bedrockとの基本的な連携を実装しました。
今回はストリーミング応答とマルチモーダル入力(画像・動画)に対応したチャットUIを作成します。どすこい。
私の環境
- macOS 14.6
- JDK 21
- Spring Boot 3.5.7
- Spring AI 1.1.0
使用するモデル
- amazon.nova-lite-v1:0
やること
- ストリーミング応答の実装
- 画像分析機能の実装
- 動画分析機能の実装
- ファイルアップロードの設定
- チャットUIの作成(ここはAIで作成)
ストリーミング応答の実装
src/main/java/com/example/spring_ai_sample/controller にStreamingChatController.java を作成します。
package com.example.spring_ai_sample.controller;

import org.springframework.ai.chat.client.ChatClient;
import org.springframework.beans.factory.annotation.Autowired;
import org.springframework.http.MediaType;
import org.springframework.web.bind.annotation.GetMapping;
import org.springframework.web.bind.annotation.RequestParam;
import org.springframework.web.bind.annotation.RestController;
import reactor.core.publisher.Flux;

/**
 * ストリーミング応答を返すコントローラー
 */
@RestController
public class StreamingChatController {

    private final ChatClient chatClient;

    @Autowired
    public StreamingChatController(ChatClient.Builder chatClientBuilder) {
        this.chatClient = chatClientBuilder.build();
    }

    /**
     * /stream-chat エンドポイント
     * Server-Sent Events (SSE) でストリーミング応答を返す
     */
    @GetMapping(value = "/stream-chat", produces = MediaType.TEXT_EVENT_STREAM_VALUE)
    public Flux<String> streamChat(@RequestParam String prompt) {
        return chatClient.prompt(prompt)
                .stream()
                .content();
    }
}
前回のChatControllerとの違いはcall()がstream()に変わっただけです。
MediaType.TEXT_EVENT_STREAM_VALUE を指定することで、Server-Sent Events(SSE)形式でレスポンスを返します。
画像分析機能の実装
同じcontrollerディレクトリにImageChatController.java を作成します。
package com.example.spring_ai_sample.controller;

import org.springframework.ai.chat.client.ChatClient;
import org.springframework.beans.factory.annotation.Autowired;
import org.springframework.core.io.ByteArrayResource;
import org.springframework.util.MimeTypeUtils;
import org.springframework.web.bind.annotation.PostMapping;
import org.springframework.web.bind.annotation.RequestParam;
import org.springframework.web.bind.annotation.RestController;
import org.springframework.web.multipart.MultipartFile;

import java.io.IOException;

/**
 * 画像分析用コントローラー
 */
@RestController
public class ImageChatController {

    private final ChatClient chatClient;

    @Autowired
    public ImageChatController(ChatClient.Builder chatClientBuilder) {
        this.chatClient = chatClientBuilder.build();
    }

    /**
     * /image-chat エンドポイント
     * 画像とテキストを受け取り、分析結果を返す
     */
    @PostMapping("/image-chat")
    public String imageChat(
            @RequestParam("prompt") String prompt,
            @RequestParam("image") MultipartFile image) throws IOException {

        byte[] imageBytes = image.getBytes();

        return chatClient.prompt()
                .user(u -> u.text(prompt)
                        .media(MimeTypeUtils.IMAGE_PNG, new ByteArrayResource(imageBytes)))
                .call()
                .content();
    }
}
user()メソッドでtext()とmedia()を組み合わせることで、テキストと画像を同時に送信できるようです。
動画分析機能の実装
こちらも同じcontrollerディレクトリにVideoChatController.javaを作成します。
package com.example.spring_ai_sample.controller;

import org.springframework.ai.chat.client.ChatClient;
import org.springframework.beans.factory.annotation.Autowired;
import org.springframework.core.io.ByteArrayResource;
import org.springframework.util.MimeTypeUtils;
import org.springframework.web.bind.annotation.PostMapping;
import org.springframework.web.bind.annotation.RequestParam;
import org.springframework.web.bind.annotation.RestController;
import org.springframework.web.multipart.MultipartFile;

import java.io.IOException;

/**
 * 動画分析用コントローラー
 */
@RestController
public class VideoChatController {

    private final ChatClient chatClient;

    @Autowired
    public VideoChatController(ChatClient.Builder chatClientBuilder) {
        this.chatClient = chatClientBuilder.build();
    }

    /**
     * /video-chat エンドポイント
     * 動画とテキストを受け取り、分析結果を返す
     */
    @PostMapping("/video-chat")
    public String videoChat(
            @RequestParam("prompt") String prompt,
            @RequestParam("video") MultipartFile video) throws IOException {

        byte[] videoBytes = video.getBytes();

        return chatClient.prompt()
                .user(u -> u.text(prompt)
                        .media(MimeTypeUtils.parseMimeType("video/mp4"), new ByteArrayResource(videoBytes)))
                .call()
                .content();
    }
}
実装内容は画像分析とほぼ同じですが、MIMEタイプをvideo/mp4に変更しています。
実装内容同じような感じなのは、キャッチアップのコスト低いので素敵ですね。
ファイルアップロードの設定
Spring Bootのデフォルトではアップロードできるファイルサイズが 1MBまでに制限されています。
画像や動画を扱うには小さすぎるので、application.propertiesに設定を追加します。
# 既存の設定
spring.application.name=spring-ai-sample
spring.ai.bedrock.aws.region=us-east-1
spring.ai.bedrock.converse.chat.options.model=amazon.nova-lite-v1:0
spring.ai.bedrock.converse.chat.options.temperature=0.8

# ファイルアップロードサイズの上限
spring.servlet.multipart.max-file-size=25MB
spring.servlet.multipart.max-request-size=25MB
Amazon Nova LiteではBase64で直接送信する場合、画像・動画ともに合計ペイロードサイズが最大25MBまでという制限があるので、25MBに設定しています。
対応している画像形式は JPEG、PNG、GIF、WebP です。
動画は MP4 形式に対応しています。
チャットUIの作成(AIが)
src/main/resources/staticディレクトリにindex.htmlを追加します。
ここはAIでなんかいい感じのコードを出力してもらいましょう。
なんかいい感じのコード
<!DOCTYPE html>
<html lang="ja">
<head>
    <meta charset="UTF-8">
    <meta name="viewport" content="width=device-width, initial-scale=1.0">
    <title>Spring AI Chat Demo</title>
    <style>
        * {
            margin: 0;
            padding: 0;
            box-sizing: border-box;
        }

        body {
            font-family: 'Segoe UI', Tahoma, Geneva, Verdana, sans-serif;
            background: linear-gradient(135deg, #667eea 0%, #764ba2 100%);
            min-height: 100vh;
            display: flex;
            justify-content: center;
            align-items: center;
            padding: 20px;
        }

        .container {
            background: white;
            border-radius: 20px;
            box-shadow: 0 20px 60px rgba(0, 0, 0, 0.3);
            max-width: 800px;
            width: 100%;
            overflow: hidden;
        }

        .header {
            background: linear-gradient(135deg, #667eea 0%, #764ba2 100%);
            color: white;
            padding: 30px;
            text-align: center;
        }

        .header h1 {
            font-size: 28px;
            margin-bottom: 10px;
        }

        .tabs {
            display: flex;
            background: #f8f9fa;
            border-bottom: 2px solid #e9ecef;
        }

        .tab {
            flex: 1;
            padding: 15px;
            text-align: center;
            cursor: pointer;
            background: #f8f9fa;
            border: none;
            font-size: 16px;
            transition: all 0.3s;
        }

        .tab:hover {
            background: #e9ecef;
        }

        .tab.active {
            background: white;
            border-bottom: 3px solid #667eea;
            font-weight: bold;
        }

        .tab-content {
            display: none;
            padding: 30px;
        }

        .tab-content.active {
            display: block;
        }

        .input-group {
            margin-bottom: 20px;
        }

        .input-group label {
            display: block;
            margin-bottom: 8px;
            font-weight: bold;
            color: #495057;
        }

        .input-group input[type="text"],
        .input-group textarea {
            width: 100%;
            padding: 12px;
            border: 2px solid #e9ecef;
            border-radius: 8px;
            font-size: 16px;
            transition: border-color 0.3s;
        }

        .input-group input[type="text"]:focus,
        .input-group textarea:focus {
            outline: none;
            border-color: #667eea;
        }

        .input-group textarea {
            min-height: 100px;
            resize: vertical;
        }

        .file-input {
            display: none;
        }

        .file-label {
            display: inline-block;
            padding: 12px 24px;
            background: #6c757d;
            color: white;
            border-radius: 8px;
            cursor: pointer;
            transition: background 0.3s;
        }

        .file-label:hover {
            background: #5a6268;
        }

        .file-name {
            margin-left: 10px;
            color: #495057;
        }

        .btn {
            width: 100%;
            padding: 15px;
            background: linear-gradient(135deg, #667eea 0%, #764ba2 100%);
            color: white;
            border: none;
            border-radius: 8px;
            font-size: 18px;
            font-weight: bold;
            cursor: pointer;
            transition: transform 0.2s;
        }

        .btn:hover {
            transform: translateY(-2px);
        }

        .btn:disabled {
            background: #6c757d;
            cursor: not-allowed;
            transform: none;
        }

        .response {
            margin-top: 30px;
            padding: 20px;
            background: #f8f9fa;
            border-radius: 8px;
            min-height: 100px;
            white-space: pre-wrap;
            word-wrap: break-word;
            line-height: 1.6;
        }

        .response.streaming {
            border-left: 4px solid #667eea;
        }

        .loading {
            text-align: center;
            color: #6c757d;
            font-style: italic;
        }

        .error {
            color: #dc3545;
            background: #f8d7da;
            padding: 15px;
            border-radius: 8px;
            margin-top: 20px;
        }
    </style>
</head>
<body>
    <div class="container">
        <div class="header">
            <h1>🤖 Spring AI Chat Demo</h1>
            <p>Amazon Bedrock Nova Lite を使用</p>
        </div>

        <div class="tabs">
            <button class="tab active" onclick="switchTab('text')">💬 テキストチャット</button>
            <button class="tab" onclick="switchTab('image')">🖼️ 画像分析</button>
            <button class="tab" onclick="switchTab('video')">🎥 動画分析</button>
        </div>

        <!-- テキストチャット -->
        <div id="text-tab" class="tab-content active">
            <div class="input-group">
                <label for="text-prompt">質問を入力してください</label>
                <textarea id="text-prompt" placeholder="例: Javaについて教えてください"></textarea>
            </div>
            <button class="btn" onclick="sendTextChat()">送信</button>
            <div id="text-response" class="response" style="display: none;"></div>
        </div>

        <!-- 画像分析 -->
        <div id="image-tab" class="tab-content">
            <div class="input-group">
                <label for="image-prompt">質問を入力してください</label>
                <input type="text" id="image-prompt" placeholder="例: この画像に何が写っていますか?">
            </div>
            <div class="input-group">
                <label>画像を選択</label>
                <input type="file" id="image-file" class="file-input" accept="image/*" onchange="updateFileName('image')">
                <label for="image-file" class="file-label">📎 ファイルを選択</label>
                <span id="image-file-name" class="file-name"></span>
            </div>
            <button class="btn" onclick="sendImageChat()">送信</button>
            <div id="image-response" class="response" style="display: none;"></div>
        </div>

        <!-- 動画分析 -->
        <div id="video-tab" class="tab-content">
            <div class="input-group">
                <label for="video-prompt">質問を入力してください</label>
                <input type="text" id="video-prompt" placeholder="例: この動画の内容を要約してください">
            </div>
            <div class="input-group">
                <label>動画を選択</label>
                <input type="file" id="video-file" class="file-input" accept="video/*" onchange="updateFileName('video')">
                <label for="video-file" class="file-label">📎 ファイルを選択</label>
                <span id="video-file-name" class="file-name"></span>
            </div>
            <button class="btn" onclick="sendVideoChat()">送信</button>
            <div id="video-response" class="response" style="display: none;"></div>
        </div>
    </div>

    <script>
        // タブ切り替え
        function switchTab(tab) {
            document.querySelectorAll('.tab').forEach(t => t.classList.remove('active'));
            document.querySelectorAll('.tab-content').forEach(c => c.classList.remove('active'));

            event.target.classList.add('active');
            document.getElementById(tab + '-tab').classList.add('active');
        }

        // ファイル名表示
        function updateFileName(type) {
            const fileInput = document.getElementById(type + '-file');
            const fileName = document.getElementById(type + '-file-name');
            fileName.textContent = fileInput.files[0] ? fileInput.files[0].name : '';
        }

        // テキストチャット(ストリーミング)
        async function sendTextChat() {
            const prompt = document.getElementById('text-prompt').value;
            const responseDiv = document.getElementById('text-response');

            if (!prompt.trim()) {
                alert('質問を入力してください');
                return;
            }

            responseDiv.style.display = 'block';
            responseDiv.classList.add('streaming');
            responseDiv.textContent = '';

            const eventSource = new EventSource(`/stream-chat?prompt=${encodeURIComponent(prompt)}`);

            eventSource.onmessage = (event) => {
                responseDiv.textContent += event.data;
            };

            eventSource.onerror = () => {
                eventSource.close();
                responseDiv.classList.remove('streaming');
            };
        }

        // 画像チャット
        async function sendImageChat() {
            const prompt = document.getElementById('image-prompt').value;
            const fileInput = document.getElementById('image-file');
            const responseDiv = document.getElementById('image-response');

            if (!prompt.trim() || !fileInput.files[0]) {
                alert('質問と画像の両方を入力してください');
                return;
            }

            responseDiv.style.display = 'block';
            responseDiv.textContent = '分析中...';

            const formData = new FormData();
            formData.append('prompt', prompt);
            formData.append('image', fileInput.files[0]);

            try {
                const response = await fetch('/image-chat', {
                    method: 'POST',
                    body: formData
                });
                const result = await response.text();
                responseDiv.textContent = result;
            } catch (error) {
                responseDiv.innerHTML = '<div class="error">エラーが発生しました: ' + error.message + '</div>';
            }
        }

        // 動画チャット
        async function sendVideoChat() {
            const prompt = document.getElementById('video-prompt').value;
            const fileInput = document.getElementById('video-file');
            const responseDiv = document.getElementById('video-response');

            if (!prompt.trim() || !fileInput.files[0]) {
                alert('質問と動画の両方を入力してください');
                return;
            }

            responseDiv.style.display = 'block';
            responseDiv.textContent = '分析中...(動画処理には時間がかかる場合があります)';

            const formData = new FormData();
            formData.append('prompt', prompt);
            formData.append('video', fileInput.files[0]);

            try {
                const response = await fetch('/video-chat', {
                    method: 'POST',
                    body: formData
                });
                const result = await response.text();
                responseDiv.textContent = result;
            } catch (error) {
                responseDiv.innerHTML = '<div class="error">エラーが発生しました: ' + error.message + '</div>';
            }
        }
    </script>
</body>
</html>
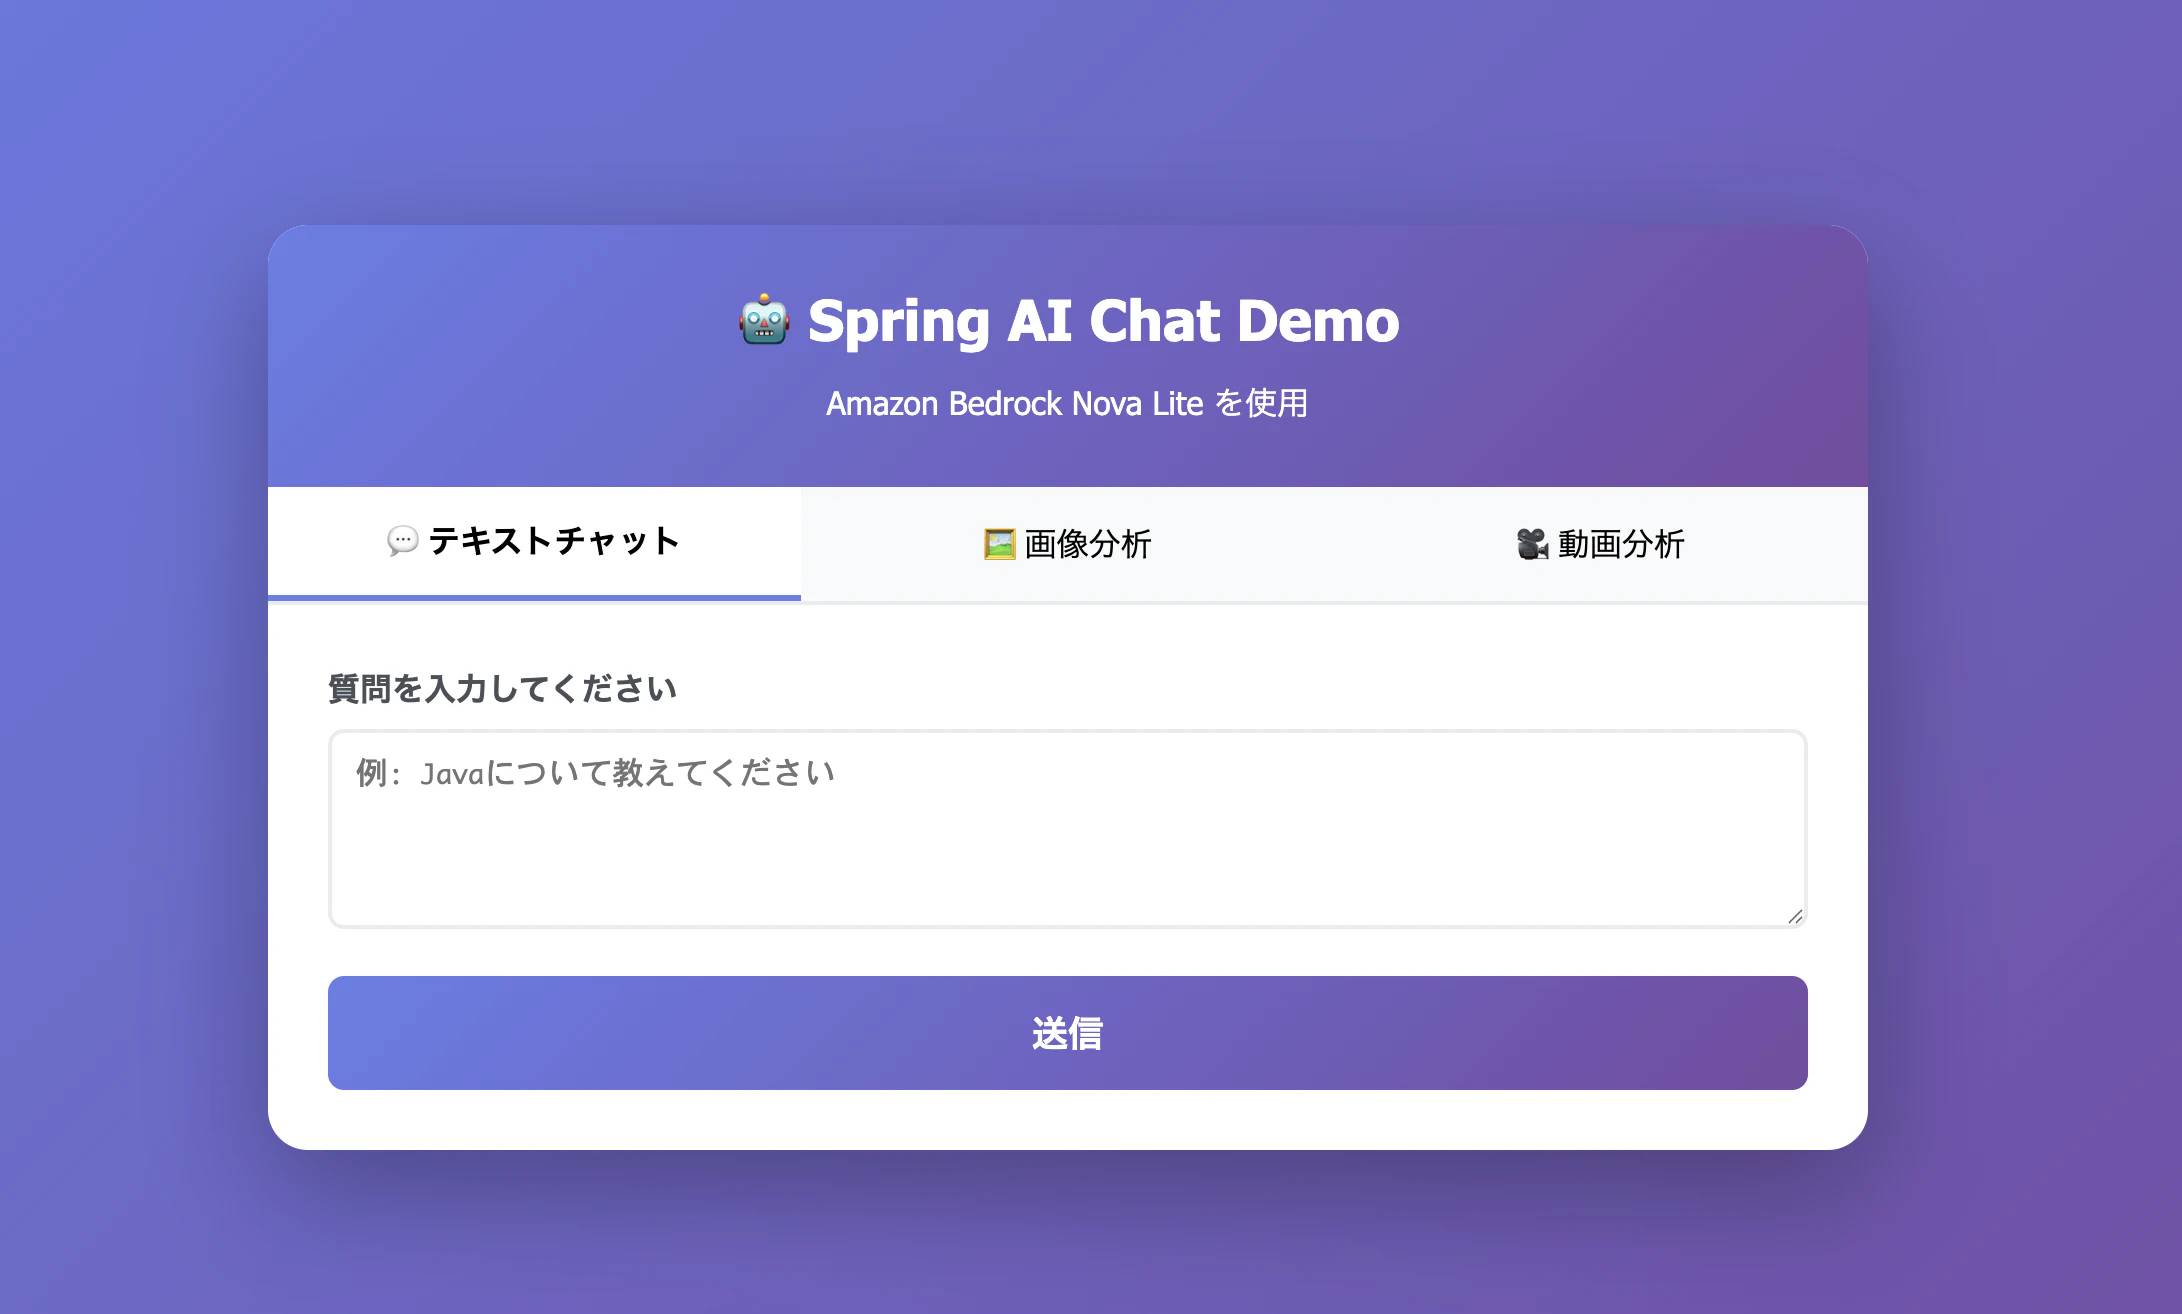
生成されたコードでできたUIはこちら
ワンショットでざっくりプロンプト投げているのにここまでいい感じになるのは素敵。どすこい。
動作確認のまえに
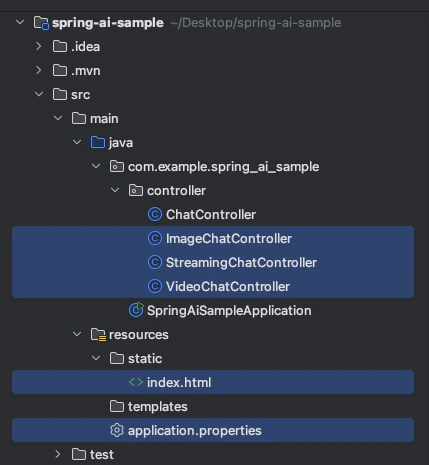
今回作成、変更したファイルはこちらとなります。
ディレクトリ階層など間違っていないか確認しておきましょう。
動作確認
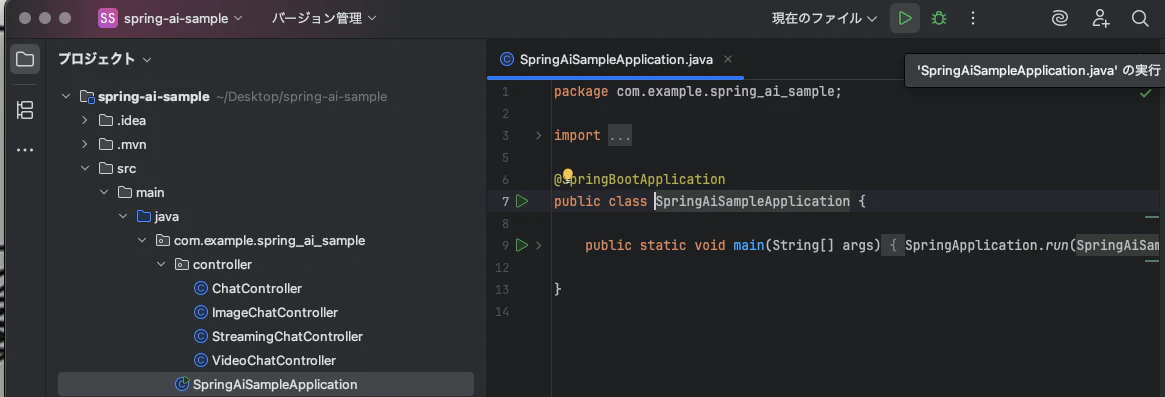
アプリケーション起動
SpringAiSampleApplication実行します。
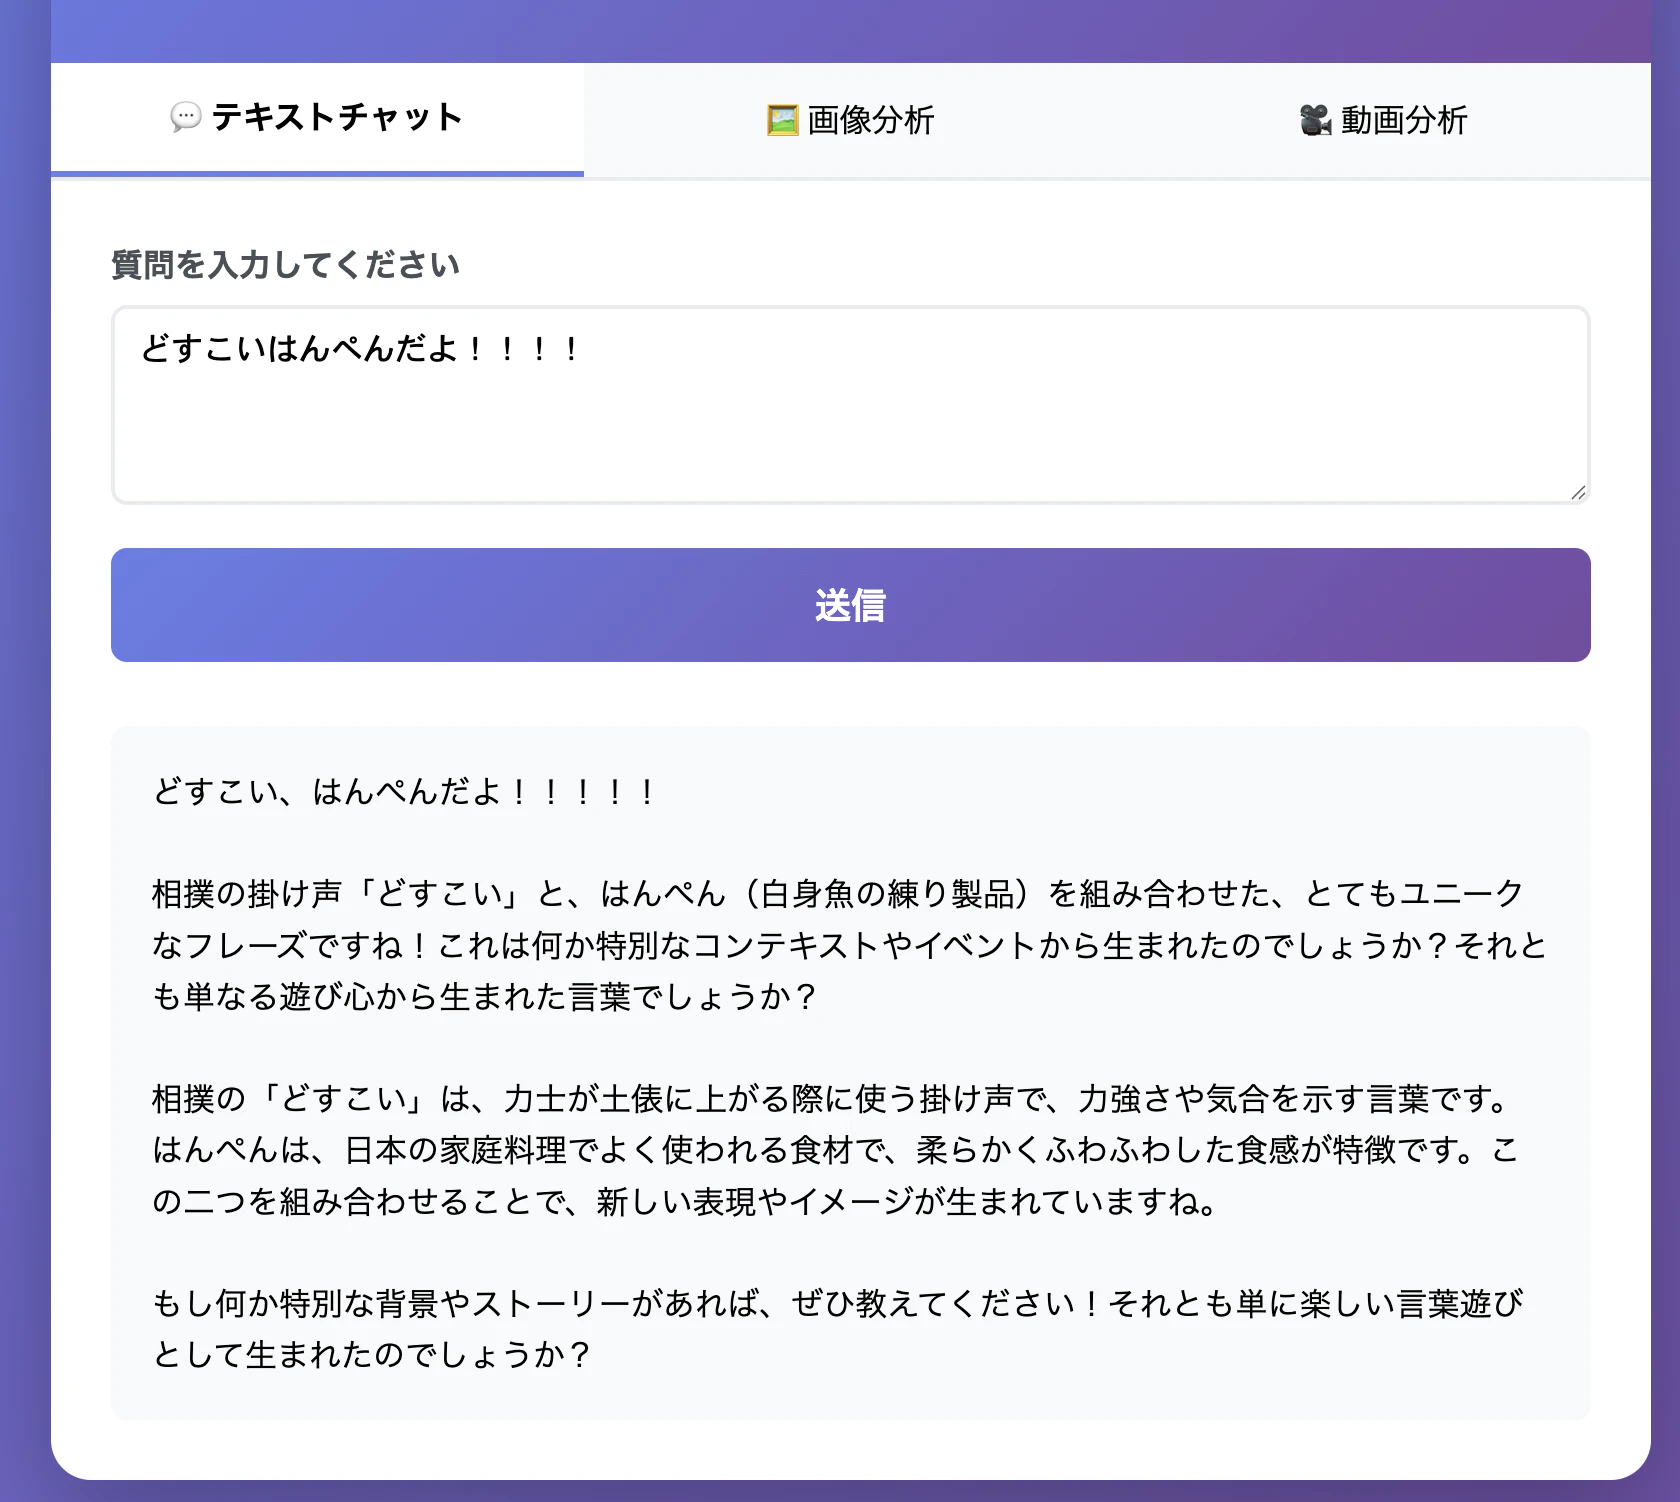
ストリーミング応答を試す
適当なプロンプトをいれて送信してみましょう。
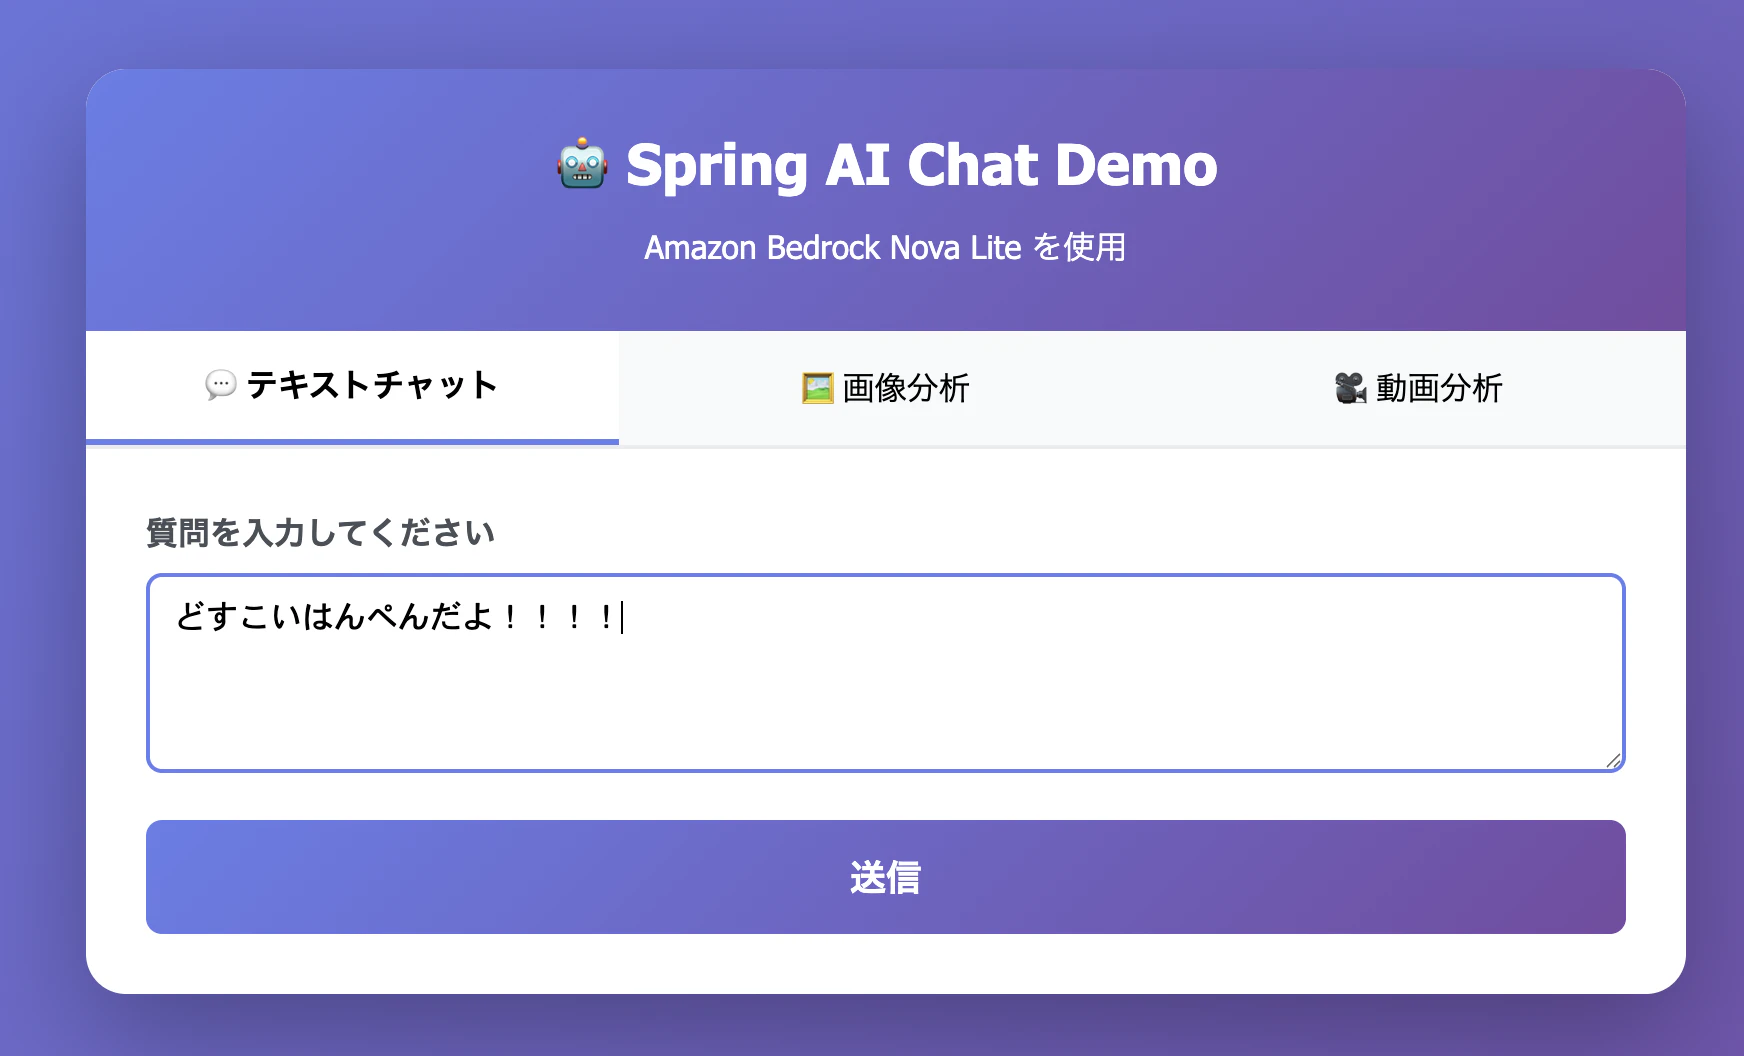
画像じゃ伝わりませんが、ストリーミング出力されていますね!
画像分析を試す
何か画像とプロンプトをいれて送信してみましょう。
私はこちらの画像使いました。
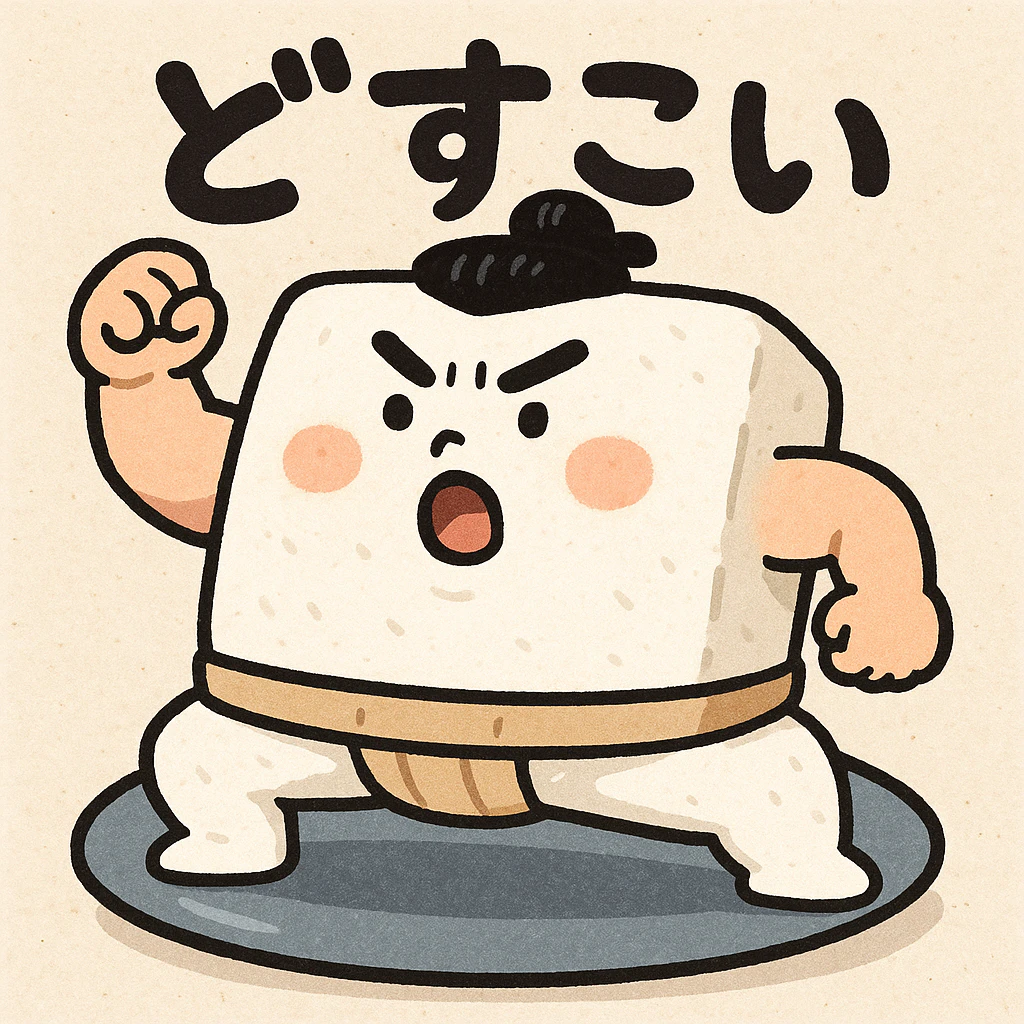
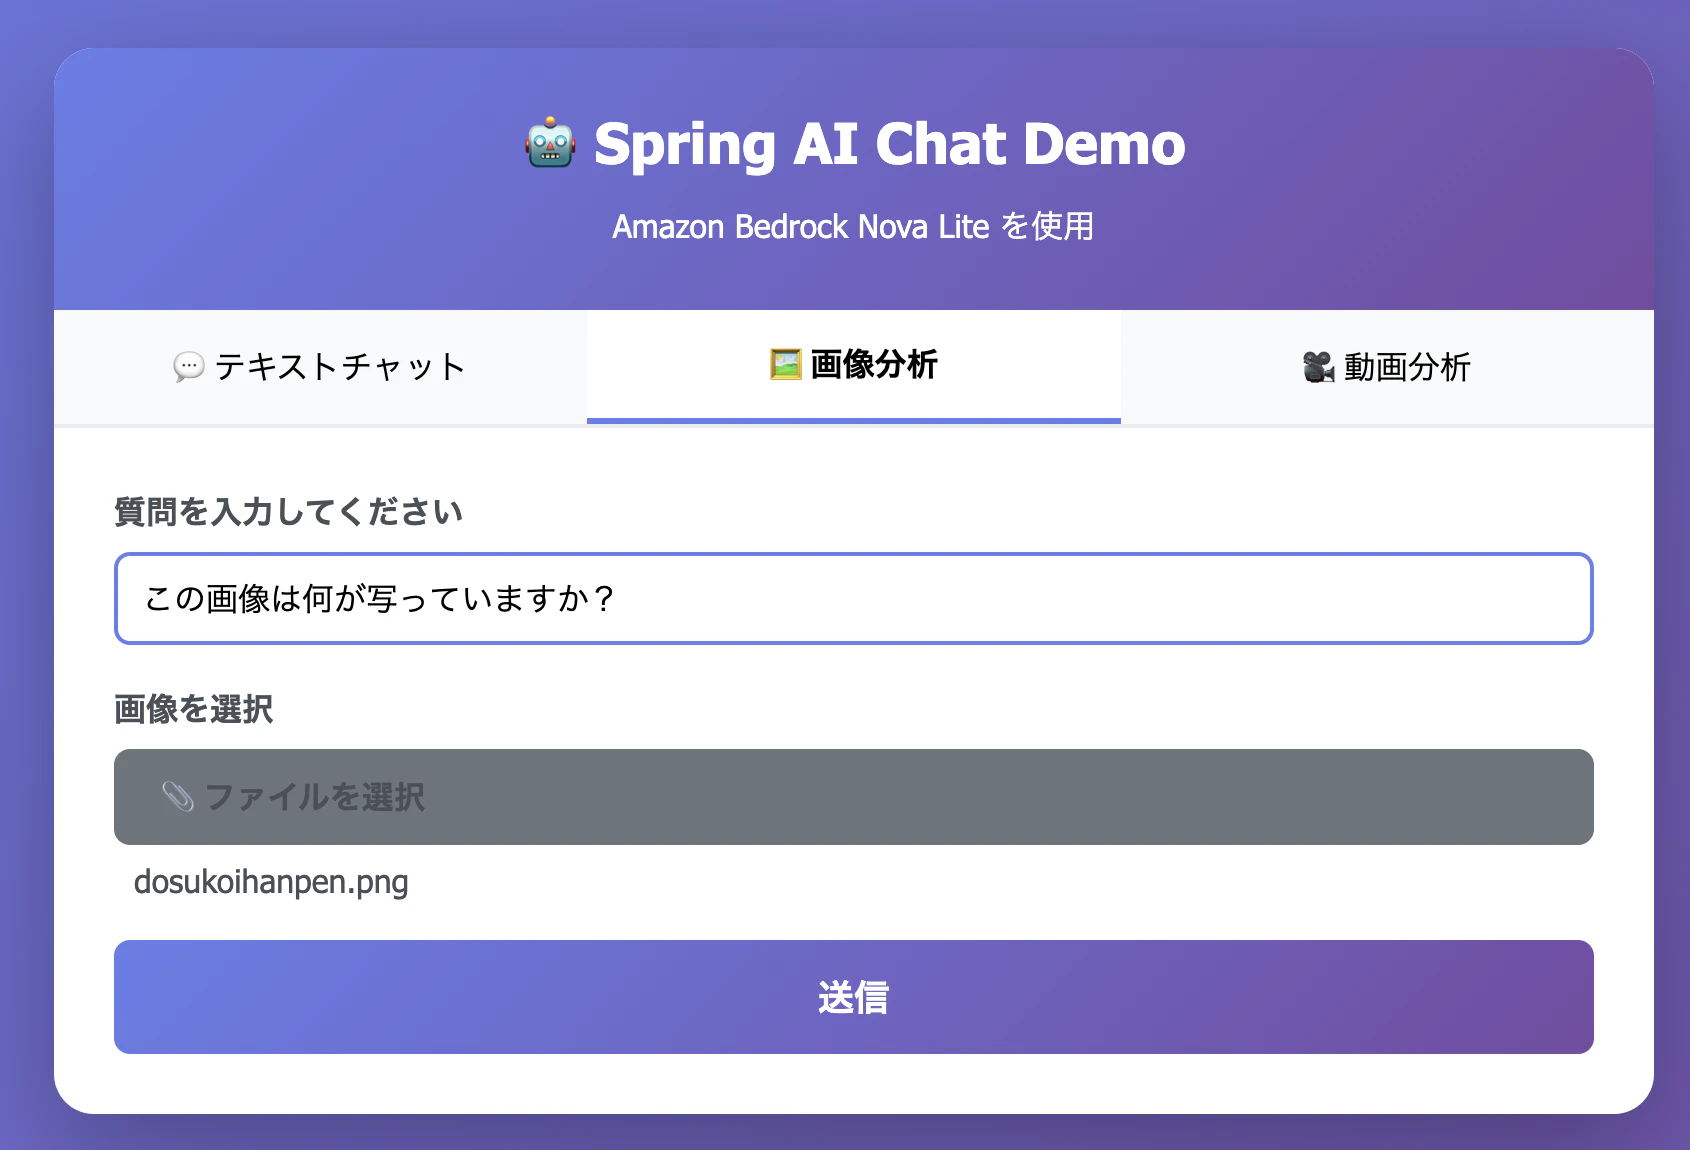
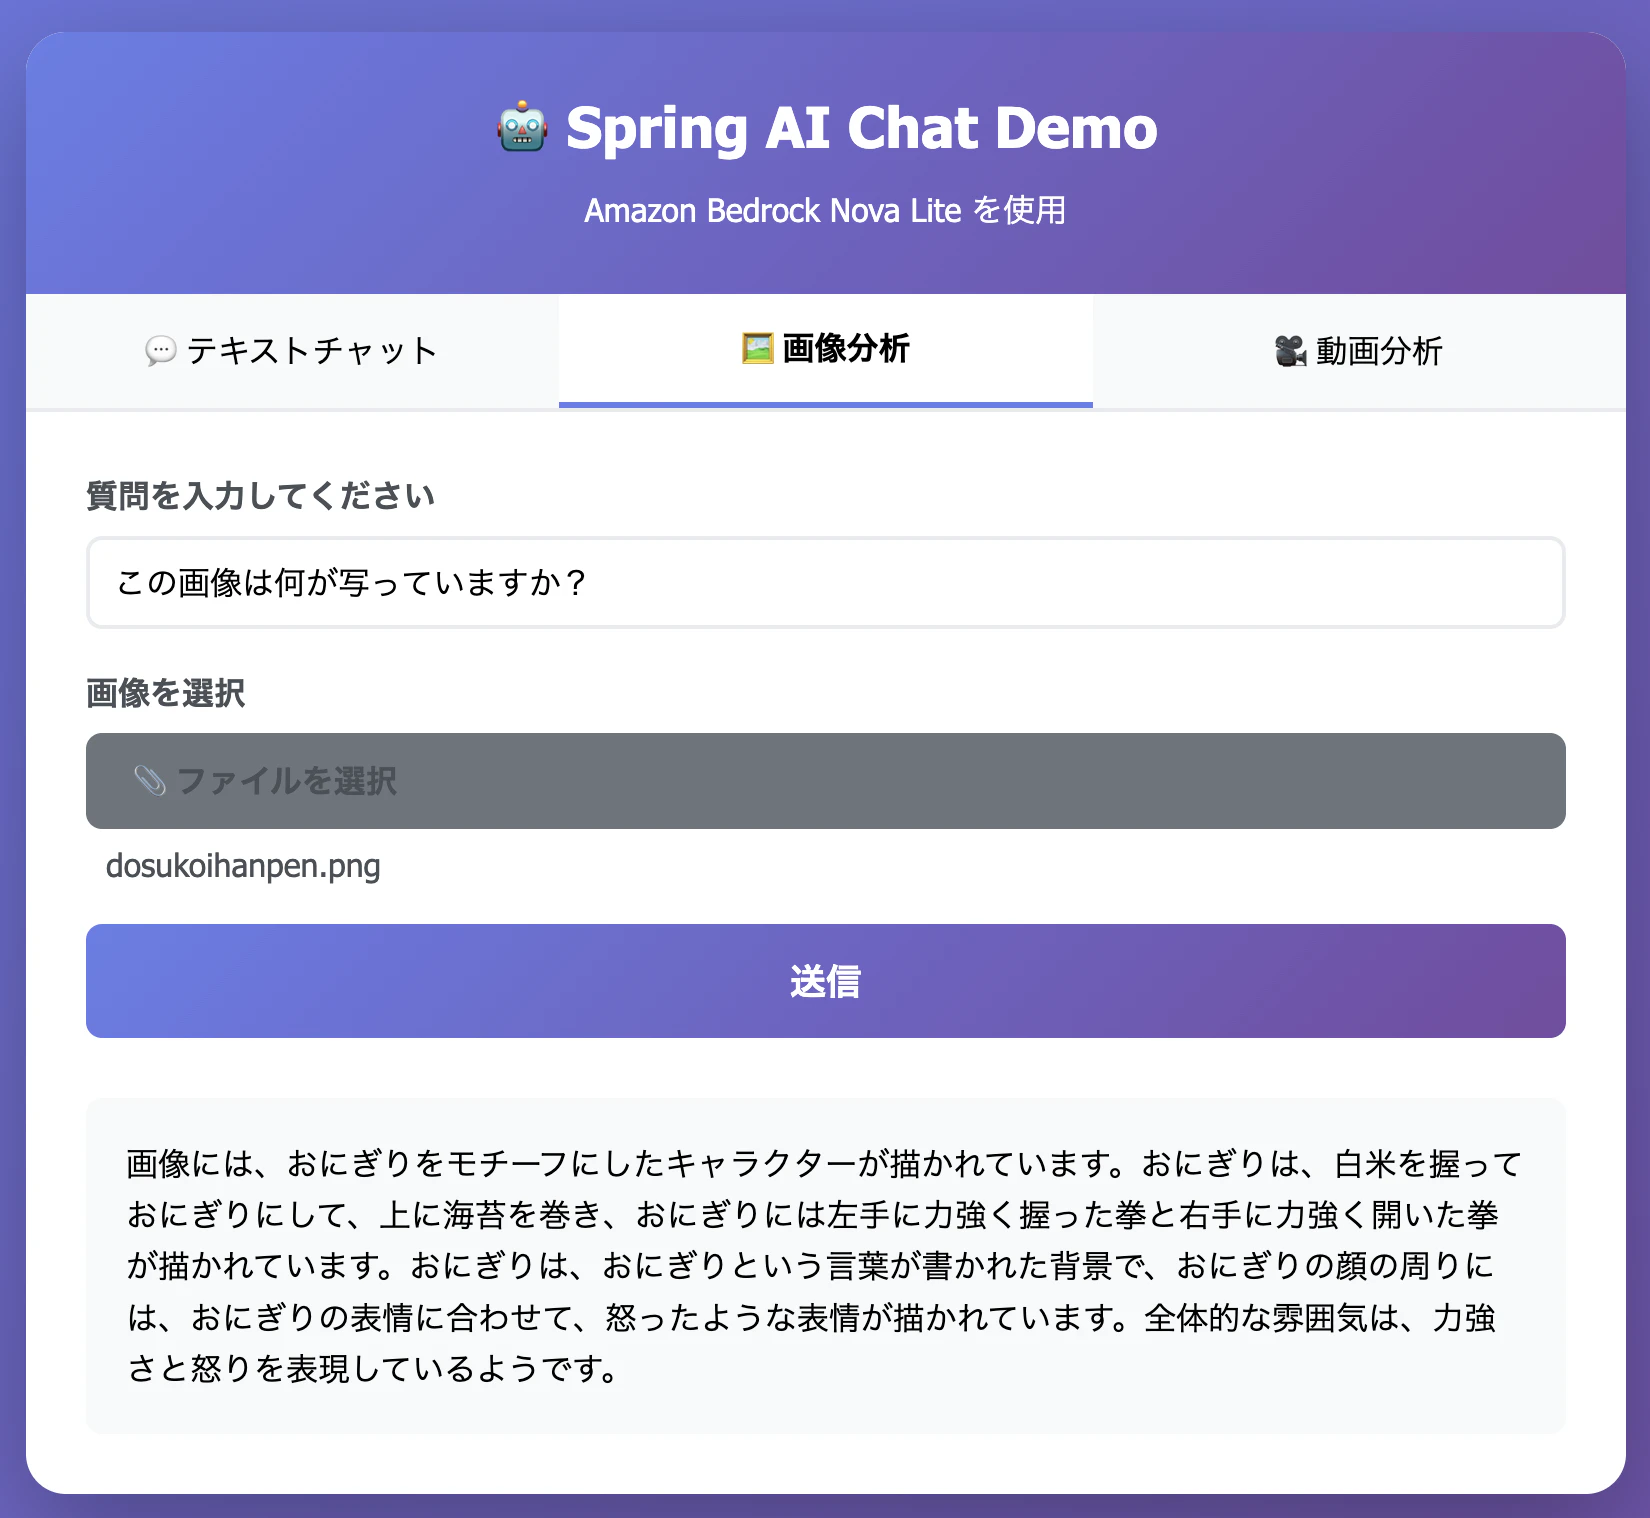
おにぎりらしいです。。。(はんぺんなんですけど)
悲しいですが、特徴はとらえているようなのでよしとしましょう。
動画分析を試す
こちらも何か動画とプロンプトをいれて送信してみましょう。
私が使用した動画は...察してください。タイトル通りです。
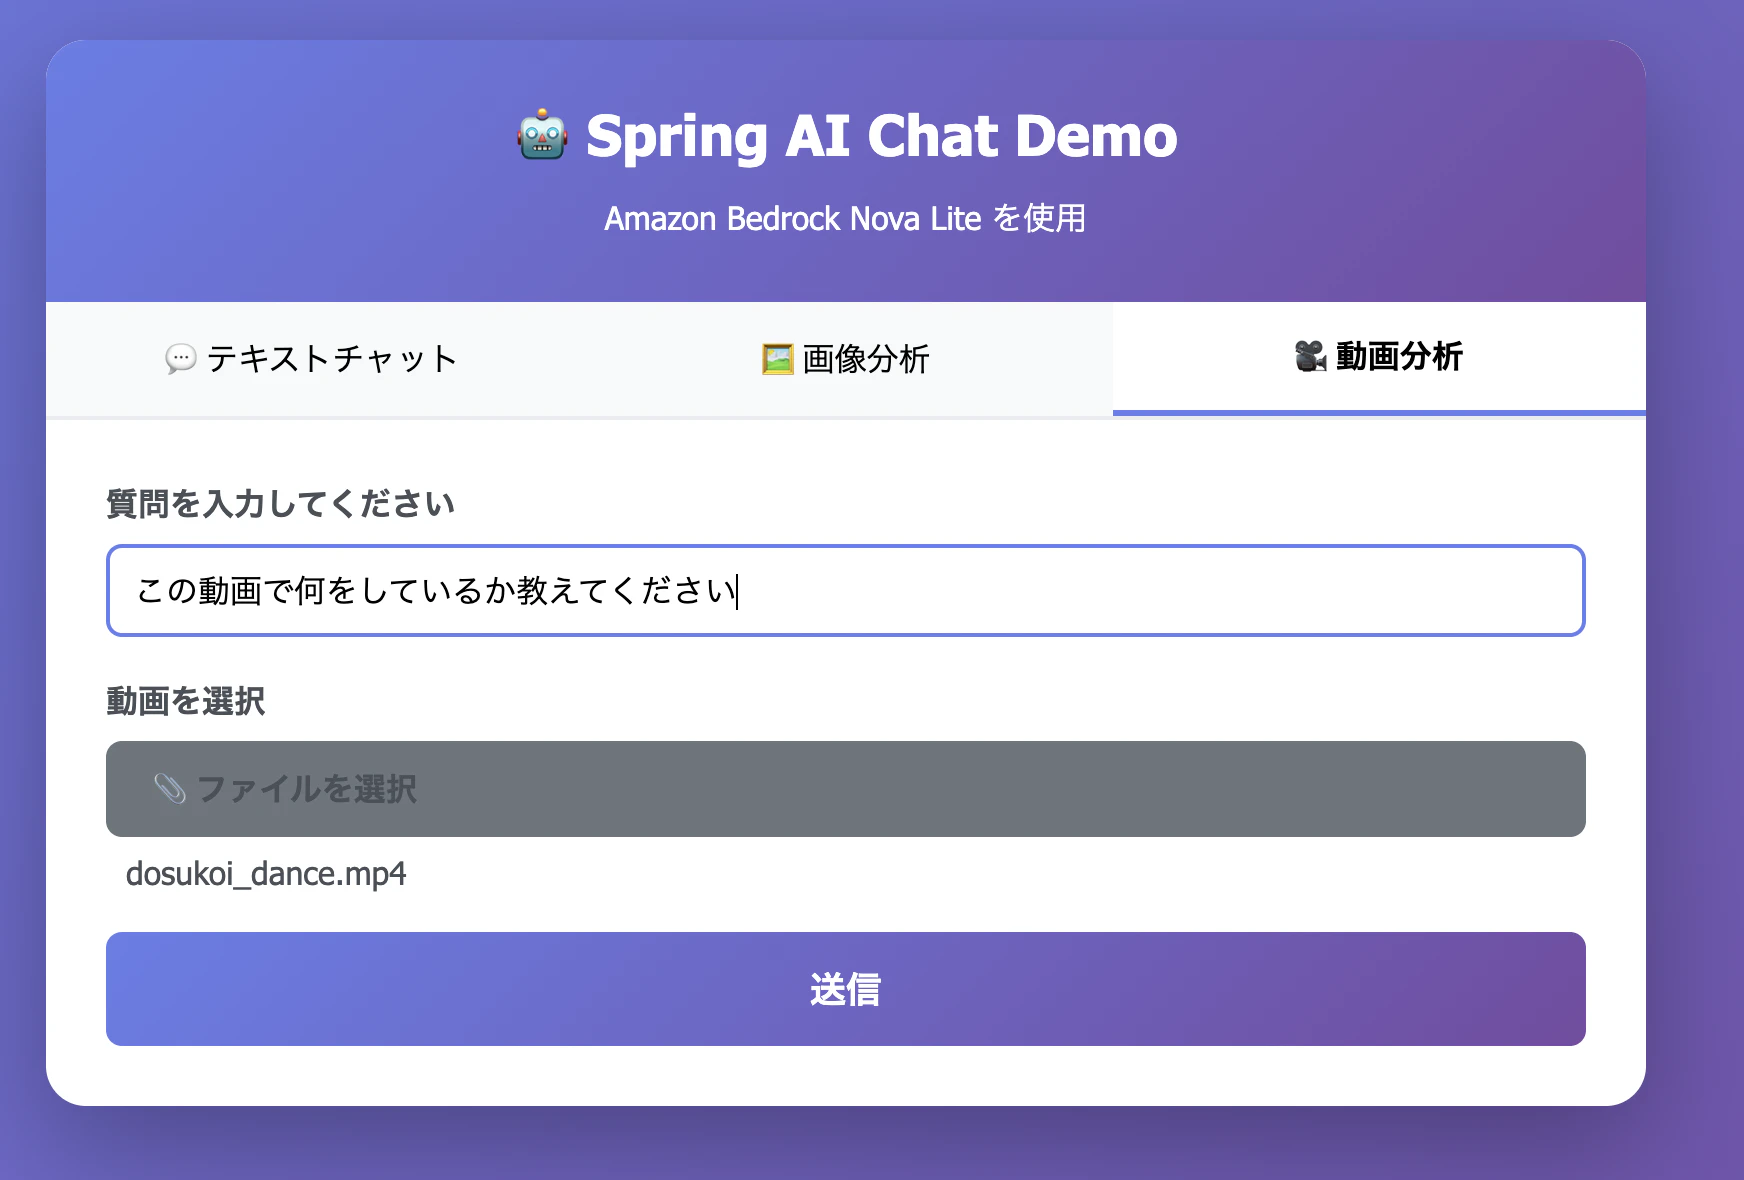
おお、、英語で返ってきました。。
(システムプロンプト指定していないので当たり前ではありますが)
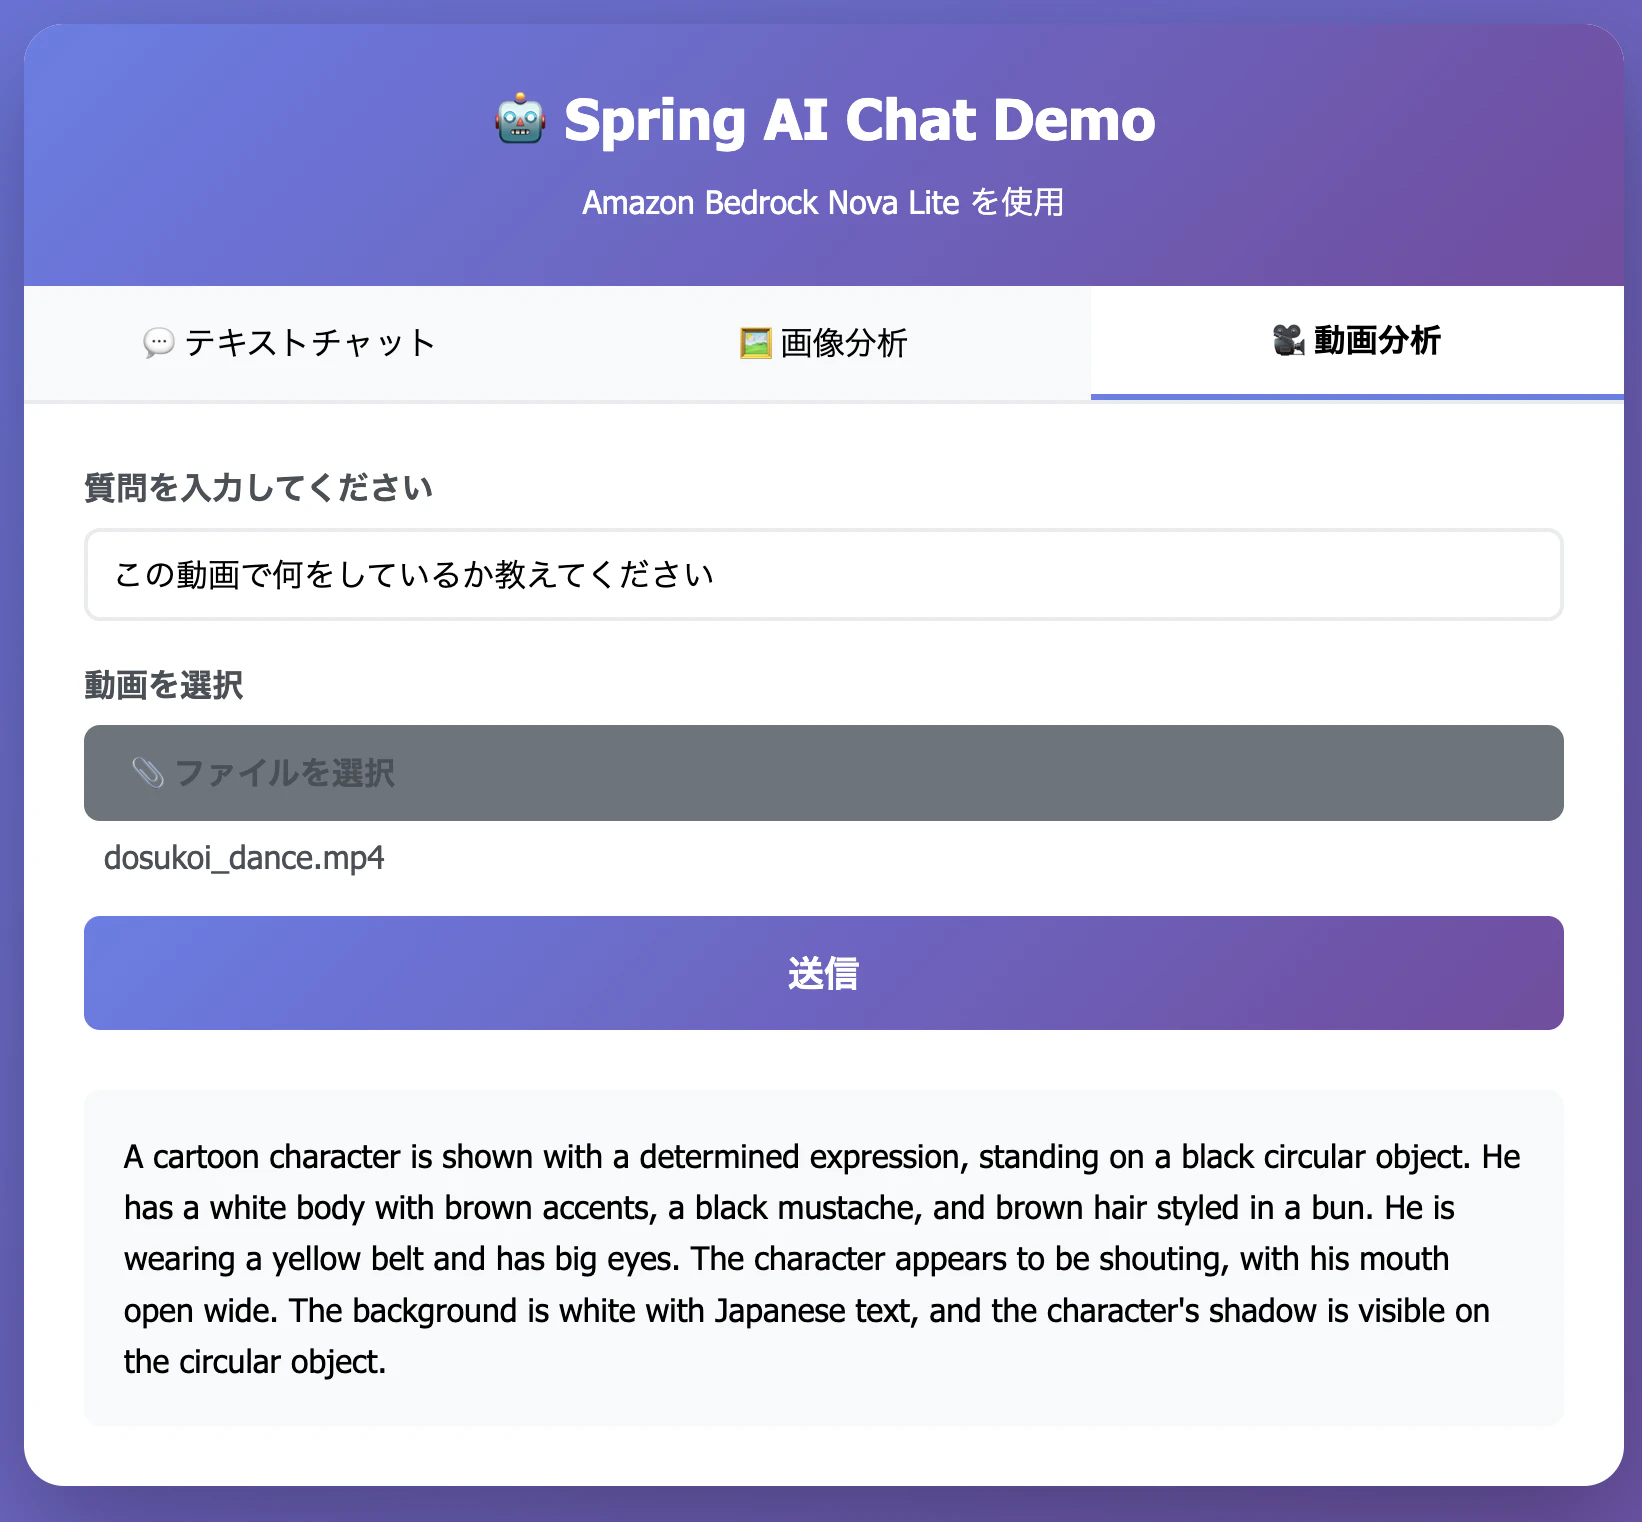
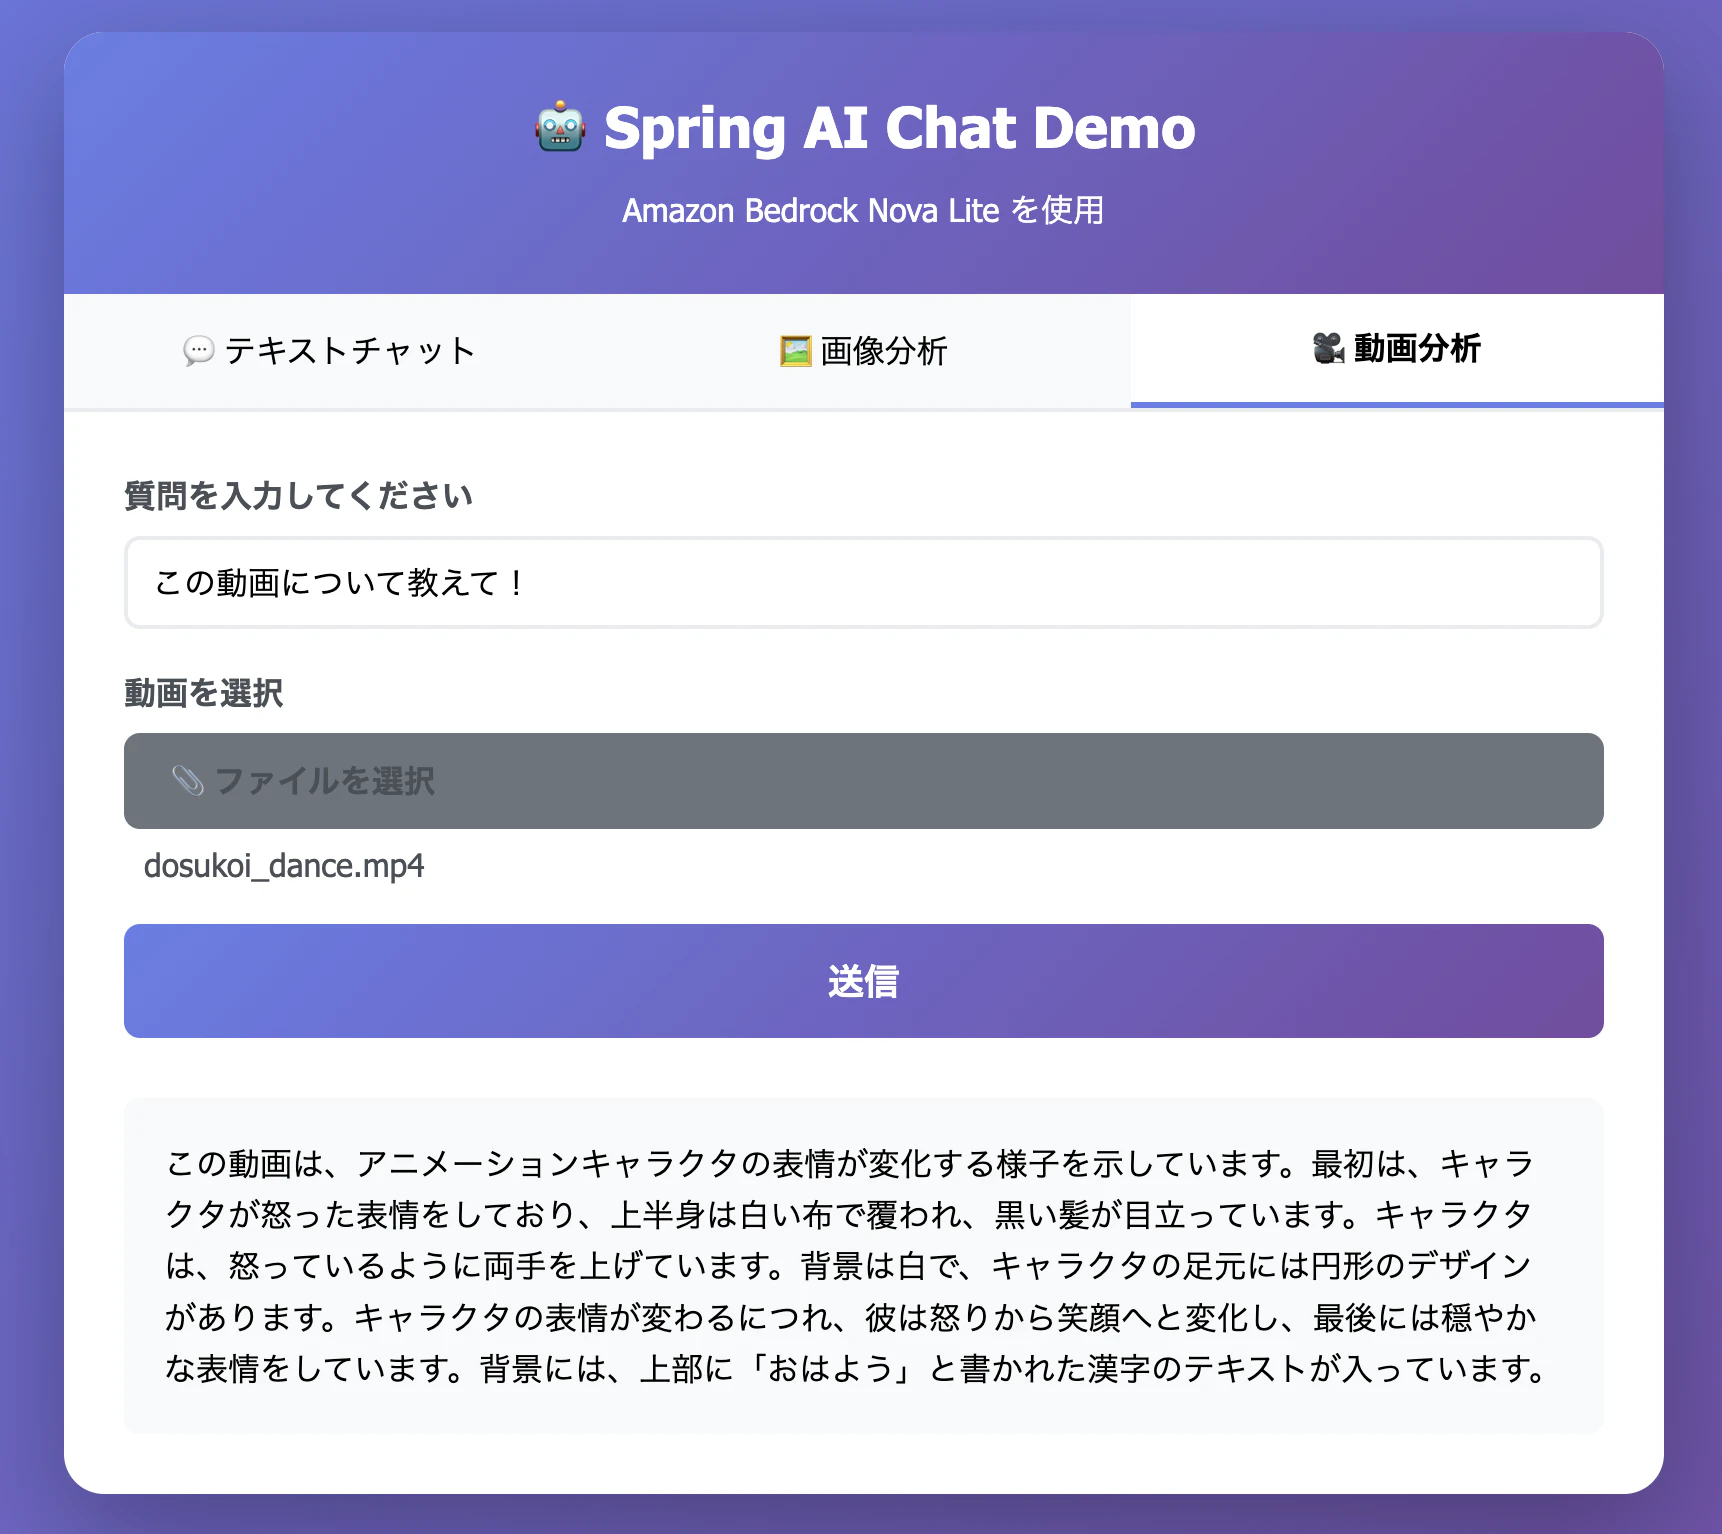
VideoChatControllerにシステムプロンプトで「あなたは日本語で回答するアシスタントです。」と指示を追加してみましょう。
@PostMapping("/video-chat")
public String videoChat(
        @RequestParam("prompt") String prompt,
        @RequestParam("video") MultipartFile video) throws IOException {

    byte[] videoBytes = video.getBytes();

    return chatClient.prompt()
            .system("あなたは日本語で回答するアシスタントです。") // システムプロンプトを追加
            .user(u -> u.text(prompt)
                    .media(MimeTypeUtils.parseMimeType("video/mp4"), new ByteArrayResource(videoBytes)))
            .call()
            .content();
}
(回答はともかく。。。)うまく日本語で回答されました!
おわりに
今回はストリーミング応答とマルチモーダル入力(画像・動画)に対応したチャットUIを実装しました。
Spring AIのChatClientはcall()をstream()に変えるだけでストリーミング対応できuser()メソッドでtext()と media()を組み合わせることでマルチモーダル入力にも対応できます。
私自身、難しいこと忘れがちなので、キャッチアップのコストが低いのはとても助かります。
次回は会話履歴の保存を試していく予定です。
では、ここで一旦まわしを締め直して終わりとします。どすこい。