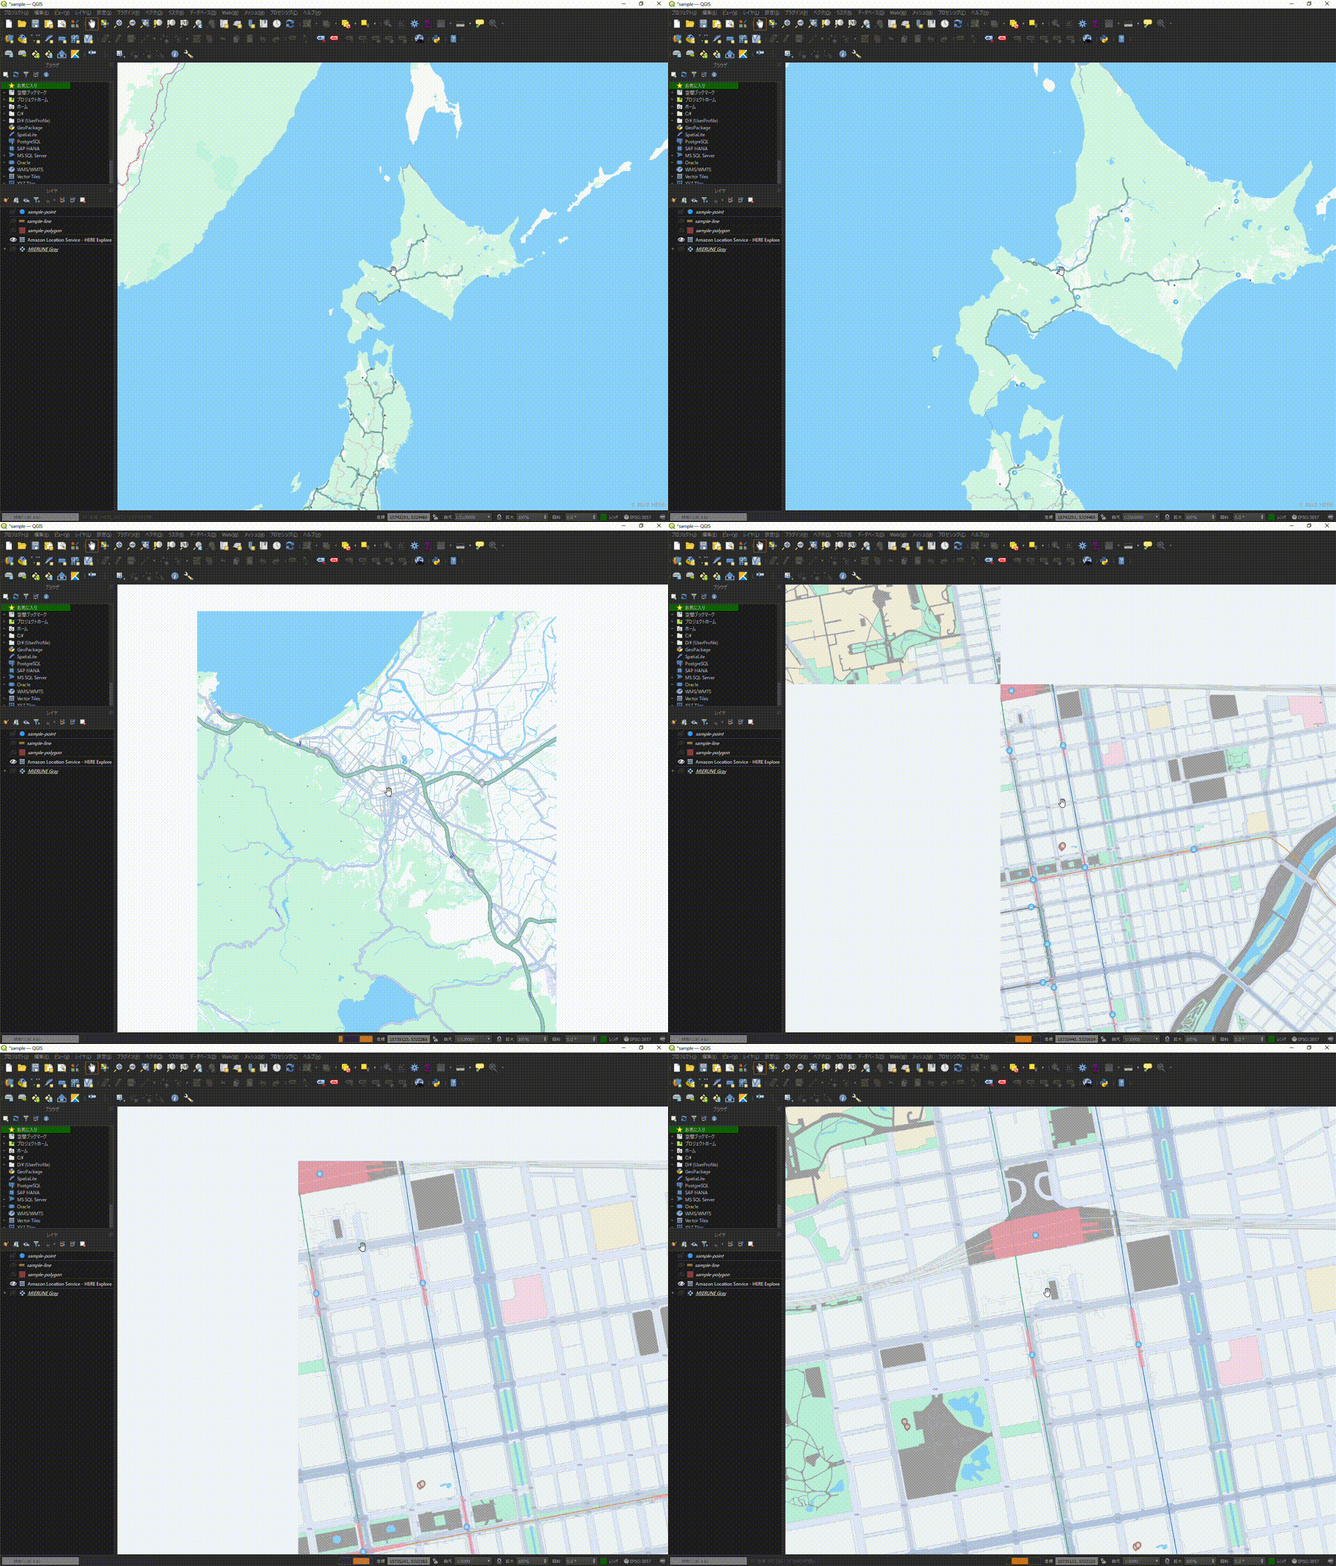
QGISでAmazon Location Serviceのマップを表示してみました 
詳細として下記について説明します。
事前準備
- Amazon Location ServiceのAPIキー作成
Amazon Location Service #004 - APIキー作成(マップ)
マップを表示するためには下記情報を準備します。
- リージョン名 (例: ap-northeast-1)
- マップ名 (例: SampleMap)
- APIキー (例: v1.public.xxxxx)
ベクトルタイルレイヤ登録
はじめに、QGISのベクトルタイルレイヤでAmazon Location Serviceのマップを登録します。
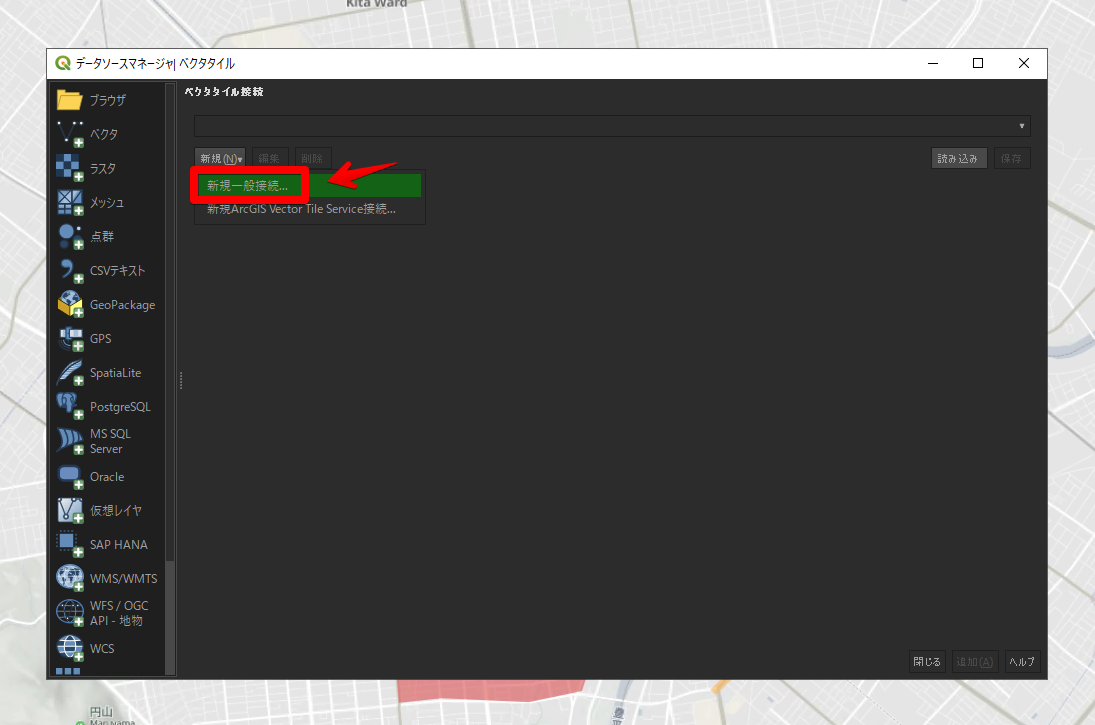
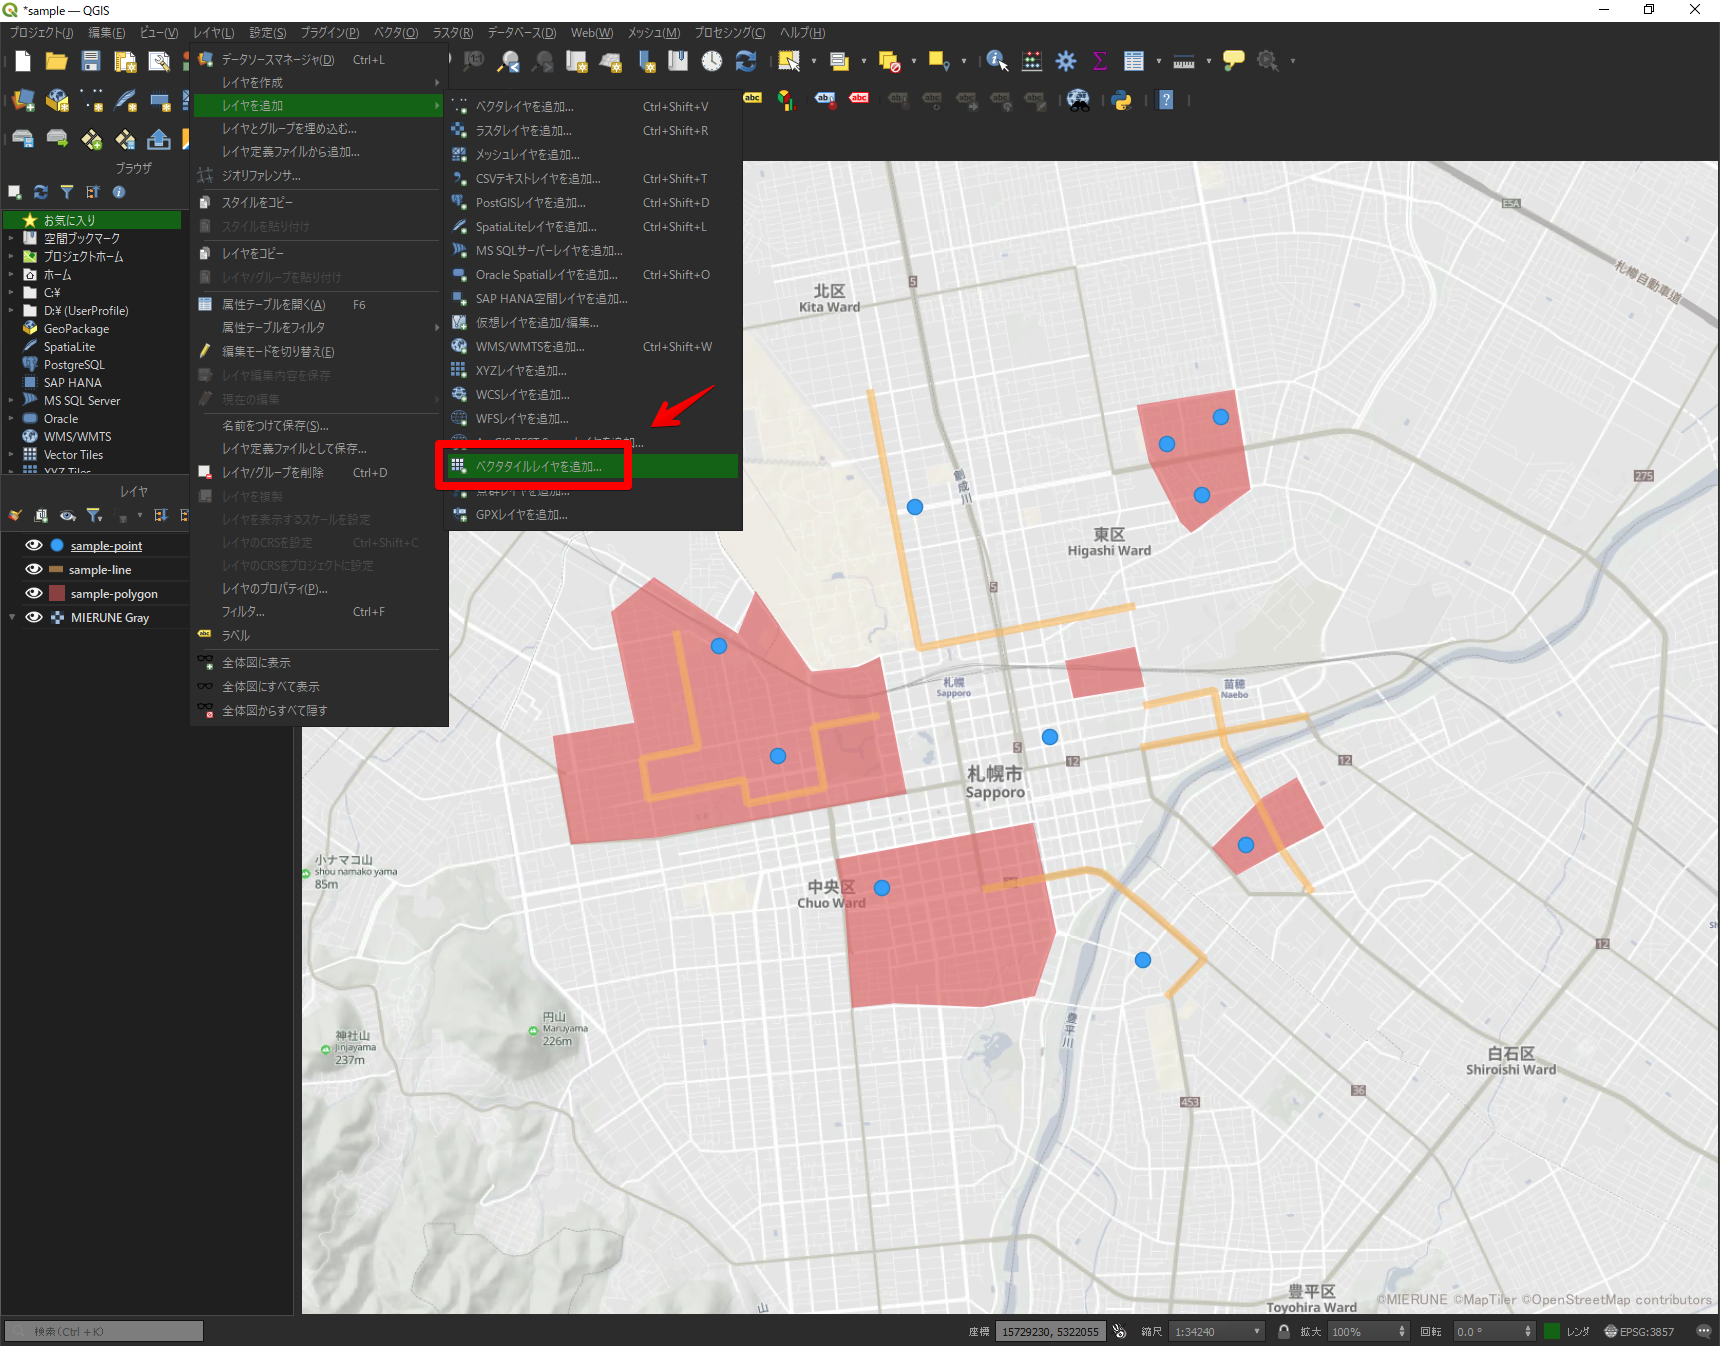
QGISを起動 → レイヤ → レイヤを追加 → ベクタタイルレイヤを追加をクリックします。
レイヤ名前・タイルURL・スタイルURLを設定しOKをクリックします。URLには、"region" にリージョン名・"mapName" にマップ名・"apiKey" にAPIキーをそれぞれ設定します。
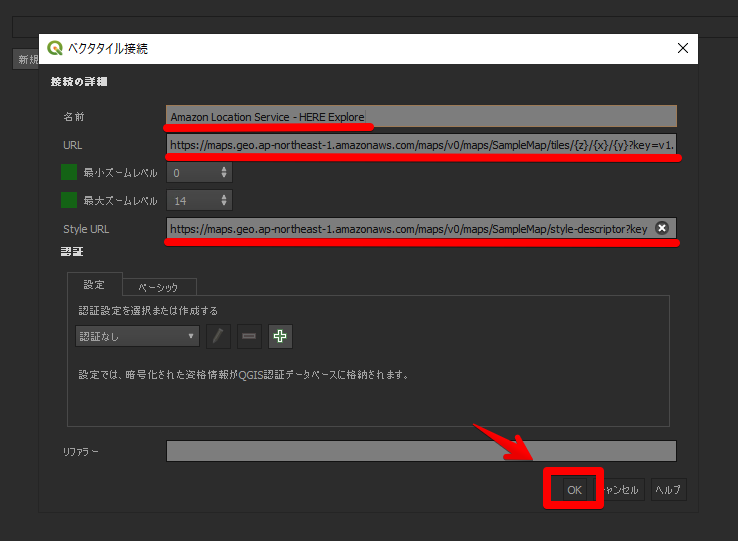
タイルURL
https://maps.geo.[region].amazonaws.com/maps/v0/maps/[mapName]/tiles/{z}/{x}/{y}?key=[apiKey]
スタイルURL
https://maps.geo.[region].amazonaws.com/maps/v0/maps/[mapName]/style-descriptor?key=[apiKey]
これでベクトルタイルレイヤ登録は完了になります!
ベクトルタイルレイヤ表示
最後に、QGISでAmazon Location Serviceのマップを表示します。
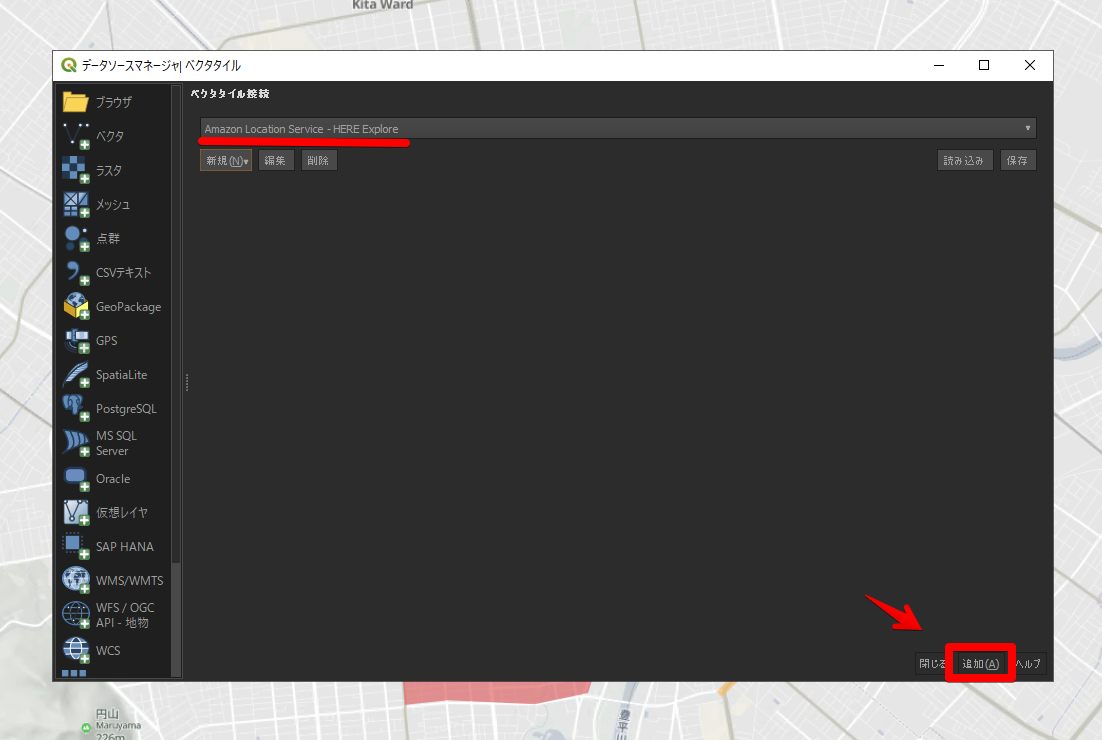
設定したベクトルタイルレイヤを選択し、追加をクリックします。
QGISでAmazon Location Serviceのマップを表示できました!
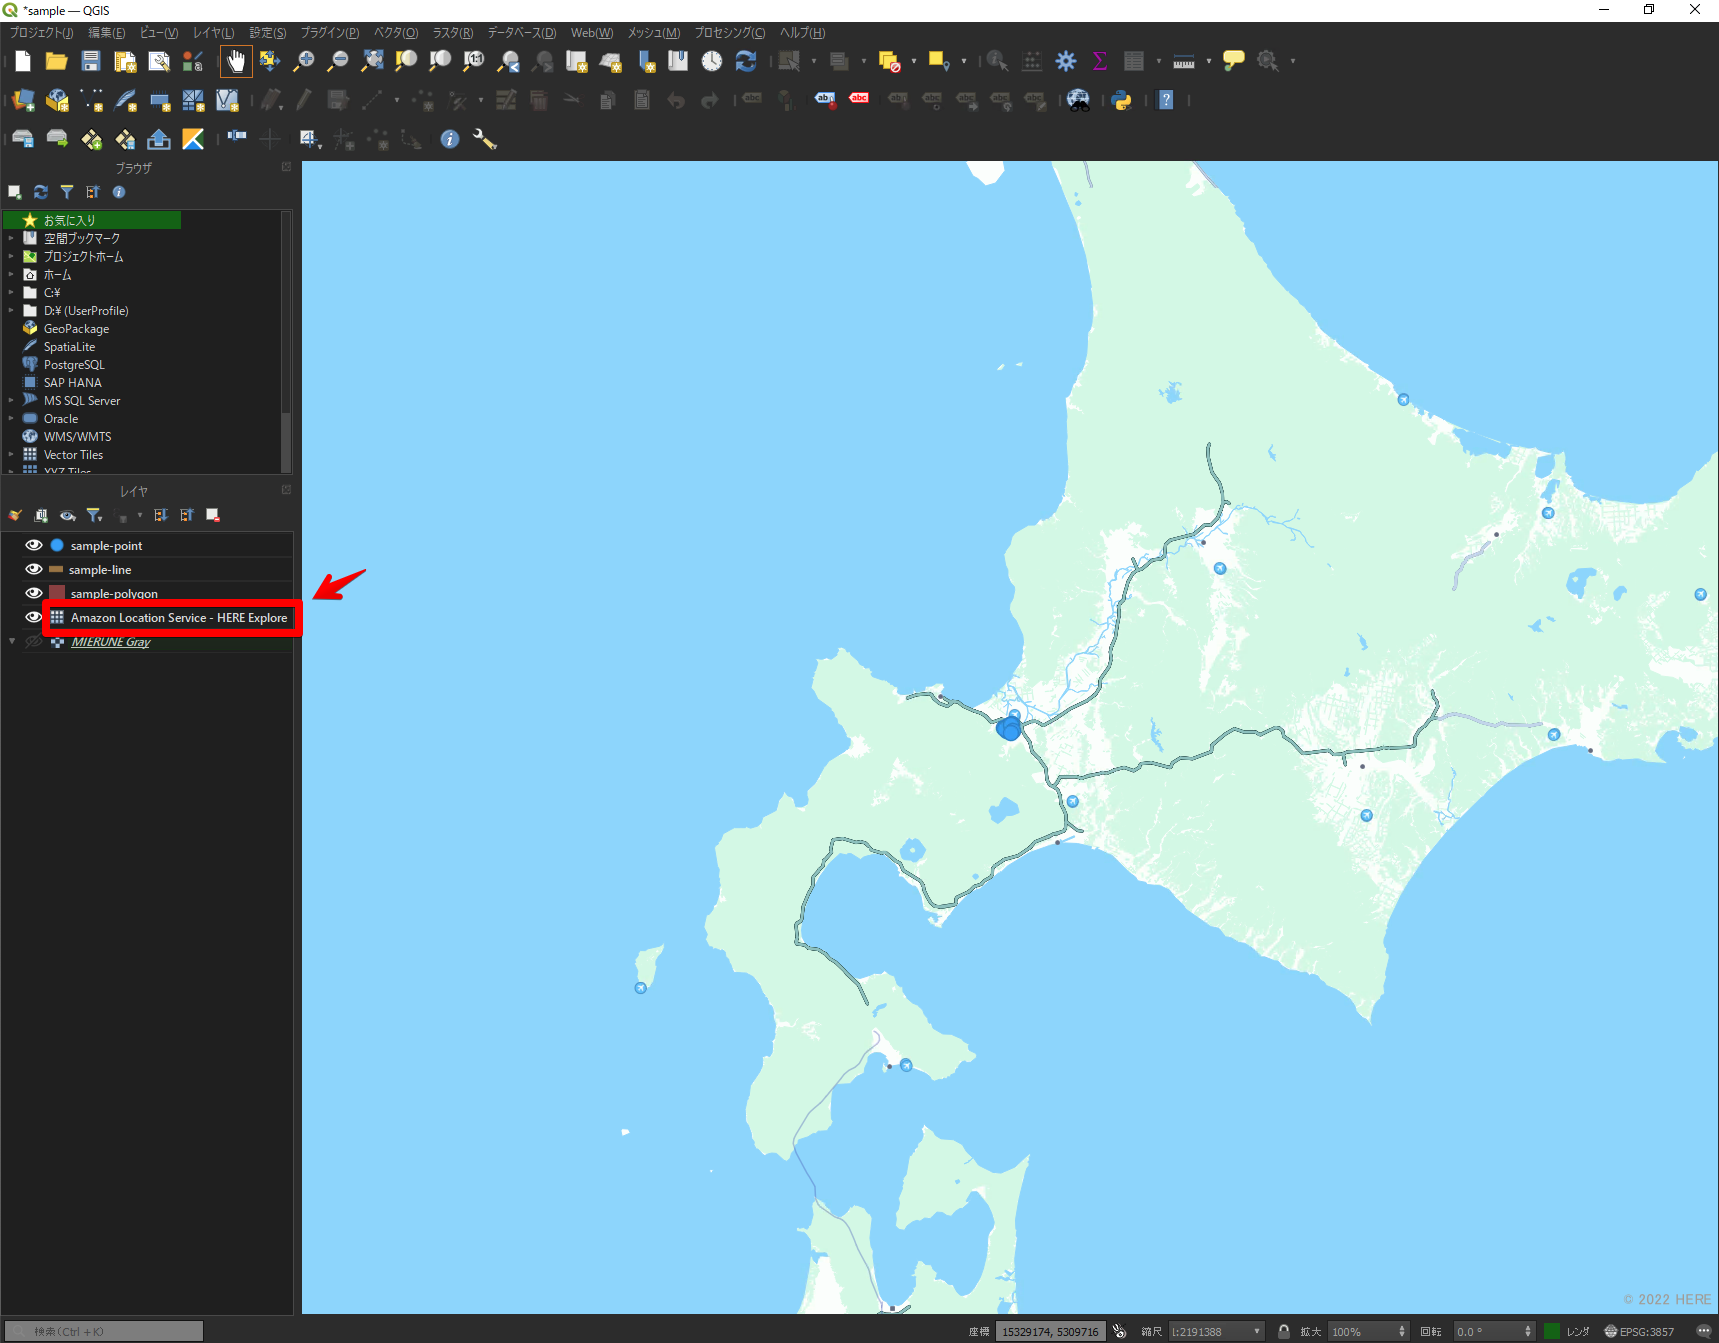
QGISではベクトルタイルやそのマップスタイルを読み込むことが可能です。Amazon Location Serviceのマップもベクトルタイルを利用しているため、QGISで読み込みができます。ただし、QGISは現状ですべてのマップスタイルには対応していないので、一部のスタイル表現が正確に再現されないことがあります。
QGISとAmazon Location Serviceについて、他にも記事を書いています。よろしければぜひ ![]()
tags - QGIS
tags - Amazon Location Service
やってみたシリーズ ![]()
tags - Try
PodcastとYouTubeやってます。よろしければぜひ。
