EKSのCNIであるVPC CNIにEnhanced Subnet Discovery機能が追加されました!
VPC CNIはPodのIPアドレスをAWS VPC上のサブネット内から払出すCNIです。
VPC内のIPを払出す事でEKSクラスタ外のサーバやAWSサービスにオーバーヘッド無くアクセスできるメリットがあります。
一方、Podに払出す事ができるIPアドレスの上限がVPC CIDRレンジに制限されるため、IPアドレスの枯渇がしばしば問題になる事がありました。
EKSクラスタのIPアドレス枯渇問題については著者が以下のブログでまとめておりますので、宜しければこちらもご参照ください。
これまでもVPC CNIにはカスタムネットワークというIPアドレス枯渇問題に使える機能がありましたが、今回のEnhanced Subnet Discoveryはより簡単にIPアドレスを拡張できる機能の様です。
非常に気になる機能ですので早速試してみました!
前提条件
- EKSはバージョン1.25以降を使用する必要があります。今回の検証は最新の1.29を使用しました
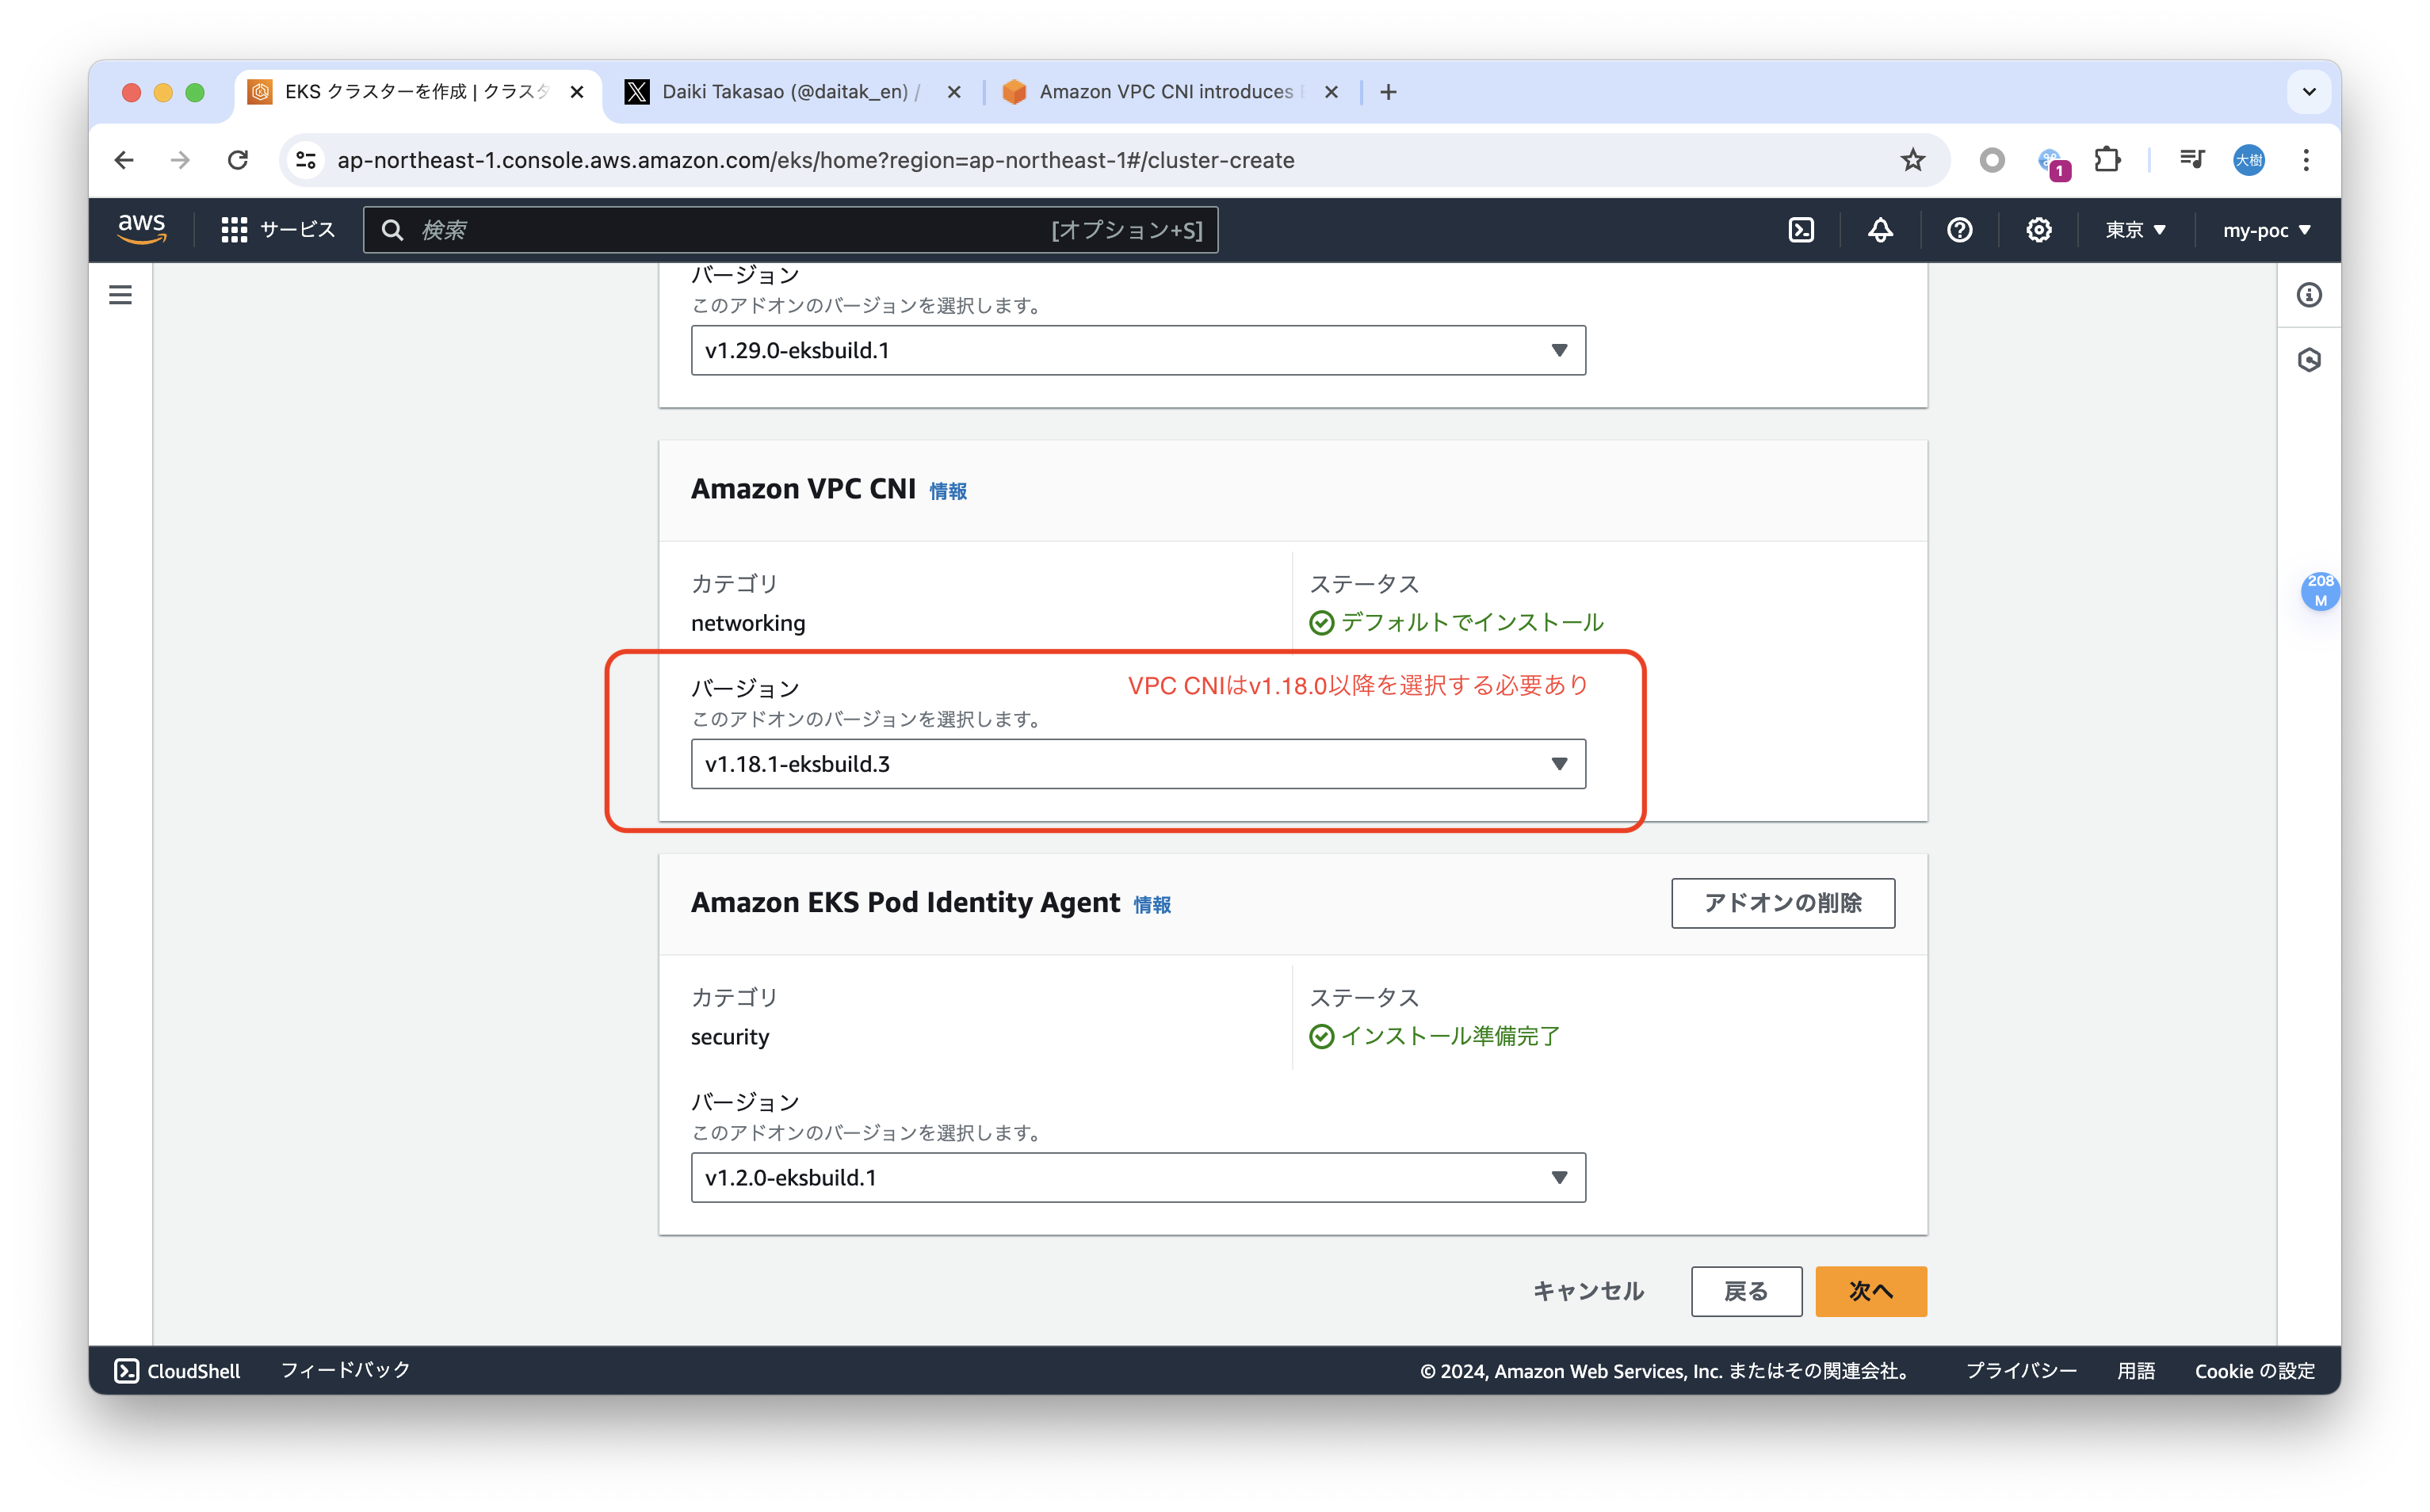
- VPC CNIはバージョン1.18.0以降を使用する必要があります。今回の検証では最新の1.18.1を使用しました。EKSクラスタ作成時のデフォルトのVPC CNIバージョンは1.16.0でしたので、今回の機能を使用するためには明示的にバージョンを変更する必要がありますので注意ください
Enhanced Subnet Discoveryを有効にする。
VPC CNIのEnhanced Subnet Discovery機能はデフォルトで有効になっています。
aws-nodePodの環境変数ENABLE_SUBNET_DISCOVERYでEnhanced Subnet Discovery機能の有効/無効を確認する事ができます。
以下の例では有効(true)になっています。
[cloudshell-user@ip-10-140-101-213 ~]$ kubectl describe ds aws-node -n kube-system | grep ENABLE_SUBNET_DISCOVERY
      ENABLE_SUBNET_DISCOVERY:                true
もし無効になっている場合は以下のコマンドで有効にしてください。
[cloudshell-user@ip-10-140-101-213 ~]$ aws eks update-addon --cluster-name $CLUSTER_NAME --region $AWS_REGION \
> --addon-name vpc-cni \
> --configuration-values '{"env":{"ENABLE_SUBNET_DISCOVERY":"true"}}'
{
    "update": {
        "id": "c1f1c193-1936-3d32-9f21-af7992044921",
        "status": "InProgress",
        "type": "AddonUpdate",
        "params": [
            {
                "type": "ConfigurationValues",
                "value": "{\"env\":{\"ENABLE_SUBNET_DISCOVERY\":\"true\"}}"
            }
        ],
        "createdAt": "2024-05-19T01:17:05.281000+00:00",
        "errors": []
    }
}
以下の環境変数には検証で使ったAWSアカウント、リージョン、クラスタの情報を入れています。
export AWS_REGION=<EKSクラスタを作成したリージョン>
export AWS_ACCOUNT=<EKSクラスタを作成したAWSアカウント>
export CLUSTER_NAME=<EKSクラスタ名>
export CLUSTER_SUBNET_PREFIX=<EKSクラスタのワーカーノードに割り当てたサブネット名のPrefix>
動作検証する!
では早速動作確認してみましょう!
今回の検証ではIPアドレス枯渇の状況を作るため、/27サブネットを2つ用意した比較的アドレスレンジが小さいEKSクラスタを用意しました。
まず、現状のIPアドレスの使用状況を確認しましょう。
[cloudshell-user@ip-10-136-45-208 ~]$ aws ec2 describe-subnets --region $AWS_REGION --filters Name=tag:Name,Values="${CLUSTER_SUBNET_PREFIX}*" --query "Subnets[].{VPC:VpcId,SubnetId:SubnetId,AvailableIPs:AvailableIpAddressCount}" --output table
-----------------------------------------------------------------------
|                           DescribeSubnets                           |
+--------------+----------------------------+-------------------------+
| AvailableIPs |         SubnetId           |           VPC           |
+--------------+----------------------------+-------------------------+
|  14          |  subnet-0c70939ce03114149  |  vpc-0bb153a4260fe05fb  |
|  2           |  subnet-0cfaf31fdbd3f70d0  |  vpc-0bb153a4260fe05fb  |
+--------------+----------------------------+-------------------------+
/27でサブネットを作成しているため、現状残りのIPアドレスは16つでした。
IPアドレスが枯渇した状況を作るため、大量のPodを起動させてみましょう。
レプリカ数が60のnginx Podを起動させてみました。
apiVersion: apps/v1
kind: Deployment
metadata:
  creationTimestamp: null
  labels:
    app: nginx
  name: nginx
spec:
  replicas: 60
  selector:
    matchLabels:
      app: nginx
  strategy: {}
  template:
    metadata:
      creationTimestamp: null
      labels:
        app: nginx
    spec:
      containers:
      - image: nginx
        name: nginx
        resources:
          requests:
            memory: "64Mi"
            cpu: "5m"
[cloudshell-user@ip-10-136-45-208 ~]$ kubectl apply -f nginx.yaml
deployment.apps/nginx created
IPアドレスが取得できずに起動できないPodはStatusがContainerCreatingになります。
ContainerCreating状態のPodが複数ありますね。
[cloudshell-user@ip-10-136-45-208 ~]$ kubectl get pod | grep nginx | grep ContainerCreating | wc -l
18
ContainerCreating状態のPodを1つ選んでイベントを見てみましょう。IPアドレスをアサインできないイベント(failed to assign an IP address to container)が出力されていますね。IP枯渇状態を再現できていそうです。
[cloudshell-user@ip-10-136-45-208 ~]$ kubectl events pod nginx-9d78bff78-xsk8k | tail -n 5
4m22s (x17 over 7m54s)   Warning   FailedCreatePodSandBox    Pod/nginx-9d78bff78-dblbs             (combined from similar events): Failed to create pod sandbox: rpc error: code = Unknown desc = failed to setup network for sandbox "c790389644da05458c6ba133f556a447a26210b7ae33d97597fcf4fba6ad2f72": plugin type="aws-cni" name="aws-cni" failed (add): add cmd: failed to assign an IP address to container
4m19s (x17 over 8m)      Warning   FailedCreatePodSandBox    Pod/nginx-9d78bff78-xsk8k             (combined from similar events): Failed to create pod sandbox: rpc error: code = Unknown desc = failed to setup network for sandbox "a9cf1603288595fa25649ca33726bcf3b4974a3a051f724ffd32d1281028de7f": plugin type="aws-cni" name="aws-cni" failed (add): add cmd: failed to assign an IP address to container
4m18s (x17 over 8m2s)    Warning   FailedCreatePodSandBox    Pod/nginx-9d78bff78-pr4l2             (combined from similar events): Failed to create pod sandbox: rpc error: code = Unknown desc = failed to setup network for sandbox "60906df5b7e141bad1346b908c811a8535a9794a5d13996f6e64949a0105ecbc": plugin type="aws-cni" name="aws-cni" failed (add): add cmd: failed to assign an IP address to container
4m17s (x17 over 7m50s)   Warning   FailedCreatePodSandBox    Pod/nginx-9d78bff78-mbmk8             (combined from similar events): Failed to create pod sandbox: rpc error: code = Unknown desc = failed to setup network for sandbox "58a079aa0eacb259d82b9c7752bb077d3f49965186a541cdb0852eaa8beadea4": plugin type="aws-cni" name="aws-cni" failed (add): add cmd: failed to assign an IP address to container
4m16s (x17 over 7m58s)   Warning   FailedCreatePodSandBox    Pod/nginx-9d78bff78-qsl25             (combined from similar events): Failed to create pod sandbox: rpc error: code = Unknown desc = failed to setup network for sandbox "9e1f1054a0db9b6c0ddb351bab711c82f2e684835d4b9c9aba5c108fbc9006f9": plugin type="aws-cni" name="aws-cni" failed (add): add cmd: failed to assign an IP address to container
それではいよいよEnhanced Subnet Discovery機能を使ってみましょう!といっても実施する事は特定のタグを付与したサブネットを追加で用意するだけです。とても簡単ですね!
具体的にはkubernetes.io/role/cni=1というタグを付与したサブネットを用意するだけで、VPC CNIはこのタグが付与されたサブネットを探し、サブネットが見付かったらその中のIPアドレスをPodに割り当てます。
早速やってみましょう。AWS CLIでkubernetes.io/role/cni=1タグを付与したサブネットを作成します。
aws ec2 create-subnet --vpc-id $EKS_VPC_ID --region $AWS_REGION \
--availability-zone "$AWS_REGION"a --cidr-block 192.168.129.0/27 \
--tag-specifications "ResourceType=subnet,Tags=[{Key=kubernetes.io/role/cni,Value=1}]"
aws ec2 create-subnet --vpc-id $EKS_VPC_ID --region $AWS_REGION \
--availability-zone "$AWS_REGION”b --cidr-block 192.168.193.0/27 \
--tag-specifications "ResourceType=subnet,Tags=[{Key=kubernetes.io/role/cni,Value=1}]"
再度Podの稼動状況を確認してみましょう。
ContainerCreating状態のPodも無く、レプリカ数で宣言した60個のPodが全て起動できました!
[cloudshell-user@ip-10-136-45-208 ~]$ kubectl get deploy nginx
NAME    READY   UP-TO-DATE   AVAILABLE   AGE
nginx   60/60   60           60          48m
[cloudshell-user@ip-10-136-45-208 ~]$ kubectl get pod | grep nginx | grep ContainerCreating | wc -l
0
今回追加したサブネットのレンジである192.168.129.0/27、192.168.193.0/27のIPアドレスでPodが起動できていますね。
[cloudshell-user@ip-10-136-45-208 ~]$ kubectl get pod -o wide | grep nginx | grep 192.168.129 | head -n 5
nginx-9d78bff78-dblbs   1/1     Running   0          53m   192.168.129.20   ip-192-168-128-4.ec2.internal    <none>           <none>
nginx-9d78bff78-fdmc8   1/1     Running   0          54m   192.168.129.13   ip-192-168-128-4.ec2.internal    <none>           <none>
nginx-9d78bff78-kvnj7   1/1     Running   0          54m   192.168.129.15   ip-192-168-128-4.ec2.internal    <none>           <none>
nginx-9d78bff78-mbmk8   1/1     Running   0          54m   192.168.129.25   ip-192-168-128-4.ec2.internal    <none>           <none>
nginx-9d78bff78-p4mkh   1/1     Running   0          53m   192.168.129.16   ip-192-168-128-4.ec2.internal    <none>           <none>
[cloudshell-user@ip-10-136-45-208 ~]$ kubectl get pod -o wide | grep nginx | grep 192.168.193 | head -n 5
nginx-9d78bff78-27blr   1/1     Running   0          54m   192.168.193.12   ip-192-168-192-10.ec2.internal   <none>           <none>
nginx-9d78bff78-64fpw   1/1     Running   0          54m   192.168.193.21   ip-192-168-192-10.ec2.internal   <none>           <none>
nginx-9d78bff78-cs4zn   1/1     Running   0          54m   192.168.193.30   ip-192-168-192-10.ec2.internal   <none>           <none>
nginx-9d78bff78-cz97f   1/1     Running   0          54m   192.168.193.22   ip-192-168-192-10.ec2.internal   <none>           <none>
nginx-9d78bff78-fcqn2   1/1     Running   0          54m   192.168.193.14   ip-192-168-192-10.ec2.internal   <none>           <none>
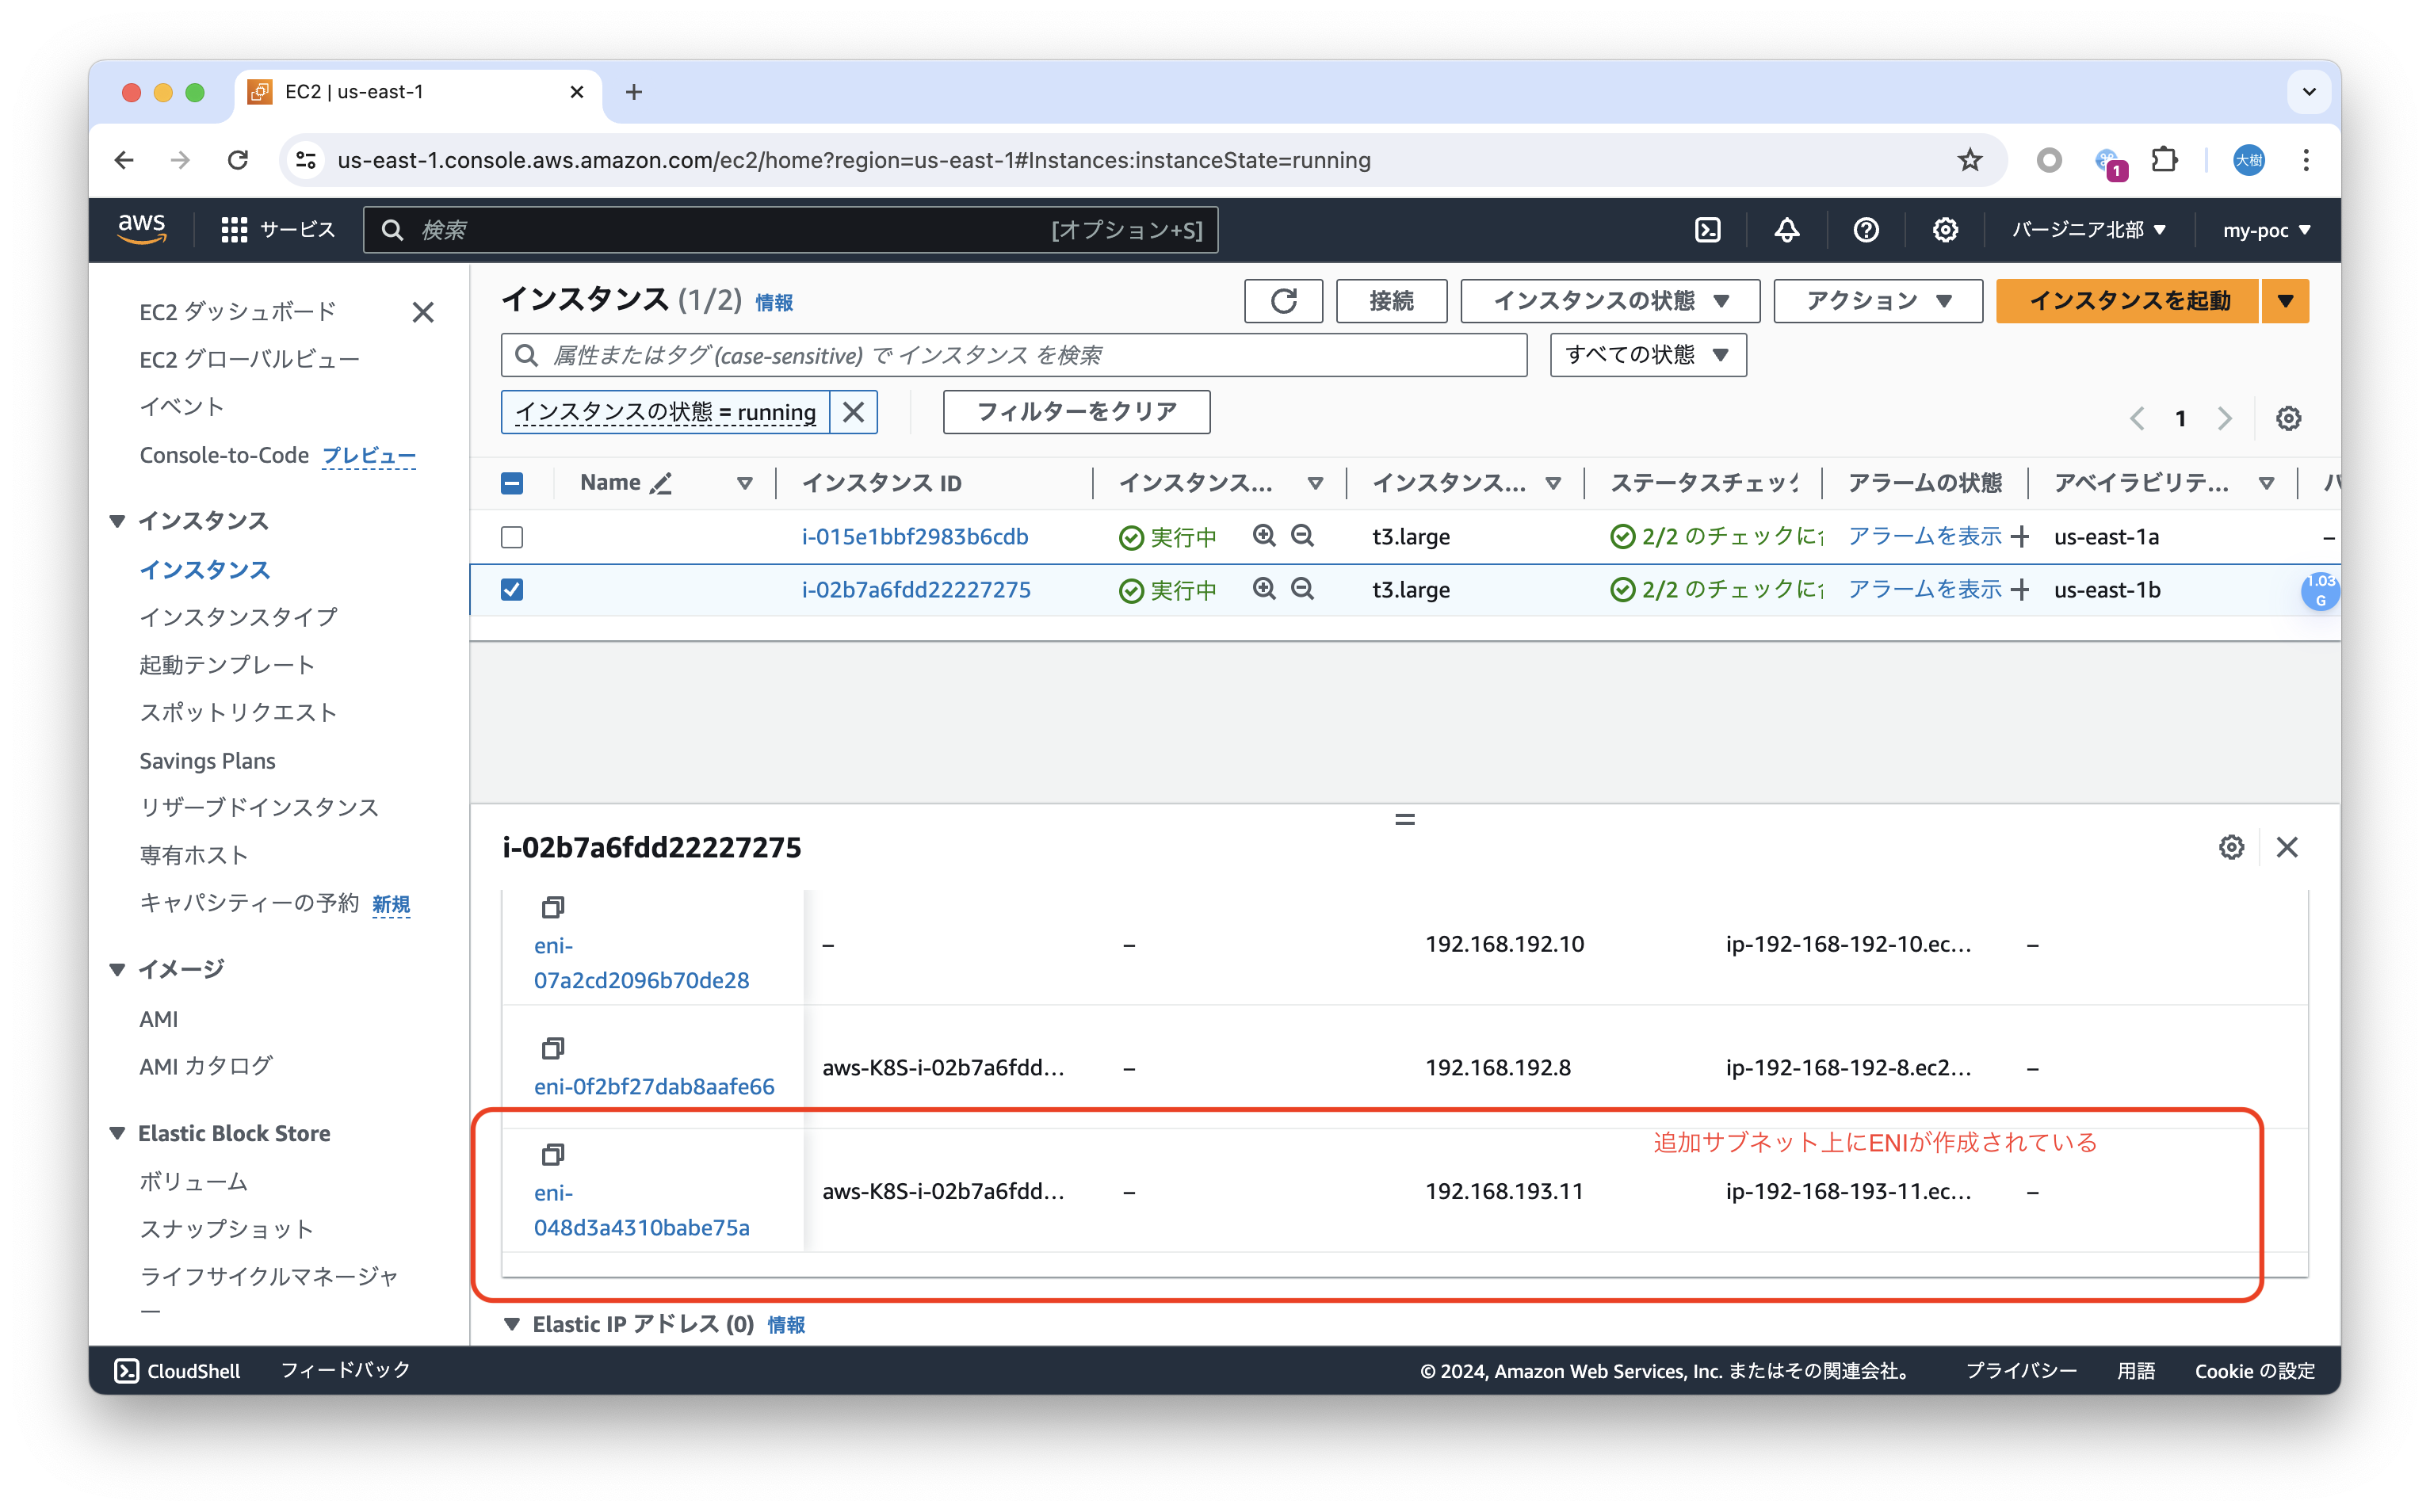
ワーカーノードを確認しましたが、追加したレンジのIPアドレスを持ったElastic Network Interface(ENI)が作成されていました。実際のPodとの通信はこのENIを経由する様です。
おわりに
今回はVPC CNIのEnhanced Subnet Discovery機能を触ってみました。
EKSクラスタ管理者が実施する事は特定ヘッダを付与したサブネットを用意するだけして、それ以降はVPC CNIが自動でこのサブネットを探索し、見付かったらそこからPodにIPアドレスを付与するという、とても使い勝手の良い機能である事がわかりました。
この機能を上手く使う事で、VPC CNIを使う上で良く問題となるIPアドレスの枯渇問題を簡単に解消できそうです。
この記事がだれかのお役に立てれば幸いです!

