1. 事前準備
1.1. Continue + OpenAI 環境の準備
- VS Code + 拡張機能 Continue をインストール
- OpenAIのAPI Keyの事前入手 (
sk-proj-xxxxxxxxxで始まるAPIキー) - ContinueへのAPI Keyの登録
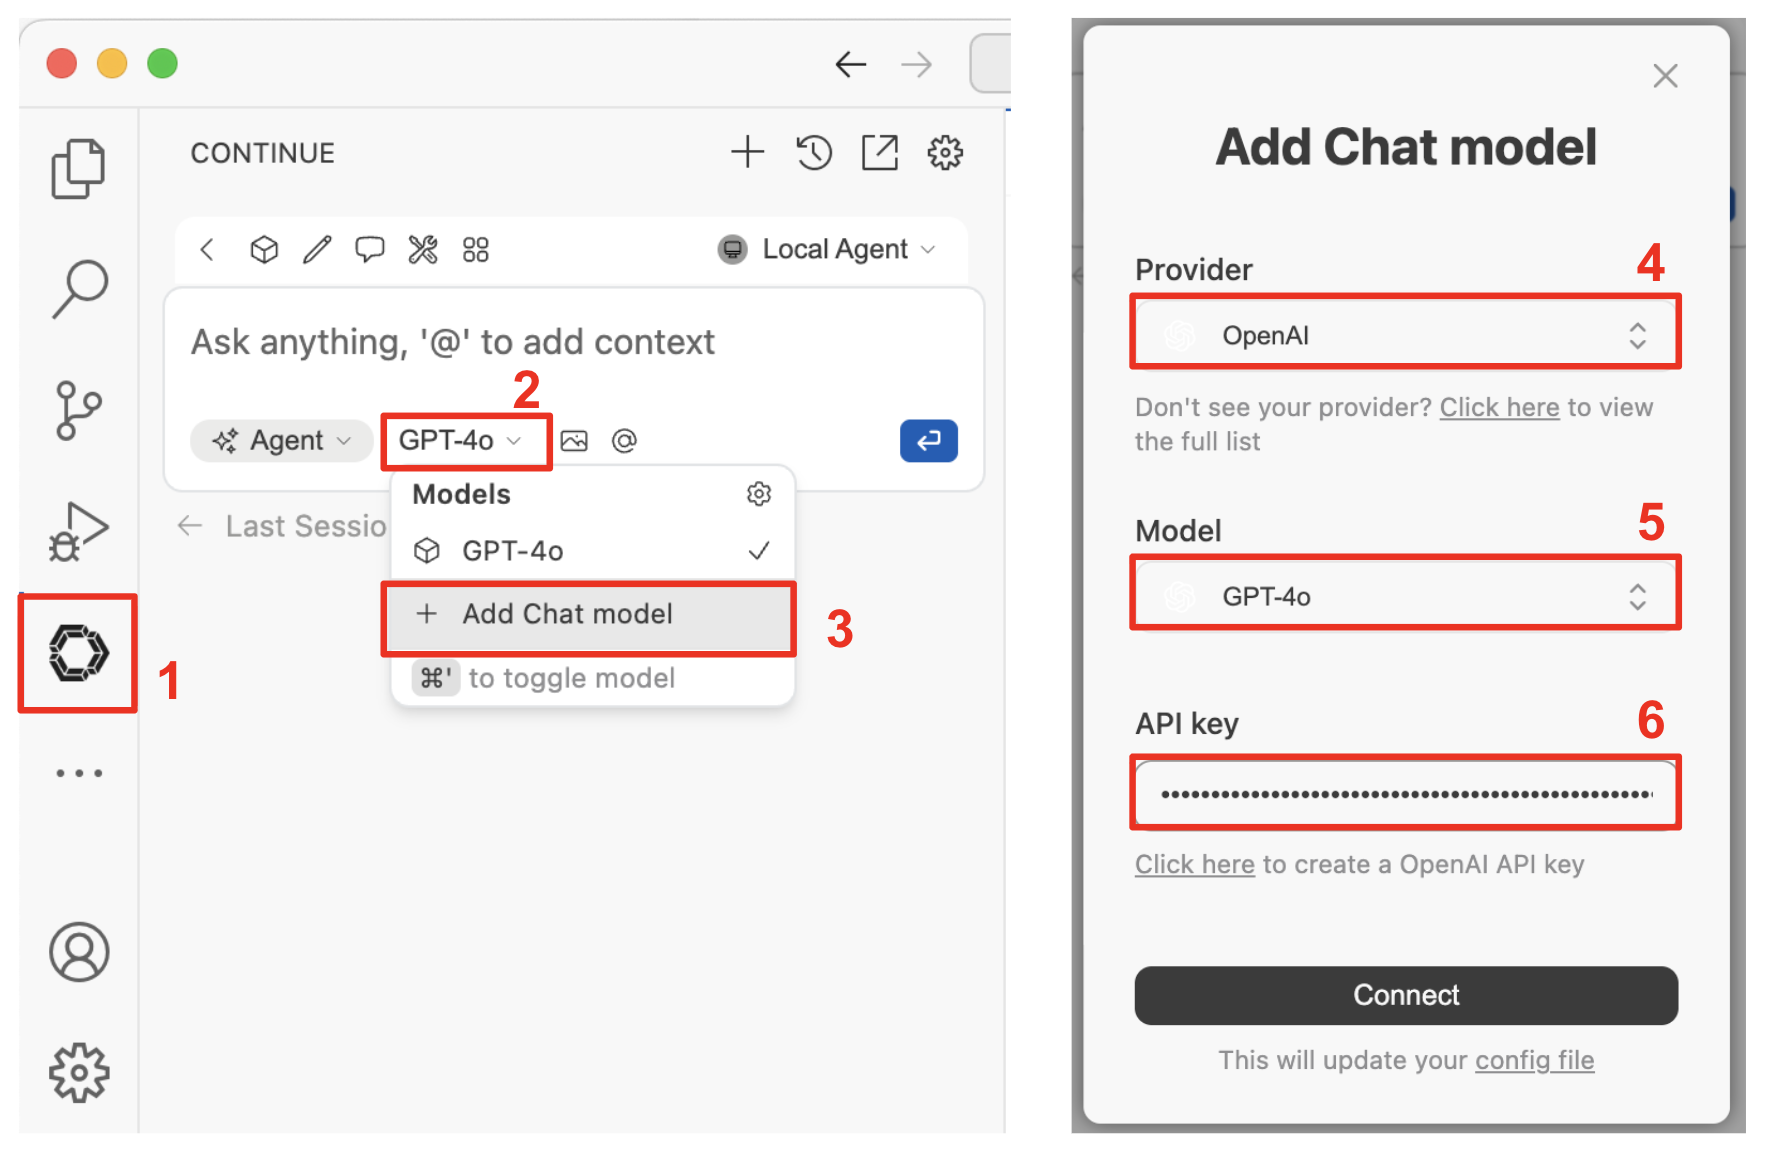
- 画面左のContinueアイコンをクリック
- Agentの横のモデルのアイコンをクリック
- Add Chat modelをクリック
- ProviderでOpenAIを選択
- 使用したいモデルを選択
- API Keyを入力
1.2. python環境の準備
Python 3.10+ の環境を準備し、仮想環境に必要なパッケージをインストールします
cd ${WORKDIR} # your any working dir
python -m venv .venv
source .venv/bin/activate
pip install fastmcp requests
2. FastMCPによるHello World MCP Server の作成
2.1. Hello World Pythonコードの作成
cd `${WORKDIR}`
vim hello_mcp.py
hello_mcp.py
#!/usr/bin/env python3
"""
Hello Greeting MCP Server
ユーザーに対して挨拶メッセージを返すシンプルなサーバー。
「挨拶して」「greet」「hello」などの入力に対応します。
"""

from fastmcp import FastMCP
from typing import Literal

mcp = FastMCP("hello-mcp-server")


@mcp.tool()
def greet_person(
    name: str,
    lang: Literal["ja", "en"] = "ja"
) -> str:
    """
    名前を指定すると、その人に挨拶を返します。
    - ユーザーが「挨拶」「hello」「greet」などと入力した場合に利用されます。
    - lang="ja" で日本語、lang="en" で英語の挨拶を返します。
    """
    if lang == "en":
        return f"Hello, {name}! Welcome to the Hello World MCP server!"
    return f"こんにちは、{name}さん!\nHello World MCPサーバーへようこそ!"


if __name__ == "__main__":
    mcp.run()
2.2. hello_mcp.pyをMCP-Serverとして登録
- 画面左のContinueアイコンをクリック
- MCP アイコンをクリック
- Add MCP Serversをクリック
- 下記のyamlの
/<your workdir>を変更しコピー/ペーストする-
type: stdio を必ず入れる -
command: 上記で作成したvenvのpythonのフルパス -
args: 上記で作成したhello_mcp.py(cwd 基準の相対パスでもOK) -
cwd: スクリプトのあるディレクトリを指定 -
env:PYTHONUNBUFFERED: "1"を入れるとログが出やすい
-
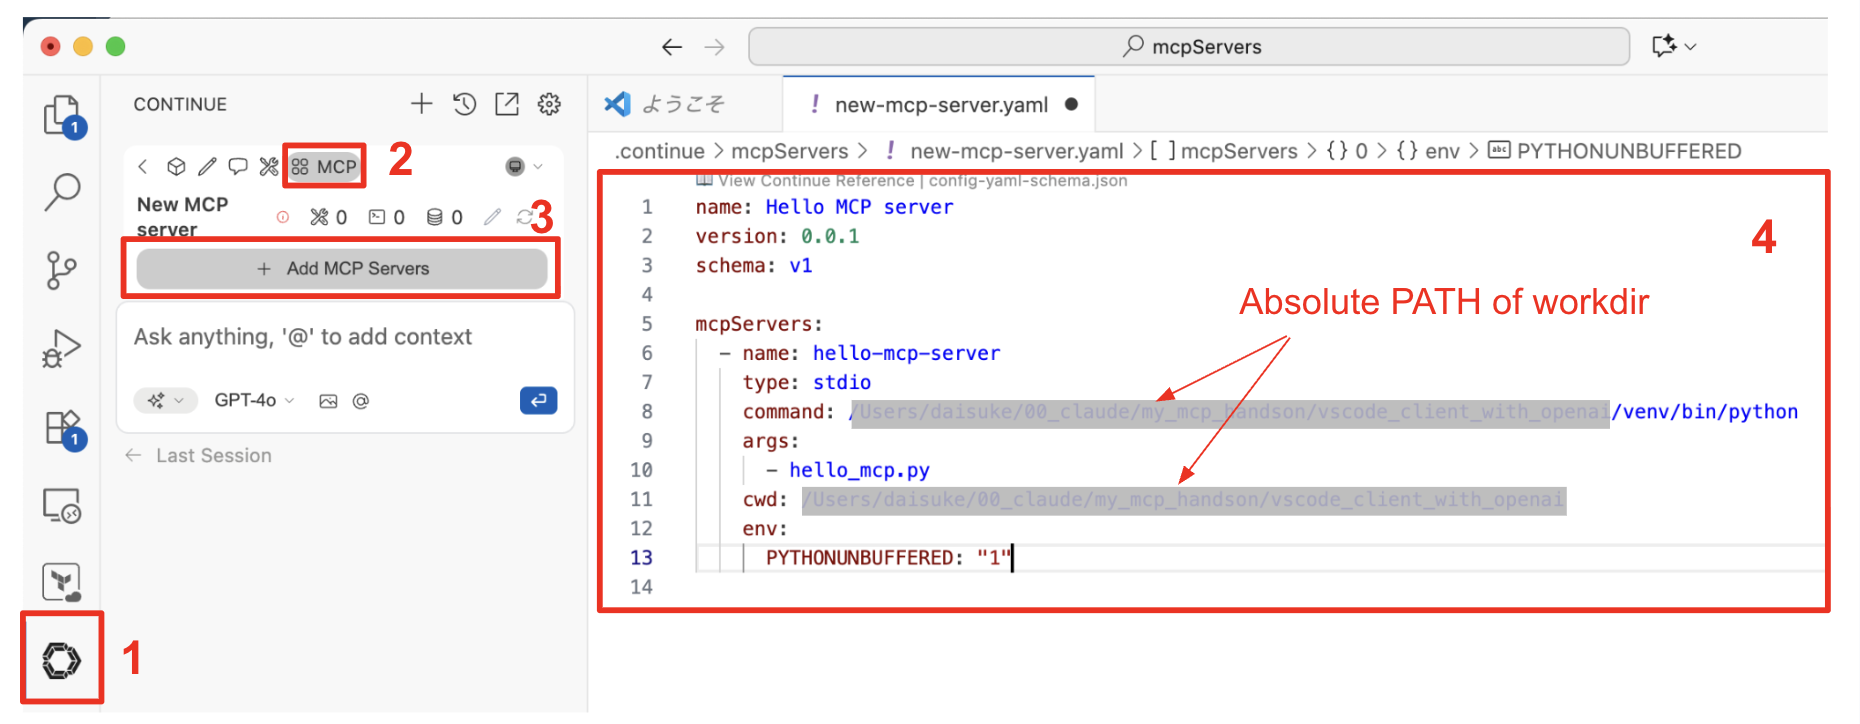
hello-mcp-server
name: Hello MCP server
version: 0.0.1
schema: v1

mcpServers:
  - name: hello-mcp-server
    type: stdio
    command: /<your workdir>/venv/bin/python
    args:
      - hello_mcp.py
    cwd: /<your workdir>
    env:
      PYTHONUNBUFFERED: "1"
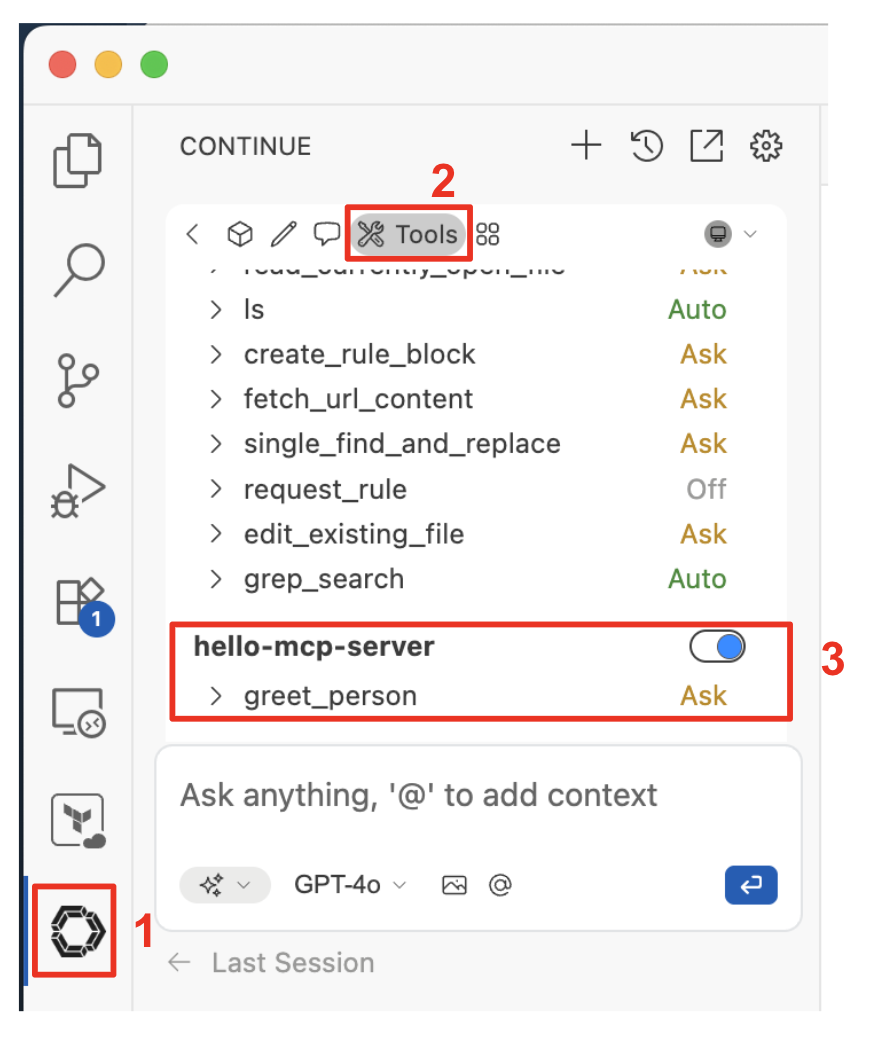
2.3. VS Codeの再起動と登録確認
VS Codeを再起動し以下の1から3の操作でhello-mcp-serverが有効化されていることを確認します
3. 実行テスト
3.1. 実行テスト
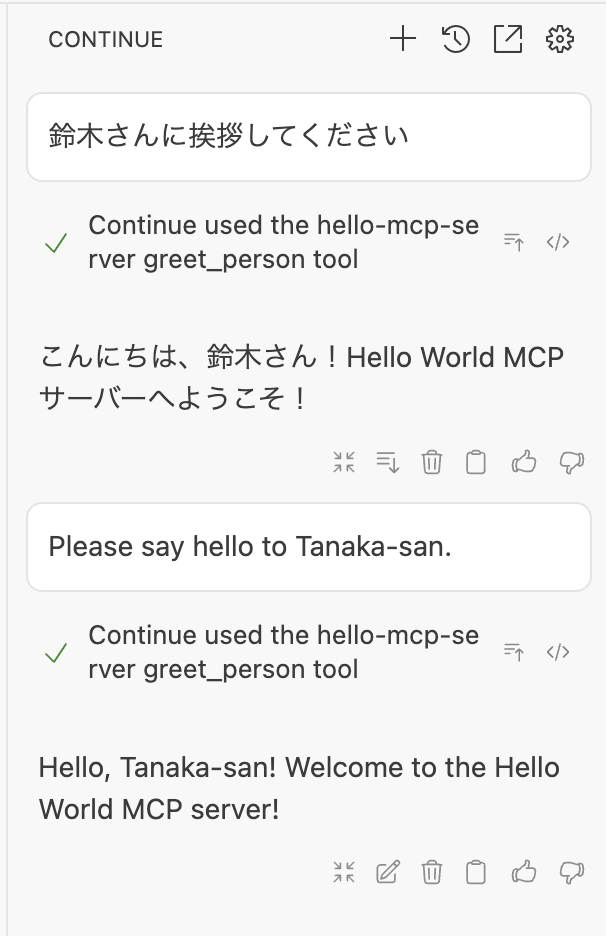
日本語
鈴木さんに挨拶してください
English
Please say hello to Tanaka-san.
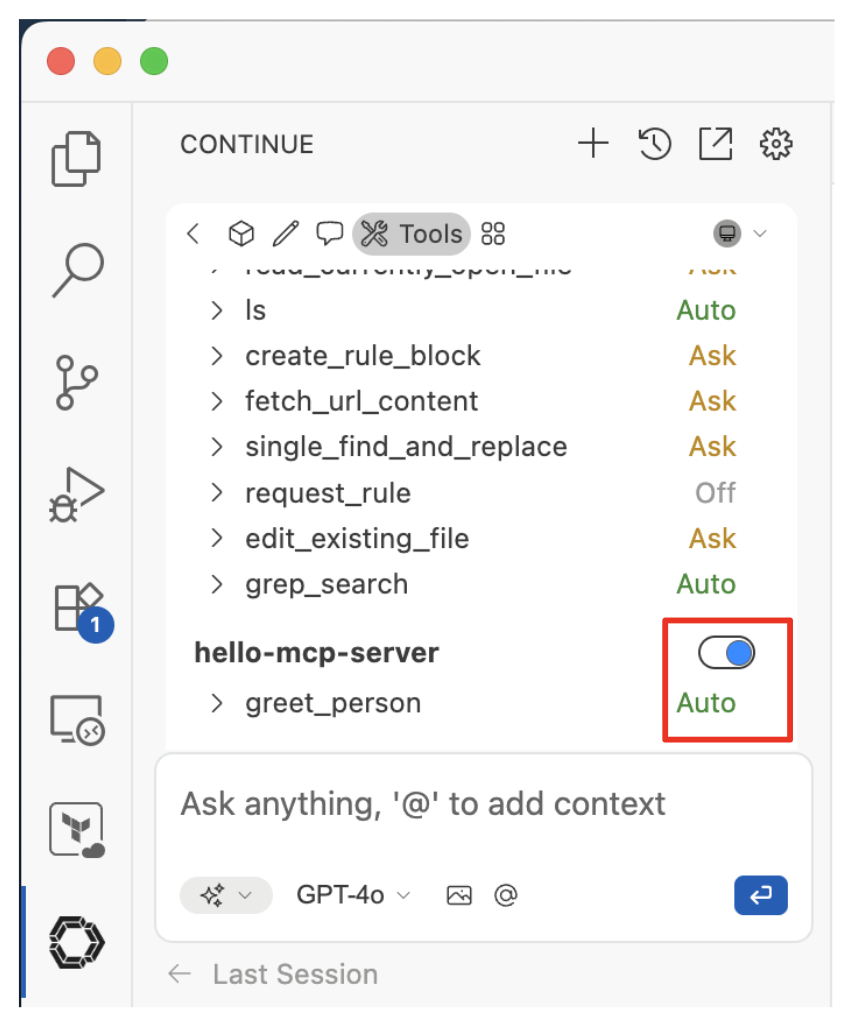
3.2. Acceptボタンを押すのが面倒になったら...
現状ですと、テストのたびにMCP Server実行のための許可が必要になって面倒です。
そこで、2.3. の操作を行い以下の画像のようにAutoにしてください。そうするとAcceptボタンを押す必要がなくなります。