概要
TwitterAPIを使用して開発する機会があったのでまとめておく
環境はLaravel(PHP)でやっていきます。
環境
| 使用した技術要素 | 備考 |
|---|---|
| Laravel | Ver. 5.6.20 |
| PHP | Ver. 7.1.15 |
| abraham/TwitterOAuth | ライブラリ Ver. 0.7.4 |
| TwitterAPI |
仕様
- 今回実装するのはOAuth認証を許可したユーザのプロフィール情報からいくつかビューに表示する機能のみです
- エラーハンドリングなどは全くしていません
まずは準備
Laravel環境
Laravel環境がない人は下記を参考にしてください
TwittterAppでアプリケーションの登録
TwitterAPIを使うに当たって絶対必要なもの
記事はたくさん出てくるので他サイトを参考にしてください。
けど一応説明
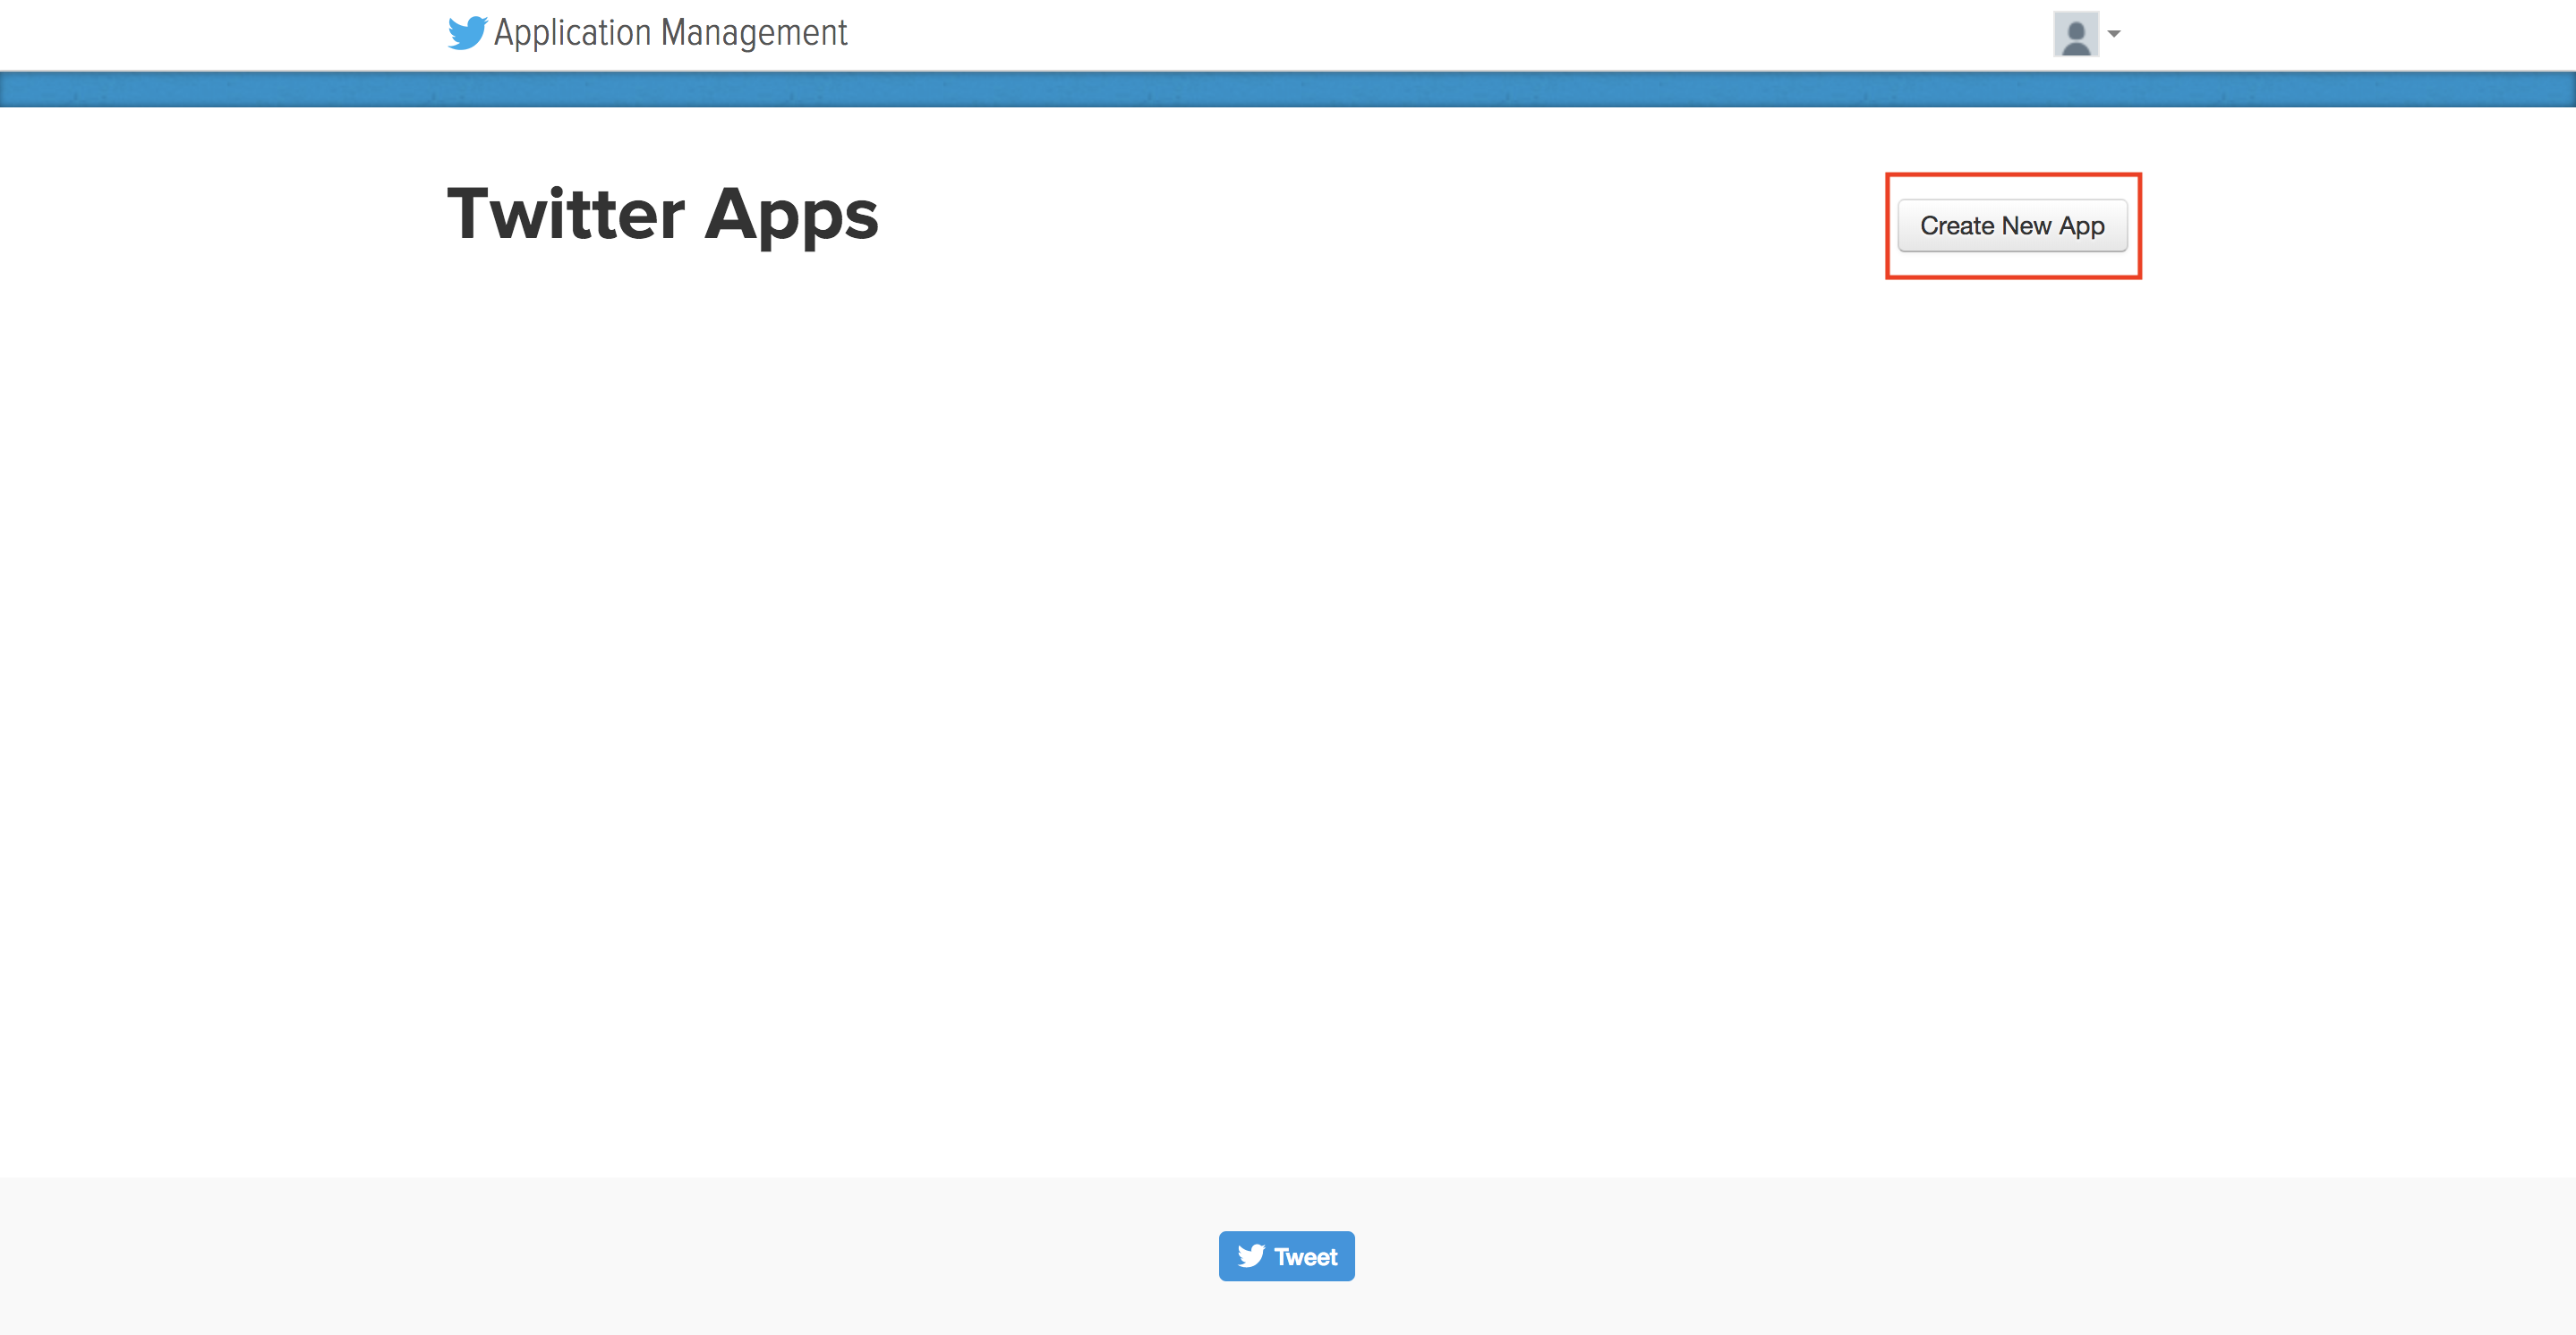
- TwitterAppsにアクセスする
- Create New Appをクリック
 1. 設定入力
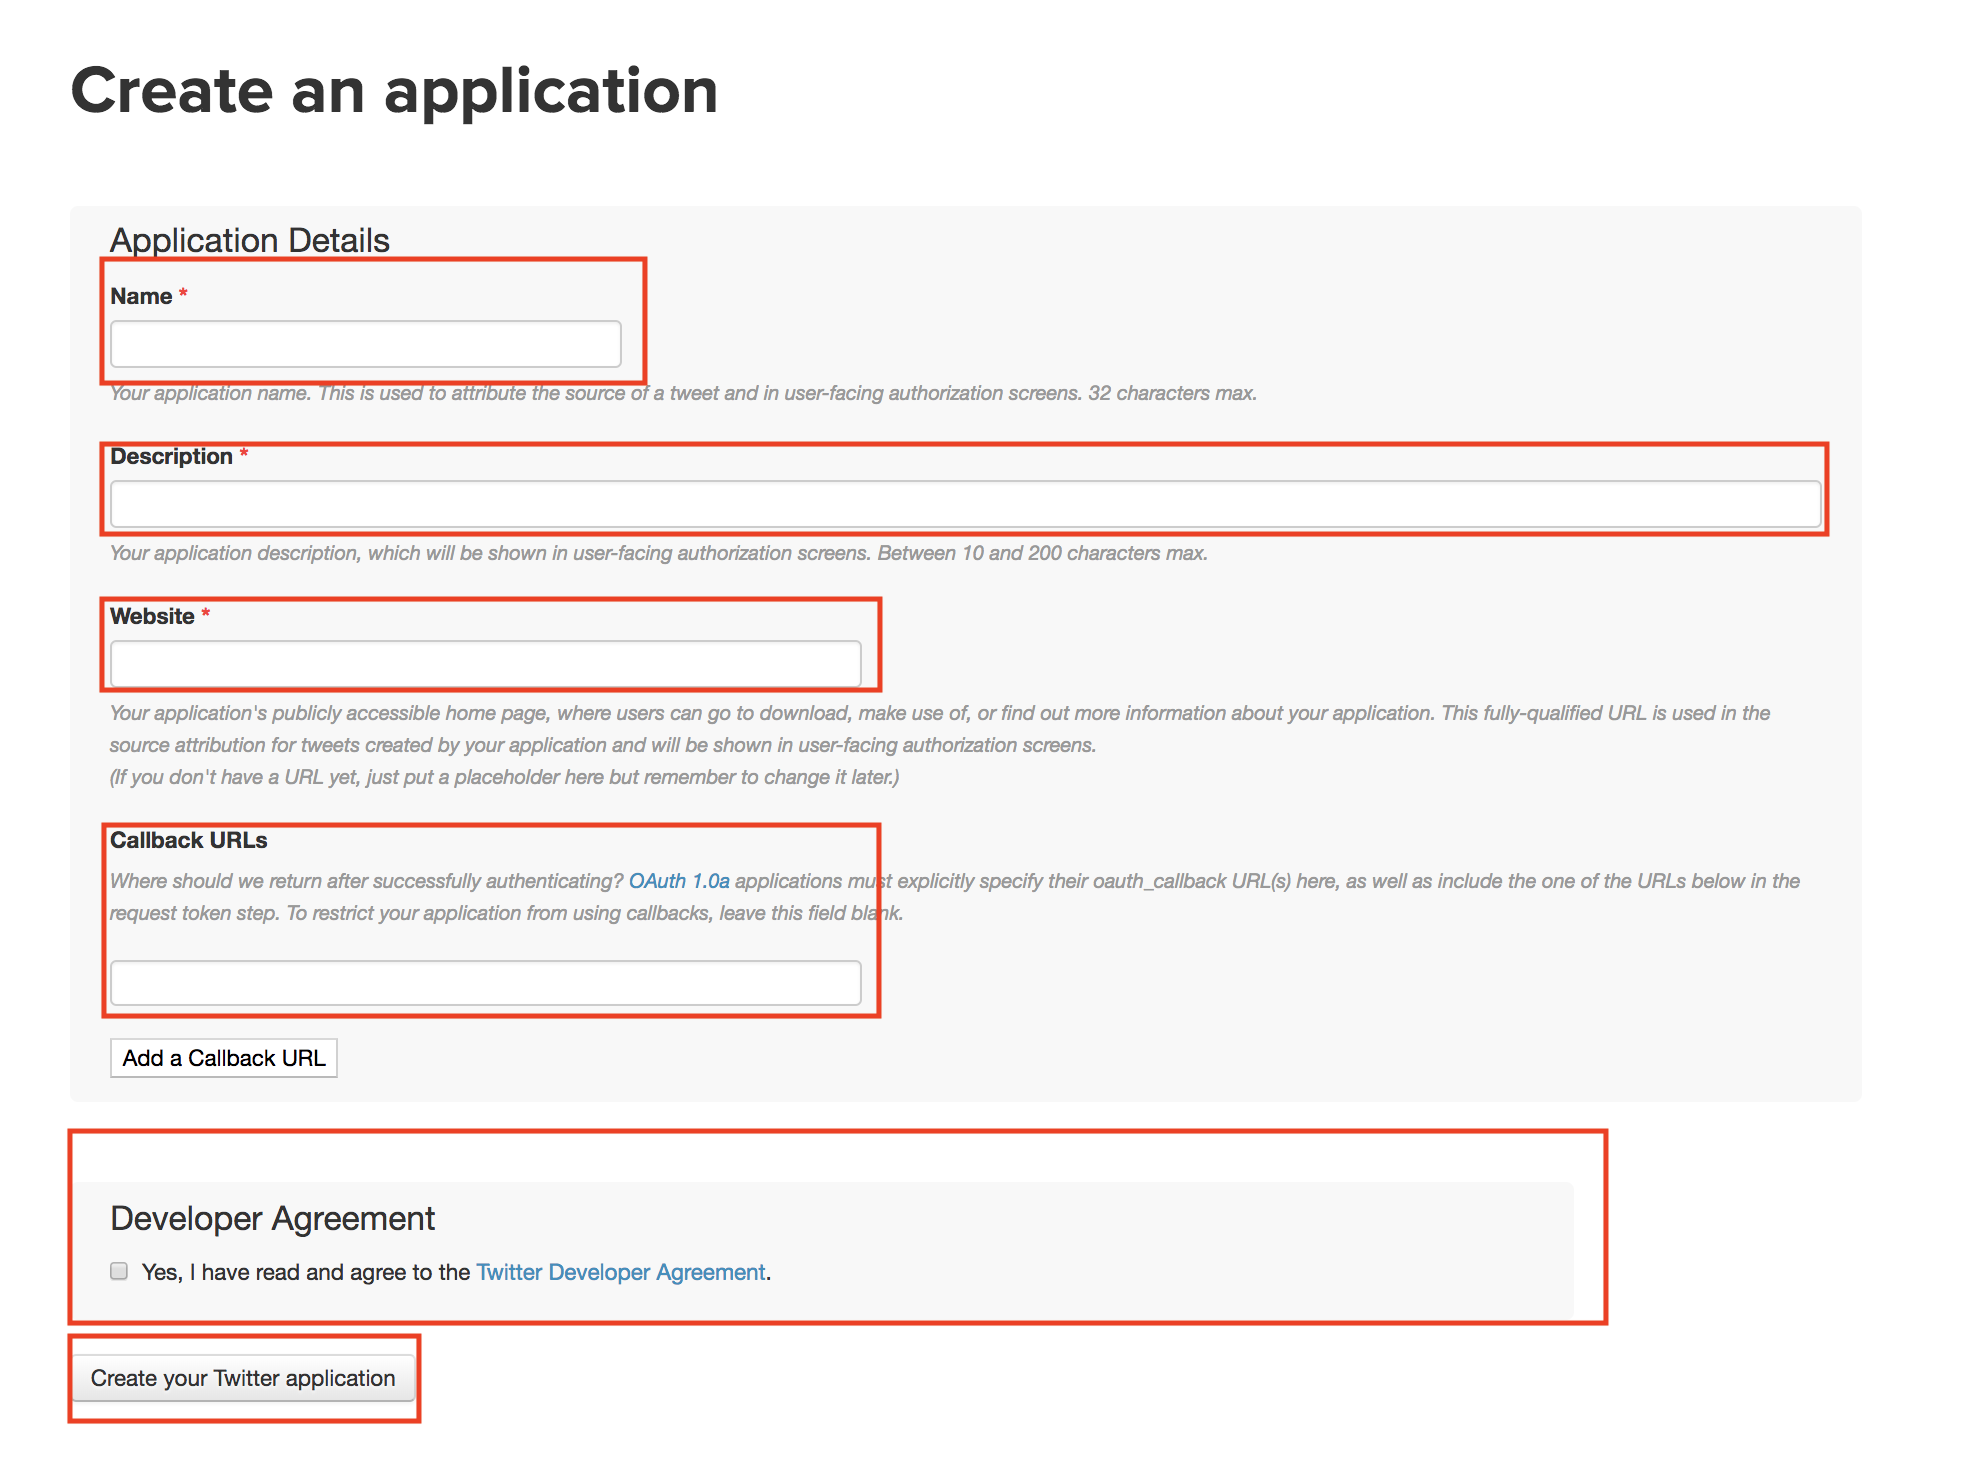 - **Name**: 任意のアプリケーションの名前を入力してください。
- 制約: 必須項目, 32文字以内
- **Description**: アプリケーションについての説明を記述してください。ここに書いたものが認証画面に表示されます。
- 制約: 必須項目,10文字以上200文字以内
- **Website**: アプリケーションを動かすサイトのURL(ローカル環境でやるなら`http://127.0.0.1:8000/`とかになると思います。)
- 制約: 必須項目, URLのフォーマットじゃないと怒られる
- これに関しては適切じゃないものをいれた場合どうなるかわからないのです....orz
- **Callback URLs**: 認証後にリダイレクトしてほしいURLを記載してください。
- 制約: URLのフォーマットじゃないと怒られる
- **Developer Agreement**: 登録したかったらチェックしてください(笑
1. **Create your Twitter application**をクリックする
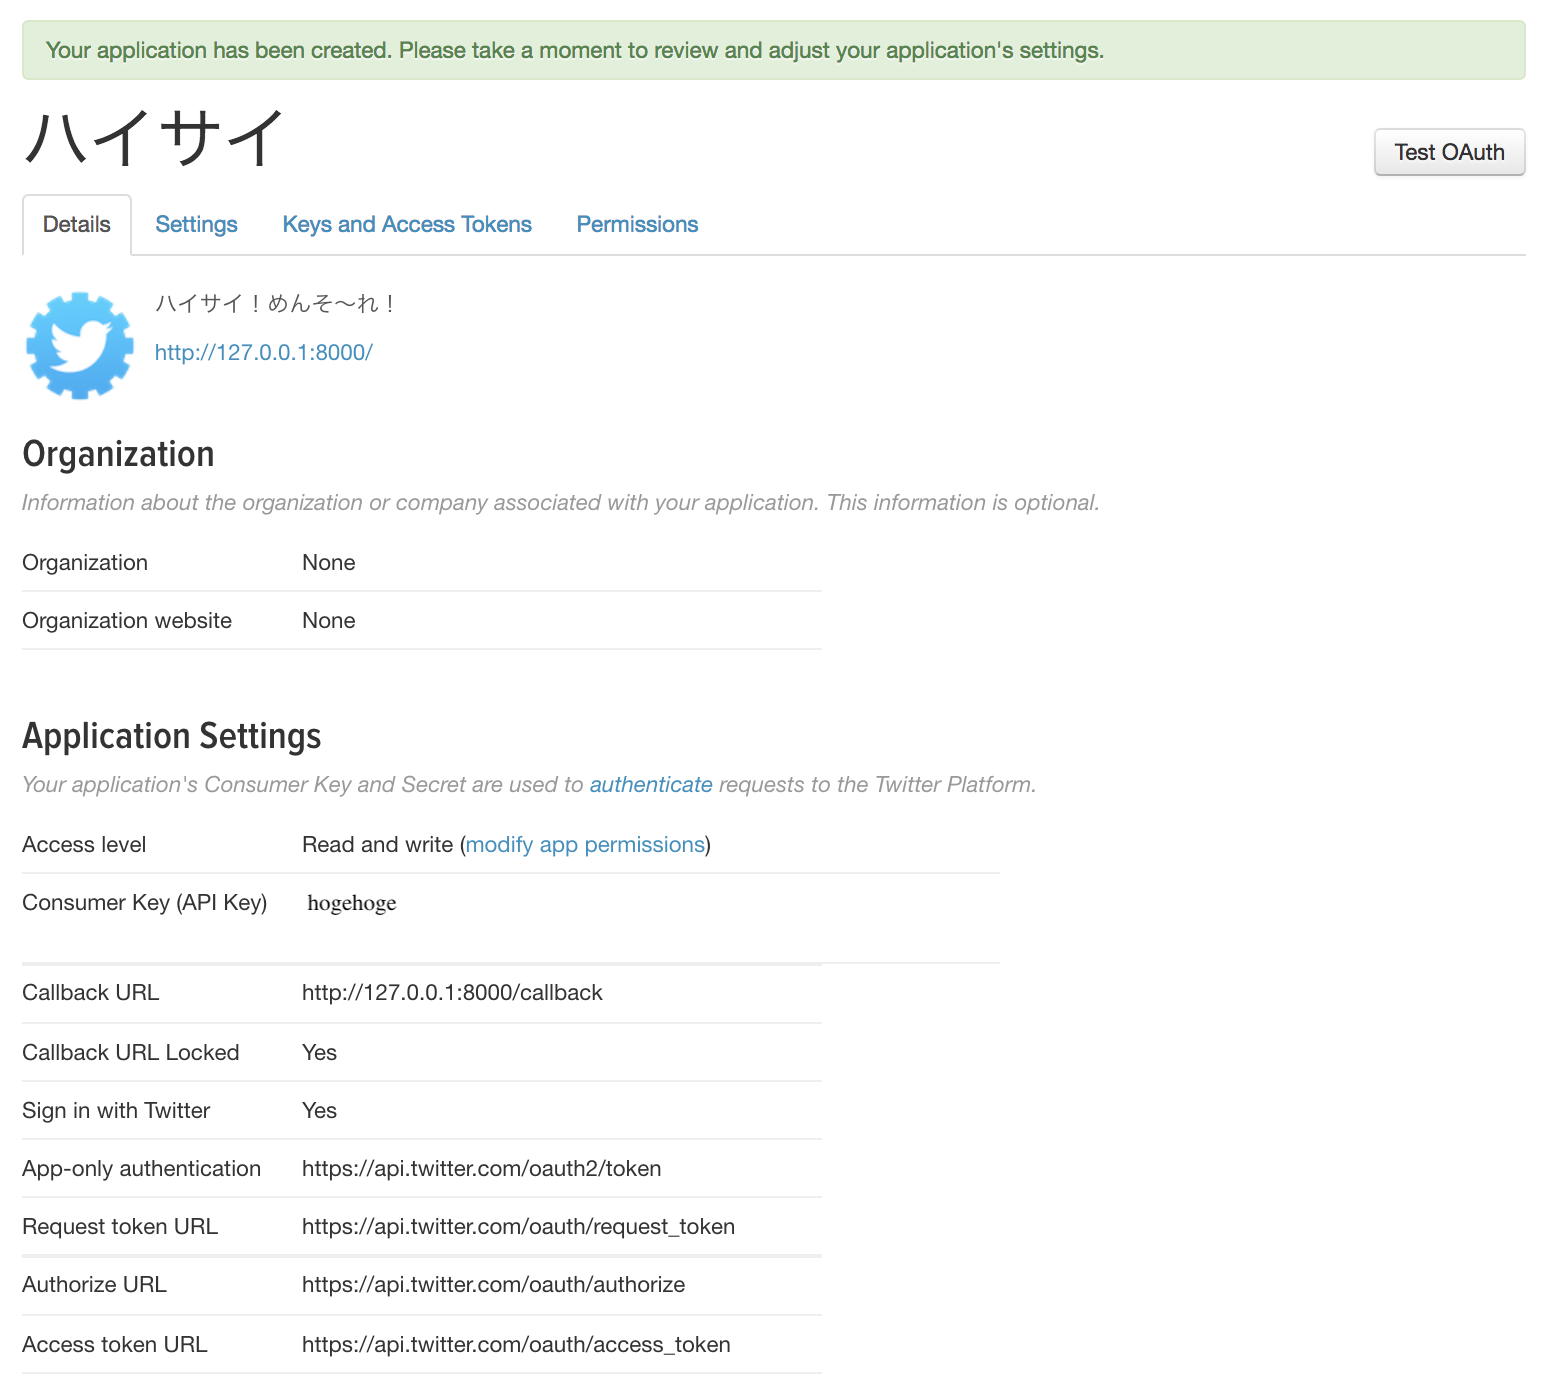
1. 登録できました👏
- ちなみに`name`と`description`は日本語いけるみたいです(笑
- **Name**: 任意のアプリケーションの名前を入力してください。
- 制約: 必須項目, 32文字以内
- **Description**: アプリケーションについての説明を記述してください。ここに書いたものが認証画面に表示されます。
- 制約: 必須項目,10文字以上200文字以内
- **Website**: アプリケーションを動かすサイトのURL(ローカル環境でやるなら`http://127.0.0.1:8000/`とかになると思います。)
- 制約: 必須項目, URLのフォーマットじゃないと怒られる
- これに関しては適切じゃないものをいれた場合どうなるかわからないのです....orz
- **Callback URLs**: 認証後にリダイレクトしてほしいURLを記載してください。
- 制約: URLのフォーマットじゃないと怒られる
- **Developer Agreement**: 登録したかったらチェックしてください(笑
1. **Create your Twitter application**をクリックする
1. 登録できました👏
- ちなみに`name`と`description`は日本語いけるみたいです(笑
-
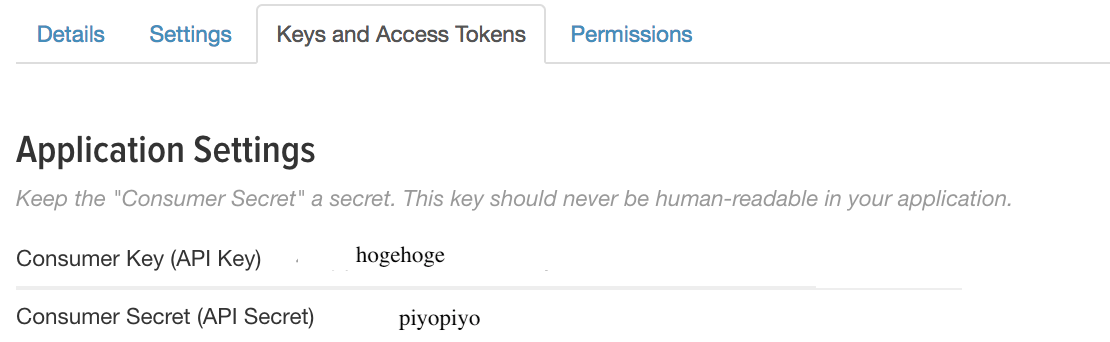
Keys and Access Tokensで下記をメモっとく(必須です)- Consumer Key (API Key)
- Consumer Secret (API Secret)
- 本当はもっとちゃんとした値が入ります(笑
これでとりあえずは準備OKです~
実装
コメントアウトに説明書いてあります。
準備
routes/web.php
<?php

//ログイン認証するためのルーティング
Route::get('/oauth', 'OAuthController@login');

//Callback用のルーティング
Route::get('/callback', 'OAuthController@callBack');

//indexのルーティング
Route::get('/index', 'OAuthController@index');

//logoutのルーティング
Route::get('/logout', 'OAuthController@logout');

//logout後のリダイレクト先
Route::get('/', function () {
    return view('welcome');
});
resources/views/layouts/common.blade.php
多分ニュープロジェクトだと無いと思うのでディレクトリとか諸々作ってください。
$ mkdir resources/views/layouts & touch resources/views/layouts/common.blade.php
<!DOCTYPE html>
<html lang="en">
<head>
    <title>OAuth Login</title>

    <!-- Fonts -->
    <link href="https://cdnjs.cloudflare.com/ajax/libs/font-awesome/4.4.0/css/font-awesome.min.css" rel='stylesheet' type='text/css'>

    <!-- Styles -->
    <link href="https://maxcdn.bootstrapcdn.com/bootstrap/3.3.6/css/bootstrap.min.css" rel="stylesheet">
</head>

<body>

    @yield('content')

    <!-- JavaScripts -->
    <script src="{{ asset('js/app.js') }}"></script>
</body>
</html>
resources/views/index.blade.php
$ touch resources/views/index.blade.php
@extends('layouts.common')
@section('content')
<div class="container">
<div class="col-sm-offset-2 col-sm-8">
<div class="panel panel-default">
<div class="panel-heading">
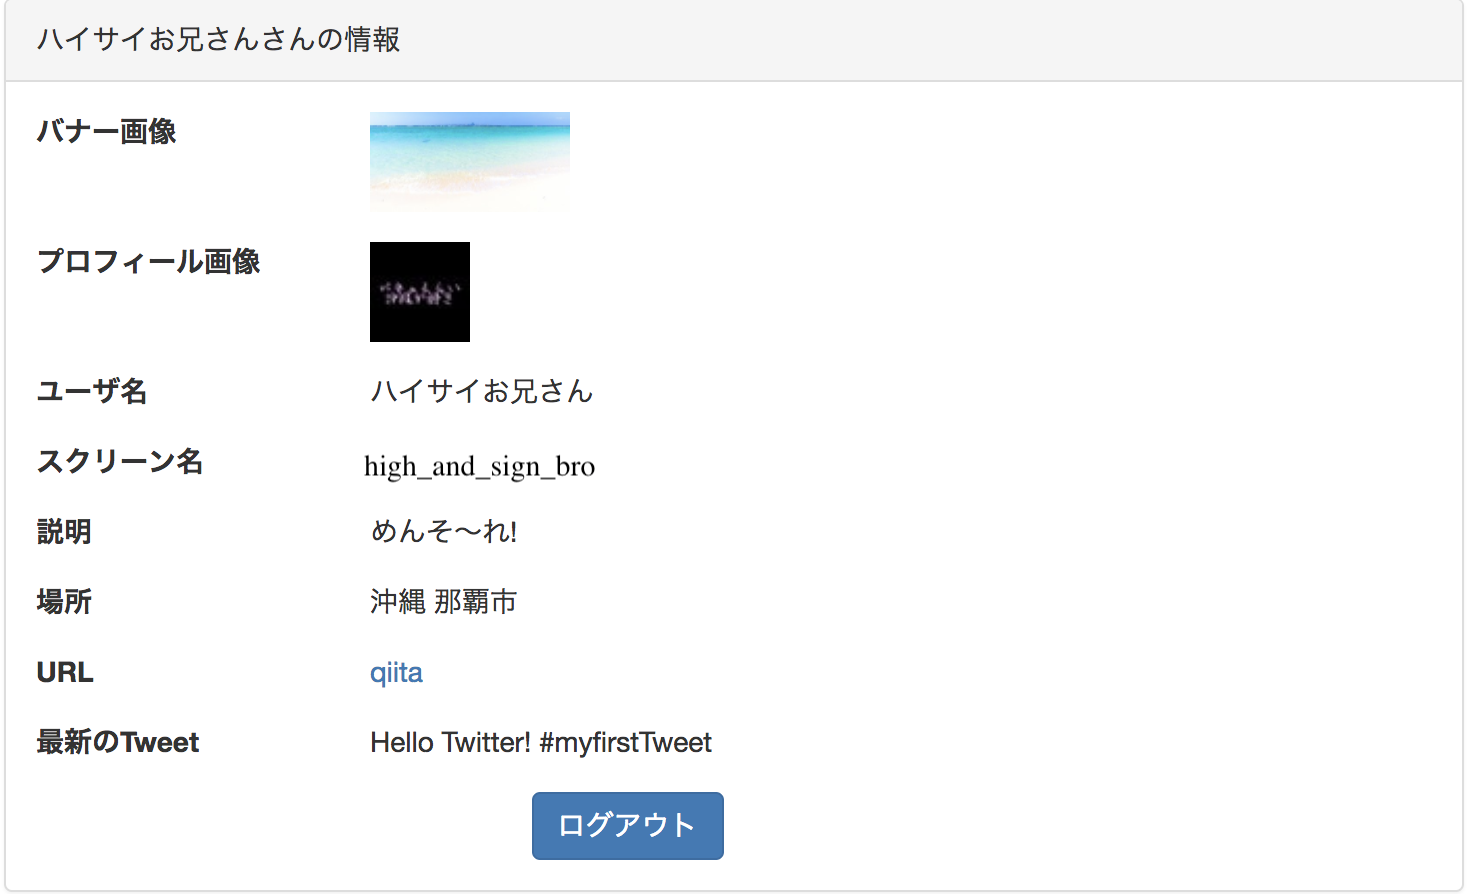
{{ $userInfo['name'] }}さんの情報
</div>
<div class="panel-body">
<!-- User Profile Contents -->
<div class="form-horizontal">
<!-- profile_banner_url -->
<div class="form-group">
<strong class="col-sm-3">バナー画像</strong>
<img src="{{ $userInfo['profile_banner_url'] }}" width="100" height="50">
</div>
<!-- profile_image_url -->
<div class="form-group">
<strong class="col-sm-3">プロフィール画像</strong>
<img src="{{ $userInfo['profile_image_url'] }}" width="50" height="50">
</div>
<!-- Name -->
<div class="form-group">
<strong class="col-sm-3">ユーザ名</strong>
<div>{{ $userInfo['name'] }}</div>
</div>
<!-- Screen Name -->
<div class="form-group">
<strong class="col-sm-3">スクリーン名</strong>
<div>{{ $userInfo['screen_name'] }}</div>
</div>
<!-- User description -->
<div class="form-group">
<strong class="col-sm-3">説明</strong>
<div>{{ $userInfo['description'] }}</div>
</div>
<!-- location -->
<div class="form-group">
<strong class="col-sm-3">場所</strong>
<div>{{ $userInfo['location'] }}</div>
</div>
<!-- url -->
<div class="form-group">
<strong class="col-sm-3">URL</strong>
<a href="{{ $userInfo['url'] }}">qiita</a>
</div>
<!-- status -->
<div class="form-group">
<strong class="col-sm-3">最新のTweet</strong>
<div>{{ get_object_vars($userInfo['status'])['text'] }}</div>
</div>
</div>
<div class="form-group">
<div class="col-md-8 col-md-offset-4">
<a href="/logout" class="btn btn-primary">ログアウト</a>
</div>
</div>
</div>
</div>
</div>
</div>
@endsection
abraham/TwitterOAuthのインストール
$ composer require abraham/twitteroauth
Controller作成(今回のメイン)
$ touch app/Http/Controllers/OAuthController.php
簡単なControllerの雛形です
<?php

namespace App\Http\Controllers;

//ライブラリを使用するための宣言みたいなもの
use Abraham\TwitterOAuth\TwitterOAuth;
use Illuminate\Support\Facades\Input;

//クラス定義
class OAuthController extends Controller{
    //さっきメモったやつを変数に格納
    //本当はenvとかに定義した方が良い
    private $consumerKey = 'hogehoge';
    private $consumerSecret = 'piyopiyo';
    private $callBackUrl = 'http://127.0.0.1:8000/callback/';

    //アクセスしてTwitterのOAuth認証のページまでリダイレクトするところまで記述する
    public function login(){

    }
    //callBack後の処理について書く(アクセストークンとか取得する)
    public function callBack(){

    }

    //アクセストークンを使用してAPIを叩いて結果をビューに受け渡す
    public function index(){

    }
    //ログアウト処理(今回は最終的にwelcomeページにリダイレクトするようにする)
    public function logout(){

    }
}
login実装
public function login(){
    //インスタンス生成
    $twitter = new TwitterOAuth($this->consumerKey, $this->consumerSecret);

    //リクエストトークン取得
    //リクエストトークンは認証用のURLを生成するのに必要になります
    //'oauth/request_token'はリクエストークンを取得するためのAPIのリソース
    $request_token = $twitter->oauth('oauth/request_token', array('oauth_callback' => $this->callBackUrl));

    //認証用URL取得
    //'oauth/authorize'は認証URLを取得するためのAPIのリソース
    $url = $twitter->url('oauth/authorize', array('oauth_token' => $request_token['oauth_token']));

    //認証ページにリダイレクト
    return redirect($url);
}
-
一旦サーバ起動して動作確認
$ php artisan serve -
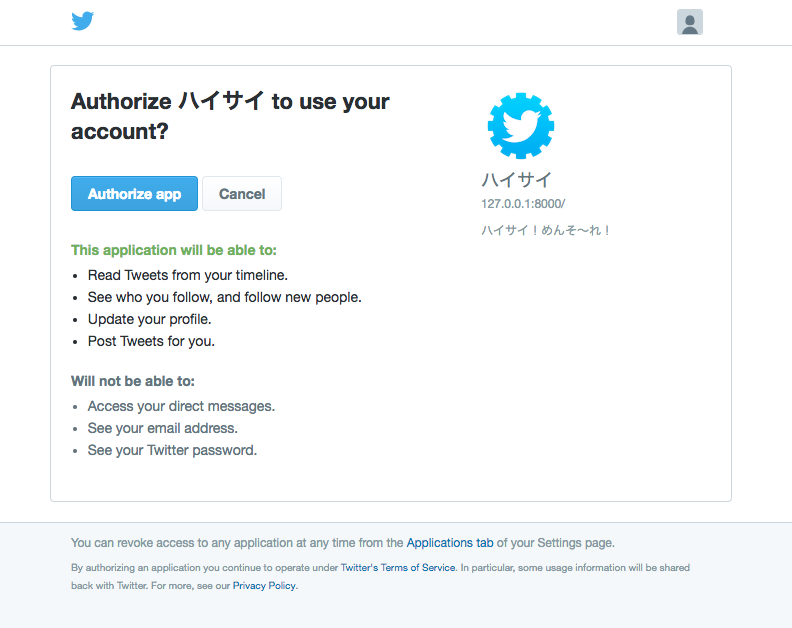
http://127.0.0.1:8000/oauth/にアクセス- OK👏
-
まだ認証してもエラーページに飛んでしまうので今度はcallbackしてきた時の処理を書いていきます
callback実装
public function callBack(){
    //GETパラメータから認証トークン取得
    $oauth_token = Input::get('oauth_token');
    //GETパラメータから認証キー取得
    $oauth_verifier = Input::get('oauth_verifier');

    //インスタンス生成
    $twitter = new TwitterOAuth(
        //API Key
        $this->consumerKey,
        //API Secret
        $this->consumerSecret,
        //認証トークン
        $oauth_token,
        //認証キー
        $oauth_verifier
    );

    //アクセストークン取得
    //'oauth/access_token'はアクセストークンを取得するためのAPIのリソース
    $accessToken = $twitter->oauth('oauth/access_token', array('oauth_token' => $oauth_token, 'oauth_verifier' => $oauth_verifier));

    //セッションにアクセストークンを登録
    session()->put('accessToken', $accessToken);

    //indexページにリダイレクト
    return redirect('index');
}
- そしてリダイレクト先のindexでユーザ情報を取得してビューに表示するところを実装します。
public function index(){
    //セッションからアクセストークン取得
    $accessToken = session()->get('accessToken');

    //インスタンス生成
    $twitter = new TwitterOAuth(
        //API Key
        $this->consumerKey,
        //API Secret
        $this->consumerSecret,
        //アクセストークン
        $accessToken['oauth_token'],
        $accessToken['oauth_token_secret']
    );

    //ユーザ情報を取得
    //'account/verify_credentials'はユーザ情報を取得するためのAPIのリソース
    // get_object_vars()でオブジェクトの中身をjsonで返す
    $userInfo = get_object_vars($twitter->get('account/verify_credentials'));

    //indexというビューにユーザ情報が入った$userInfoを受け渡す
    return view('index', ['userInfo' => $userInfo]);
}
今回は全部そのままビューに渡しちゃいました
-
↓ちなみに戻り値はこんな感じになってます。↓
{ "id": 733310751801118700, "id_str": "733310751801118720", "name": "ハイサイお兄さん", "screen_name": "high_and_sign_bro", "location": "沖縄 那覇市", "description": "めんそ〜れ!", "url": "https://t.co/pmulmz9xnm", "entities": { "url": { "urls": [ { "url": "https://t.co/pmulmz9xnm", "expanded_url": "https://qiita.com/da-sugi", "display_url": "qiita.com/da-sugi", "indices": [ 0, 23 ] } ] }, "description": { "urls": [] } }, "protected": false, "followers_count": 2, "friends_count": 5, "listed_count": 0, "created_at": "Thu May 19 14:58:02 +0000 2016", "favourites_count": 1, "utc_offset": null, "time_zone": null, "geo_enabled": false, "verified": false, "statuses_count": 1, "lang": "en", "status": { "created_at": "Thu May 17 03:15:12 +0000 2018", "id": 996952245919891500, "id_str": "996952245919891456", "text": "Hello Twitter! #myfirstTweet", "truncated": false, "entities": { "hashtags": [ { "text": "myfirstTweet", "indices": [ 15, 28 ] } ], "symbols": [], "user_mentions": [], "urls": [] }, "source": "<a href=\"http://twitter.com\" rel=\"nofollow\">Twitter Web Client</a>", "in_reply_to_status_id": null, "in_reply_to_status_id_str": null, "in_reply_to_user_id": null, "in_reply_to_user_id_str": null, "in_reply_to_screen_name": null, "geo": null, "coordinates": null, "place": null, "contributors": null, "is_quote_status": false, "retweet_count": 0, "favorite_count": 0, "favorited": false, "retweeted": false, "lang": "no" }, "contributors_enabled": false, "is_translator": false, "is_translation_enabled": false, "profile_background_color": "000000", "profile_background_image_url": "http://abs.twimg.com/images/themes/theme1/bg.png", "profile_background_image_url_https": "https://abs.twimg.com/images/themes/theme1/bg.png", "profile_background_tile": false, "profile_image_url": "http://pbs.twimg.com/profile_images/997353301376094208/V9ojDTT-_normal.jpg", "profile_image_url_https": "https://pbs.twimg.com/profile_images/997353301376094208/V9ojDTT-_normal.jpg", "profile_banner_url": "https://pbs.twimg.com/profile_banners/733310751801118720/1526622568", "profile_link_color": "7FDBB6", "profile_sidebar_border_color": "000000", "profile_sidebar_fill_color": "000000", "profile_text_color": "000000", "profile_use_background_image": false, "has_extended_profile": true, "default_profile": false, "default_profile_image": false, "following": false, "follow_request_sent": false, "notifications": false, "translator_type": "none" } -
今回はこの鬼ほど多い情報からいくつかビューに表示するように
index.blade.phpがつくられているのでそのまま動作確認しましょう
動作確認
- 再度
http://127.0.0.1:8000/oauthにアクセス -
Authorize appをクリック - ↓のようにプロフィールの情報が表示されればOKです!✌️
実際のアカウントのスクショ
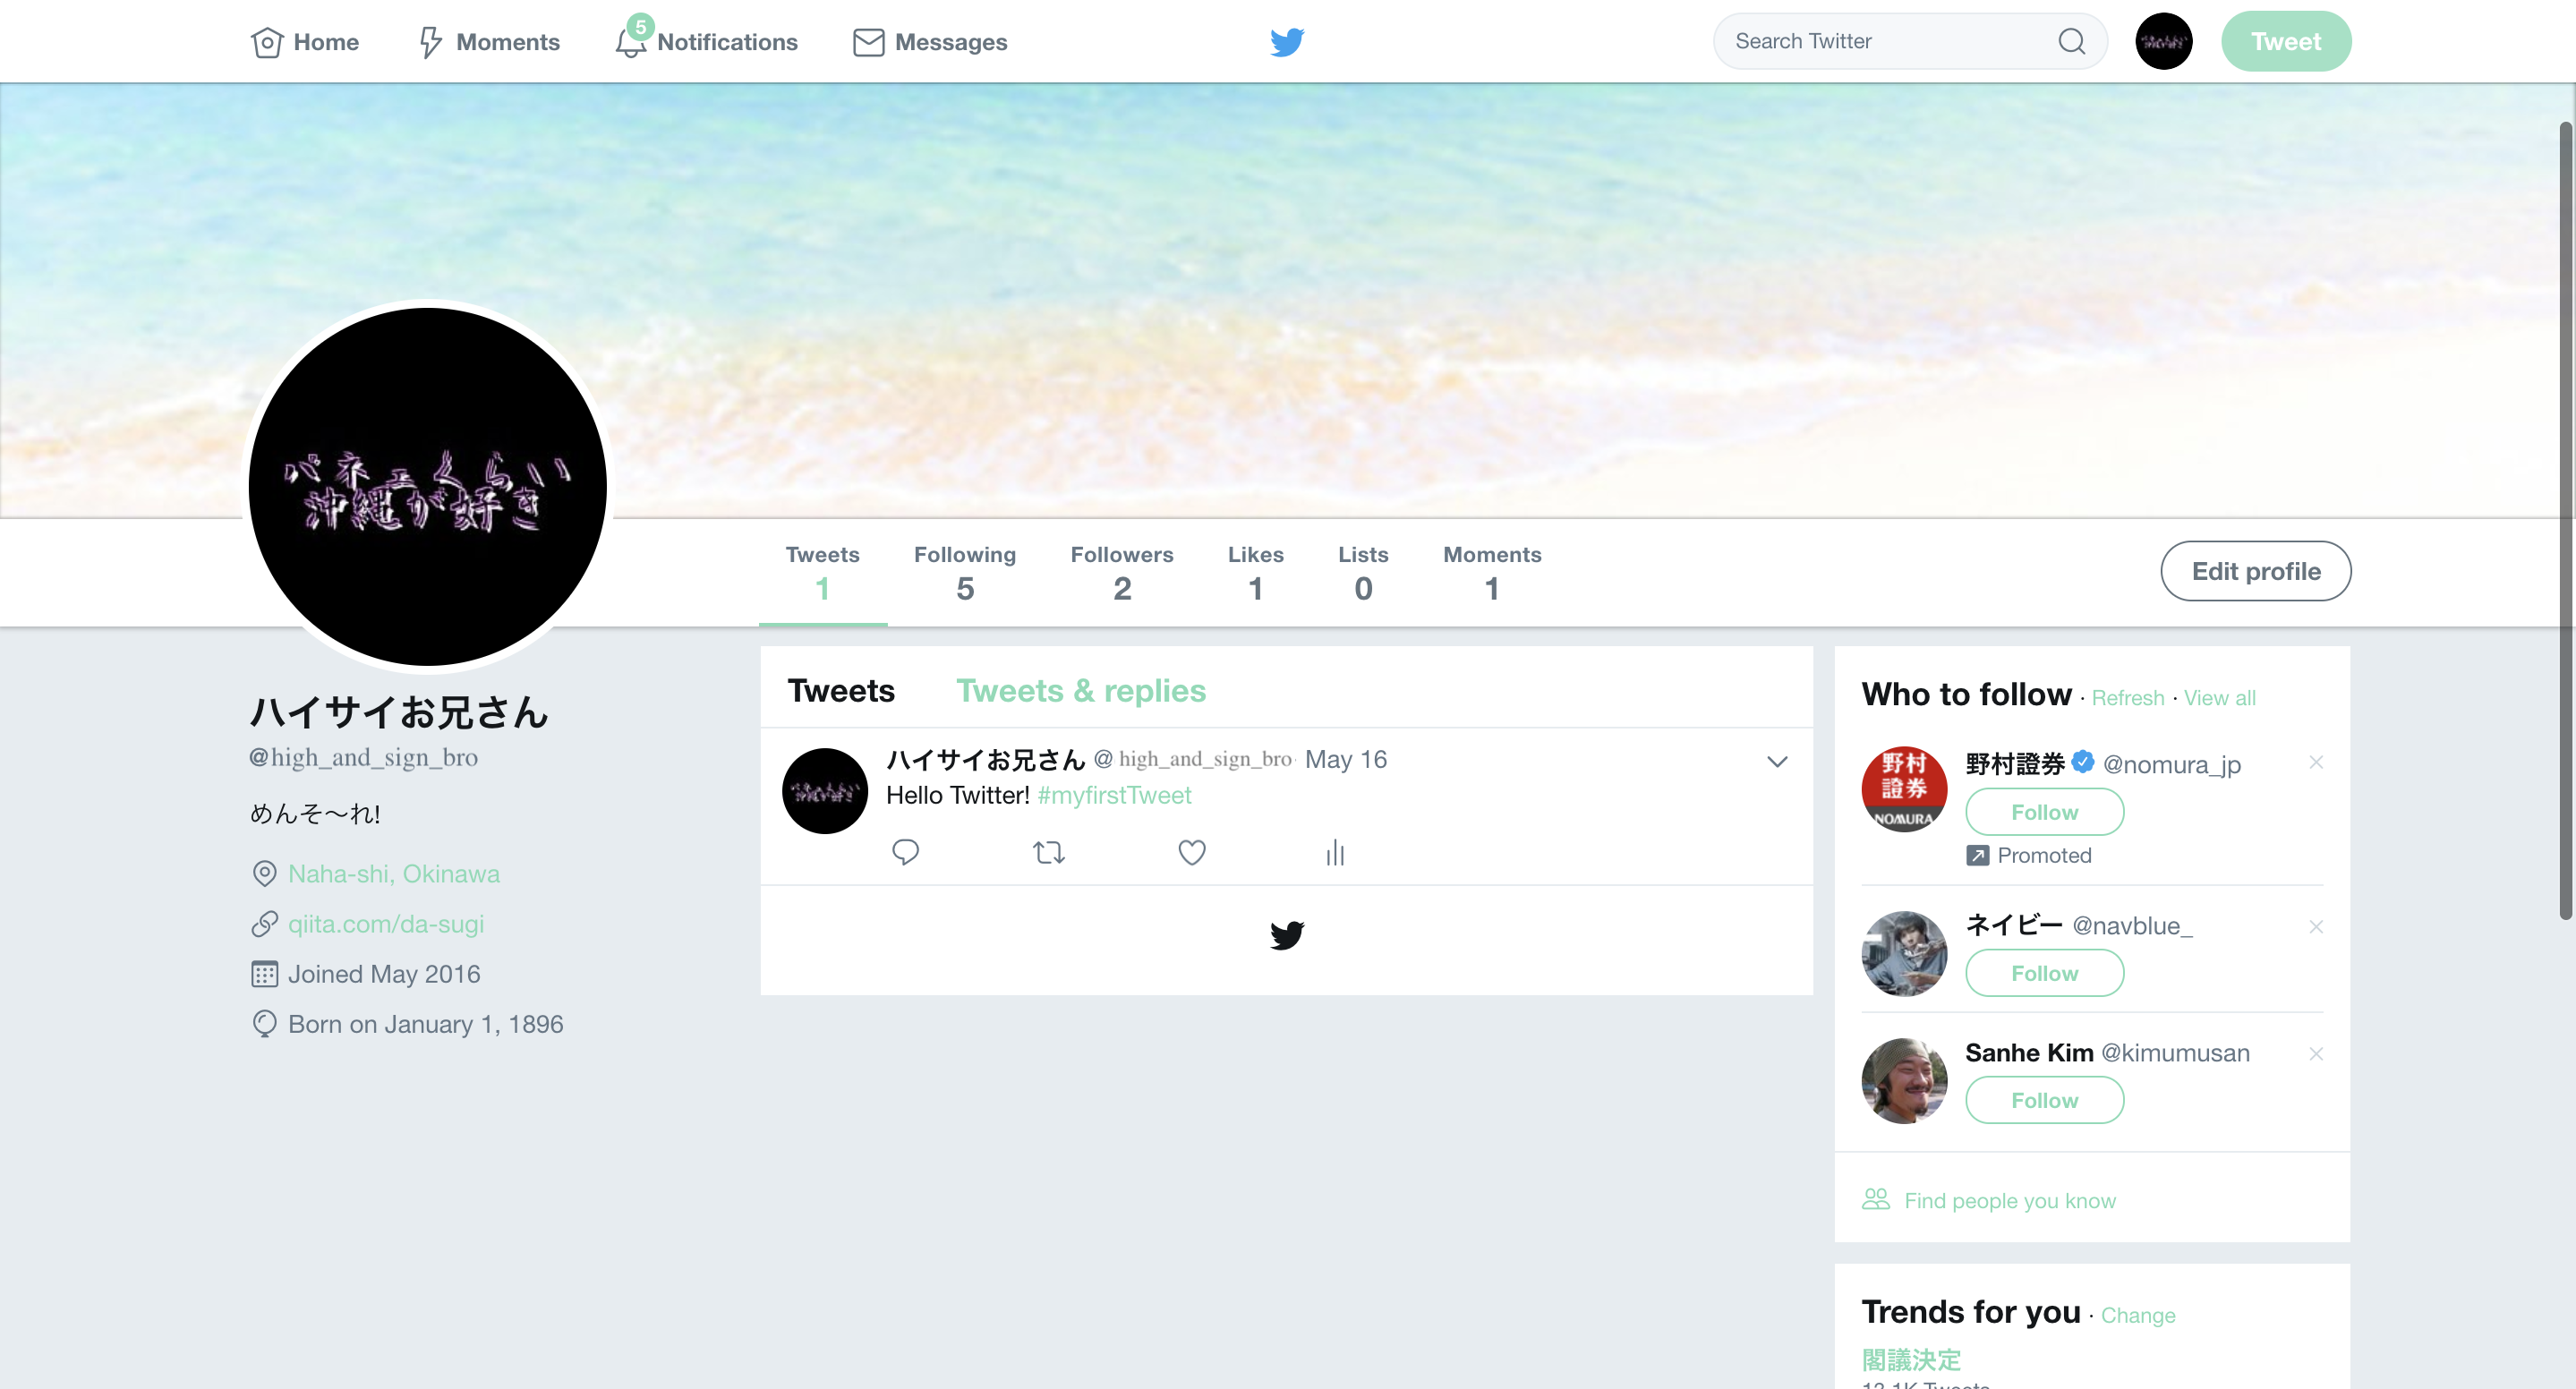
- ちゃんと取得できて表示できてますね✌️
おまけ
logout実装
セッションクリアして、http://127.0.0.1:8000/にリダイレクトさせるだけです!
今回だとLaravelのwelcome画面が表示されます。
public function logout(){
    //セッションクリア
    session()->flush();

    //OAuthログイン画面にリダイレクト
    return redirect('/');
}
おわり
色々内容が濃くなってしまいましたが、アクセストークンさえ取得できてしまえば、あとはどのAPIのリソースにどんなリクエストを投げて、データ取得またはツイート投稿するのかだけなので、あとはドキュメントを見てください👀