はじめに
Vue.jsとFirebaseで自己紹介用の静的サイトをポートフォリオで作っていたのですが備忘録を残そうと思って2ヶ月が経過してしまって細かいところがうろ覚えになってしまったため、再度復習のためと環境を最新の状態で実践して他の人でも簡単に静的サイトを作れるようにしようかなあと思ったのがキッカケで記事にしました。
ポートフォリオとして何を作るか悩んでる際、参考にしていただけると幸いです。
2か月前に実際作ったのが以下です。
〇ポートフォリオ
https://vue-project-16285.firebaseapp.com/
〇GitHubリポジトリ
https://github.com/stkzk3110/portfolio
続きの記事はこちら・・・(作成中)
Vue.js + Firebaseで自己紹介用の静的サイトを作ってみた 第2弾 実装編(ルーティング)
[Vue.js + Firebaseで自己紹介用の静的サイトを作ってみた 第3弾 実装編(ヘッダー、フッター、SNSリンク設置)]
(https://qiita.com/fisherman3110se/items/10a9061e18b52e4b0c3a)
環境構築編
・バージョン
$ node -v
v12.1.0
$ npm -v
6.9.0
・VueCLIインストール
$ npm install -g @vue/cli
$ vue -V
3.7.0
$ vue create vue_firebase-project
$ cd vue_firebase-project
$ npm run serve
vue create実施時にdefaultかmanualか設定出来ますが特に指定無ければdefaultでそのままやりましょう。
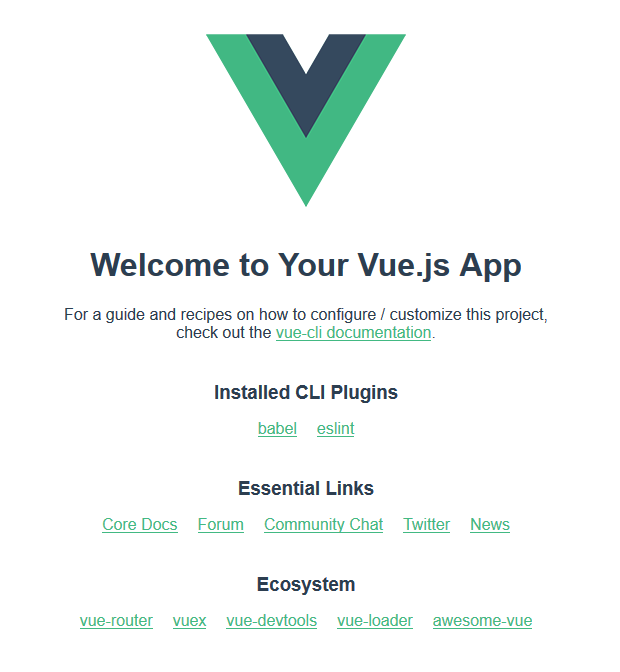
http://localhost:8080/にアクセスすると以下が表示されます。
$ npm run build
今までは./publicフォルダ配下のindex.htmlが実際動いていたが、./distフォルダが作られ、./distフォルダ配下のindex.htmlが実際動くようになる。
・Firebase
https://console.firebase.google.com/u/0/?hl=ja
Firebaseコンソールを開いて、プロジェクトを追加。
ガイドも分かりやすいのでガイドに従って設定していきます。
設定が終わるとプロジェクトが作成されます。
Firebaseは、AuthenticationやDatabase,Storageなと複数機能を持ってますが今回は静的サイトの作成のため、Hostingを使います。
Firebase ツールをインストール:
$ npm install -g firebase-tools
Google にログインします:
$ firebase login
プロジェクトを開始:
$ firebase init

     ######## #### ########  ######## ########     ###     ######  ########
     ##        ##  ##     ## ##       ##     ##  ##   ##  ##       ##
     ######    ##  ########  ######   ########  #########  ######  ######
     ##        ##  ##    ##  ##       ##     ## ##     ##       ## ##
     ##       #### ##     ## ######## ########  ##     ##  ######  ########

You're about to initialize a Firebase project in this directory:

  /Users/KazukiSaito/vue_firebase-project

? Which Firebase CLI features do you want to set up for this folder? Press Space
 to select features, then Enter to confirm your choices.
 ◯ Database: Deploy Firebase Realtime Database Rules
 ◯ Firestore: Deploy rules and create indexes for Firestore
 ◯ Functions: Configure and deploy Cloud Functions
❯◉ Hosting: Configure and deploy Firebase Hosting sites
 ◯ Storage: Deploy Cloud Storage security rules

=== Project Setup
? Select a default Firebase project for this directory:
  [don't setup a default project]
  nuxt-project-***** (nuxt-project)
❯ vue-firebase-project-***** (vue-firebase-project)
  vue-project-***** (vue-project)
  [create a new project]
=== Hosting Setup

Your public directory is the folder (relative to your project directory) that
will contain Hosting assets to be uploaded with firebase deploy. If you
have a build process for your assets, use your build's output directory.

? What do you want to use as your public directory? (public) dist
? Configure as a single-page app (rewrite all urls to /index.html)? (y/N) N
? File dist/index.html already exists. Overwrite? (y/N) N
使いたい機能をSpaceキーで選択。(複数選択可能)
今回は前述で言った通り、静的サイトの作成のため、Hostingのみとします。
その後、プロジェクトを選択。(先ほど作成したプロジェクトを選択)
公開に利用するディレクトリ名の入力が求められるので先ほどnpm run buildで作ったdistディレクトリを入力。
その後、公開するページはindex.htmlかどうかと聞かれるがそのままNoとします。
今あるdist/index.htmlを上書きするか聞かれたがこれもNoとします。
ここまででルートディレクトリに.firebaserc、firebase.jsonが出来ていることが確認できます。
ウェブサイトをデプロイ:
$ firebase deploy
=== Deploying to 'vue-firebase-project-*****'...

i  deploying hosting
i  hosting[vue-firebase-project-*****]: beginning deploy...
i  hosting[vue-firebase-project-*****]: found 9 files in dist
✔  hosting[vue-firebase-project-*****]: file upload complete
i  hosting[vue-firebase-project-*****]: finalizing version...
✔  hosting[vue-firebase-project-*****]: version finalized
i  hosting[vue-firebase-project-*****]: releasing new version...
✔  hosting[vue-firebase-project-*****]: release complete

✔  Deploy complete!

Project Console: https://console.firebase.google.com/project/vue-firebase-project-*****/overview
Hosting URL: https://vue-firebase-project-*****.firebaseapp.com
https://vue-firebase-project-*****.firebaseapp.comにアクセスするとhttp://localhost:8080/にアクセスした時と同様の内容がブラウザに表示されていることが確認できるはずです。
まとめ
ここまでで環境構築は完了です。
以下に続く・・・
Vue.js + Firebaseで自己紹介用の静的サイトを作ってみた 第2弾 実装編(ルーティング)
○リポジトリ
https://github.com/stkzk3110/vue_firebase-project
今回のコミット部分
・Create project in Vue CLI
・Add Firebase
