この記事はラクスAdvent Calendar 2022 14日目の記事です。Reactで簡単にアニメーションを実装したくてFramer Motionを試してみました。本記事は公式ドキュメントの例を参考に実装してみたときの備忘録になります。
Framer Motionとは
Framer MotionはFramerが提供するReactのためのプロダクションレディなアニメーションライブラリで、複雑なユーザーインタラクションをシンプルなマークアップで表現することができます。
このライブラリのコアとなるのが<motion.div>コンポーネントです。
<motion.div>
このコンポーネントにFramer Motionのプロパティを設定することで簡単にアニメーションを表現することができます。
導入は非常に簡単で以下のコマンドを実行するだけです。
npm install framer-motion
今回は手軽にコンポーネントを実装できるChakraUIと一緒に使ってみたいと思います。
npm i @chakra-ui/react @emotion/react @emotion/styled framer-motion
Animations
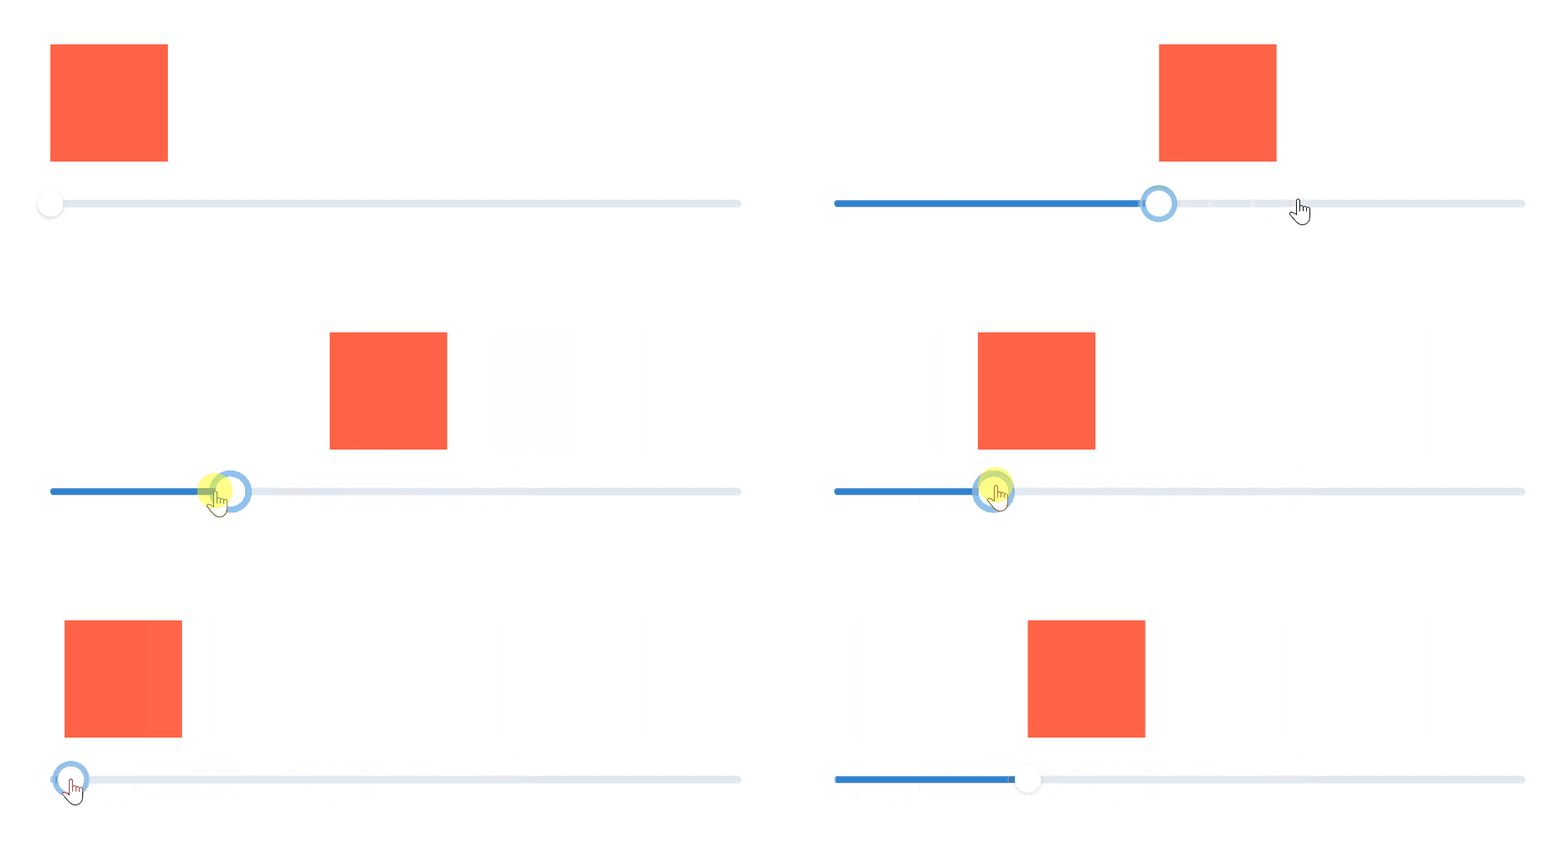
animateプロパティには各アニメーションの値をオブジェクトとして渡すことができます。
<motion.div animate={{ x: 100 }} />
これらの値が変化するとモーションコンポーネントは自動的に新しいアニメーションを生成します。

const [sliderValue, setSliderValue] = useState(0);

return (
<Box gap={4} p={8}>
  <motion.div animate={{ x: sliderValue + "%" }}>
    <Box w={16} h={16} bg="tomato" />
  </motion.div>
  <Slider
    mt={4}
    aria-label="slider-ex-1"
    onChange={(val) => setSliderValue(val)}
  >
    <SliderTrack>
      <SliderFilledTrack />
    </SliderTrack>
    <SliderThumb />
  </Slider>
</Box>
);
またinitialプロパティとtransitionプロパティを使ってアニメーションの初期状態や速度を制御することができます。

<motion.div
  initial={{ opacity: 0, scale: 0.5 }}
  animate={{ opacity: 1, scale: 1 }}
  transition={{ duration: 0.5 }}
>
  <Text
    bgGradient="linear(to-l, #7928CA, #FF0080)"
    bgClip="text"
    fontSize="6xl"
    fontWeight="extrabold"
  >
    Welcome to Framer Motion
  </Text>
</motion.div>
Keyframes
値を配列で設定するとMotionコンポーネントはその値を順番にアニメイトしてくれます。デフォルトでは、各キームレームは等間隔のタイミングで制御されますが、transitionプロパティによってより詳細にタイミングやイージングを設定することができます。

<motion.div
  animate={{
    scale: [1, 2, 2, 1, 1],
    rotate: [0, 0, 180, 180, 0],
  }}
  transition={{
    duration: 2,
    ease: "easeInOut",
    times: [0, 0.2, 0.5, 0.8, 1],
    repeat: Infinity,
    repeatDelay: 1,
  }}
>
  <Box bgGradient="linear(to-r, green.200, pink.500)" w={16} h={16} />
</motion.div>
Gesture animations
MotionコンポーネントはwhileHover、whileTap、 whileDrag、whileFocusといったプロパティも提供しています。これらはユーザーのアクションにしたがってコンポーネントに一時的なアニメーションを付与してくれます。
以下のようにホバー時とタップ時のアニメーションを同時に設定した場合、Motionは自動的に2つのアニメーションの相互作用をハンドリングします。例えばコンポーネントがホバージェスチャーを行っている最中にタップされたとき、Motionはタップ時のアニメーションを優先してアニメイトするように制御してくれます。
<motion.div whileHover={{ scale: 1.1 }} whileTap={{ scale: 0.9 }}>
  <Button>Button</Button>
</motion.div>

Drag
dragプロパティを使用することでコンポーネントをドラッグすることができるようになります。さらにdragConstraintsを設定することでコンポーネントの配置を特定の範囲に制限することができます。制限する範囲はピクセルで定義するか他のDOM要素へのrefでも定義できます。アニメーションは弾性的な動きで表現され、この弾性の強さはdragElasticプロパティで設定できます。

<Box w="128px" h="128px" borderRadius={8} bgColor="gray.200">
  <motion.div
    drag
    dragConstraints={{
      top: 0,
      left: 0,
      right: 64,
      bottom: 64,
    }}
    dragElastic={0.5}
  >
    <Box w={16} h={16} bg="tomato" borderRadius={8} />
  </motion.div>
</Box>
おわりに
Framer Motionを使うことでとても簡単にアニメーションを実装することができました。今回紹介した機能はframer motionのほんの一部でしかありません。この他にも様々なプロパティやhooksが提供されているので興味を持った方はぜひ公式ドキュメントを参照してみてください!
参考文献