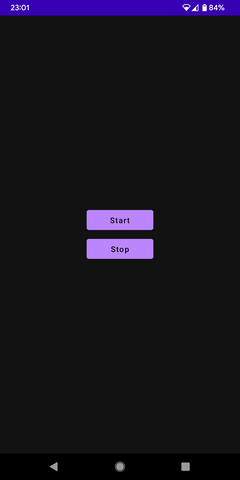
MediaProjectionを使用したサンプルとして、実況配信風動画が収録できるアプリを作成しました。
Startで開始、Stopで終了するシンプルな作りです。
端末上で再生されている映像の録画、音声の録音に加えてマイク入力も同時に録音して合成しています。
アプリを実装する上で必要になったことについて書いていきたいと思います。
全体像

青背景の要素はMediaProjectionを使用します。映像はVirtualDisplay(後述)をMediaCodecでエンコード、音声は2つのAudioRecordから得られるデータを合成してMediaCodecでエンコード、最終的にMediaMuxerで一つのファイルに保存します。
画面キャプチャ
画面キャプチャの実装にはこちらのブログを参考にさせてもらいました。
【Android / MediaProjection / Kotlin】Androidで画面録画をする | たくさんの備忘録 | 備忘録
一応この記事でも少し触れていきたいと思います。
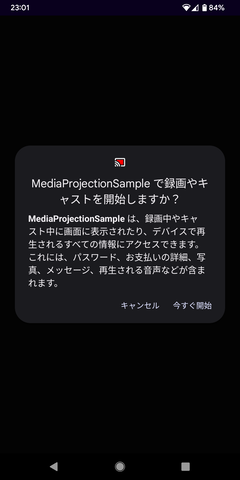
MediaProjectionインスタンスを取得する前段として、MediaProjectionManager.createScreenCaptureIntent()で生成したIntentを起動してユーザーから許可を得る必要があります。
//MainActivity.kt (抜粋)
private lateinit var mediaProjectionManager: MediaProjectionManager

private val launcher = registerForActivityResult(
    ActivityResultContracts.StartActivityForResult()
) { result ->
    if (result.resultCode != RESULT_OK || result.data == null) {
        Toast.makeText(this@MainActivity, "Not permitted", Toast.LENGTH_SHORT).show()
        return@registerForActivityResult
    }
    startCaptureService(result.data!!)
}

private fun onClickStart() {
    launcher.launch(mediaProjectionManager.createScreenCaptureIntent())
}

override fun onCreate(savedInstanceState: Bundle?) {
    super.onCreate(savedInstanceState)

    mediaProjectionManager =
        getSystemService(Service.MEDIA_PROJECTION_SERVICE) as MediaProjectionManager

// 〜以下略〜

インテントを起動するとダイアログが表示されます。ユーザーの選択に合わせて処理を書いていきます。
MediaProjectionインスタンスの取得はServiceで行う
表示されたダイアログでユーザーから許可が得られたら、result.dataを元にMediaProjectionインスタンスが取得できるようになります。ですが、取得できるのはandroid:foregroundServiceType="mediaProjectionが指定されたServiceだけです。
また、パーミッションも追加する必要があります。
<uses-permission android:name="android.permission.FOREGROUND_SERVICE" />
<service
    android:name="com.crakac.mediaprojectionsample.ScreenRecordService"
    android:foregroundServiceType="mediaProjection" />
マニフェストファイルに記述漏れがあったり、指定したService以外でインスタンスを取得しようとするとSecurityExceptionで落ちます。
java.lang.SecurityException: Media projections require a foreground service of type ServiceInfo.FOREGROUND_SERVICE_TYPE_MEDIA_PROJECTION
        at android.app.ActivityThread.handleServiceArgs(ActivityThread.java:4657)
Activityで取得したresult.dataをService起動用Intentに詰め込んで、Serviceに渡します。
そして、Service内でMediaProjectionManager.getMediaProjection()を実行することでMediaProjectionインスタンスが取得できます。
VirtualDisplay
MediaProjection.createVirtualDisplay()を使用してVirtualDisplayを作成する際、VirtualDisplayの描画先をMediaCodecのinputSurfaceにすることで、画面録画が実現できます。
Service内なので、resource.displayMetricsで画面の縦横ピクセル数、dpi等を取得できます。適当に縮小してVirtualDisplayに渡すと良いと思います。
// ScreenRecordService.kt (抜粋)
private lateinit var projection: MediaProjection
private lateinit var virtualDisplay: VirtualDisplay

override fun onStartCommand(intent: Intent?, flags: Int, startId: Int): Int {
    if (intent == null) {
        return super.onStartCommand(intent, flags, startId)
    }
    val data = intent.getParcelableExtra<Intent>(KEY_DATA) ?: return START_NOT_STICKY
    val projectionManager =
        getSystemService(Context.MEDIA_PROJECTION_SERVICE) as MediaProjectionManager
    projection = projectionManager.getMediaProjection(RESULT_OK, data)

    val metrics = resources.displayMetrics
    val rawWidth = metrics.widthPixels
    val rawHeight = metrics.heightPixels

    val scale = if(maxOf(rawWidth, rawHeight) > 960){
        960f / maxOf(rawWidth, rawHeight)
    } else 1f

    val width = (rawWidth * scale).roundToInt()
    val height = (rawHeight * scale).roundToInt()

    virtualDisplay = projection.createVirtualDisplay(
        "Projection",
        width,
        height,
        metrics.densityDpi,
        DisplayManager.VIRTUAL_DISPLAY_FLAG_AUTO_MIRROR,
        recorder.surface, // MediaCodecのcreateInputSurface()で得られるsurface
        null,
        null
    )
    recorder.start()
音声のキャプチャ
音声録音の基本となるAudioRecordを使用するには、RECORD_AUDIOパーミッションが追加で必要なのでマニフェストに追加します。
<uses-permission android:name="android.permission.RECORD_AUDIO" />
また、実行時にユーザーから許可を得る必要があります。
// MainActivity.kt (抜粋)
private fun isPermissionGranted() =
    (ContextCompat.checkSelfPermission(this, Manifest.permission.RECORD_AUDIO)
            == PackageManager.PERMISSION_GRANTED)

private fun onClickStart() {
    if (!isPermissionGranted()) {
        requestPermissions(
            arrayOf(Manifest.permission.RECORD_AUDIO), REQUEST_CODE
        )
    } else {
        launcher.launch(mediaProjectionManager.createScreenCaptureIntent())
    }
}
端末上で再生されている音声をキャプチャするには、AudioRecordにAudioPlaybackCaptureConfigurationをセットします。 AudioPlaybackCaptureConfigurationの作成にはMediaProjectionインスタンスを渡す必要があります。
// AudioEncoder.kt (抜粋)
private val playbackConfig = AudioPlaybackCaptureConfiguration.Builder(mediaProjection)
    .addMatchingUsage(AudioAttributes.USAGE_MEDIA)
    .addMatchingUsage(AudioAttributes.USAGE_GAME)
    .addMatchingUsage(AudioAttributes.USAGE_UNKNOWN)
    .build()

@SuppressLint("MissingPermission")
private val audioPlayback = AudioRecord.Builder()
    .setAudioPlaybackCaptureConfig(playbackConfig)
    .setAudioFormat(
        AudioFormat.Builder()
            .setSampleRate(SAMPLE_RATE)
            .setEncoding(AudioFormat.ENCODING_PCM_16BIT)
            .setChannelMask(channelMask)
            .build()
    )
    .setBufferSizeInBytes(audioBufferSizeInBytes)
    .build()
これでaudioPlaybackを使って端末上の音声をキャプチャできます。
パーミッションのチェックが行われていないと思われる箇所でAudioRecordインスタンスを作成するとき、AndroidStudioが警告を出します。今回作成したアプリでは、Startボタンをクリックしたときにチェックしているので@SuppressLint("MissingPermission")を付与して警告を抑制しています。
マイク入力のキャプチャ
AudioRecordで取得できます。
後で合成するために、音声キャプチャとマイク入力のキャプチャで、チャンネル数、エンコードフォーマット、サンプリングレートを揃えておきます。
@SuppressLint("MissingPermission")
private val audioRecord = AudioRecord(
    MediaRecorder.AudioSource.CAMCORDER,
    SAMPLE_RATE,
    channelMask,
    AudioFormat.ENCODING_PCM_16BIT,
    audioBufferSizeInBytes
)
音声の合成
audioRecord.read()とaudioPlayback.read()で取得できるデータを加算します。
audioRecord, audioPlaybackは、AudioRecordをラップしてread()でReadResultクラスを返すようにしています。
// AudioRecordWrapper.kt
class AudioRecordWrapper(
    private val audioRecord: AudioRecord,
    bufferSizeInBytes: Int
) {
    private val buffer = ShortArray(bufferSizeInBytes / 2)

    fun read(): ReadResult {
        val readBytes = audioRecord.read(buffer, 0, buffer.size)
        // 〜〜〜(中略)〜〜〜
        return ReadResult(buffer, readBytes, isSuccess = true)
    }
}
class ReadResult(
    val data: ShortArray,
    val readShorts: Int,
    val isSuccess: Boolean,
)
// AudioEncoder.kt
private fun record() = scope.launch {
    while (isActive) {
        // 音声キャプチャ、マイク入力を読み込む
        val deferredVoice = async { audioRecord.read() }
        val deferredPlayback = async { audioPlayback.read() }

        val voice = deferredVoice.await()
        val playback = deferredPlayback.await()
        if (!voice.isSuccess || !playback.isSuccess) continue

        val dataSizeInShorts = minOf(voice.readShorts, playback.readShorts)
        // それぞれのデータを加算して合成
        for (i in 0 until dataSizeInShorts) {
            synthesizedData[i] =
                minOf(voice.data[i] + playback.data[i], Short.MAX_VALUE.toInt()).toShort()
        }
        val inputBufferId = codec.dequeueInputBuffer(-1)
        val inputBuffer = codec.getInputBuffer(inputBufferId)!!
        synthesizedData.copyToByteArray(synthesizedByteArray, dataSizeInShorts)
        inputBuffer.put(synthesizedByteArray)
        codec.queueInputBuffer(
            inputBufferId, 0, dataSizeInShorts * 2, audioRecord.createTimestamp(), 0
        )
    }
}

// Util.kt
fun ShortArray.copyToByteArray(byteArray: ByteArray, size: Int) {
    for (i in 0 until size) {
        val s = get(i).toInt()
        byteArray[i * 2] = s.and(0xFF).toByte()
        byteArray[i * 2 + 1] = s.shr(8).toByte()
    }
}
16BIT_PCMでエンコードしているので、AudioRecord.read(short[], int, int)で得られるデータを単純に加算することで合成できます。
MediaCodecのinputBufferに入力する際にはByteArrayに変換します。
MediaCodecとMediaMuxer
MediaCodecで映像、音声のエンコードを行い、MediaMuxerでファイルに保存します。
MediaMuxer.writeSampleData()で書き込むために、MediaCodecフォーマット変更と、エンコードされたデータを拾うコールバックを作成します。
enum class EncoderType { Video, Audio }

interface EncoderCallback {
    fun onFormatChanged(format: MediaFormat, type: EncoderType)
    fun onEncoded(buffer: ByteBuffer, info: MediaCodec.BufferInfo, type: EncoderType)
}
// MyMediaRecorder.kt (抜粋)

private const val NUM_TRACKS = 2 // video, audio
private const val UNINITIALIZED = -1

class MyMediaRecorder(
    mediaProjection: MediaProjection,
    fileDescriptor: FileDescriptor,
    width: Int,
    height: Int,
    isStereo: Boolean = true,
) : EncoderCallback {

    private val muxer = MediaMuxer(fileDescriptor, MediaMuxer.OutputFormat.MUXER_OUTPUT_MPEG_4)
    private var isMuxerAvailable = false
    private var trackCount = 0
    private val trackIds = MutableList(NUM_TRACKS) { UNINITIALIZED }

    override fun onFormatChanged(format: MediaFormat, type: EncoderType) {
        val index = type.ordinal
        synchronized(this) {
            if (trackIds[index] == UNINITIALIZED) {
                trackIds[index] = muxer.addTrack(format)
                trackCount++
                if (trackCount == NUM_TRACKS) {
                    muxer.start()
                    isMuxerAvailable = true
                }
            }
        }
    }

    override fun onEncoded(buffer: ByteBuffer, info: MediaCodec.BufferInfo, type: EncoderType) {
        if (!isMuxerAvailable) return
        val trackId = trackIds[type.ordinal]
        muxer.writeSampleData(trackId, buffer, info)
    }

    private val audioEncoder = AudioEncoder(
        mediaProjection = mediaProjection, isStereo = isStereo, callback = this
    )

    private val videoEncoder = VideoEncoder(
        width = width, height = height, callback = this
    )

    // ...
映像用、音声用のMediaCodec両方でコールバックを呼び出します。
// AudioEncoder.kt (抜粋)
private fun drain() = scope.launch {
    val bufferInfo = MediaCodec.BufferInfo()
    while (true) {
        val outputBufferId = codec.dequeueOutputBuffer(bufferInfo, -1)
        if (outputBufferId == MediaCodec.INFO_TRY_AGAIN_LATER) {
            continue
        } else if (outputBufferId == MediaCodec.INFO_OUTPUT_FORMAT_CHANGED) {
            Log.d(TAG, "Output format changed")
            callback.onFormatChanged(codec.outputFormat, EncoderType.Audio)
        } else {
            val encodedData = codec.getOutputBuffer(outputBufferId)
                ?: throw RuntimeException("encodedData is null")
            if (bufferInfo.flags and MediaCodec.BUFFER_FLAG_CODEC_CONFIG != 0) {
                bufferInfo.size = 0
            }
            if (bufferInfo.size > 0) {
                callback.onEncoded(encodedData, bufferInfo, EncoderType.Audio)
                codec.releaseOutputBuffer(outputBufferId, false)
            }

            if (bufferInfo.flags and MediaCodec.BUFFER_FLAG_END_OF_STREAM != 0) {
                Log.d(TAG, "EOS")
                break
            }
        }
    }
// VideoEncoder.kt (抜粋)
override fun onOutputFormatChanged(codec: MediaCodec, format: MediaFormat) {
    callback.onFormatChanged(format, EncoderType.Video)
}

override fun onOutputBufferAvailable(
    codec: MediaCodec,
    index: Int,
    info: MediaCodec.BufferInfo
) {
    val buffer =
        codec.getOutputBuffer(index) ?: throw RuntimeException("Output buffer is null")
    callback.onEncoded(buffer, info, EncoderType.Video)
    codec.releaseOutputBuffer(index, false)
}
MediaCodecでエンコードを行うとき、MediaMuxerにoutputBufferを渡した後にreleaseOutputBuffer()を実行する必要があります。
実行を忘れると、いつまでも次のOutputBufferが取得できなくなってエンコードが進まないため、1秒未満の短い動画が保存されます。
雑感
ゲームを使って収録すると自分の声が重なるだけですごく配信動画っぽくなるので楽しい気持ちになります。
参考記事
【Android / MediaProjection / Kotlin】Androidで画面録画をする | たくさんの備忘録 | 備忘録
MediaProjection API を使ってミラーリングしてみた - Qiita
イヤホン配信を支える音のプログラミング入門 - Mirrativ Tech Blog
再生キャプチャ | Android デベロッパー | Android Developers
