前回の【Rails】コメント機能をAjax実装① 準備編の続きです。
コメントの投稿機能を実装していきます!
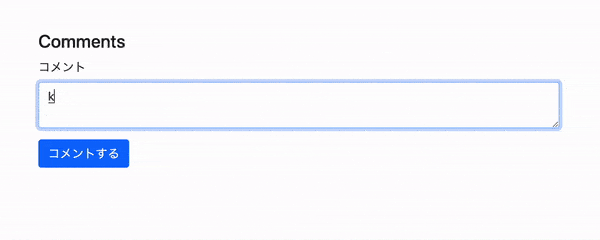
この記事での完成形はこんな感じです↓ (※Bootstrap使っています)
コメント投稿機能を実装
(1) Postコントローラーにnewメソッドを追加
class PostsController < ApplicationController
  #~~省略~~
  def show
    @post = Post.find(params[:id])
    @comment = Comment.new
    @comments = @post.comments.includes(:comments)
  end
  #~~省略~~
end
最後の行@comments = @post.comments.includes(:comments)のincludes(:comments)は、コメントを新着順にソートするための記述です。
詳しくはこちらの記事に書いております!
(2) Commentコントローラーにcreateメソッドを追加
class CommentsController < ApplicationController
  before_action :authenticate_user!
  before_action :set_comment, only: [:edit, :update, :destroy]
  before_action :set_post, only: [:create, :edit, :update]

  def create
    @comment = current_user.comments.new(comment_params)
    @comment.post_id = @post.id
    if @comment.save
      render "create", notice: "コメントを投稿しました"
    else
      redirect_to @comment.post
    end
  end

  private
  def set_comment
    @comment = Comment.find(params[:id])
  end

  def set_post
    @post = Post.find(params[:post_id])
  end

  def comment_params
    params.require(:comment).permit(:body, :post_id).merge(user_id: current_user.id)
  end

end
コメントはログインユーザーのみ可能なので、before_action :authenticate_user!を追加します。
(3) Viewファイルを作成します
まず、投稿機能で必要なViewsファイルを確認していきます。
(1) 記事(Post#show)にフォームを設置するので、Posts/show.html.erbを編集
(2) フォーム・コメントを表示させるパーシャルをそれぞれ作成
(3) 部分更新を行うために、JavaScriptファイル、create.js.erbを作成
.views
├── comments
│   ├──_comments.html.erb
│   ├──_form.html.erb
│   └──create.js.erb
│
└── posts
    └──show.html.erb
<!--省略-->
<section class="comments">
  <div class="mb-5">
      <h4>コメント</h4>
      <div>
      <% if user_signed_in? %>
        <%= render "comments/form", post: @post, comment: @comment %>
      <% else %>
        <p><%= link_to 'ログイン', new_user_session_path %>してコメントをする</p>
      <% end %>
      </div>
    </div>
    <div class="mb-3">
      <div id="comments_area" class="card-body">
      <% if @post.comments.present? %>
        <%= render 'comments/comments', post: @post, comments: @comments %>
      <% else %>
        <p>コメントはまだありません</p>
      <% end %>
      </div>
    </div>
</section>
<!--省略-->
<%= form_with model:[post, comment], local: false do |f| %>
  <div class="form-group">
    <%= f.label :コメント %>
    <%= f.text_area :body, class: "form-control" %>
  </div>
  <div class="btn-group">
    <%= f.submit "コメントする", class: "btn btn-primary" %>
  </div>
<% end  %>
Rails6のform_withは同期通信(local: true)がデフォルトですので、必ずlocal: falseにします。
私は、この部分の記述を忘れて色々と右往左往しておりました(;-ω-)ウーン
検証ツールでformに箇所にdata-remote="true"が入っていればOKです!
<% post.comments.each do |comment| %>
  <div id="comment_<%= comment.id %>" class="comment pb-3 d-flex gap-3">
    <div class="profile_icon">
      <%= image_tag comment.user.profile_icon.url, class: 'rounded-circle' %>
    </div>
    <div class="p-3 border flex-grow-1 rounded">
      <div class="d-flex gap-3 pb-3">
        <div class="fw-bold"><%= comment.user.name %></div>
        <div><%= comment.created_at %></div>
      </div>
      <div>
        <p class="pb-3"><%= comment.body %></p>
      </div>
    </div>
  </div>
<% end %>
ユーザーがログインしていれば、コメントのフォームを表示、
ログインしていなければログインページへの導線を設置しています。
最後にJavaScriptファイルを作成したら完成です。
$("#comments_area").html("<%= j(render 'comments/comments', post: @post, comment: @comment) %>");
$("textarea").val('');
次回は、削除機能を実装していきます (๑و•̀ω•́)و✧
参考にさせて頂いた記事
https://qiita.com/nakachan1994/items/a7d0957afa9dfd9146ed
https://zenn.dev/odentravel/books/e69a157daeecb3/viewer/6d1551
続きの記事
【Rails】コメント機能をAjax実装① 準備編
【Rails】コメント機能Ajax実装③ 削除編
【Rails】コメント機能Ajax実装④ 更新編