この記事はNTTコムウェア Advent Calendar 2021 24日目の記事です。
はじめに
皆さん、「バルス」という言葉を聞いたら、某アニメ映画で登場する滅びの呪文を連想する人も多いのではないでしょうか?
この記事ではバルスを紹介したいと思います!
と言っても紹介するのは勿論アニメではなく、脆弱性スキャンツールの「Vuls(バルス)」です。
Vulsはオープンソースソフトウェアの脆弱性スキャンツールで、GitHub上で公開されています。
Vulsを導入することで、UbuntuやDebian、CentOSなどのサーバOSの脆弱性関連情報を収集でき、IPAからも脆弱性対策に有効なツールとして紹介されています。
今回はVulsの導入方法を仮想マシンでの検証を交えつつ紹介します。
環境情報
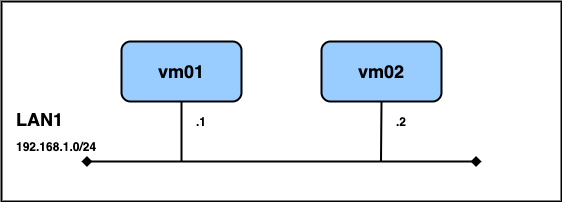
- vm01
- 用途:Vulsをインストールするマシン
- OS:CentOS Linux release 7.9.2009
- vm02
- 用途:脆弱性検出用に古いOSで起動するマシン
- OS:CentOS Linux release 7.4.1708
補足
- 検証環境はVagrant1を利用して構築しています
Vagrantfile
Vagrant.configure("2") do |config|
    config.vm.box = "centos/7"
    config.vm.define "vm01" do |vm01|
        vm01.vm.box_version = "2004.01"
        vm01.vm.hostname = "vm01"
        vm01.vm.network :private_network, ip: "192.168.1.1", virtualbox__intnet: "LAN1"
    end
    config.vm.define "vm02" do |vm02|
        vm02.vm.box_version = "1803.01"
        vm02.vm.hostname = "vm02"
        vm02.vm.network :private_network, ip: "192.168.1.2", virtualbox__intnet: "LAN1"
    end
end
Vuls導入検証
事前作業
dockerインストール(vm01)
以下のページを参考に、vm01へdockerをインストールする。
https://man.plustar.jp/docker/engine/installation/linux/docker-ce/centos.html
# yum install -y yum-utils device-mapper-persistent-data lvm2
# yum-config-manager --add-repo https://download.docker.com/linux/centos/docker-ce.repo
# yum install docker-ce
# systemctl start docker
# systemctl status docker
dockerのインストール後確認
[root@vm01 ~]# docker run hello-world

Hello from Docker!
This message shows that your installation appears to be working correctly.

To generate this message, Docker took the following steps:
 1. The Docker client contacted the Docker daemon.
 2. The Docker daemon pulled the "hello-world" image from the Docker Hub.
    (amd64)
 3. The Docker daemon created a new container from that image which runs the
    executable that produces the output you are currently reading.
 4. The Docker daemon streamed that output to the Docker client, which sent it
    to your terminal.

To try something more ambitious, you can run an Ubuntu container with:
 $ docker run -it ubuntu bash

Share images, automate workflows, and more with a free Docker ID:
 https://hub.docker.com/

For more examples and ideas, visit:
 https://docs.docker.com/get-started/
Vulsのインストール
vulsを容易にセットアップできるvulsctlを導入します。
# git clone https://github.com/vulsio/vulsctl.git
# cd vulsctl
脆弱性データベースを取得(※時間がかかります。私の場合完了まで約30分かかりました)
# cd docker
# ./update-all.sh
設定ファイルを作成
# vi config.toml

[servers]
[servers.vm01]
host        = "192.168.1.1"
port        = "22"
user        = "vuls"
sshConfigPath   = "/root/.ssh/config"
keyPath     = "/root/.ssh/id_rsa"

[servers.vm02]
host        = "192.168.1.2"
port        = "22"
user        = "vuls"
sshConfigPath   = "/root/.ssh/config"
keyPath     = "/root/.ssh/id_rsa"
これで脆弱性情報を取得する準備は整いました。
脆弱性スキャン
# ./scan.sh

Scan Summary
================
vm01	centos7.9.2009	380 installed, 0 updatable
vm02	centos7.4.1708	303 installed, 215 updatable
脆弱性情報の確認
スキャンが完了したので、実際に脆弱性情報を確認してみましょう。
Vulsで脆弱性確認する方法は大きく3つ用意されています。
- コンソール上でリスト表示
- TUI(テキストユーザインタフェース)
- VulsRepo(ブラウザ上のGUI表示)
コンソール上でリスト表示
# ./report.sh

vm01 (centos7.9.2009)
=====================
Total: 2 (Critical:0 High:2 Medium:0 Low:0 ?:0)
2/2 Fixed, 0 poc, 0 exploits, en: 0, ja: 0 alerts
380 installed

+----------------+------+--------+-----+------+---------+-------------------------------------------------+
|     CVE-ID     | CVSS | ATTACK | POC | CERT |  FIXED  |                       NVD                       |
+----------------+------+--------+-----+------+---------+-------------------------------------------------+
| CVE-2016-2124  |  8.9 |  AV:N  |     |      |   fixed | https://nvd.nist.gov/vuln/detail/CVE-2016-2124  |
| CVE-2020-25717 |  8.9 |  AV:N  |     |      |   fixed | https://nvd.nist.gov/vuln/detail/CVE-2020-25717 |
+----------------+------+--------+-----+------+---------+-------------------------------------------------+

vm02 (centos7.4.1708)
=====================
Total: 555 (Critical:45 High:360 Medium:146 Low:4 ?:0)
555/555 Fixed, 154 poc, 7 exploits, en: 14, ja: 7 alerts
303 installed

+------------------+------+--------+-----+------+---------+---------------------------------------------------+
|      CVE-ID      | CVSS | ATTACK | POC | CERT |  FIXED  |                        NVD                        |
+------------------+------+--------+-----+------+---------+---------------------------------------------------+
| CVE-2018-1111    | 10.0 |  AV:A  | POC |      |   fixed | https://nvd.nist.gov/vuln/detail/CVE-2018-1111    |
| CVE-2021-43527   | 10.0 |  AV:N  |     |      |   fixed | https://nvd.nist.gov/vuln/detail/CVE-2021-43527   |
| CVE-2015-9262    |  9.8 |  AV:L  |     |      |   fixed | https://nvd.nist.gov/vuln/detail/CVE-2015-9262    |
| CVE-2015-9289    |  9.8 |  AV:L  |     |      |   fixed | https://nvd.nist.gov/vuln/detail/CVE-2015-9289    |
| CVE-2016-4658    |  9.8 |  AV:N  |     |      |   fixed | https://nvd.nist.gov/vuln/detail/CVE-2016-4658    |
<以下省略>
TUI
# ./tui.sh
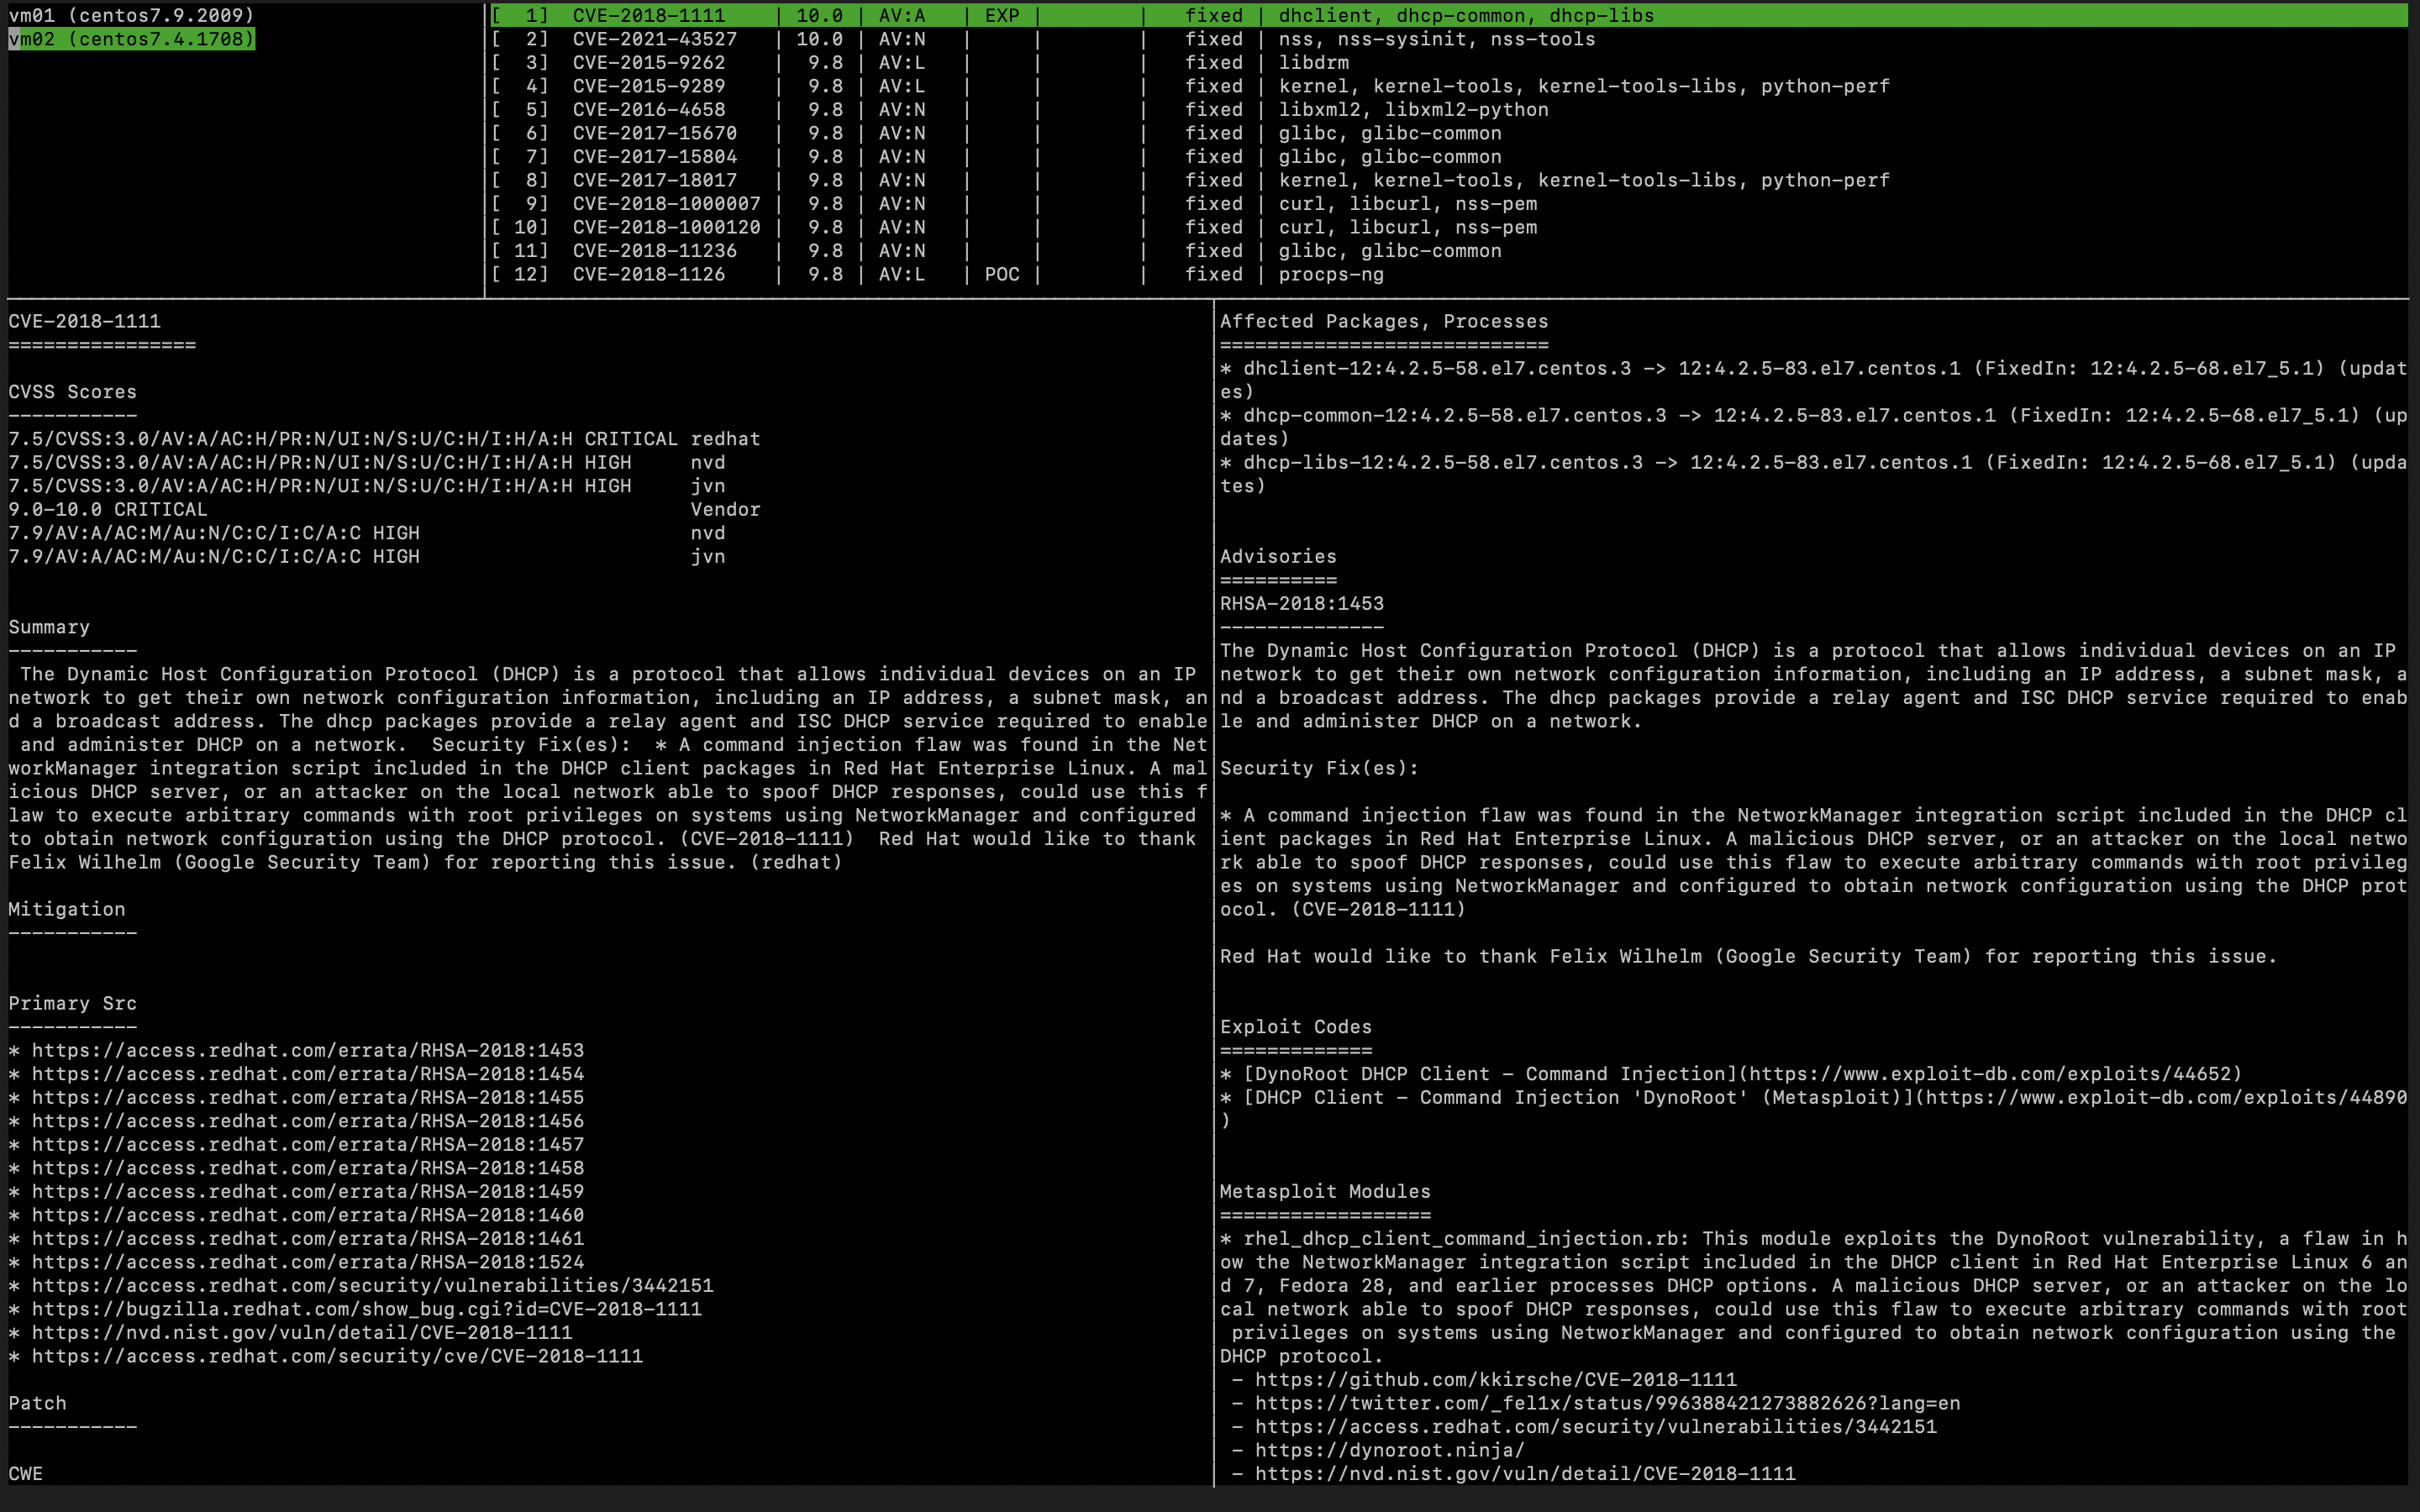
シェルを実行することで、コンソール上で詳細な脆弱性情報が確認できます。
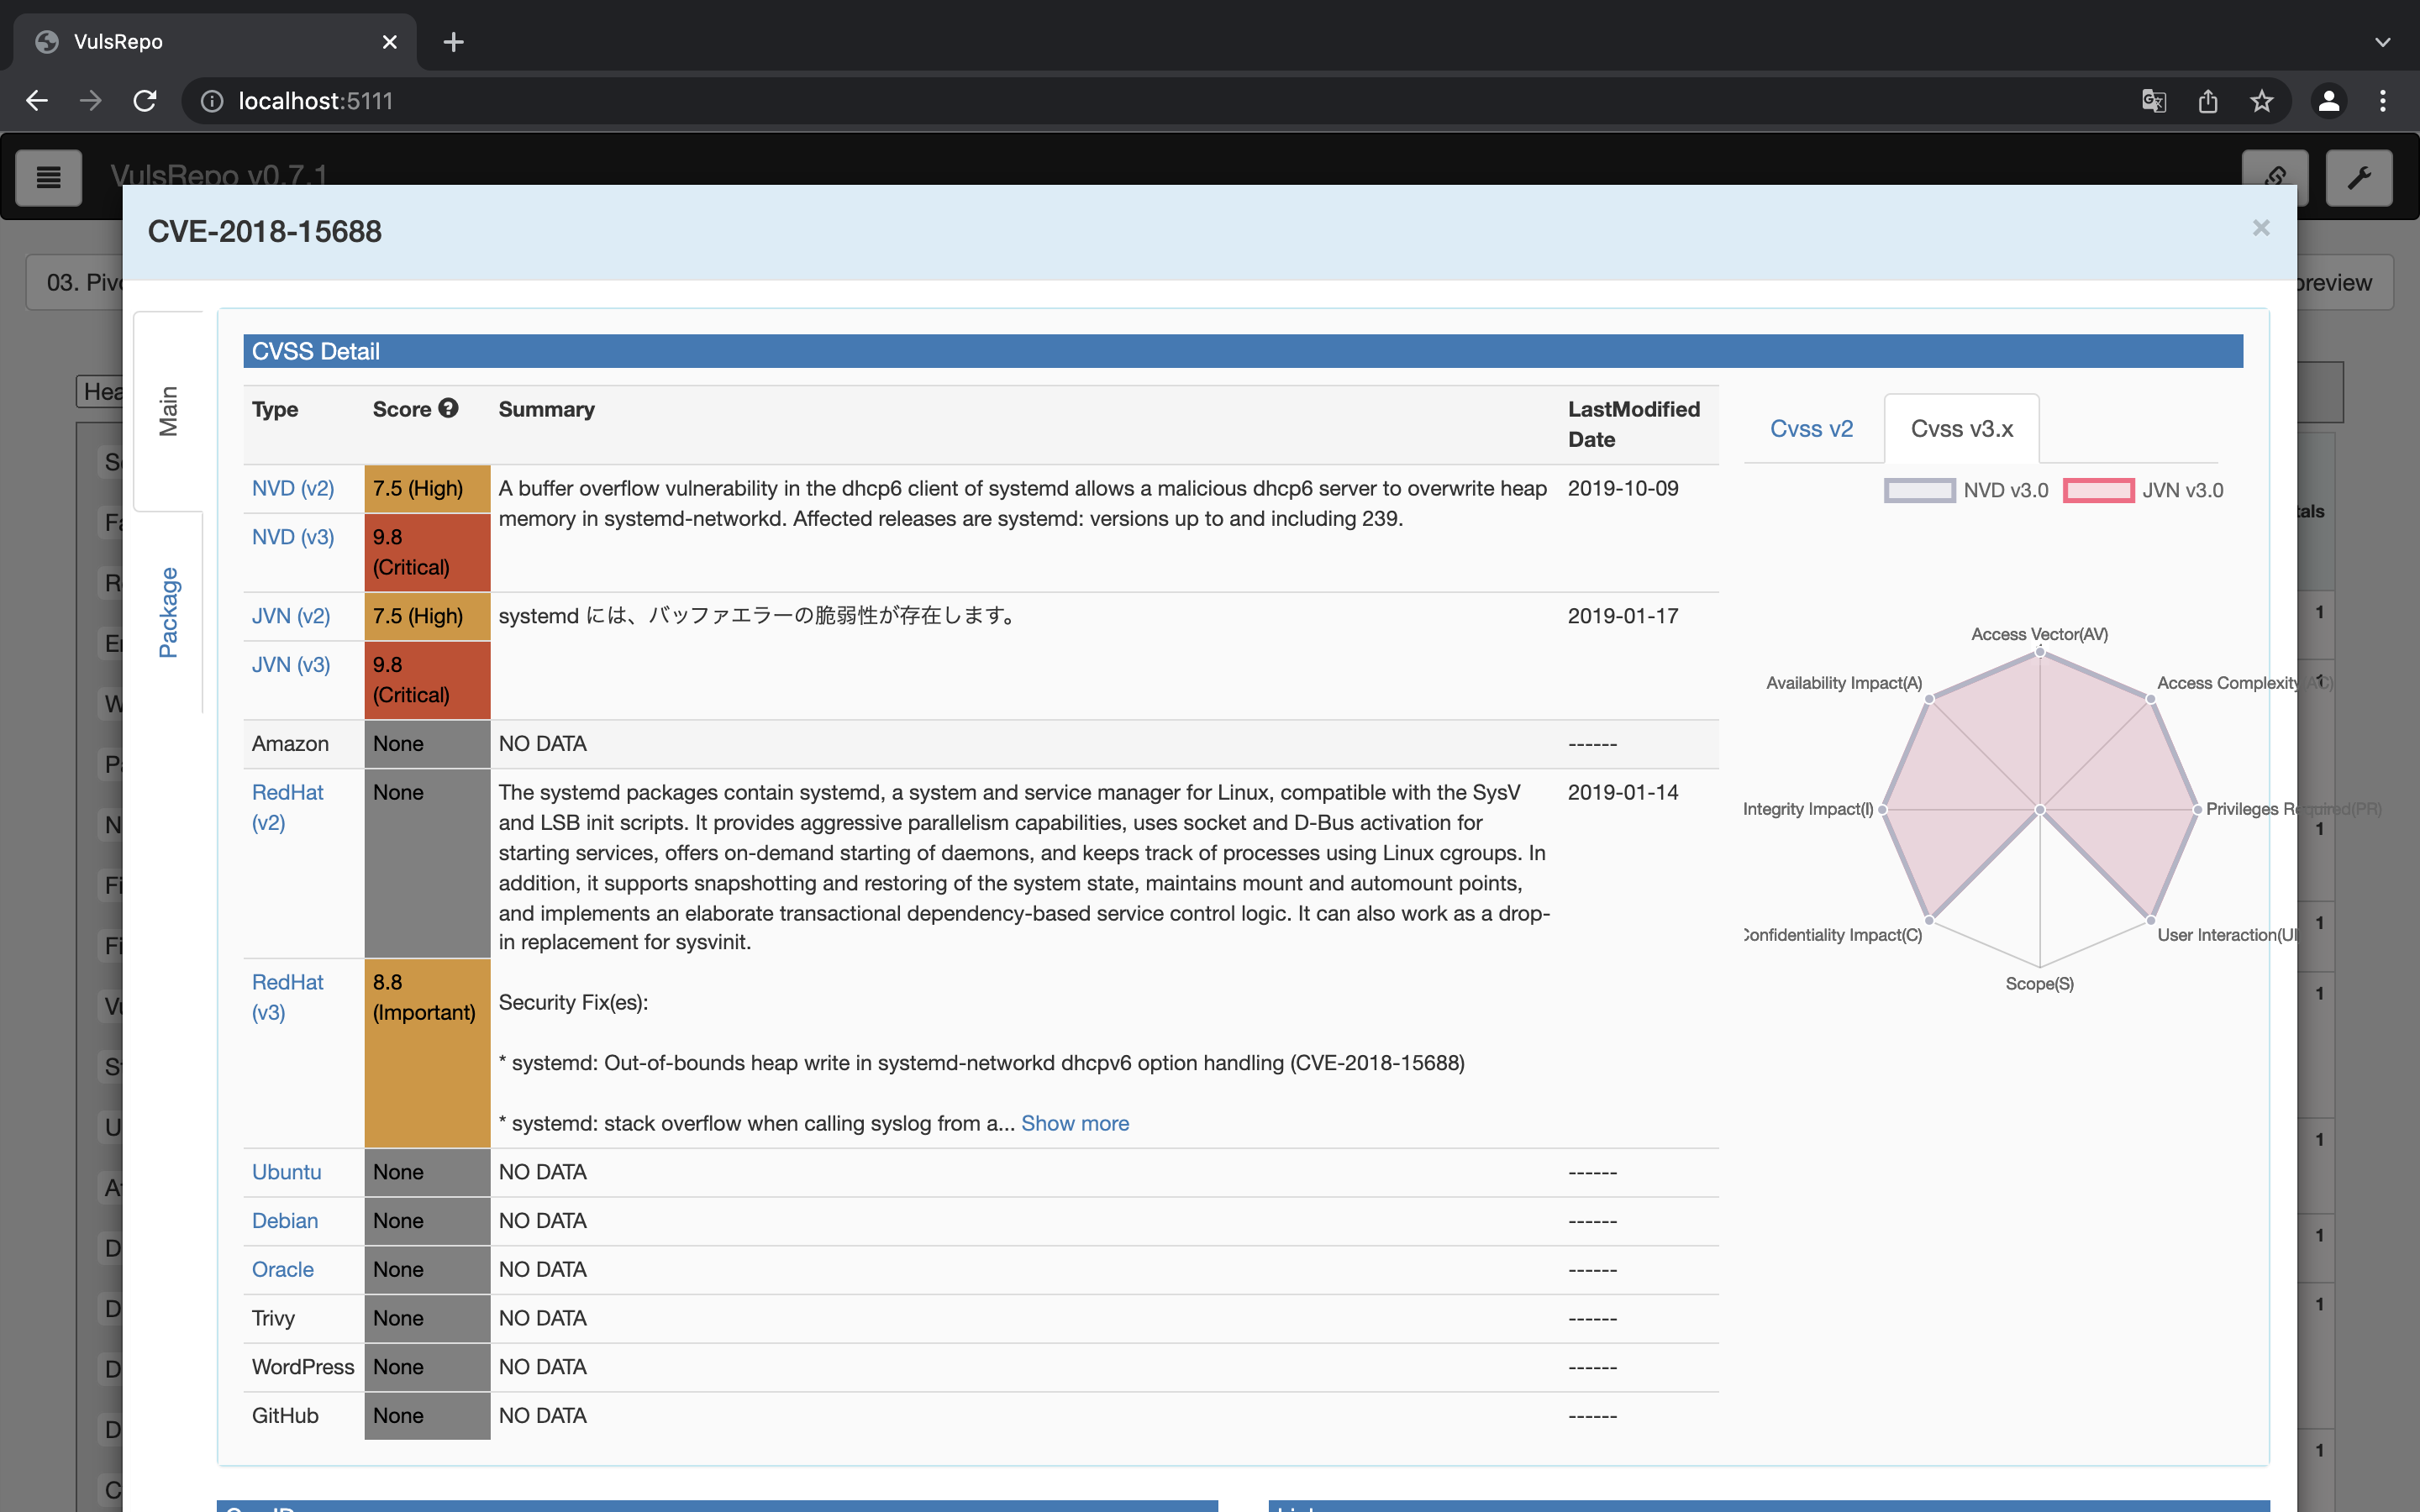
VulsRepo
# ./vulsrepo.sh
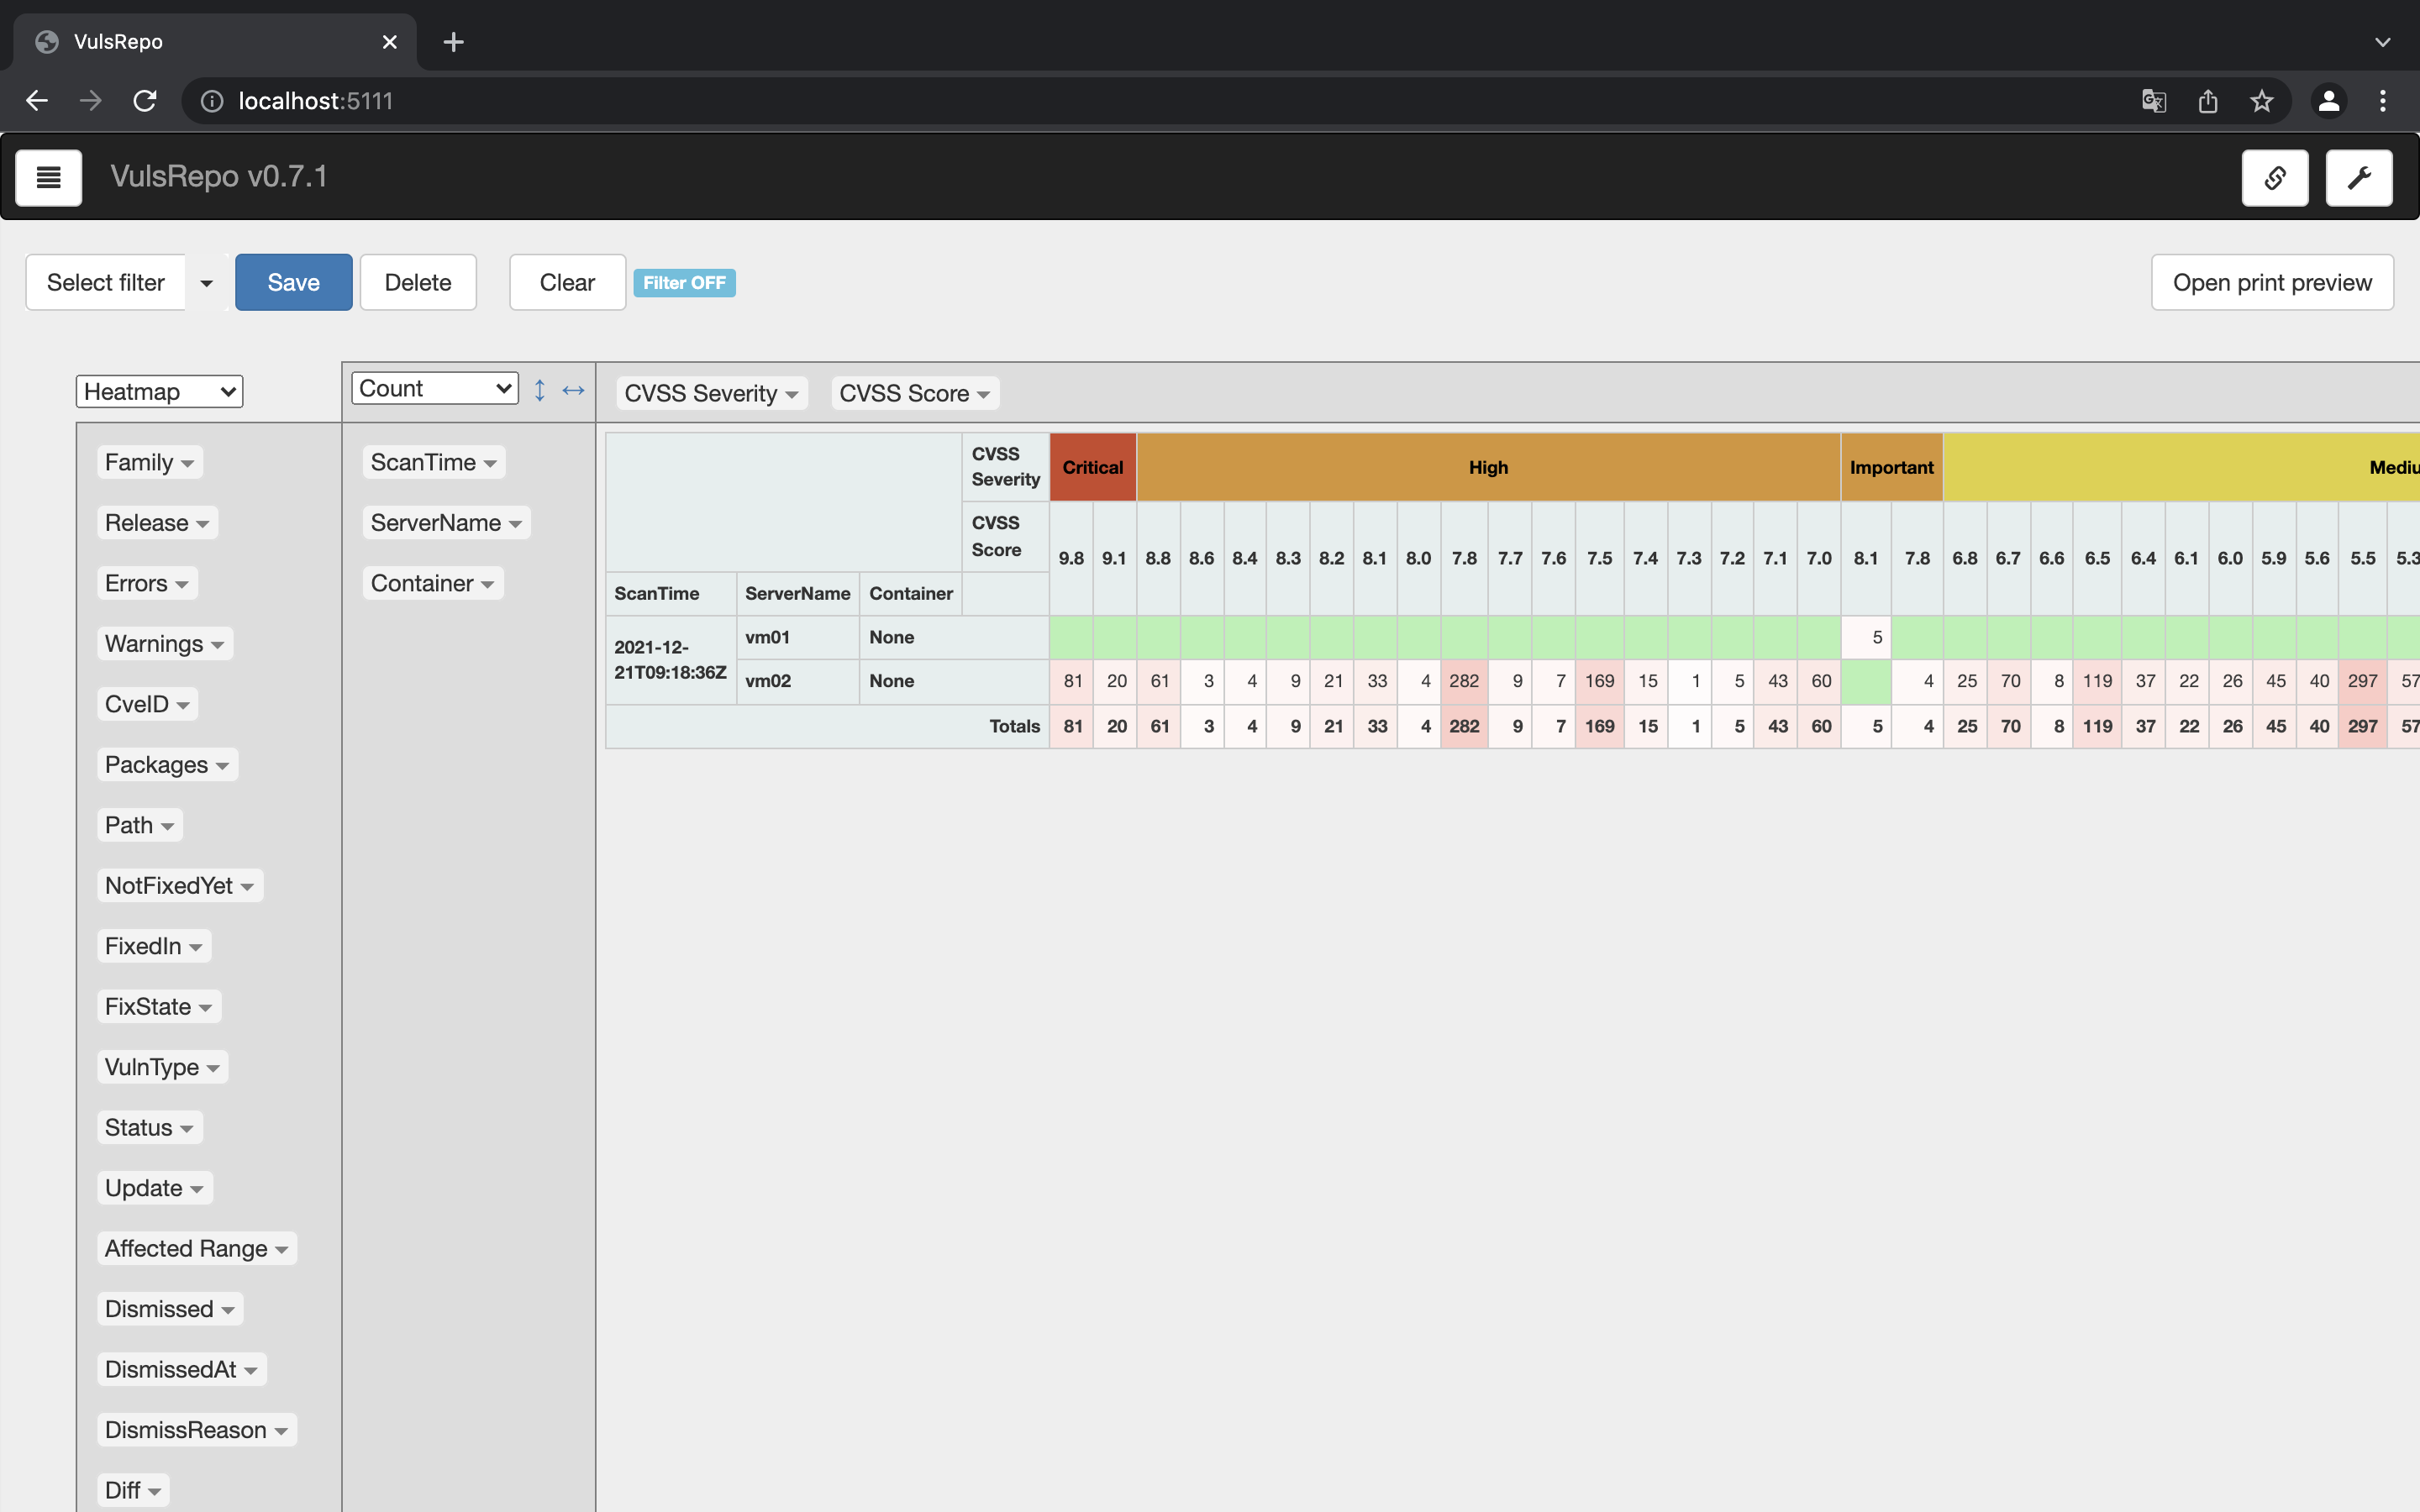
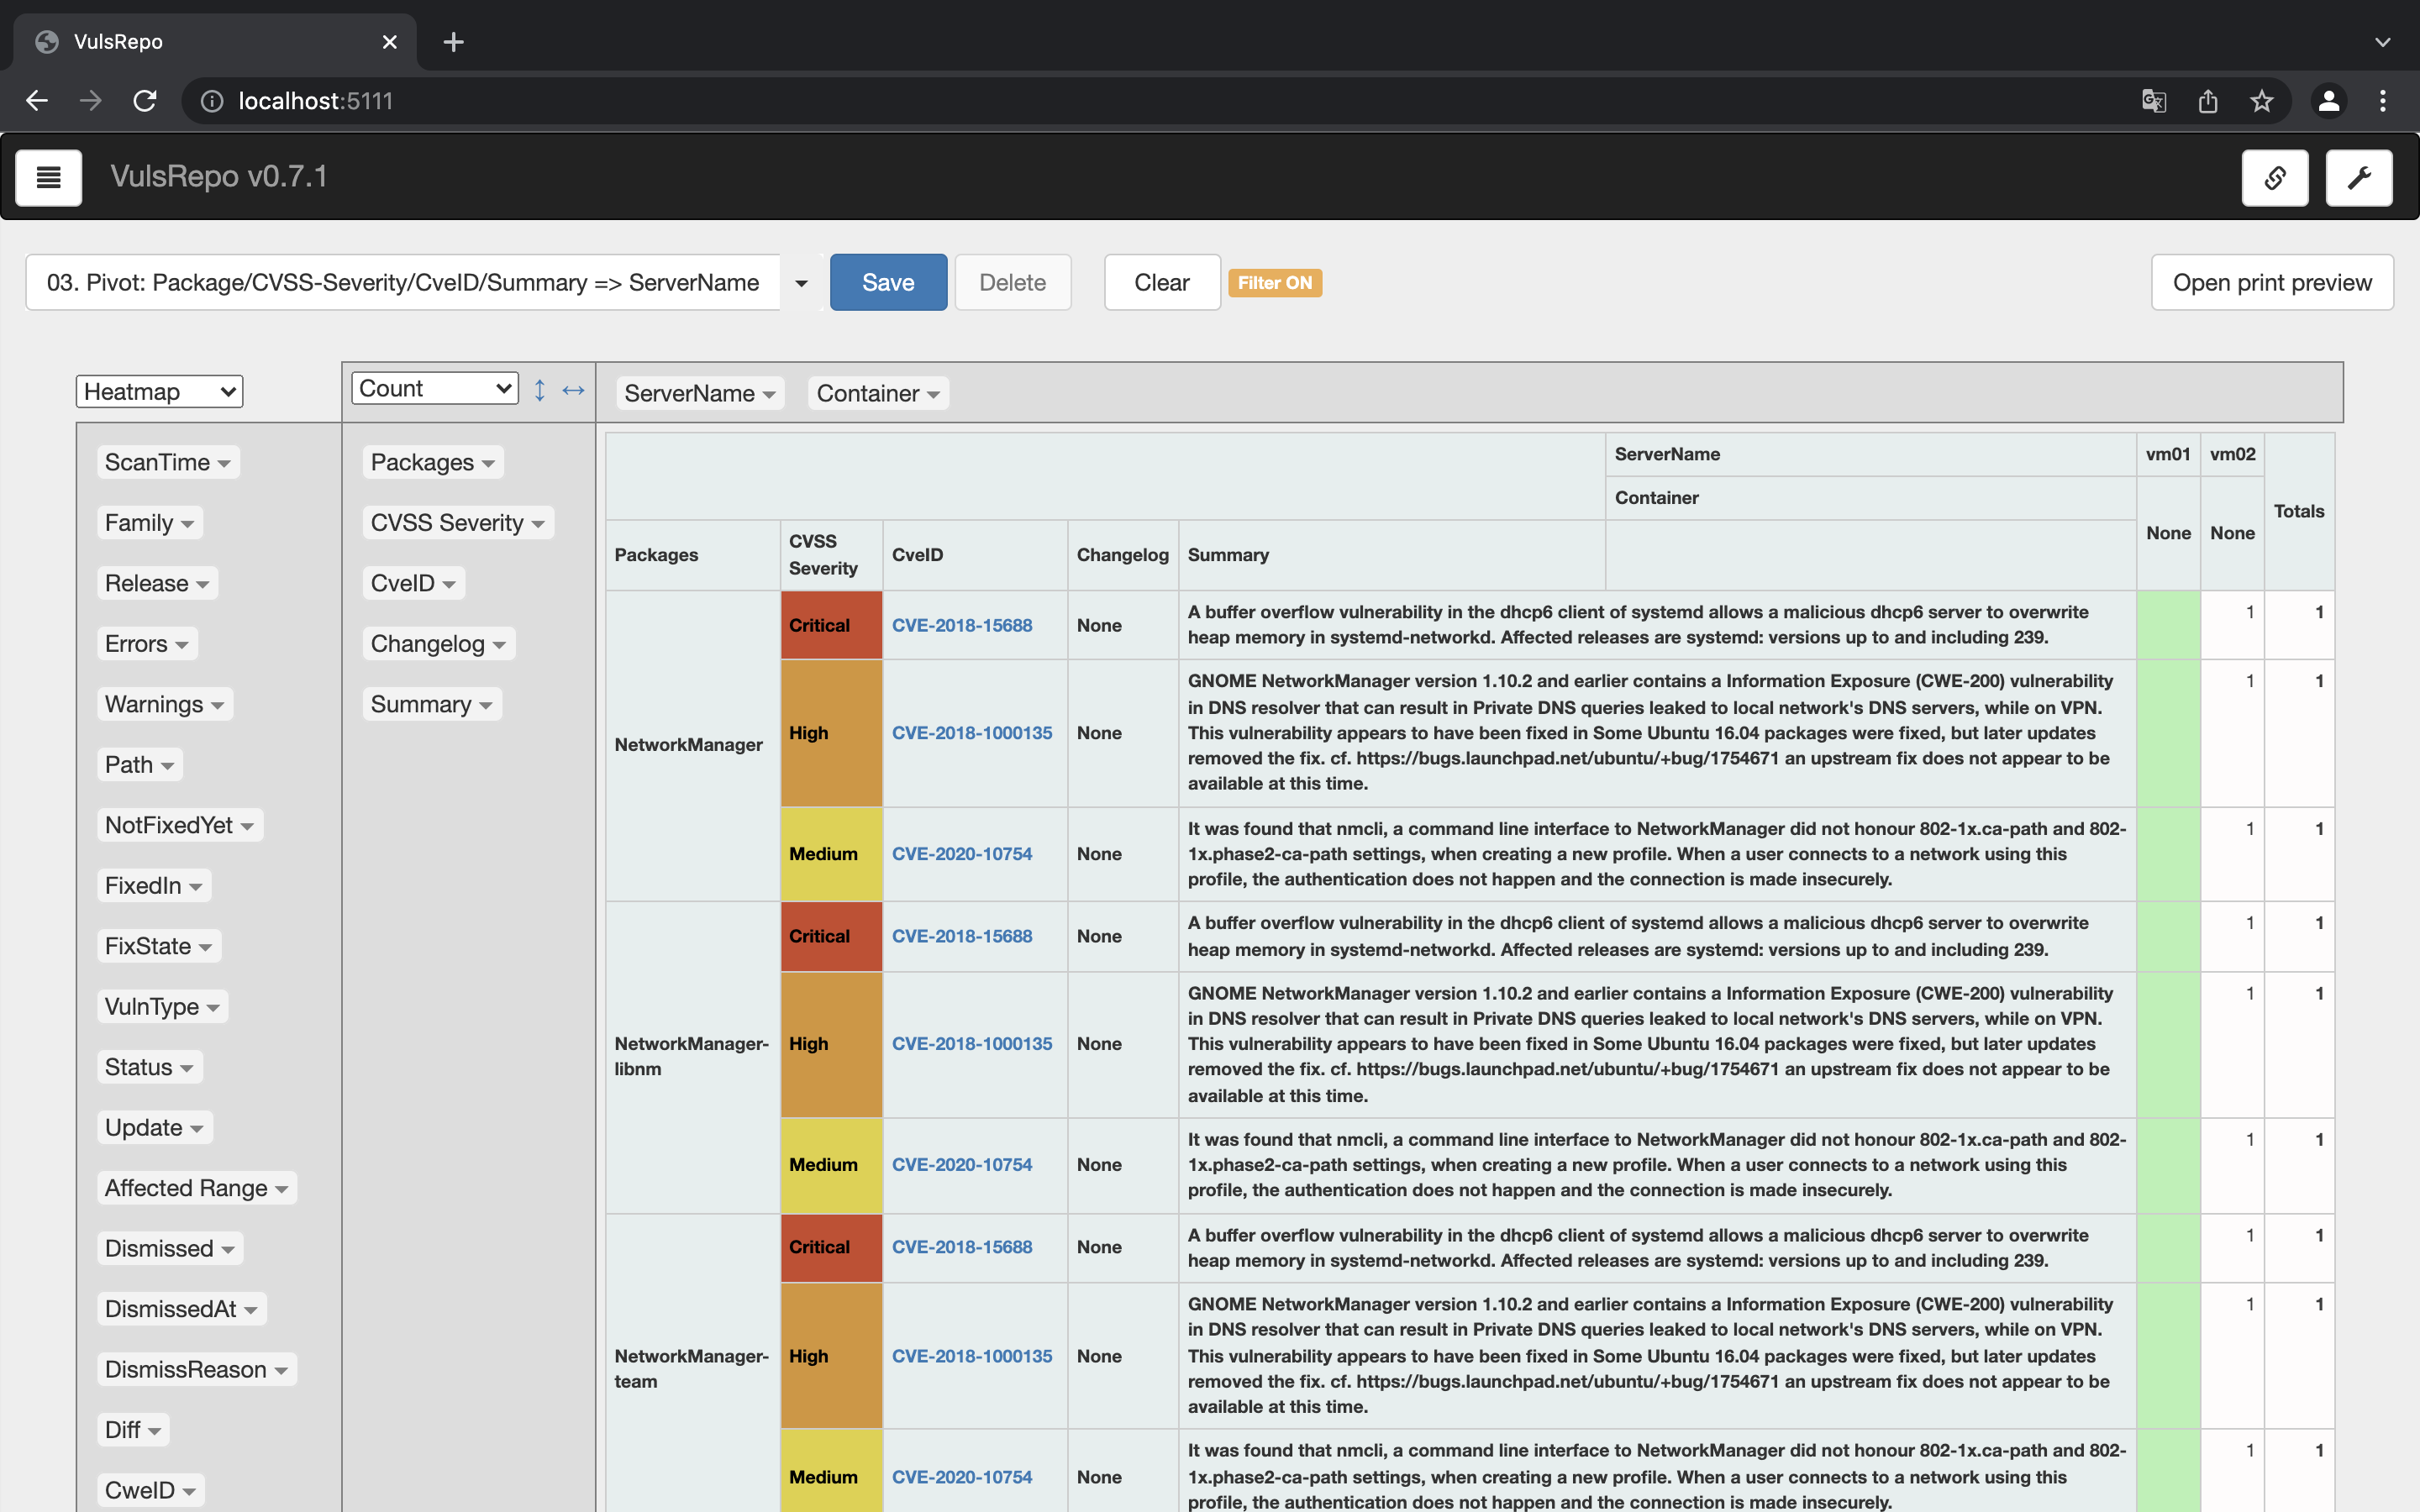
シェルを実行した後、ブラウザからhttp://localhost:5111にアクセスすることで脆弱性を確認できます。
おわりに
ここまで脆弱性スキャンツールのVulsを紹介してきました。
脆弱性対策の第一歩として、どの様な脆弱性があるか知ることは重要なことなので、この記事がセキュリティ向上の参考になれば幸いです。
参考
-
VirtualBoxなどの仮想化ソフトウェアをCUIで簡単に管理・操作できるソフトウェア ↩
