はじめに
Visual Studoにて開発されている方、インストーラ作成には何を利用されていますか?
この記事では拡張機能である「Microsoft Visual Studio Installer Projects 2022」(以下VSIと呼びます)を利用する際のTipsを記載します。
インストーラの最後に、アプリを起動できるチェックボックスを追加する方法
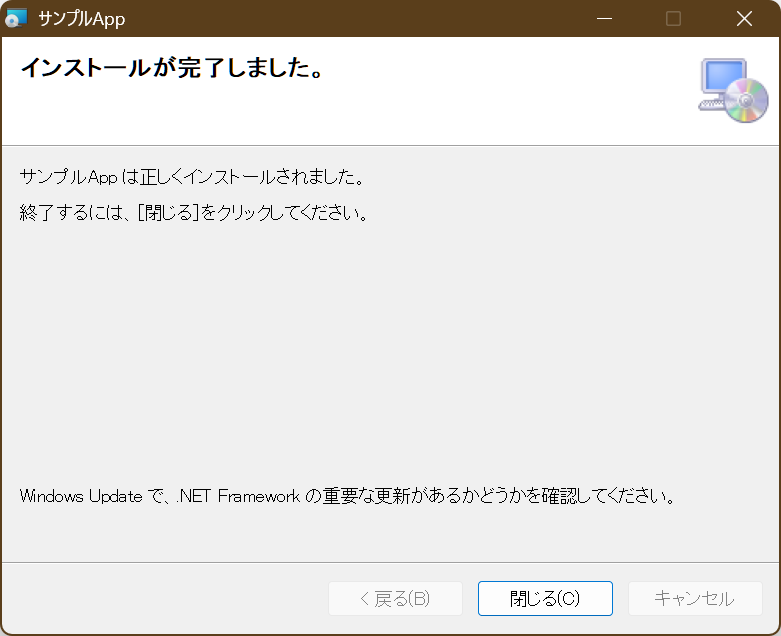
VSIにて作成したインストーラの最後のページは下図のようになっています。
巷にはインストーラの最後にインストールしたアプリをそのまま実行できる物があります。
カスタムダイアログを使用した方法等が実現する方法はありますが、ここではVSIに付属しているファイルを利用する方法を紹介します。
前提
- Visual Studio 2022がインストールされている
- 「Microsoft Visual Studio Installer Projects 2022」をVisual Studioの拡張機能としてインストールし、インストーラプロジェクトが作成されていること
手順
-
C:\Program Files\Microsoft Visual Studio\2022\Professional\Common7\IDE\CommonExtensions\Microsoft\VSI\EnableLaunchAfterInstall\
にあるファイルEnableLaunchApplication.jsを.vdprojファイルと同じフォルダにコピーします - 1.でコピーした
EnableLaunchApplication.jsファイルをテキストエディタで開き、8行目付近にある"<YourAppNameHere>.exe"の部分を起動するアプリのexeファイル名に変更してください
7行目の"Launch [ProductName]"の部分を変更するとチェックボックスに表示されるテキストを変更できます。
// EnableLaunchApplication.js <msi-file>
// Performs a post-build fixup of an msi to launch a specific file when the install has completed


// Configurable values
var checkboxChecked = true;			// Is the checkbox on the finished dialog checked by default?
var checkboxText = "Launch [ProductName]";	// Text for the checkbox on the finished dialog
var filename = "<YourAppNameHere>.exe";	        // The name of the executable to launch


// Constant values from Windows Installer
var msiOpenDatabaseModeTransact = 1;
       :
       :
いずれも日本語は利用できませんのでご注意ください。
ただし [ProductName] はプロジェクトのプロパティProductNameに設定されている文字列が使用されます。これは日本語OKです。
3. Visual Studioでプロジェクトを開きます
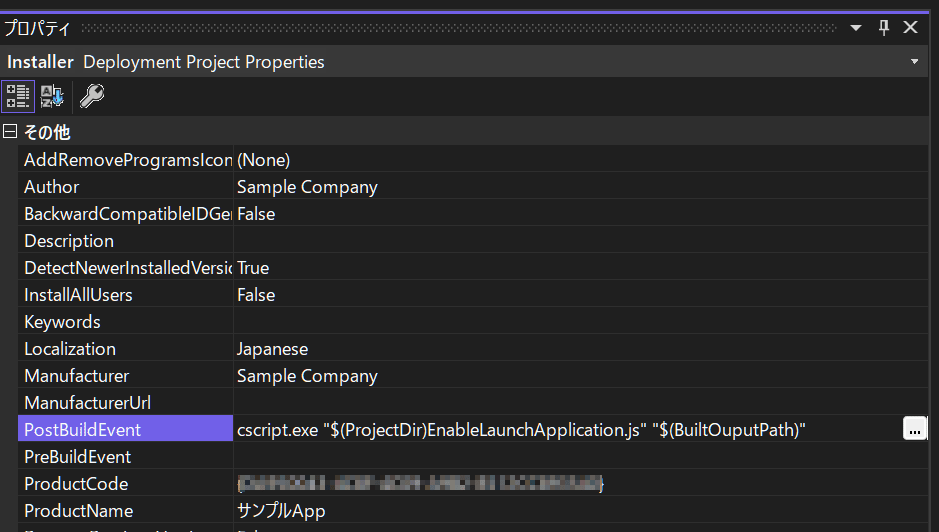
4. .vdprojファイルのプロパティウィンドウを表示します
5. プロパティウィンドウの PostBuildEvent アイテムをクリックして、"..." ボタンをクリックします
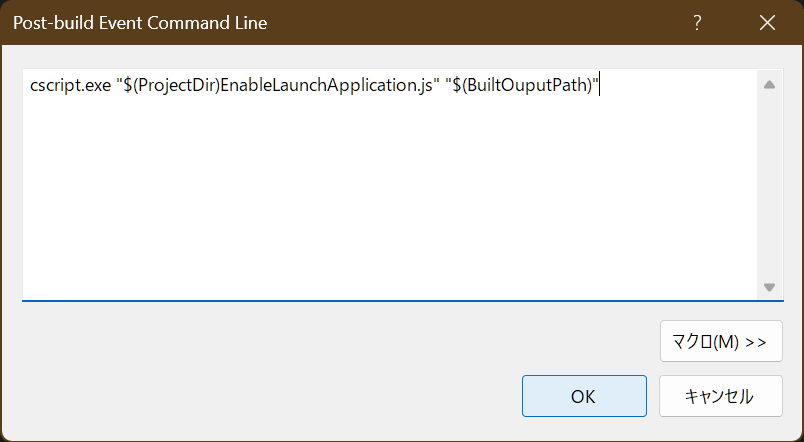
6. Post-build Event コマンドラインダイアログが表示されます

7. 次のコマンド行をコピーして、コマンド行テキストボックスに貼り付け、OKボタンを押します
cscript.exe "$(ProjectDir)EnableLaunchApplication.js" "$(BuiltOuputPath)"
9. Visual Studioでプロジェクトを保存し、ビルドします。
結果
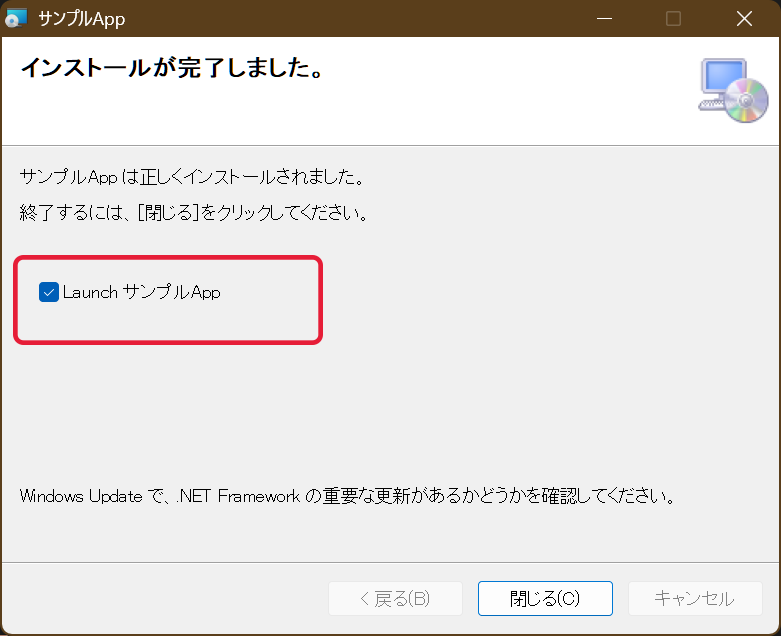
作成されたインストーラでインストールを実行してみると下図のようチェックボックスが追加されます。

完成形
サンプルで使用したソースファイルは以下のGitHubにあります。
少しPR
弊社では、Accessファイルの比較ができるツールを作成しています。
ご興味ある方は CA! Accessファイル比較ツール をご利用してみてください。
(日本語資料があまりなく苦労して作成していますので・・・)

