GKE Ingress オブジェクトを利用して HTTPS 負荷分散する
GKEのIngressオブジェクトを利用した HTTPS LB を作成して、
バックエンドに対する負荷分散を行う方法を解説します
ついでにTLS証明書の発行方法も紹介してます
目標

ユーザが"https://ingress.<ドメイン>.com/"でアクセスしたらnginxのウェルカムページが表示される
↑この状態を目指します
もちろん、ドメイン名は任意です
構成

- 開発サーバ:
- 開発・確認用サーバとしてGoogleComputeEngineのVMを利用
- kubectlなどのコマンドもここで実施
- yum(dnf)でNginxをインストール済
- GKE:
- deployment:
- podを3つ起動
- pod:
- Nginxコンテナを起動
- port 8080 でリッスン
- Nginxコンテナを起動
- Service:
- port 80 からのリクエストを Nginxコンテナの port 8080 に 転送
- Ingress:
- port 80 で Service に転送
- deployment:
- TLS証明書:
- Let's Encrypt certbot の無料TLS証明書を発行し、利用する
- DNSレコード登録はCloud DNSを使う
前提知識など
専門用語に関する知識はすべて割愛しているので、
不安がある方はそれぞれ公式ドキュメントへどうぞ(※特にKubernetes)
ある程度Kubernetesの知識がある
Deployment, Service, Podが分かればなんとかなりそう
kubectl describe 〇〇みたいなコマンドを知っていればデバッグもスムーズにいきます
ある程度Dockerの知識がある
build,pushの基本的な操作ができればOKです
この記事ではNginxのコンテナをビルドしてリポジトリにプッシュする操作があります。
ある程度GoogleCloudの知識がある
各種リソースの作成を行うので、
コンソールの操作や、サービスアカウント、IAMロールの知識を少々
ある程度SSL/TLSの知識がある
SSL/TLSがどのように働いているのか、そもそもSSL/TLSって何?みたいな部分は理解している前提で進めます
Domainを取得している(お名前.com とか GoogleDomain)
だいたい1,500円/年くらいのお金かかりますが、あると何かと便利なので取得してみてはいかがでしょうか
手順
大まかな流れ
- TLS証明書発行
- GKEクラスタ作成
- Nginxコンテナイメージ作成
- Deployment, Service, Ingress 作成
- HTTPSに対応させる
Let's EncryptでTLS証明書発行
それではやっていきましょう
まずは Let’s Encrypt - certbot でTLS証明書を発行します
なんと、無料です!
Certbotのインストールガイドを見ながらやっていきます
snapd というパッケージマネージャのようなものでインストールする方式のようです
snapdのインストールページを見て導入する
- snapd install
まずsnapdをインストールします
# dnf install -y snapd

# systemctl enable --now snapd.socket
Created symlink /etc/systemd/system/sockets.target.wants/snapd.socket → /usr/lib/systemd/system/snapd.socket.

# ln -s /var/lib/snapd/snap /snap

# systemctl start snapd

# systemctl status snapd
● snapd.service - Snap Daemon
   Loaded: loaded (/usr/lib/systemd/system/snapd.service; disabled; vendor preset: disabled)
   Active: active (running) since Mon 2022-03-21 17:17:25 JST; 4s ago
 Main PID: 202608 (snapd)
    Tasks: 8 (limit: 49466)
   Memory: 14.3M
   CGroup: /system.slice/snapd.service
           └─202608 /usr/libexec/snapd/snapd
- certbot install
# snap install core; snap refresh core
core 16-2.54.4 from Canonical✓ installed
snap "core" has no updates available

# snap install --classic certbot
certbot 1.25.0 from Certbot Project (certbot-eff✓) installed
- setup certbot
# ln -s /snap/bin/certbot /usr/bin/certbot

# snap set certbot trust-plugin-with-root=ok

# snap install certbot-dns-google
certbot-dns-google 1.25.0 from Certbot Project (certbot-eff✓) installed
Google Cloud でサービスアカウント作成
certbotがCloudDNSのリソースにアクセスできるように
サービスアカウントを作成します
- 名前 : certbot@.iam.gserviceaccount.com
- ロール : roles/dns.admin (DNS 管理者)
作成したら、「キー」タブより、「鍵を追加」→「新しい鍵を作成」→「JSON」を選択して「作成」
自動的にPCに保存されるので、ファイルの中身を確認用VMのどこかに保存
(今回は.secrets/google/certbot_sa.jsonとして保存した)
証明書作成
ワイルドカード証明書(*.example.com)を発行します
発行方法は各DNSサーバによって違うので、それぞれ自分が利用するものを確認しましょう
この記事ではCloudDNSを使います
CloudDNSを利用する場合の方法はこちら
↑のExapmlesに書いてあるコマンドを実行する
※google.jsonはさっき作成&DLしたサービスアカウントの鍵のこと
# certbot certonly --dns-google --dns-google-credentials ~/.secrets/google/certbot_sa.json -d *.example.com -i nginx

Saving debug log to /var/log/letsencrypt/letsencrypt.log
Enter email address (used for urgent renewal and security notices)
 (Enter 'c' to cancel): cokemaniaIIDX@gmail.com ←メールアドレスを入力

- - - - - - - - - - - - - - - - - - - - - - - - - - - - - - - - - - - - - - - -
Please read the Terms of Service at
https://letsencrypt.org/documents/LE-SA-v1.2-November-15-2017.pdf. You must
agree in order to register with the ACME server. Do you agree?
- - - - - - - - - - - - - - - - - - - - - - - - - - - - - - - - - - - - - - - -
(Y)es/(N)o: Y ←ライセンスを読み、同意する

- - - - - - - - - - - - - - - - - - - - - - - - - - - - - - - - - - - - - - - -
Would you be willing, once your first certificate is successfully issued, to
share your email address with the Electronic Frontier Foundation, a founding
partner of the Let's Encrypt project and the non-profit organization that
develops Certbot? We'd like to send you email about our work encrypting the web,
EFF news, campaigns, and ways to support digital freedom.
- - - - - - - - - - - - - - - - - - - - - - - - - - - - - - - - - - - - - - - -
(Y)es/(N)o: Y ← 登録メールに団体からのメールを受け取るかどうか
Account registered.
Requesting a certificate for *.example.com
Waiting 60 seconds for DNS changes to propagate

Successfully received certificate.
Certificate is saved at: /etc/letsencrypt/live/example.com/fullchain.pem
Key is saved at:         /etc/letsencrypt/live/example.com/privkey.pem
This certificate expires on 2022-06-19.
These files will be updated when the certificate renews.
Certbot has set up a scheduled task to automatically renew this certificate in the background.

- - - - - - - - - - - - - - - - - - - - - - - - - - - - - - - - - - - - - - - -
If you like Certbot, please consider supporting our work by:
 * Donating to ISRG / Let's Encrypt:   https://letsencrypt.org/donate
 * Donating to EFF:                    https://eff.org/donate-le
- - - - - - - - - - - - - - - - - - - - - - - - - - - - - - - - - - - - - - - -
/etc/letsencrypt/live/<ドメイン>/に鍵と証明書がインストールされるので、
nginxに持っていきます
# cp /etc/letsencrypt/live/<ドメイン>/privkey.pem /etc/nginx/tls/server.key
# cp /etc/letsencrypt/live/<ドメイン>/fullchain.pem /etc/nginx/tls/server.crt
SSLの設定を追加
# vi /etc/nginx/conf.d/tls.conf
server {
    listen 443 ssl;

    ssl_certificate             /etc/nginx/tls/server.crt;
    ssl_certificate_key         /etc/nginx/tls/server.key;
}
設定確認し、reload
# nginx -t
nginx: the configuration file /etc/nginx/nginx.conf syntax is ok
nginx: configuration file /etc/nginx/nginx.conf test is successful

# nginx -s reload

# systemctl status nginx
● nginx.service - The nginx HTTP and reverse proxy server
   Loaded: loaded (/usr/lib/systemd/system/nginx.service; disabled; vendor preset: disabled)
   Active: active (running) since Mon 2022-03-21 16:41:10 JST; 2h 34min ago
ブラウザで証明書の有効性確認
https://開発サーバのIP(もしくはドメイン)にアクセスできることを確認

これで有効なTLS証明書を発行できました!
GKE cluster 作成
証明書の作成が出来たので、GKEを作っていきます
- サービスアカウント作成
クラスタ作成前に、まずはクラスタに適用するサービスアカウントを作成します
クラスタに設定するサービスアカウントはArtifact Registryにアクセスできる必要があるので、
ArtifactRegistry 読み取り (roles/artifactregistry.reader)権限を付与します
| 項目 | 設定値 |
|---|---|
| name(id) | ingress-cluster |
| role | roles/artifactregistry.reader |
- GKEクラスタ作成
続きまして、GKEクラスタを作成していきます
| 項目 | 設定値 |
|---|---|
| cluster_name | ingress-cluster |
| location | asia-northeast1 |
| preemptible | 有効 |
| node数 | 1 |
| node_pool_name | ingress_nodepool |
| node_machine_type | e2-medium |
| service account | ingress-cluster |
- kubeconfigエントリの生成
↓のコマンドを実行することで、kubectlコマンドを実行したときの対象がさっき作成したクラスタになる
$ gcloud container clusters get-credentials --region=asia-northeast1 ingress-cluster

$ kubectl config view
apiVersion: v1
clusters:
- cluster:
    certificate-authority-data: DATA+OMITTED
    server: https://35.187.207.69
  name: gke_<PROJECTID>_asia-northeast1_ingress-cluster
contexts:
- context:
    cluster: gke_<PROJECTID>_asia-northeast1_ingress-cluster
    user: gke_<PROJECTID>_asia-northeast1_ingress-cluster
  name: gke_<PROJECTID>_asia-northeast1_ingress-cluster
current-context: gke_<PROJECTID>_asia-northeast1_ingress-cluster
kind: Config
preferences: {}
users:
- name: gke_<PROJECTID>_asia-northeast1_ingress-cluster
  user:
    auth-provider:
      config:
        cmd-args: config config-helper --format=json
        cmd-path: /usr/lib64/google-cloud-sdk/bin/gcloud
        expiry-key: '{.credential.token_expiry}'
        token-key: '{.credential.access_token}'
      name: gcp
Artifact Registry 作成
ArtifactRegistryとは、アーティファクト(=Dockerイメージ)を格納していくリポジトリです
GKEはこのリポジトリからイメージをプルしてコンテナを起動させます
- 設定内容:
| 項目 | 設定値 |
|---|---|
| repository_name | ingress |
| location | asia-northeast1 |
| format | DOCKER |
- 認証の構成
↓のコマンドを実行することで、開発サーバのDockerがArtifact Registryに接続してイメージのpush,pullができるようになる
$ gcloud auth configure-docker asia-northeast1-docker.pkg.dev
コンテナ作成、GCRにプッシュ
podに利用するNginxコンテナの設定を行います
nginxの公式イメージをいろいろいじった上でGoogle Artifact Registryにプッシュして使います
いじる内容
- nginx.conf
-
port:8080でLISTENするように変更 -
if_modified_sice : off;にする- ↑onだと、変更がなかった時に
304のレスポンスを返すようになり、LBのヘルスチェックを不合格にしてしまう- GKE Ingress のLBは200のみヘルスチェックを合格させるため
- ↑onだと、変更がなかった時に
- ほかは全部デフォルト
-
user nginx;
worker_processes auto;
error_log /var/log/nginx/error.log;
pid /run/nginx.pid;

include /usr/share/nginx/modules/*.conf;

events {
    worker_connections 1024;
}

http {
    log_format  main  '$remote_addr - $remote_user [$time_local] "$request" '
                      '$status $body_bytes_sent "$http_referer" '
                      '"$http_user_agent" "$http_x_forwarded_for"';

    access_log  /var/log/nginx/access.log  main;

    sendfile            off;
    if_modified_since   off; # for healthcheck
    tcp_nopush          on;
    tcp_nodelay         on;
    keepalive_timeout   65;
    types_hash_max_size 2048;

    include             /etc/nginx/mime.types;
    default_type        application/octet-stream;

    include /etc/nginx/conf.d/*.conf;

    server {
        listen       8080 default_server;
        listen       [::]:8080 default_server;
        server_name  _;
        root	     /usr/share/nginx/html;

        include /etc/nginx/default.d/*.conf;

        location / {
	      }

        error_page 404 /404.html;
            location = /40x.html {
        }

        error_page 500 502 503 504 /50x.html;
            location = /50x.html {
        }
    }
}
dcoker 操作
- Dockerfile 作成
nginxの公式イメージをプルしてきて、
さっき作ったファイルをコンテナ内に配置する設定
FROM nginx:latest
LABEL maintainer="cokemaniaIIDX cokemaniaIIDX@gmail.com"

RUN echo "building nginx server..."

RUN echo "copy conf files"
COPY nginx.conf /etc/nginx/nginx.conf
- docker build実行
$ docker build . custom-nginx
- tagづけ
pull してきた nginx イメージを Artifact Registryにアップロードできるようにタグ付けする
$ docker tag nginx asia-northeast1-docker.pkg.dev/<GCP_PROJECT_ID>/ingress/custom-nginx:v2.0

確認
$ docker images
REPOSITORY                                                                TAG       IMAGE ID       CREATED          SIZE
asia-northeast1-docker.pkg.dev/<PROJECTID>/ingress/custom-nginx   v2.0      a3e3c5c36651   45 minutes ago   142MB
- push
imageをpush!
$ docker push asia-northeast1-docker.pkg.dev/<PROJECTID>/ingress/nginx:v2.0
GKEのDeployment,Service,Ingress作成
再びGKE関連操作に戻ってきます
Deployment の作成
apiVersion: apps/v1
kind: Deployment
metadata:
  name: ingress-deployment
spec:
  selector:
    matchLabels:
      app: nginx
  replicas: 3
  template:
    metadata:
      labels:
        app: nginx
    spec:
      containers:
      - name: nginx-app-1
        image: "asia-northeast1-docker.pkg.dev/imade-gaming-265014/ingress/custom-nginx:v2.0"
        env:
        - name: "PORT"
          value: "8080"
-
内容
- kind: このマニフェストファイルが
Deploymentであることを指定しています - metadata: メタデータとして、任意の名前を付けます(= ingress-deployment)
- spec: デプロイメントのスペックを指定していきます
- selector.matchLabesl: ここで指定したラベルと一致するPodを、このDeploymentの対象とします ラベルは
templateで指定します - replicas:
Podの起動数を指定します - template:
- metadata.labels:
Podに対してnginxのラベルを付けます - spec.container:
Pod内で起動するコンテナに関して指定していきます- name: 任意の名前を付けます
- image: コンテナで利用するイメージを指定します ここではさっき作ってArtifactRepoにアップした
custom-nginxを利用するように指定してます - env: コンテナの
port 8080をリッスンするように指定しています envではなくports.containerPortで指定数方法もアリ
- metadata.labels:
- selector.matchLabesl: ここで指定したラベルと一致するPodを、このDeploymentの対象とします ラベルは
- kind: このマニフェストファイルが
-
適用
$ kubectl apply -f ingress_deployment.yaml
deployment.apps/ingress-deployment created
Service の作成
apiVersion: v1
kind: Service
metadata:
  name: ingress-service
spec:
  type: NodePort
  selector:
    app: nginx
  ports:
  - protocol: TCP
    port: 80
    targetPort: 8080
-
内容
- kind: このマニフェストファイルが
Serviceであることを指定しています - metadata: メタデータとして、任意の名前を付けます
- spec:
- type: HTTP(S)ロードバランサーとして設定するためには
NodePortを指定します-
コンテナネイティブにする場合はClusterIPを指定するらしい
-
- selector:
nginxのラベルがついたPodをこのServiceの対象Podとします - ports:
80/tcpできたリクエストを、podの8080/tcpに送るように指定しています
- type: HTTP(S)ロードバランサーとして設定するためには
- kind: このマニフェストファイルが
-
適用
$ kubectl apply -f ingress_service.yaml
service/ingress-service created
Ingress の作成
apiVersion: networking.k8s.io/v1
kind: Ingress
metadata:
  name: ingress
  annotations:
    kubernetes.io/ingress.class: "gce"
spec:
  rules:
  - http:
      paths:
      - path: /*
        pathType: ImplementationSpecific
        backend:
          service:
            name: ingress-service
            port:
              number: 80
-
内容
- kind: このマニフェストファイルが
Ingressであることを指定しています - metadata: メタデータとして、任意の名前を付けます
- annotations:
kubernetes.io/ingress.class: "gce"を指定することで外部LBであることを明示します - デフォルトが
gceなので、指定しなくてもOK 内部LBにする場合gce-internalを指定します-
コンテナネイティブのLBにする場合は指定不要
-
- spec:
- path:
/* (つまりすべて)のパスのトラフィックを下記ルールで処理します - pathType: 基本的に
ImplementationSpecificを指定しますPrefixやExacなども指定できるみたいですが、使い方不明 - backend.service: 先ほど作成したService、
ingress-serviceのPort:80にトラフィックを流すように指定します
- path:
- kind: このマニフェストファイルが
-
適用
$ kubectl apply -f ingress.yaml
ingress.networking.k8s.io/ingress created
※ingressを作成すると、ingressが勝手にLBを作成します
「ネットワークサービス」→「Cloud Load Balancing」から確認してみよう
接続テスト
$ kubectl get ingress
NAME      CLASS    HOSTS   ADDRESS          PORTS   AGE
ingress   <none>   *       <ここにIP>       80      88m

$ kubectl describe ingress ingress
Name:             ingress
Labels:           <none>
Namespace:        default
Address:          <ここにIP>
Default backend:  default-http-backend:80 (10.xxx.yyy.zzz:8080)
Rules:
  Host        Path  Backends
  ----        ----  --------
  *
              /*   ingress-service:80 (10.148.3.19:8080,10.148.3.20:8080,10.148.3.21:8080)
Annotations:  ingress.kubernetes.io/backends: {"k8s-be-30073--850c385e18f8440c":"HEALTHY","k8s-be-32066--850c385e18f8440c":"HEALTHY"} # ← HEALTHYであることを確認する
              ingress.kubernetes.io/forwarding-rule: k8s2-fr-2vr3o74u-default-ingress-fgx1jtuq
              ingress.kubernetes.io/target-proxy: k8s2-tp-2vr3o74u-default-ingress-fgx1jtuq
              ingress.kubernetes.io/url-map: k8s2-um-2vr3o74u-default-ingress-fgx1jtuq
              kubernetes.io/ingress.class: gce
Events:
  Type     Reason     Age                   From                     Message
  ----     ------     ----                  ----                     -------
  Warning  Translate  45m (x16 over 48m)    loadbalancer-controller  Translation failed: invalid ingress spec: service "default/ingress-service" is type "ClusterIP", expected "NodePort" or "LoadBalancer"
  Normal   Sync       44m                   loadbalancer-controller  UrlMap "k8s2-um-2vr3o74u-default-ingress-fgx1jtuq" updated
  Normal   Sync       2m36s (x16 over 89m)  loadbalancer-controller  Scheduled for sync
describe ingressコマンドでbackendがHEALTHであることが確認できれば、接続可能なはずです
表示されているIPにブラウザからアクセスしてみよう
↓が表示されればOK
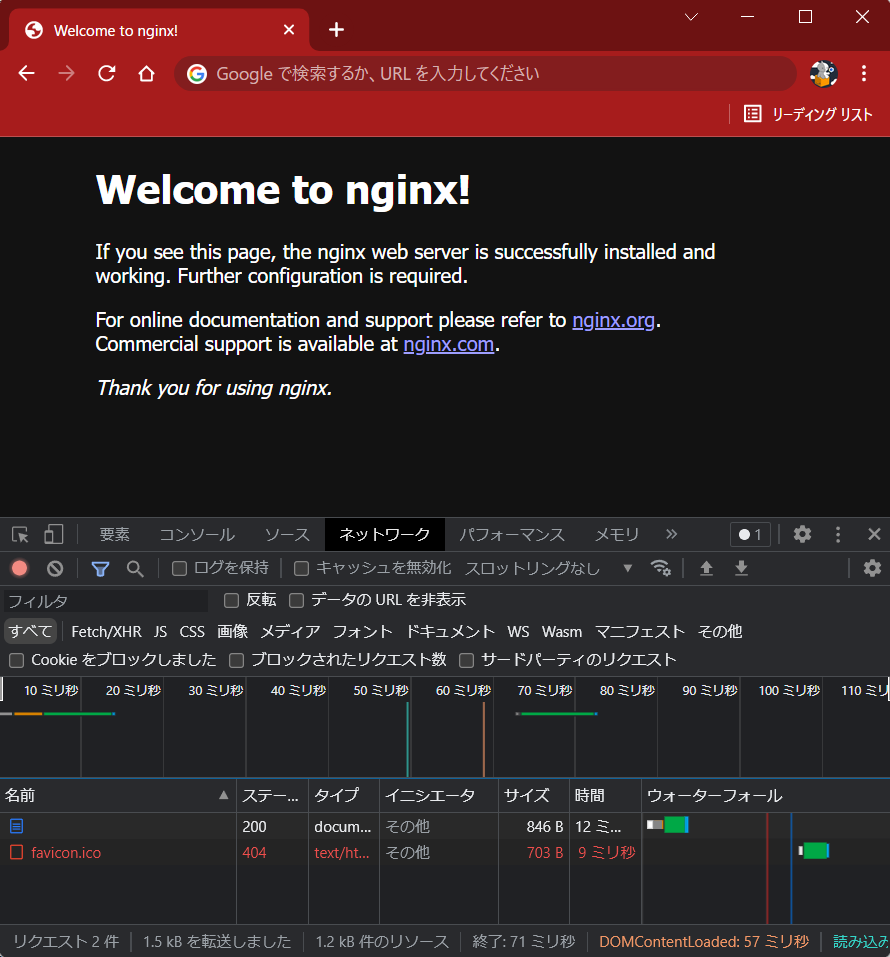
TLS対応させる
ここまでで、LBによって負荷分散されたNginxコンテナにHTTPでアクセスできるようになりました
次は、序盤で作成したTLS証明書を利用してTLS通信に対応させます
固定IPを取得
HTTPS通信ではLBの名前解決をするDNSレコードが必要なので、IPを固定する必要があります
↑ちょっと説明が難しい
- 注意点
IPのtierはPREMIUMにする必要がある → グローバルIPはPREMIUMのみなので特別機にする必要はない
→参考: ロードバランサのIP
spec: loadBalancerIP の IP アドレスがスタンダード ティアの IP の場合、値 Standard を含むアノテーション cloud.google.com/network-tier が必須です。
また、グローバルIPじゃないと機能しない(=リージョンIPアドレスはIngressでは使えない)
→参考: Ingressの使用
HTTP(S) ロードバランサを作成する Ingress を使ってアプリケーションを公開する場合は、グローバル静的 IP アドレスを予約する必要があります。
リージョン IP アドレスは Ingress では機能しません。
| 項目 | 設定内容 |
|---|---|
| アドレス名 | ingress-ip |
| IPバージョン | IPv4 |
| タイプ | グローバル |
Kubernetes Secret オブジェクト作成
certbotで取得した証明書をKubernetes Secretオブジェクトとして作成
- 鍵ファイルコピー (※鍵、証明書ファイルの管理は厳重に!!)
鍵ファイルの保存場所に作成されてるREADMEにも書いてありますが、鍵ファイルは無闇に移動させないほうが良いですね
そう考えると一連のkubectlコマンドも全部rootでやったほうが良いのかもしれません
# cp cert.pem /path/to/workingDirectory/server.crt
# cp privkey.pem /path/to/workingDirectory/server.key

# cd /path/to/workingDirectory
# chown user. server.*
- Kubernetes Secret オブジェクト作成
$ kubectl create secret tls ingress-tls --cert server.crt --key server.key
secret/ingress-tls created
- Ingressに適用
apiVersion: networking.k8s.io/v1
kind: Ingress
metadata:
  name: ingress
  annotations:
    kubernetes.io/ingress.global-static-ip-name: ingress-ip
    kubernetes.io/ingress.class: "gce"
    kubernetes.io/ingress.allow-http: "false"
spec:
  tls:
  - secretName: ingress-tls
  rules:
  - http:
      paths:
      - path: /*
        pathType: ImplementationSpecific
        backend:
          service:
            name: ingress-service
            port:
              number: 80
-
内容
- annotations:
- global-static-ip-name: さっき作成したグローバルの固定IPを、IPアドレスの名前で指定します
- allow-http:
HTTPはアクセスできないようにfalseに指定します HTTPS対応させたので、HTTPからはアクセスできなくしてもいいでしょう
- annotations:
-
適用
$ kubectl apply -f ingress.yaml
ingress.networking.k8s.io/ingress configured
Cloud DNS で DNSレコード登録
- コンソールで実施
↓の通りでDNSレコードを登録
ingress.<ドメイン>.net 300 IN A <さっき作成した固定IP>
確認
ブラウザでhttps://ingress.<ドメイン>.net/にアクセス!!
↓が表示されたら完璧です
お疲れさまでした^^
おわりに
GKEを使ってHTTPSの負荷分散されたアプリケーションを構築できました
- TLS証明書の発行
- GKE クラスタのデプロイ
- deployment, service, ingress
について理解できたのではないでしょうか
僕はこの記事の作成を通してすげー理解できました!笑
ただ、実をいうとGCEタイプの外部LBより、途中で何度か登場したコンテナネイティブの負荷分散のほうがいろいろと性能がよさそうです。参考
仕事ではそっちを使うように変更したいと思ってます
あと、Ingressに代わってGatewayAPIなるものが6月ごとにGAらしいです
Ingressについての需要は減ってくのかな、、せっかく調べたのに😢
この記事が誰かのお役に立てば幸いです
では、また