(2021/10/5追記)
ありがたいことに今もこの記事を読んでくださる方がいるのですが、2021年現在では少し古い情報が含まれていたり、内容的にそもそもあまり意味のなさそうな記述が含まれていたりするため、この記事を読まれる方は以下のポストにも目を通してくださると良いかと思います。
こちらは2021年7月時点で新しいgemを作成する際、自分用に書いたメモです。
内容的に指摘がありましたらぜひPRなど下さい![]()
はじめに
こんにちは!Tama.rbから @fuqdaさんの圧力を受け、はじめてのアドベントカレンダーを書くことになりました、Webエンジニア一年生のしおいです。
最近は「まだまだ弱い自分が、コミュニティに貢献できるまで成長するためにはどうすれば良いのだろう」…と悩んだりなどしております。
こちらに対して、Asakusa.rb(Tamaじゃない)にて激つよRubyistの方から**「簡単なgemを作ってみたりして、知識の隙間を埋めていくと良いよ」**とのアドバイスをいただきました。
すでに詳細な記事もありますが、せっかくなのでこちらで公開をさせていただきます。
お題
「Hello, Tama!」と出力するだけの簡単なgemを作ってRubyGemsにリリースしてみる
1. 準備
① GitHubで新しいリポジトリを作る
② RubyGemsにアカウントを登録
③ gemをupdate(以下を参照)
# gemを最新版へupdate
$ gem update --system
# bundlerも同じく
$ gem update bundler
2. 雛形を作成する
gemの雛形は、コマンドで簡単に作成できます。
# hello_tamaという名前のgemの雛形を作る
$ bundle gem hello_tama
この後、ターミナル上でいろんなことを訊かれます。
Do you want to generate tests with your gem?
Type 'rspec' or 'minitest' to generate those test files now and in the future. rspec/minitest/(none)
# gemにテストファイルを追加しますか?
# (追加する場合はrspecかminitestと入力)
今回はテストを使用しないため、何も入力せずにそのままEnter。
Do you want to license your code permissively under the MIT license?
This means that any other developer or company will be legally allowed to use your code for free as long as they admit you created it. You can read more about the MIT license at https://choosealicense.com/licenses/mit. y/(n)
# MITライセンスにしますか?
こちらはyを入力。
MITライセンスの内容はこちらで確認できます。
Do you want to include a code of conduct in gems you generate?
Codes of conduct can increase contributions to your project by contributors who prefer collaborative, safe spaces. You can read more about the code of conduct at contributor-covenant.org. Having a code of conduct means agreeing to the responsibility of enforcing it, so be sure that you are prepared to do that. Be sure that your email address is specified as a contact in the generated code of conduct so that people know who to contact in case of a violation. For suggestions about how to enforce codes of conduct, see https://bit.ly/coc-enforcement. y/(n)
# code of conduct に関するファイルも一緒に作成しますか?
code of conduct = 行動規範
yにした場合、CODE_OF_CONDUCT.mdというファイルが追加されます。
ファイルの内容はこちらの記事で翻訳を確認できます。
Contributor Code of Conduct
これらの質問に答えると、次のファイルが生成されます。
      create  hello_tama/Gemfile
      create  hello_tama/lib/hello_tama.rb
      create  hello_tama/lib/hello_tama/version.rb
      create  hello_tama/hello_tama.gemspec
      create  hello_tama/Rakefile
      create  hello_tama/README.md
      create  hello_tama/bin/console
      create  hello_tama/bin/setup
      create  hello_tama/.gitignore
      create  hello_tama/LICENSE.txt
      create  hello_tama/CODE_OF_CONDUCT.md
3. gemspecを設定
hello_tamaディレクトリの中にhello_tama.gemspecというファイルができています。
こちらにGemの設定を書き込んでいきます。
ファイルを開くとこんな感じ。
lib = File.expand_path("../lib", __FILE__)
$LOAD_PATH.unshift(lib) unless $LOAD_PATH.include?(lib)
require "hello_tama/version"

Gem::Specification.new do |spec|
  # gemの名前
  spec.name          = "hello_tama"
   # gemのバージョン lib/hello_tama/version.rb と言うファイルで管理されている
  spec.version       = HelloTama::VERSION
  #  $ git configで取得可能なuser.name
  spec.authors       = ["tamataro"]
  #  $ git configで取得可能なuser. email
  spec.email         = ["tama@example.com"]

  # 以下は`TODO`の文字が入っているとgemをbuildする際にエラーが出てしまうため、内容を適宜書き換えます。
  # gemの説明(要約)
  spec.summary       = %q{TODO: Write a short summary, because RubyGems requires one.}
  # gemの説明
  spec.description   = %q{TODO: Write a longer description or delete this line.}
    # 関連サイト(あれば)
  spec.homepage      = "TODO: Put your gem's website or public repo URL here."
  # ライセンス
  spec.license       = "MIT"

  # 以下はプライベートgemを誤ってrubygems.orgに登録してしまい、他人にインストールされてしまうことがないように制御するための設定。
  # 今回はRubyOrgに登録したいため、削除します。

    # -- ここから --
  # Prevent pushing this gem to RubyGems.org. To allow pushes either set the 'allowed_push_host'
  # to allow pushing to a single host or delete this section to allow pushing to any host.
  if spec.respond_to?(:metadata)
    spec.metadata["allowed_push_host"] = "TODO: Set to 'http://mygemserver.com'"

    spec.metadata["homepage_uri"] = spec.homepage
    spec.metadata["source_code_uri"] = "TODO: Put your gem's public repo URL here."    spec.metadata["changelog_uri"] = "TODO: Put your gem's CHANGELOG.md URL here."
  else
    raise "RubyGems 2.0 or newer is required to protect against " \
      "public gem pushes."
  end
    # --ここまで--

    # 以下はその他の詳細な設定

  # Specify which files should be added to the gem when it is released.
  # The `git ls-files -z` loads the files in the RubyGem that have been added into git.
  # gemパッケージに含まれる対象となるファイルのリスト
  spec.files         = Dir.chdir(File.expand_path('..', __FILE__)) do
    `git ls-files -z`.split("\x0").reject { |f| f.match(%r{^(test|spec|features)/}) }
  end

    # 実行可能なコマンド名を格納しているディレクトリの設定
  spec.bindir        = "exe"

  # gemパッケージに含まれる実行可能コマンドとしてのファイルのリスト
  spec.executables   = spec.files.grep(%r{^exe/}) { |f| File.basename(f) }

    # ルートとなるパスの設定
  spec.require_paths = ["lib"]

    # 依存gemがある場合はここに追加
  # (デフォルトでは開発環境用に`bundler`と`rake`が指定されています)
  spec.add_development_dependency "bundler", "~> 1.17"
  spec.add_development_dependency "rake", "~> 10.0"
end
編集後のファイルはこんな感じです。
lib = File.expand_path("../lib", __FILE__)
$LOAD_PATH.unshift(lib) unless $LOAD_PATH.include?(lib)
require "hello_tama/version"

Gem::Specification.new do |spec|
  spec.name          = "hello_tama"
  spec.version       = HelloTama::VERSION
  spec.authors       = ["tamataro"]
  spec.email         = ["tama@example.com"]

  spec.summary       = %q{Puts 'Hello, Tama!'}
  spec.description   = %q{Puts 'Hello, Tama!'}
  spec.homepage      = ""
  spec.license       = "MIT"
  spec.files         = Dir.chdir(File.expand_path('..', __FILE__)) do
    `git ls-files -z`.split("\x0").reject { |f| f.match(%r{^(test|spec|features)/}) }
  end
  spec.bindir        = "exe"
  spec.executables   = spec.files.grep(%r{^exe/}) { |f| File.basename(f) }
  spec.require_paths = ["lib"]

  spec.add_development_dependency "bundler", "~> 1.17"
  spec.add_development_dependency "rake", "~> 10.0"
end
4. 実際のコードを記述
実際のコードはlib/hello_tama.rbの中に記述していきます。
今回はHello, Tama!を出力するだけのコードなので、こんな感じ。
require "hello_tama/version"

module HelloTama
  class Error < StandardError; end
  # ここから下に記述
    def greets
      puts 'Hello, Tama!'
    end
  end
end
5. Bundle Install
作ったgemのディレクトリに移動して、bundle installしてみます。
$ cd hello_tama/
$ bundle
Fetching gem metadata from https://rubygems.org/.
Fetching gem metadata from https://rubygems.org/.
Resolving dependencies...
Fetching rake 10.5.0
Installing rake 10.5.0
Using bundler 1.17.1
Using hello_tama 0.1.0 from source at `.` # ←注目!
Bundle complete! 3 Gemfile dependencies, 3 gems now installed.
Use `bundle info [gemname]` to see where a bundled gem is installed.
成功しました!
6. ちゃんと動くか確認
$ irb
2.5.3 :001 > require 'hello_tama'
 => true
2.5.3 :002 > HelloTama.greets
Hello, Tama!
 => nil
動いた!
7. RubyGemsにリリースするための準備
Gitにここまでの変更を保存し、あらかじめ作っておいたGitHubのリポジトリにpushします。
$ git init
$ git add -A
$ git commit -m "Create new gem"
$ git remote add origin git@github.com:アカウント名/hello_tama.git
$ git push origin master
続いてRubyGemsに登録する準備です。
SignInし、自分のプロフィールページにアクセスしたらEdit Profileをクリック。
少し下の方へスクロールすると、API Keyとログイン用のコマンドの記載があります。
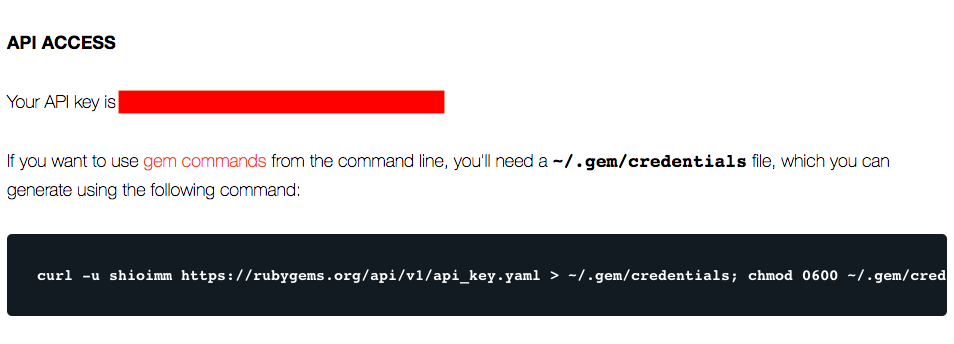
Your API key is以下に記載されているAPI keyを、~/.gem/credentialsファイルの中で指定します。
(API keyが記述されたファイルをGitHubにpushするなど、第三者の目に触れる場所に置かないように注意!)
:rubygems_api_key: [自分のAPI key]
さらにcurlコマンドをターミナルで実行して、RubyGemsにログインします。
$ curl -u アカウント名 https://rubygems.org/api/v1/api_key.yaml > ~/.gem/credentials; ~/.gem/credentials
この時RubyGems.orgに登録しているパスワードを確認されます。
入力したパスワードが間違っていた場合もエラー表示等は出ないため、きちんとログインできているか次のコマンドで確認します。
$ cat ~/.gem/credentials

# ログインできていない場合
HTTP Basic: Access denied.

# ログインできている場合
---
:rubygems_api_key: [自分のAPI key]
8. ついにRubyGemsにリリース
gemをビルドします。
$ rake build
...
エラーが出ていなければ、続いてgemをリリースします。
$ rake release
...
Pushed hello_tama 0.1.0 to rubygems.org
無事リリースに成功しました!
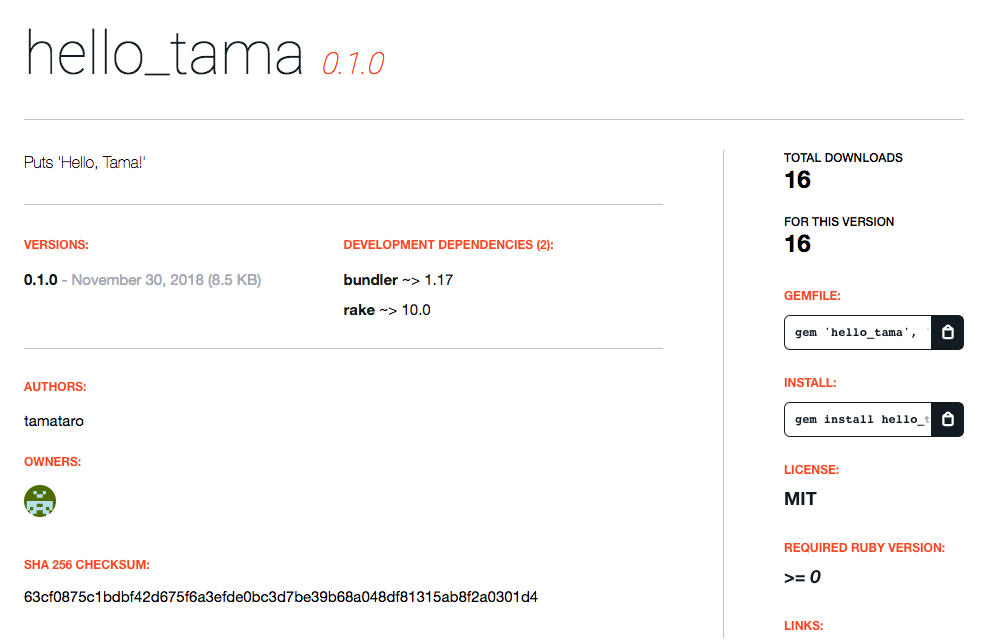
動作確認してみる…
$ gem install hello_tama
Fetching: hello_tama-0.1.0.gem (100%)
Successfully installed hello_tama-0.1.0
1 gem installed

$ irb
2.5.3 :001 > require 'hello_tama'
 => true
2.5.3 :002 > HelloTama.greets
Hello, Tama!
 => nil
動きましたー!🙌
最後に
Gemの雛形を作るためのコマンドが用意されているため、初心者でも簡単にGemを作って公開することができました!
たくさんの方に使っていただけるGemを作ることはRubyエンジニアのロマンですが、最初の一歩はこんなところから、自分だけのお役立ちGemを作るところからはじめてみるのも良さそうです。
余談
この記事を作成するにあたって大変参考にさせていただいた記事、同じTama.rb参加メンバーの方の執筆記事であった…(8割書き終えた後に気づいた)
参考
更なる詳細はこちらをどうぞ