準備作業
前回の記事
https://qiita.com/chooaya/items/d2ed0caa31c336973226
では、resourcesフォルダの下の元々のapp.asarを削除せずそのままにしました。
CocosCreator.exeから起動するとき、既に解凍済みのappフォルダからソースを読み込みますが、起動が若干重くなる気がします(私の気のせいかもしれません)。
下図はそれぞれapp.asarから読み込んだ状態と解凍済みのappフォルダから読み込んだ状態となっています。
app.asarからの場合:

解凍済みのappフォルダからの場合:

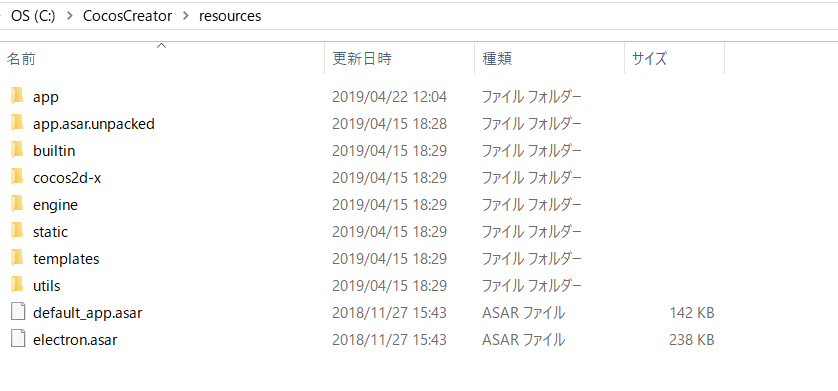
app.asarがある状態で予期せぬ問題が発生したらまずいので、とりあえずこのファイル別の場所に退避しましょう。
cocos creatorのresourcesが下記状態になっていることを前提に話を進めます。
cocos creatorのpluginの作成とvisual studio codeを利用したpluginのデバッグ
pluginの作成
CocosCreator.exeクリックでcocos creatorを起動します。

出てきた画面で「New Project」タブを選択します。

「Hello TypeScript」を選択し、下図のパス入力のところに作りたいプロジェクトの名前を入れましょう。私の場合は「TestPlugin01」。入力終わったら、右下の「Create」ボタンを押します。

するとエディタが起動します。

ここでゲームを作成できますが、今回作るのはプラグインなので、まずは下図のように、メニューからExtension→Create a new extension→For current project(For current project folder)の流れで選択します。

「For current project(For current project folder)」クリックで出てきたダイアログのファイル名にプラグインの名前をいれ、「Create Extension」を押せば、pluginの雛形が完成します。

以下は私が適当につけた名前myfirstpluginで進めます。

今回作成したプロジェクトTestPlugin01のpackagesフォルダの下に、さきほど作成したmyfirstpluginが生成されたことがわかります。

vscode拡張機能のインストールとpluginデバッグ用設定ファイルの作成
visual studio codeを開きます。(vscode内のターミナルでnode npm nvmなど実行するとき、アクセス権限が聞かれることがあるので、管理者権限でvscodeを起動しました。)

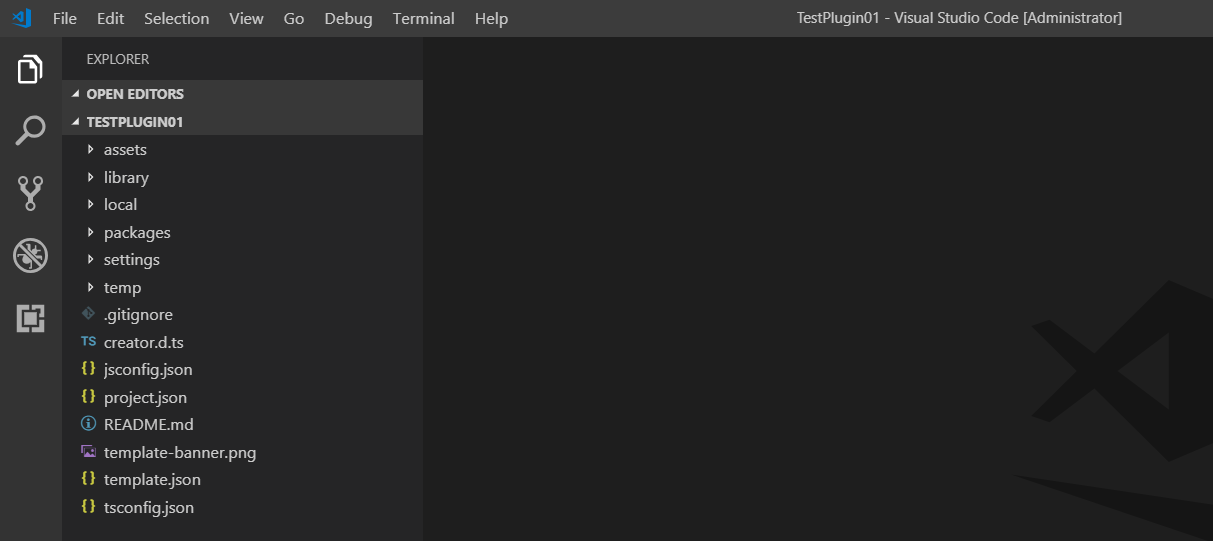
プロジェクトTestPlugin01のあるフォルダを開きます。

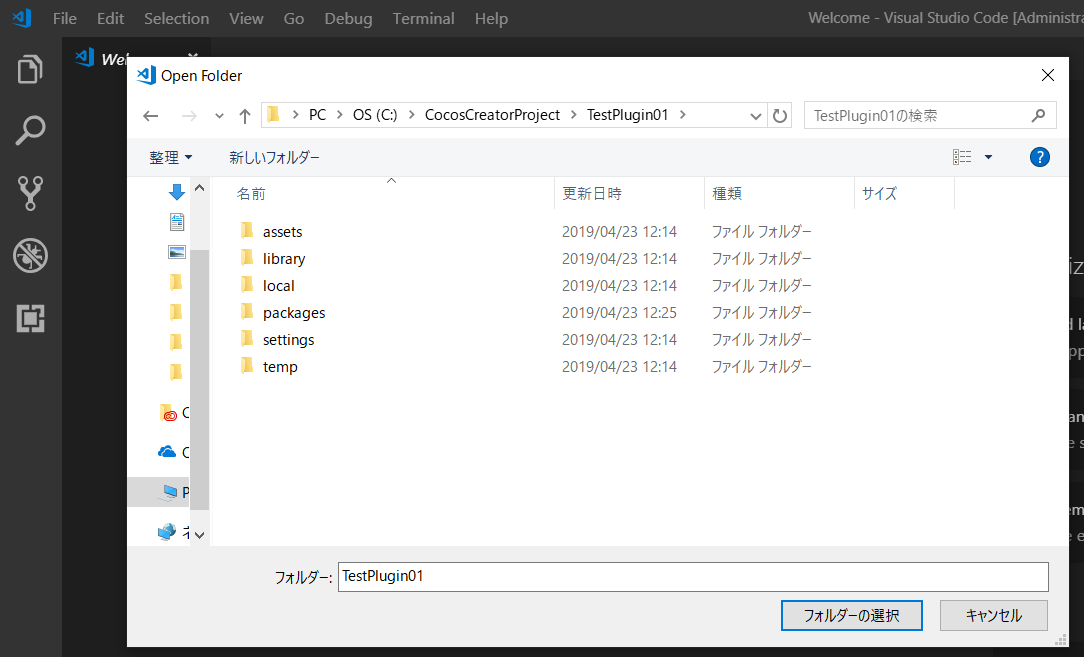
開けたら以下の表示になります。
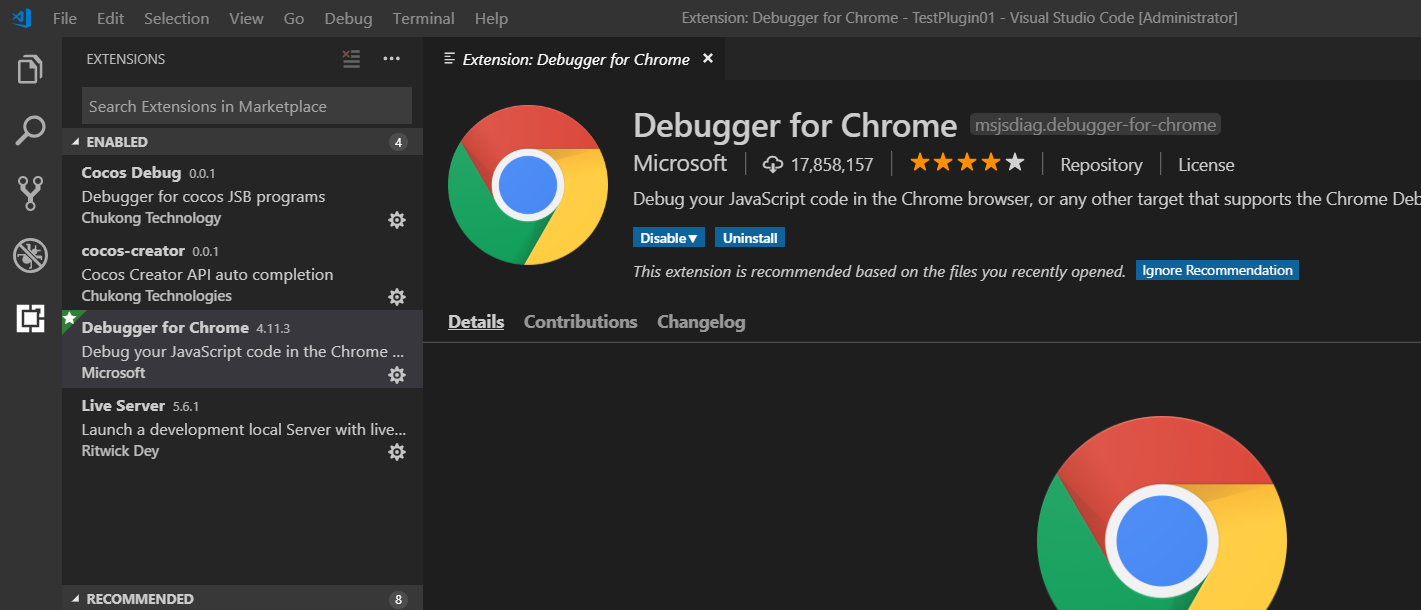
visual studio codeに拡張機能「Debugger for Chrome」をインストールします。既にインストールされているなら、スキップで大丈夫です。
次はDebugのアイコンをクリックし、Debugの設定をします。

歯車アイコンをクリックし、出てきた一覧からNode.jsを選択します。

デバッグの設定用ファイルが自動的に生成されます。

こちらのlaunch.jsonの内容を以下の設定に変えましょう。
設定について https://qiita.com/wataradio/items/6005f8257ae43914de04 を参考にしています。
{
    // Use IntelliSense to learn about possible attributes.
    // Hover to view descriptions of existing attributes.
    // For more information, visit: https://go.microsoft.com/fwlink/?linkid=830387
    "version": "0.2.0",
    "configurations": [
        {
            "name": "Electron Plugin: Main",
            "type": "node",
            "request": "launch",
            "cwd": "${workspaceRoot}",
            "runtimeExecutable": "electron",
            "runtimeArgs": [
                "--remote-debugging-port=9223"
            ],
            "args": [
                "C:\\CocosCreator\\resources\\app",
                "${workspaceRoot}"
            ],
            "windows": {
                "runtimeExecutable": "electron.cmd"
            },
            "console":"integratedTerminal",
        },
        {
            "name": "Electron Plugin: Renderer",
            "type": "chrome",
            "request": "attach",
            "port": 9223,
            "webRoot": "${workspaceRoot}",
            "timeout": 30000
        }
    ],
    "compounds": [
        {
            "name": "Electron: All",
            "configurations": [
                "Electron Plugin: Main",
                "Electron Plugin: Renderer"
            ]
        }
    ]
}
上記の設定の中で、唯一自分の環境に合わせて変える必要があるのは、argsの一行目のところになります。
設定するのはapp.asarの解凍済みのappフォルダのフルパスなので、もしCocosCreatorのインストール先が違う場合、そのインストール先に合わせてください。

pluginのデバッグ
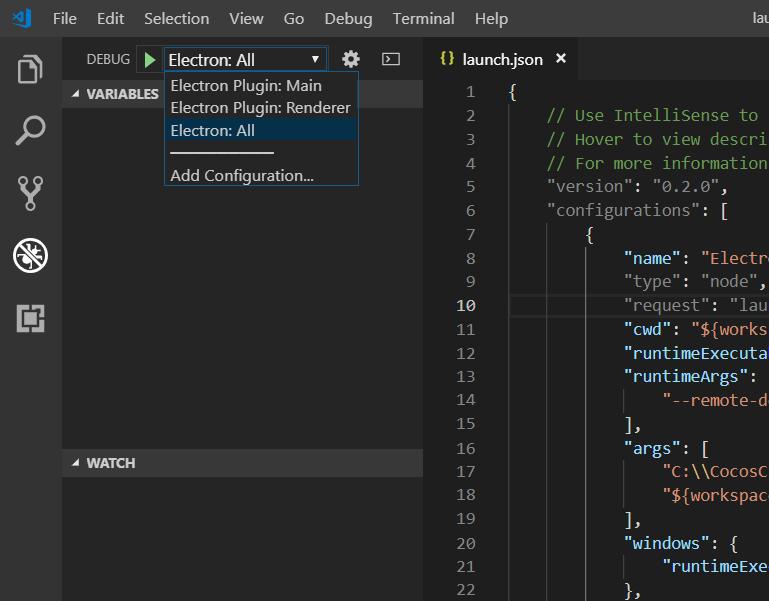
デバッグアイコンをクリックしてデバッグビューを表示し、'Electron: All'コンフィグレーションを選択してF5キーを押すか緑の再生ボタンをクリックしてください。
すると、デバッグ処理が走り、vscodeのCALL STACKに
Electron Plugin: Main
Electron Plugin: Renderer
がRUNNING状態ということがわかります。

エラーがなければ、最終的にエディタ画面が表示されますが、CALL STACKのところは
Electron Plugin: Mainだけになってしまっています。
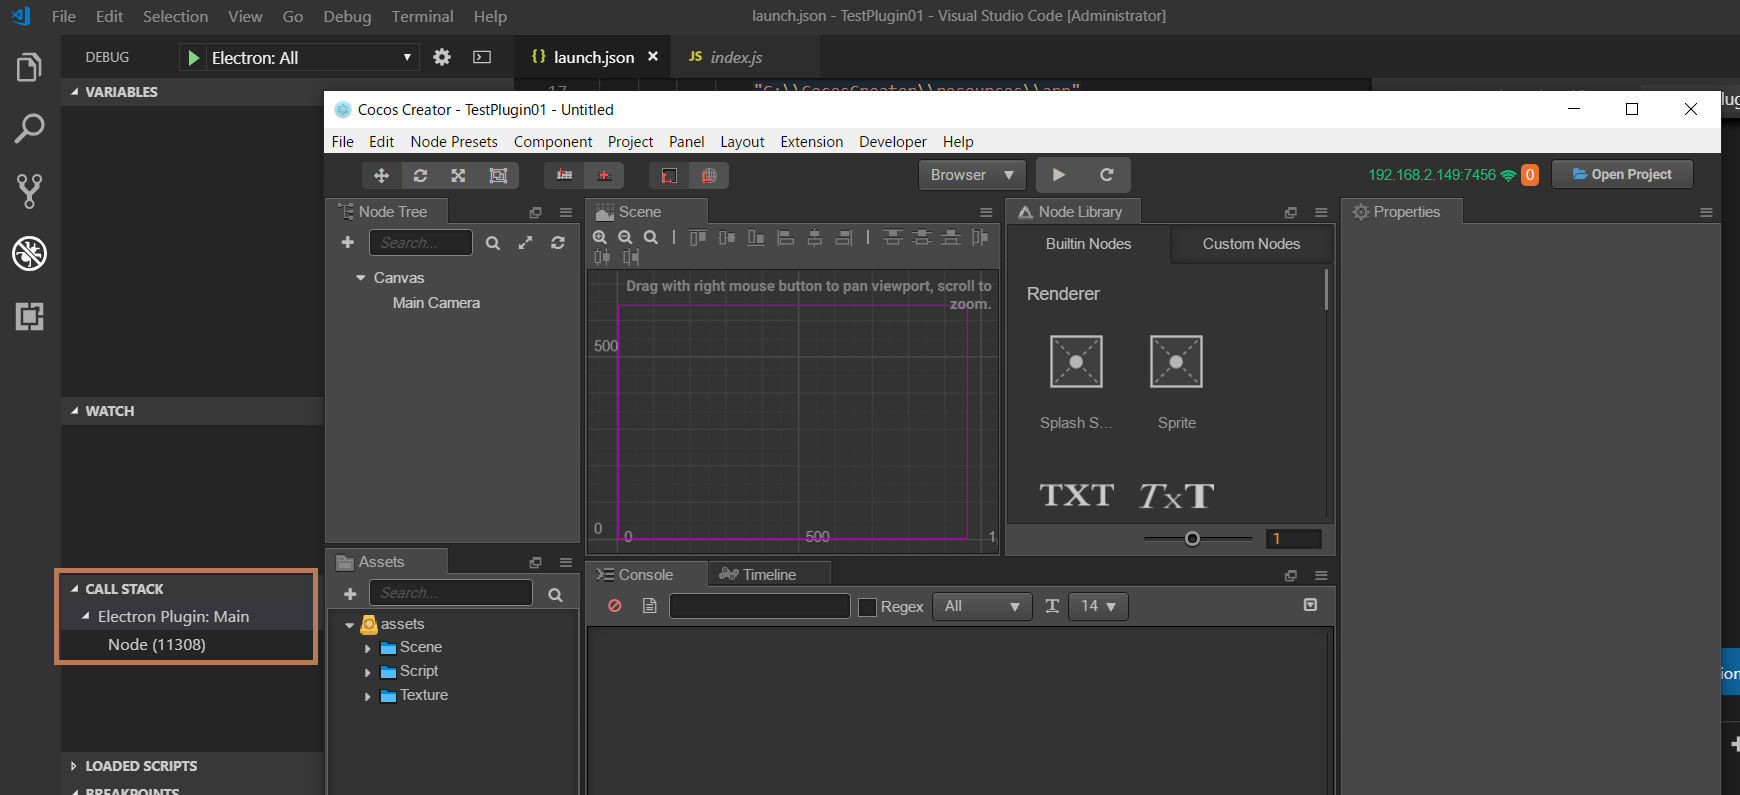
これについて把握し切れていないですが、このエディタ画面以外にダッシュボードなどの画面が一連の実行処理で自動的に閉じたことの影響ではないかと推測しています。
なので、もう一度コンフィグレーションのところからElectron Plugin: Rendererを選択し、緑の再生ボタンをクリックしてください。
もし下の二つの画面のように一覧が出てきたら、名前が「Cocos Creator」のものを選択してください。


成功したらElectron Plugin: RendererがCALL STACKに追加表示されます。

ブレークポイントを設定し、実際にデバッグしてみる
https://docs.cocos2d-x.org/creator/manual/en/extension/scene-script.html
こちらのページを参考に、レンダープロセスで使えるスクリプトを作成し、そのファイル名をpluginのpackage.jsonに登録します。
追加するファイル名とその内容は下記のようです。
module.exports = {
    'Get-canvas-children': function (event) {
        var canvas = cc.find ('Canvas');
        Editor.log ('children length:' + canvas.children.length);
        if (event.reply) {
            event.reply (canvas.children.length);
        }
    }
};
階層はpackage.jsonと同じにします。

"scene-script": "scene-walker.js"をpackage.jsonに追加します。
{
  "name": "myfirstplugin",
  "version": "0.0.1",
  "description": "The package template for getting started.",
  "author": "Cocos Creator",
  "main": "main.js",
  "main-menu": {
    "i18n:MAIN_MENU.package.title/myfirstplugin/open": {
      "message": "myfirstplugin:open"
    },
    "i18n:MAIN_MENU.package.title/myfirstplugin/hello": {
      "message": "myfirstplugin:say-hello"
    }
  },
  "panel": {
    "main": "panel/index.js",
    "type": "dockable",
    "title": "myfirstplugin",
    "width": 400,
    "height": 300
  },
  "scene-script": "scene-walker.js"
}
package.jsonと同じ階層にあるmain.jsを以下のように修正します。
'use strict';

module.exports = {
  load () {
    // execute when package loaded
  },

  unload () {
    // execute when package unloaded
  },

  // register your ipc messages here
  messages: {
    'open' () {
      // open entry panel registered in package.json
      Editor.Panel.open('myfirstplugin');
    },
    'say-hello' () {
      Editor.log('Hello World!');
      // send ipc message to panel
      Editor.Ipc.sendToPanel('myfirstplugin', 'myfirstplugin:hello');

      // 追加する処理:Scene-walker.jsのGet-canvas-children処理を呼び出します。
      Editor.Scene.callSceneScript ('myfirstplugin', 'Get-canvas-children', function (length) {
        console.log ('get-canvas-children callback: length - ' + length);
      });
    },
    'clicked' () {
      Editor.log('Button clicked!');
    }
  },
};
上記作業が終わったら、メインプロセス側のmain.jsとレンダープロセス側のscene-walker.jsにそれぞれブレークポイントを付けます。

エディタのメニューからExtension→myfirstplugin→helloを選択しましょう。

そうするとまずはメインプロセスのブレークポイントで処理が止まります。

Continueボタンを押すと、

次はレンダープロセスのブレークポイントで止まります。

これでpluginの両方のプロセスをデバッグすることができました。
参考資料:
https://qiita.com/wataradio/items/6005f8257ae43914de04
https://docs.cocos2d-x.org/creator/manual/en/extension/scene-script.html