前回まで
- その1:雪を降らせる
- その2:Flaskにp5.jsの画像を載せる
- その3:#つぶやきProcessingをやってみる
はじめに
- 今回は簡単なお絵かきアプリを作っていきたいと思います。
- ただのお絵かきアプリだとつまらないので、みんな大好きSpaceCat(※宇宙を背景に猫の画像をコラージュしたもの)と組み合わせて作っていきます。
成果物
-
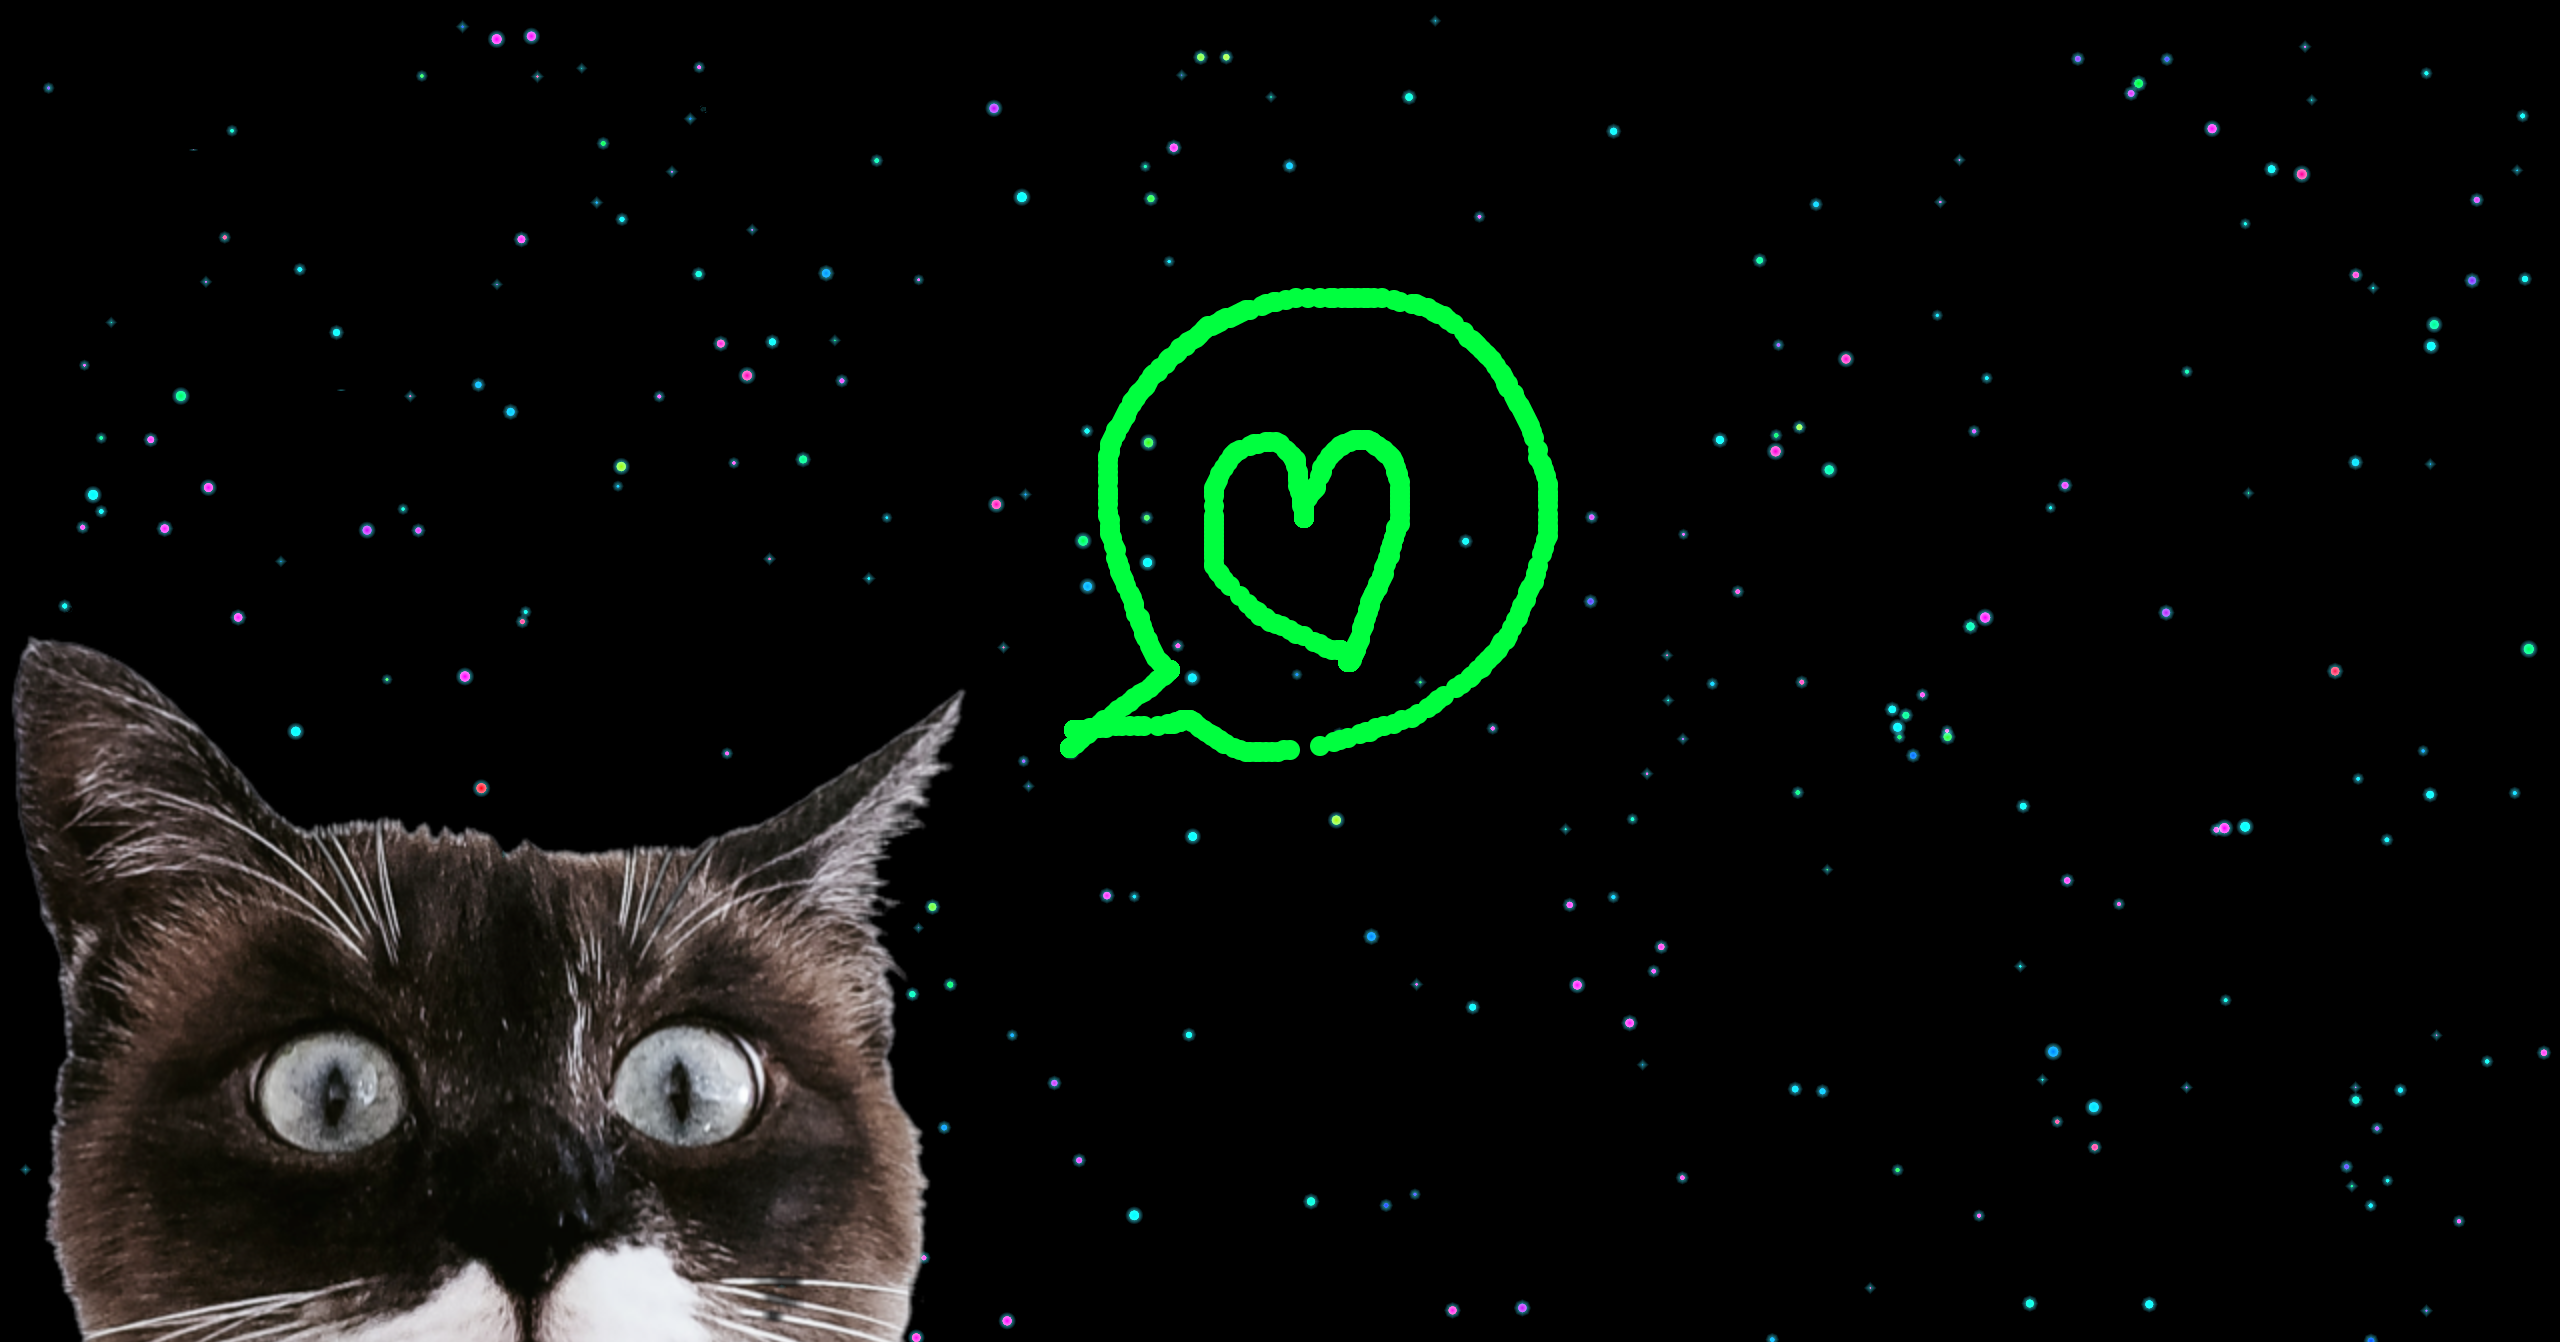
こんな感じのお絵かきアプリ(Webアプリ)が出来ました。
-
猫の画像はぱくたその素材を加工して使用しました。
-
左下にお絵かきした画像の保存/ツイート/クリア(リロード)ボタンを配置しています。

-
保存した画像はこんな感じ。キャンバスのみ保存されます。
-
星空/線の色は毎回ランダムに変化します。
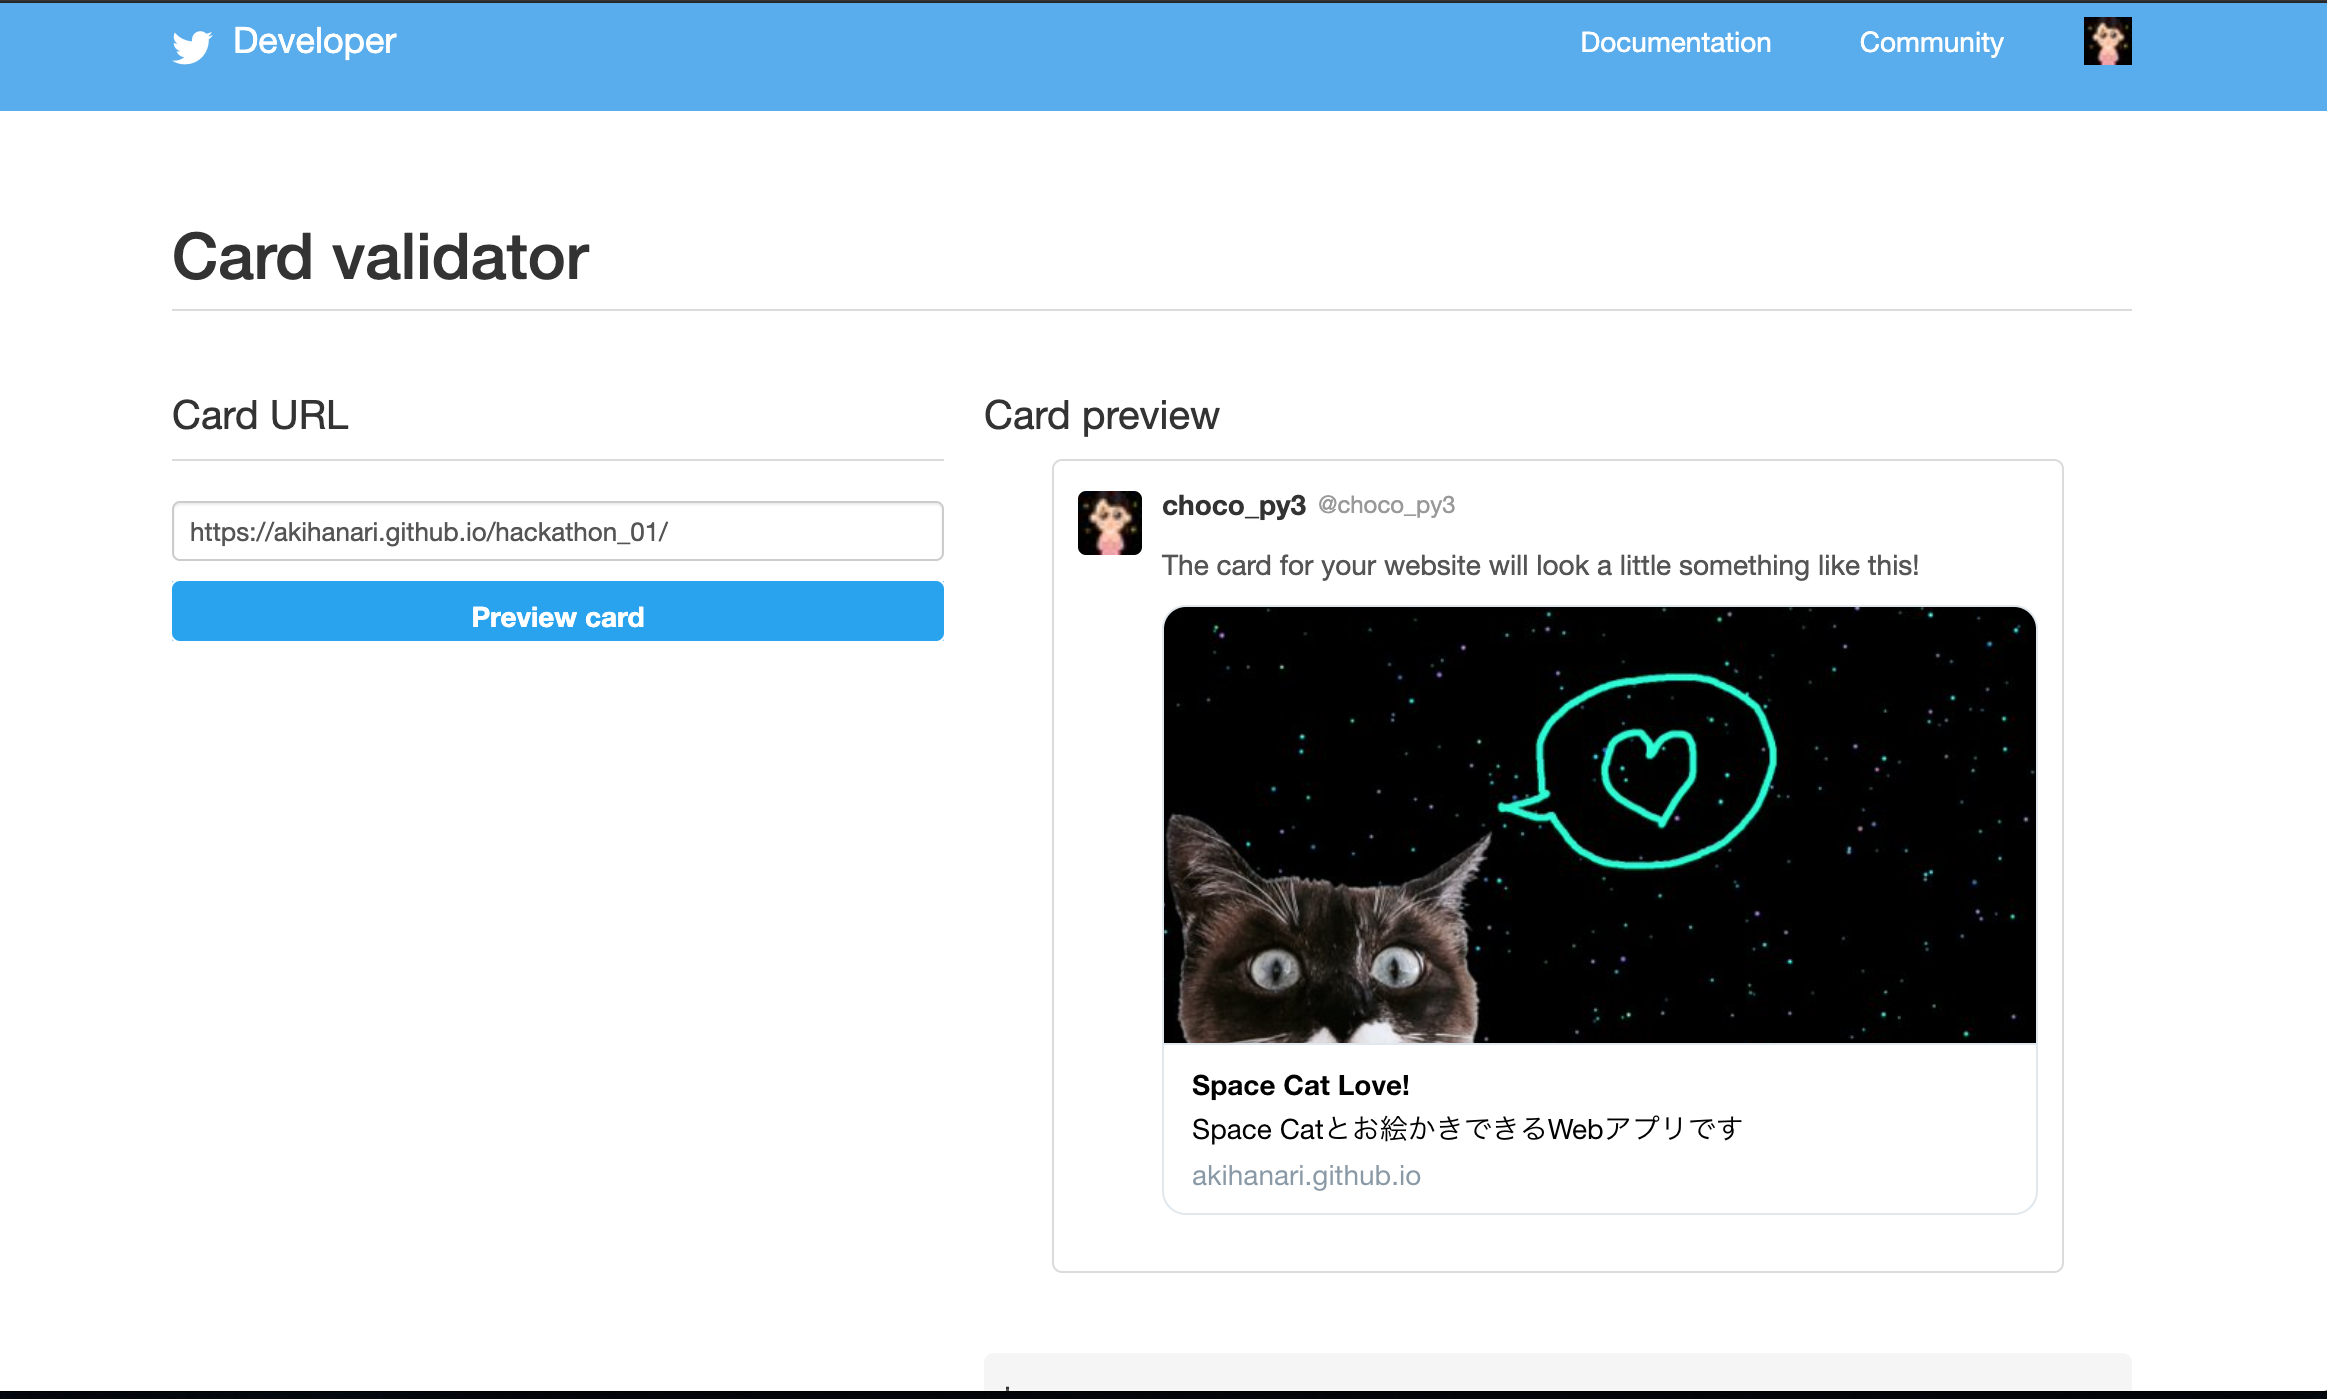
- ついでにTwitterカードの設定もしてみました。
苦労したポイント
- PC・スマホ両対応にする
- 星をぼんやり光らせる
- スマホ向けにボタンを大きく見やすくする
※以上の点は以下の参考記事で全て解決しました(インターネットってすごい)
参考記事
- ぼんやり光る効果を出す簡単な方法 その2 : Processing Tips
- 12_1:コントロール要素 Creative Coding p5.js
- p5.jsとスマートフォンでインタラクティブアートを作る
- p5.js と p5.dom.js (とcssパワー) でボタンのデザインまとめ
- 【2020年版】Twitterカードとは?使い方と設定方法まとめ
コード
space.js
let x,y;
let w;
let img;
let h,s,b;
let button,button2,button3,button4;


function setup() {
  createCanvas(windowWidth, windowHeight - 50);
  background(0);

  for (i = 1; i < 300; i++){
    blendMode(SCREEN);
    colorMode(HSB);
    h = random(100,360);
    fill(h, 100, 100, 100);

    x = random(0,windowWidth);
    y = random(0,windowHeight);
    w = random(0,5);

    for (j = 1; j < 5; ++j) {
        strokeWeight(j);
        stroke(
          map(j, 1, 50, 180, 360),
          80,
          map(j, 1, 50, 15, 1),
          100
          );
        ellipse(x, y, w);
      }

    }
  blendMode(BLEND);
  colorMode(RGB);

  loadImage('images/cat.png', img => {
    image(img, 0,windowHeight - 406);
  });

  button = createButton("Save");
  button.style("width", "50px");
  button.style("height", "50px");
  button.style("border-radius", "25px");
  button.style("color", "#ffffff");
  button.style("background", "#00ce14");
  button.mousePressed(saveme);

  button2 = createButton("Tweet");
  button2.style("width", "50px");
  button2.style("height", "50px");
  button2.style("border-radius", "25px");
  button2.style("color", "#ffffff");
  button2.style("background", "#00acee");
  button2.mousePressed(tweetme);

  button3 = createButton("Clear");
  button3.style("width", "50px");
  button3.style("height", "50px");
  button3.style("border-radius", "25px");
  button3.style("color", "#ffffff");
  button3.style("background", "#cc0000");
  button3.mousePressed(clearme);

  button4 = createButton("©︎choco_py3");
  button4.style("color", "#ffffff");
  button4.mousePressed(chocopyme);
}

function draw() {
  noStroke();
  if(mouseIsPressed){
    ellipse(mouseX, mouseY, 10);
  }
}

function saveme() {
    saveCanvas('spacecat');
}

function tweetme() {
  link("https://twitter.com/share?ref_src=twsrc%5Etfw");
}

function clearme() {
  link("index.html");
}

function chocopyme() {
  link("https://twitter.com/choco_py3");
}

function link(url, winName, options) {
  winName && open(url, winName, options) || (location = url);
}
index.html
<!DOCTYPE html>
<html lang="ja">
<head>
    <meta charset="UTF-8">
    <meta name="viewport" content="width=device-width, user-scalable=no, initial-scale=1,viewport-fit=cover" />

    <meta name="twitter:card" content="summary_large_image" />
    <meta name="twitter:site" content="@choco_py3" />
    <meta property="og:url" content="https://akihanari.github.io/hackathon_01/" />
    <meta property="og:title" content="Space Cat Love!" />
    <meta property="og:description" content="Space Catとお絵かきできるWebアプリです" />
    <meta property="og:image" content="https://akihanari.github.io/hackathon_01/images/Twittercard.png" />

    <link rel="stylesheet" href="./style.css">
    <title>Space cat Love</title>
</head>
<body>
    <script src="https://cdnjs.cloudflare.com/ajax/libs/p5.js/0.7.2/p5.min.js"></script>
    <script src="https://cdnjs.cloudflare.com/ajax/libs/p5.js/0.7.3/addons/p5.dom.min.js"></script>
    <script src="space.js"></script>

</body>
</html>
style.css
* {
    padding: 0;
    margin: 0;
    background: black;
}

canvas {
    display:block;
}
- GitHubにも載せています
おわりに
- 次回は画像を使わずに絵を書いていこうと思います。