#1. はじめに
本投稿は以下の記事の続編となります。
【AWS】CloudFormationでWebサービスを構築①(NW編)
本投稿を初めてご覧の方はまずはこちらの記事からお読みになって下さい。
#2. EC2編概要
今回の『【AWS】CloudFormationでWebサービスを構築②(EC2編)』では、Web環境の核となるサーバ郡、及びその周辺サービスのテンプレートを作成します。
具体的なサービスとしては以下の通りとなります。
##2.1 「server.yml」で登場するサービス
- IAMロール
- MySQLとの連携にSSMを使用しますので、SSMへの権限をEC2に付与します
- SSM
- EC2接続用
- EC2(Web/APサーバ)
- HTTPサーバにはApacheを使用します
- Route53
- 事前にドメインを準備しておいてください
(投稿主は「Route53」で取得したドメインを使用します)
- 事前にドメインを準備しておいてください
- Elastic Load Balancer(ALB)
- 負荷分散方式ですが、Web環境を構築する為、一番シナジーの強いALBを採用します
- ACM
- 証明書はACMにて新規発行します
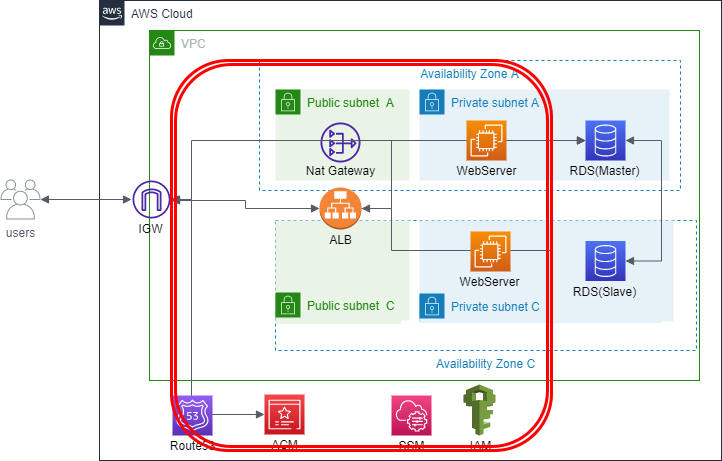
##2.2 EC2編構成図
EC2編で作成するテンプレート環境の構成図を下図の通りとします。
#3. EC2テンプレートの作成
以下はEC2部分のテンプレートになります。
命名規則等、必要であればご自身の環境に合わせて修正してください。
修正が完了したら、作業用ディレクトリに「server.yml」というファイル名で保存してください。
AWSTemplateFormatVersion: "2010-09-09"
Description: Web2tier-Server-Template


# ------------------------------------------------------------
# Input Parameters
# ------------------------------------------------------------
Parameters:
### Project Prefix ###
  PJPrefix:
    Type: String
### Key pair ###
  KeyName:
    Description: input EC2 Keyname
    Type: 'AWS::EC2::KeyPair::KeyName'
### Hosted Zone ###
  HostedZoneName:
    Type: String
    Description: DNS Name to create
    Default: '<<ドメイン(example.com)>>'
    AllowedPattern: (?!-)[a-zA-Z0-9-.]{1,63}(?<!-)
    ConstraintDescription: must be a valid DNS zone name
  SubDomain:
    Description: FQDN of the certificate
    Type: String
    Default: 'www.<<ドメイン(example.com)>>'


### Resources ###
Resources:
# ------------------------------------------------------------
# IAM Role
# ------------------------------------------------------------
  SSMRole:
    Type: AWS::IAM::Role
    Properties:
      Path: /
      RoleName: !Sub "${PJPrefix}-SSMRole"
      AssumeRolePolicyDocument:
        Version: 2012-10-17
        Statement:
          - Effect: Allow
            Principal:
              Service:
                - ec2.amazonaws.com
            Action:
              - sts:AssumeRole
      MaxSessionDuration: 3600
      ManagedPolicyArns:
        - arn:aws:iam::aws:policy/service-role/AmazonEC2RoleforSSM

  SSMRoleProfile:
    Type: AWS::IAM::InstanceProfile
    Properties:
      Path: /
      Roles:
        - !Ref SSMRole


# ------------------------------------------------------------
# EC2
# ------------------------------------------------------------
### AvailabilityZone-A ###
  EC2WebA:
    Type: AWS::EC2::Instance
    Properties:
      ImageId: ami-032d6db78f84e8bf5
      InstanceType: t2.micro
      IamInstanceProfile: !Ref SSMRoleProfile
      KeyName: !Ref KeyName
      NetworkInterfaces:
        - AssociatePublicIpAddress: "true"
          DeviceIndex: "0"
          SubnetId: { "Fn::ImportValue": !Sub "${PJPrefix}-private-subnet-a" }
          GroupSet:
            - { "Fn::ImportValue": !Sub "${PJPrefix}-web-sg" }
      UserData:
        Fn::Base64: !Sub |
          #!/bin/bash
          sudo yum -y update
          sudo yum -y install httpd
          sudo systemctl start httpd
          sudo systemctl enable httpd
          sudo echo "chibiharu's Qiita Apache Test Page For Success AZ-a" > /var/www/html/index.html
          sudo systemctl start amazon-ssm-agent.service
          sudo systemctl enable amazon-ssm-agent.service
      Tags:
          - Key: Name
            Value: !Sub "${PJPrefix}-web-server-1a"

### AvailabilityZone-C ###
  EC2WebC:
    Type: AWS::EC2::Instance
    Properties:
      ImageId: ami-032d6db78f84e8bf5
      InstanceType: t2.micro
      IamInstanceProfile: !Ref SSMRoleProfile
      KeyName: !Ref KeyName
      NetworkInterfaces:
        - AssociatePublicIpAddress: "true"
          DeviceIndex: "0"
          SubnetId: { "Fn::ImportValue": !Sub "${PJPrefix}-private-subnet-c" }
          GroupSet:
            - { "Fn::ImportValue": !Sub "${PJPrefix}-web-sg" }
      UserData:
        Fn::Base64: !Sub |
          #!/bin/bash
          sudo yum -y update
          sudo yum -y install httpd
          sudo systemctl start httpd
          sudo systemctl enable httpd
          sudo echo "chibiharu's Qiita Apache Test Page For Success AZ-c" > /var/www/html/index.html
          sudo systemctl start amazon-ssm-agent.service
          sudo systemctl enable amazon-ssm-agent.service
      Tags:
          - Key: Name
            Value: !Sub "${PJPrefix}-web-server-1c"


# ------------------------------------------------------------
# Target Group
# ------------------------------------------------------------
  TargetGroup:
    Type: "AWS::ElasticLoadBalancingV2::TargetGroup"
    Properties:
      VpcId: { "Fn::ImportValue": !Sub "${PJPrefix}-vpc" }
      Name: !Sub "${PJPrefix}-tg"
      Protocol: HTTP
      Port: 80
      HealthCheckProtocol: HTTP
      HealthCheckPath: "/"
      HealthCheckPort: "traffic-port"
      HealthyThresholdCount: 2
      UnhealthyThresholdCount: 2
      HealthCheckTimeoutSeconds: 5
      HealthCheckIntervalSeconds: 10
      Matcher:
        HttpCode: 200
      Tags:
        - Key: Name
          Value: !Sub "${PJPrefix}-${ALB}-tg"
      TargetGroupAttributes:
        - Key: "deregistration_delay.timeout_seconds"
          Value: 300
        - Key: "stickiness.enabled"
          Value: false
        - Key: "stickiness.type"
          Value: lb_cookie
        - Key: "stickiness.lb_cookie.duration_seconds"
          Value: 86400
      Targets:
        - Id: !Ref EC2WebA
        - Id: !Ref EC2WebC
          Port: 80


# ------------------------------------------------------------
# Application Load balancer
# ------------------------------------------------------------
### ALB ###
  ALB:
    Type: "AWS::ElasticLoadBalancingV2::LoadBalancer"
    Properties:
      Name: !Sub "${PJPrefix}-alb"
      Scheme: "internet-facing"
      LoadBalancerAttributes:
        - Key: "deletion_protection.enabled"
          Value: false
        - Key: "idle_timeout.timeout_seconds"
          Value: 4000
      SecurityGroups:
        - { "Fn::ImportValue": !Sub "${PJPrefix}-alb-sg" }
      Subnets:
        - { "Fn::ImportValue": !Sub "${PJPrefix}-public-subnet-a" }
        - { "Fn::ImportValue": !Sub "${PJPrefix}-public-subnet-c" }

### Listener HTTP ###
  ALBListenerHTTP:
    Type: "AWS::ElasticLoadBalancingV2::Listener"
    Properties:
      Port: 80
      Protocol: HTTP
      DefaultActions:
        - Type: redirect
          RedirectConfig:
            Host: '#{host}'
            Path: '/#{path}'
            Port: 443
            Protocol: HTTPS
            Query: '#{query}'
            StatusCode: HTTP_301
      LoadBalancerArn: !Ref ALB

### Listener HTTPS ###
  ALBListenerHTTPS:
    Type: AWS::ElasticLoadBalancingV2::Listener
    Properties:
      Port: 443
      Protocol: HTTPS
      Certificates:
        - CertificateArn: !Ref ACM
      DefaultActions:
        - TargetGroupArn: !Ref TargetGroup
          Type: forward
      LoadBalancerArn: !Ref ALB


# ------------------------------------------------------------
# Route53
# ------------------------------------------------------------
  HostedZone:
    Type: AWS::Route53::HostedZone
    Properties:
      Name: !Ref HostedZoneName
      HostedZoneTags:
      - Key: Name
        Value: !Sub "${PJPrefix}-cfn-hostedzone"

  DNSRecord:
    Type: AWS::Route53::RecordSet
    Properties:
      HostedZoneId: !Sub '${HostedZone}'
      Comment: "alias to alb"
      Name: !Sub '${SubDomain}'
      Type: A
      AliasTarget:
        HostedZoneId: !GetAtt 'ALB.CanonicalHostedZoneID'
        DNSName: !GetAtt 'ALB.DNSName'


# ------------------------------------------------------------
# ACM
# ------------------------------------------------------------
  ACM:
    Type: AWS::CertificateManager::Certificate
    Properties:
      DomainName: !Sub '${SubDomain}'
      DomainValidationOptions:
        - DomainName: !Sub '${SubDomain}'
          HostedZoneId: !Sub '${HostedZone}'
      ValidationMethod: DNS


# ------------------------------------------------------------
# Output Parameter
# ------------------------------------------------------------
Outputs:
### EC2 ###
  EC2WebA:
    Value: !Ref EC2WebA
    Export:
      Name: !Sub "${PJPrefix}-web-server-1a"
  EC2WebC:
    Value: !Ref EC2WebC
    Export:
      Name: !Sub "${PJPrefix}-web-server-1c"
##3.1 EC2テンプレートのビルド
作成したCFnテンプレートのビルドを行います。
以下コマンドを実行してください。
※ スタック名やプレフィックス、また追加で指定したいパラメータ等があればご自身の環境に合わせ修正して下さい。
$ aws cloudformation create-stack \
--stack-name web2tier-Server-stack \
--template-body file://./server.yml \
--parameters ParameterKey=KeyName,ParameterValue=<<キーペア名>> \
ParameterKey=PJPrefix,ParameterValue=web2tier
↓ 構文エラーが無ければ、以下のような結果が出力されます。
{
    "StackId": "arn:aws:cloudformation:ap-northeast-1:xxxxxxx:stack/<スタックネーム>/<メタ番号>"
}
##3.2 ドメインプロパイダーへのNSの登録
Route53にてホストゾーンを作成しただけでは、名前解決はできません。
ドメインを発行しているプロパイダーにて、Route53にて発行されたNSレコードを登録する必要があります。
この手順に関しては、流石にCFnでは実行できず、手動にて行う必要があります。
申し訳ありませんが、本記事ではIaCにおける環境構築に焦点を当てているので、プロパイダーへのNSレコードの登録手順は省かさせていただきます。
しかし、Googleで「Route53 <ドメインプロパイダー名> NSレコード登録」等で検索をかけると同手順が腐るほどでてきますので、そちらをご覧になってくださればと思います。
##3.3 ACMでの証明書のDNS検証
CFnビルド後、DNSプロパイダーへNSレコードの追加。
ここまで行ってもまだ、作業は完了しません。
ACMにて発行した証明書のDNS検証が終わらないとHTTPS通信ができない為、検証が終わるのを待つという作業があります。
CFnビルド時点で、ACMでのDNS検証は自動で始まるので、本当にただひたすら待つだけです(笑)
大体15~30分程で検証は終わりますので、気長に待ちましょう。
#4. 動作確認 - Webサーバのテストページの閲覧
ここで一度動作確認を行います。
完了要件の一つである以下を確認します。
・Webサーバのテストページの閲覧
具体的には、ホストゾーンへ登録したドメインをブラウザへ打ち込み、Webサーバにて設定したテストページが閲覧します。
また、リロードを繰り返し、ALBに負荷分散が行われているかも確認します。
早速確認してみましょう。
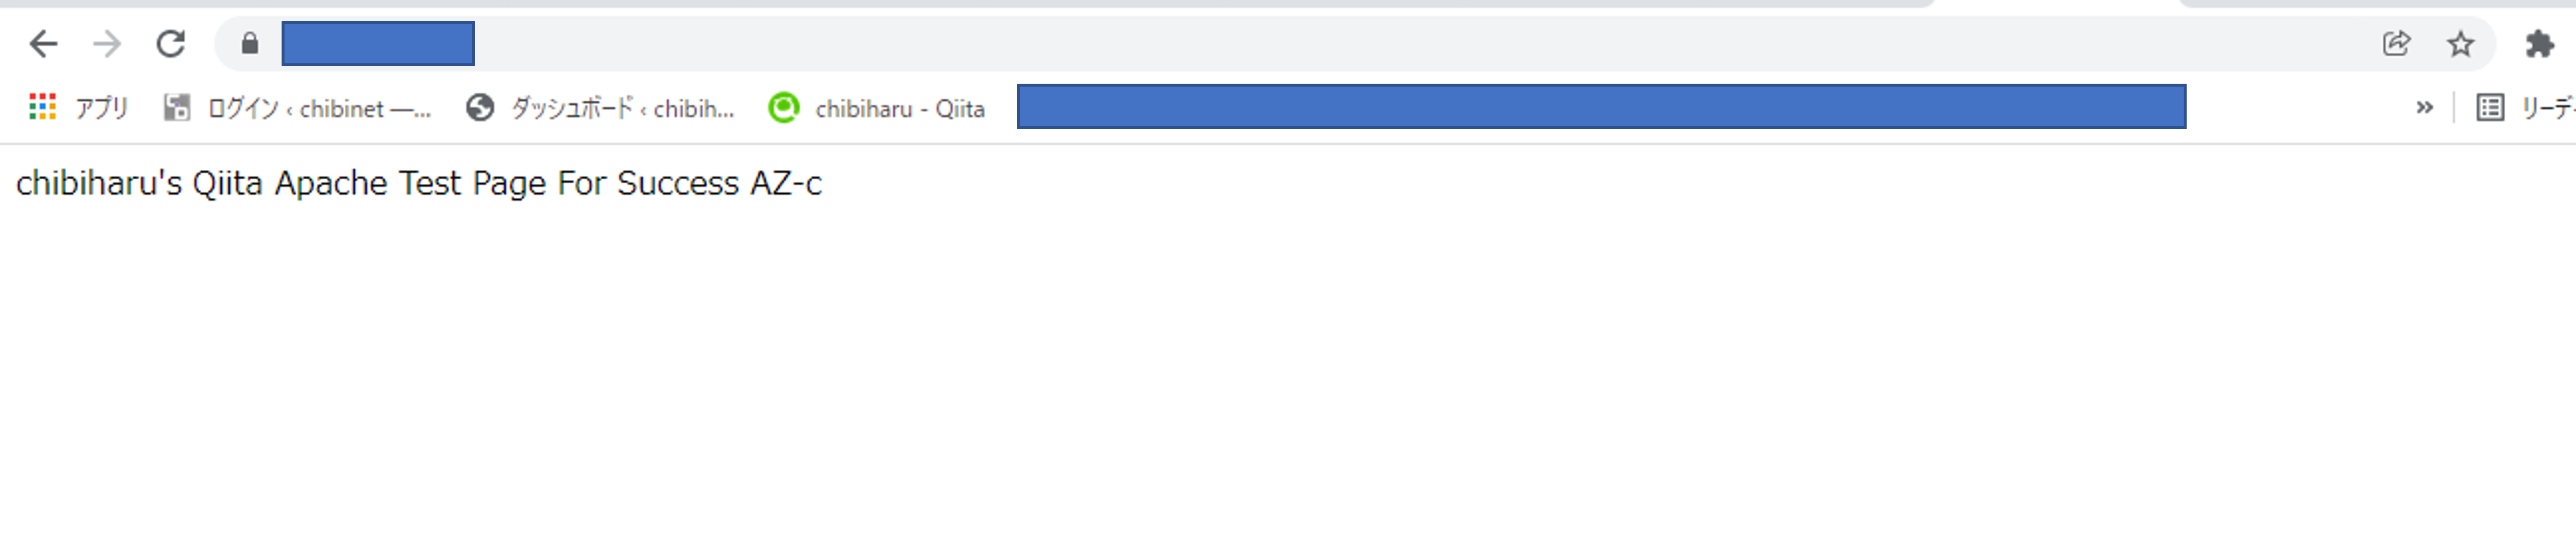
以下ページが表示され、リロードを繰り返し、"a"と"c"の表記が変動すること、またWebページが暗号化されていることが確認できれば、動作確認はクリアとなります!
● AZ-a

● AZ-c
#5. まとめ
今回の記事にて、Web環境におけるサーバ群のデプロイが完了しました。
たったこれだけの作業で、サーバ構築が行えてしまうのですから、やはりIaCは偉大としか言いようがありません。
個人的な見解ですが、将来的にはインフラ構築も全てコード管理されていくのではないかと予想しています。
(CFnが主流になるとは限りませんが..)
次回の記事は、データベース(RDS)編となります。
お楽しみにしていてください。
--- 記事一覧 ---
①【AWS】CloudFormationでWebサービスを構築①(NW編)
②【AWS】CloudFormationでWebサービスを構築②(EC2編)
③【AWS】CloudFormationでWebサービスを構築③(RDS編)