はじめに
先日GoogleのAPIを使う際に見落としでNot FoundエラーとBad Requestのエラーがありましたので、メモとしてまとめます。
Googleのコンソールからプロジェクト作成
API認証情報の作成
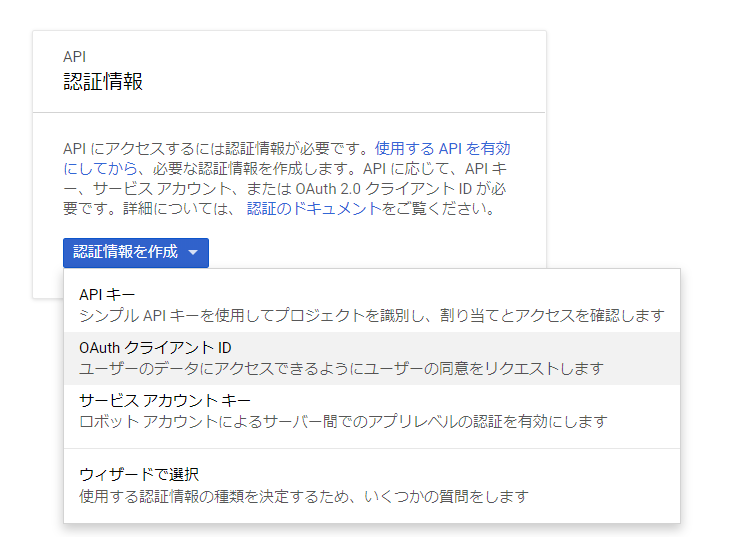
1. OAuthクライアントID
利用者は画面から認可同意を行う場合はこちらを選択
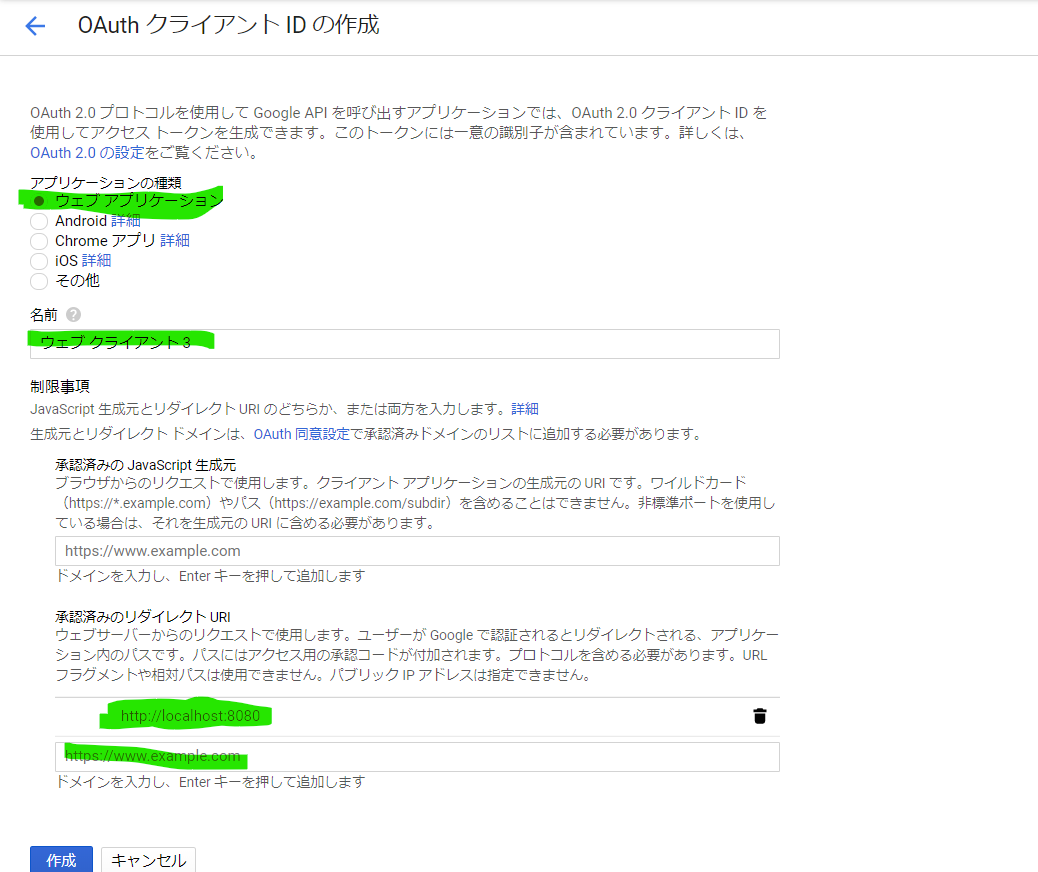
アプリケーション種類、名前、承認済みのリダイレクトURIは3つは入力すると、クライアント ID、クライアント シークレットを生成されました。
2. サービスアカウントキー
画面操作不要で裏でJSON形式でアクセストークンを取得。バッチなどの処理の場合はこちらを選択
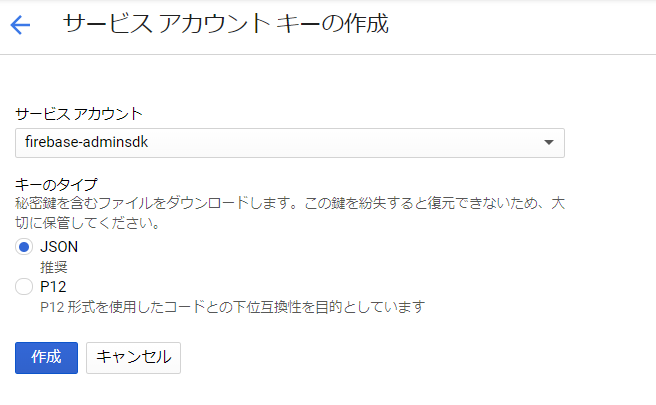
JSON形式でファイルをダウンロードする
※APIのClientのライブラリを利用して通信
https://developers.google.com/api-client-library/java/google-api-java-client/oauth2
認可コードの取得
クライアント、スコップを設定してURLからアクセス
https://accounts.google.com/o/oauth2/v2/auth?
 scope=https%3A%2F%2Fwww.googleapis.com%2Fauth%2Fdrive.metadata.readonly&
 access_type=offline&
 include_granted_scopes=true&
 redirect_uri=http%3A%2F%2localhost:8080&
 response_type=code&
 client_id=上記で取得したクライアントID
Google側に同意すると、URLから認可コードを取得できます。
http://localhost:8080/?code=xxxxxxxxxxxx&scope=yyyyyyyyyyy
※1 scopeは下記のURLに確認できます。
https://developers.google.com/identity/protocols/googlescopes
※2 redirect_uriは設定した承認済みのリダイレクトURI
※3 access_typeはonline、offlineを設定可能。offline + 初回目の場合のみToken APIをアクセスするとrefresh_tokenをもらえる。
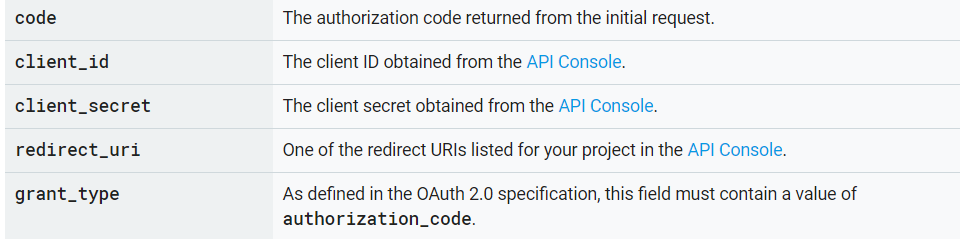
アクセストークンの取得
仕様
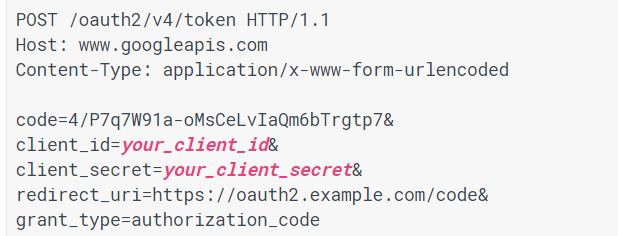
ポイント1:POSTメソッド。GETメソッドだとNG
ポイント2:ヘッダーに「Content-Type: application/x-www-form-urlencoded」を設定。設定しないまたはJSONを設定するとNG。
サンプルコード
        String url = "https://oauth2.googleapis.com/token";

		CloseableHttpClient httpclient = HttpClients.createDefault();

		HttpPost request = new HttpPost(url);
		List<BasicNameValuePair> parameters = new ArrayList<BasicNameValuePair>();
		parameters.add(new BasicNameValuePair("code", authorizationCode)); //上記取得した認可コード
		parameters.add(new BasicNameValuePair("client_id", oAuthClientId)); //コンソールにAPI認証情報のクライアントID
		parameters.add(new BasicNameValuePair("client_secret", oAuthClientSecret)); //コンソールにAPI認証情報のクライアントシークレット
		parameters.add(new BasicNameValuePair("redirect_uri", "http://localhost:8080")); //設定した承認済みのリダイレクトURI
		parameters.add(new BasicNameValuePair("grant_type", "authorization_code")); //固定

		HttpEntity entity = new UrlEncodedFormEntity(parameters);
		request.setEntity(entity);

		request.setHeader("Content-Type", "application/x-www-form-urlencoded");

		CloseableHttpResponse response = httpclient.execute(request);
		if (response.getStatusLine().getStatusCode() == HttpStatus.SC_OK) {
		    String result = EntityUtils.toString(response.getEntity(), "UTF-8");
		    System.out.println(result);
		}
		response.close();
レスポンスのフィールド:
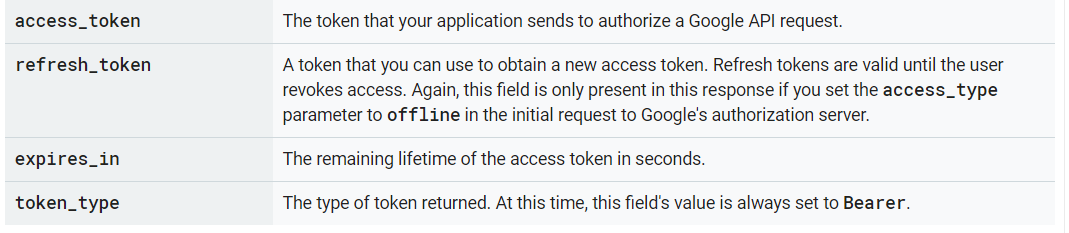
ここまでアクセストークンが取得できましたので、Googleからデータ取得はできます。
ヘッダーにアクセストークンを設定する例です。
curl -H "Authorization: Bearer <access_token>" https://www.googleapis.com/drive/v2/files
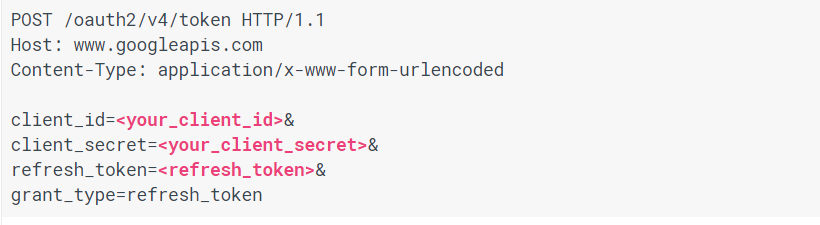
リフレッシュトークンを使ってアクセストークン更新
アクセストークンが期限あります。一定期間(60分)を経過すると、無効になります。このとき、再度認可コードを取得してもよいのですが、
利用者に面倒なので、リフレッシュトークンを使ってアクセストークン再発行するのは一般的です。
仕様
アクセストークンと同じ感じです。

サンプルコード
        String url = "https://oauth2.googleapis.com/token";

		HttpPost request = new HttpPost(url);
		List<BasicNameValuePair> parameters = new ArrayList<BasicNameValuePair>();
		parameters.add(new BasicNameValuePair("refresh_token", "xxxxxxx")); //もっているリフレッシュトークン
		parameters.add(new BasicNameValuePair("client_id", oAuthClientId)); //コンソールにAPI認証情報のクライアントID
		parameters.add(new BasicNameValuePair("client_secret", oAuthClientSecret)); //コンソールにAPI認証情報のクライアントシークレット
		parameters.add(new BasicNameValuePair("redirect_uri", "http://localhost:8080")); //設定した承認済みのリダイレクトURI
		parameters.add(new BasicNameValuePair("grant_type", "refresh_token")); //固定

		HttpEntity entity = new UrlEncodedFormEntity(parameters);
		request.setEntity(entity);

		request.setHeader("Content-Type", "application/x-www-form-urlencoded");

		CloseableHttpClient httpclient = HttpClients.createDefault();
		CloseableHttpResponse response = httpclient.execute(request);
		if (response.getStatusLine().getStatusCode() == HttpStatus.SC_OK) {
		    String result = EntityUtils.toString(response.getEntity(), "UTF-8");
		    System.out.println(result);
		}
		response.close();
レスポンス例です。
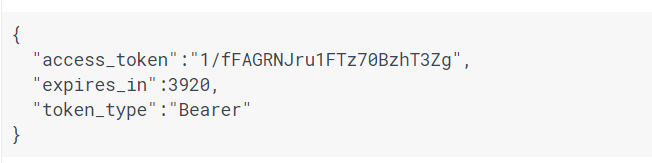
サンプルの通り、リフレッシュトークンがないので、リフレッシュトークンも無効になったら、認可コード取得からやり直すとなります。
参考URL:https://developers.google.com/identity/protocols/OAuth2WebServer
以上