初めに
OpenVINOで推論してみた第二回になります。前回の記事で顔検出をやりましたが、それを使って今度は顔認識を行っていきます。今回は年齢と性別を判定するものですね!
それでは早速やっていきます!!
今回も最後に使った全コードを載せておきますので説明等不要な方はとりあえず実装してみてくださいね!!
実行環境
windows10
OpenVINO toolkit 2021.4.752
OpenVINO 2021.4.2
python 3.6
opencv 3.4.2
age-gender-recognition-retail-0013
モデル詳細
githubはこちらになります。
Use Case and High-Level Description
Fully convolutional network for simultaneous Age/Gender recognition. The network is able to recognize age of people in [18, 75] years old range, it is not applicable for children since their faces were not in the training set.
18歳から75歳までの人を判別できるみたいですね、子供の顔のデータセットがないため、それ以下の人は無理みたいです。さすがのAIでもデータがなければどうしようもないですからね。。。
今回特にどんなモデルを使っているのかの説明はないので詳細説明は書いてあるそのままになります。
Specification
| Metric | Value |
|---|---|
| Rotation in-plane | ±45˚ |
| Rotation out-of-plane | Yaw: ±45˚ / Pitch: ±45˚ |
| Min object width | 62 pixels |
| GFlops | 0.094 |
| MParams | 2.138 |
| Source framework | Caffe* |
仕様ですが、こんなもんかあと流してみてもらえれば大丈夫だと思います。
判別できる顔の角度と顔の大きさが書いてあります。
GFlopsも大きくないのでサクサク動くと思います。
frameworkはCaffeですね。
Accuracy
| Metric | Value |
|---|---|
| Avg. age error | 6.99 years |
| Gender accuracy | 95.80% |
年齢の誤差が6.99年で性別判定の精度は95.8%とさすがの高性能ですね!!
Inputs
Image, name: input, shape: 1, 3, 62, 62 in 1, C, H, W format, where:
C - number of channels
H - image height
W - image width
Expected color order is BGR.
今回の入力は人の顔画像になります。書いてあることは前回とさほど変わらないので省略します。
ただ、OpenVINOのモデルは入力の名称がgithubに書いてあるものと違うことが多々あるので実装の時に確認しようと思います。
Outputs
Name: age_conv3, shape: 1, 1, 1, 1 - Estimated age divided by 100.
Name: prob, shape: 1, 2, 1, 1 - Softmax output across 2 type classes [0 - female, 1 - male].
今回の出力は年齢と性別の二つです。年齢は100で割ったもので、性別はsoftmax出力になっていますね。
それでは張り切って実装行きましょう!
実装
ディレクトリ構造
openvino/
├─ models/
├─ age-gender-recognition-retail-0013/
   ├─ intel/
      ├─ face-detection-0200/
         ├─ FP16/
         ├─ FP16-INT8/
         ├─ FP32/
            ├─ face-detection-0200.bin
            ├─ face-detection-0200.xml
      ├─ age-gender-recognition-retail-0013/
         ├─ FP16/
         ├─ FP16-INT8/
         ├─ FP32/
            ├─ age-gender-recognition-retail-0013.bin
            ├─ age-gender-recognition-retail-0013.xml
   ├─ age-gender-recognition-retail-0013.py
   ├─ input_image.jpg
age-gender-recognition-retail-0013.py
顔認識で顔画像を入れて年齢と性別を判定してもらうのもいいのですがそれだけでは味気ないので、前回使用した顔検出モデルの出力を使って判別をしていきたいと思います。
モデルの読み込み
流れは前回と変わりないのでモデルの読み込みをしていきます。
前回はそのまま読み込みをしましたが今回はモデルの詳細を出力するように作っていきます。使うモデルも二つになってます。
import cv2
from openvino.inference_engine import IECore
import numpy as np
import time

# read module
ie = IECore()

# ***** detection model *****
# read IR model
model1 = './intel/face-detection-retail-0004/FP32/face-detection-retail-0004'
net1 = ie.read_network(model=model1+'.xml', weights=model1+'.bin')

# print model data
input_blob_name  = list(net1.inputs.keys())
output_blob_name = list(net1.outputs.keys())

print("input_blob_name: {}".format(input_blob_name))
print("output_blob_name: {}".format(output_blob_name))

batch,channel,height,width = net1.inputs[input_blob_name[0]].shape

print("input shape: {} x {}".format(height, width))
print("input channel: {}".format(channel))

# select target device
exec_net1 = ie.load_network(network=net1, device_name='CPU', num_requests=1)

# ***** recognition model *****
# read IR model
model2 = './intel/age-gender-recognition-retail-0013/FP32/age-gender-recognition-retail-0013'
net2 = ie.read_network(model=model2+'.xml', weights=model2+'.bin')

# print model data
input_blob_name  = list(net2.inputs.keys())
output_blob_name = list(net2.outputs.keys())

print("input_blob_name: {}".format(input_blob_name))
print("output_blob_name: {}".format(output_blob_name))

batch,channel,height,width = net2.inputs[input_blob_name[0]].shape

print("input shape: {} x {}".format(height, width))
print("input channel: {}".format(channel))

# select target device
exec_net2 = ie.load_network(network=net2, device_name='CPU', num_requests=1)
前回のとほとんど同じですね!量は二倍になってますが、。あとはモデル情報をそれぞれ出力しているだけです。
出力は以下のようになっています。
input_blob_name: ['data']
output_blob_name: ['detection_out']
input shape: 300 x 300
input channel: 3
input_blob_name: ['data']
output_blob_name: ['age_conv3', 'prob']
input shape: 62 x 62
input channel: 3
githubと比較してみると、input_name以外は同じですね。入力の時だけ気を付ければ問題なさそうです。
input
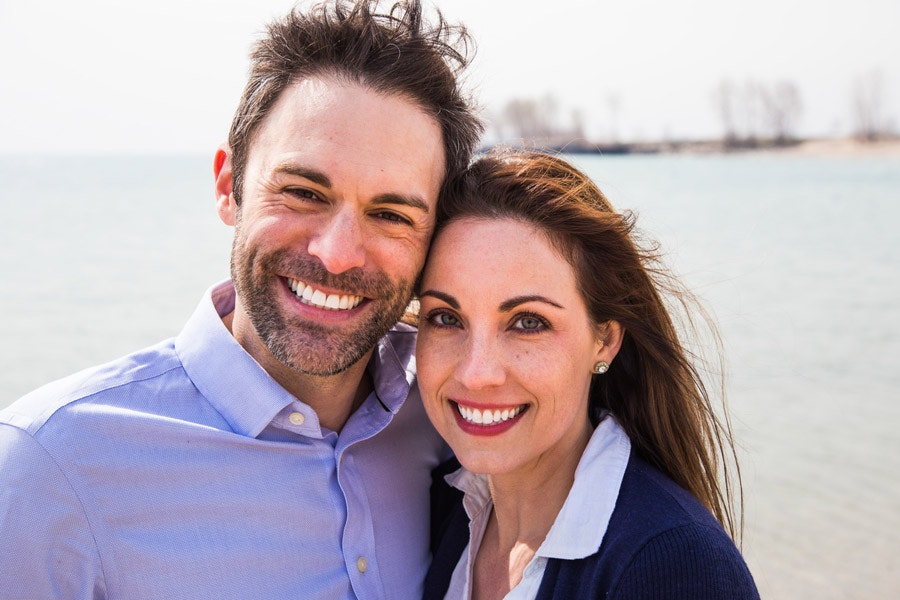
こちらも前回と同じ画像を使っていきます。
顔検出の部分は前回のコードをそのまま使っていきます。
frame = cv2.imread('input_image.jpg')
img = cv2.resize(frame, (width, height))
img = img.transpose((2, 0, 1))
img = img.reshape((1, channel, height, width))

# inference (face)
out = exec_net.infer(inputs={'image': img})
out = out['detection_out']
out = np.squeeze(out)
# detection process
for detection in out:
    # conf value
    confidence = float(detection[2])

    # outputs rect
    if confidence > 0.6:
        # translate box into image
        xmin = int(detection[3] * frame.shape[1])
        ymin = int(detection[4] * frame.shape[0])
        xmax = int(detection[5] * frame.shape[1])
        ymax = int(detection[6] * frame.shape[0])

        # adjustment
        if xmin < 0:
            xmin = 0
        if ymin < 0:
            ymin = 0
        if xmax > frame.shape[1]:
            xmax = frame.shape[1]
        if ymax > frame.shape[0]:
            ymax = frame.shape[0]
顔認識モデルへの入力はこの画像の顔部分、このxmin, ymin, xmax, ymaxなのでこの四点で画像をトリミングします。
ここから先のコードは全部if confidence > 0.6:の条件文の中のものなのでインデントにご注意ください。
face = frame[ymin: ymax, xmin: xmax]
そのあとの処理は一つ目のモデルと同じなのでパパっとやっちゃいましょう!ここでもgithubとinput_nameが違うので注意しましょう。
face = cv2.resize(face, (62, 62))
face = face.transpose((2, 0, 1))
face = face.reshape((1, 3, 62, 62))
out = exec_net2.infer(inputs={'data': face})
print(out)

>>>
{'age_conv3': array([[[[0.41843498]]]], dtype=float32), 'prob': array([[[[0.0455569]],

        [[0.9544431]]]], dtype=float32)}
{'age_conv3': array([[[[0.2380444]]]], dtype=float32), 'prob': array([[[[0.97024095]],

        [[0.02975903]]]], dtype=float32)}
年齢のほうは先ほど確認したように100で割った値が出力されているので100をかけてあげましょう。
また、性別はsoftmax出力になっていることがわかりますね!この出力はただ単に大きいほうを採用すればよいです。インデックスの0が女性で1が男性です。
Name: prob, shape: 1, 2, 1, 1 - Softmax output across 2 type classes [0 - female, 1 - male].
age = int(np.squeeze(out['age_conv3']) * 100)
prob = np.squeeze(out['prob'])
if prob[0] > prob[1]:
    sex = "female"
else:
    sex = "male"
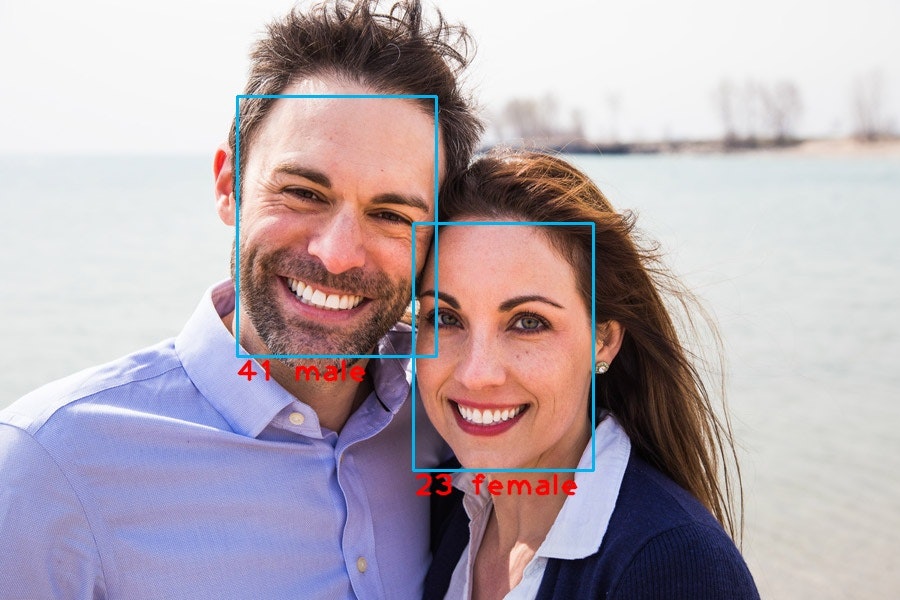
あとはこれを表示して終了になります。
cv2.rectangle(frame, (xmin, ymin), (xmax, ymax),
    color=(240, 180, 0), thickness=2)

cv2.putText(frame,
    text=f"{age} {sex}",
    org=(xmin, ymax+25),
    fontFace=cv2.FONT_HERSHEY_PLAIN,
    fontScale=2.0,
    color=(0, 0, 255),
    thickness=2,
    lineType=cv2.LINE_AA)
cv2.imwrite('output.jpg', frame)
全コード
こちらに記述しているコードは画像を保存ではなく表示するものになっております。また、comment outと書いてある部分のコメントアウトを外すとカメラでのストリーミングもできるようにしておりますのでやってみてください。
import cv2
from openvino.inference_engine import IECore
import numpy as np
import time

# read module
ie = IECore()

# ***** detection model *****
# read IR model
model1 = './intel/face-detection-retail-0004/FP32/face-detection-retail-0004'
net1 = ie.read_network(model=model1+'.xml', weights=model1+'.bin')

# print model data
input_blob_name  = list(net1.inputs.keys())
output_blob_name = list(net1.outputs.keys())

print("input_blob_name: {}".format(input_blob_name))
print("output_blob_name: {}".format(output_blob_name))

batch,channel,height,width = net1.inputs[input_blob_name[0]].shape

print("input shape: {} x {}".format(height, width))
print("input channel: {}".format(channel))

# select target device
exec_net1 = ie.load_network(network=net1, device_name='CPU', num_requests=1)

# ***** recognition model *****
# read IR model
model2 = './intel/age-gender-recognition-retail-0013/FP32/age-gender-recognition-retail-0013'
net2 = ie.read_network(model=model2+'.xml', weights=model2+'.bin')

# print model data
input_blob_name  = list(net2.inputs.keys())
output_blob_name = list(net2.outputs.keys())

print("input_blob_name: {}".format(input_blob_name))
print("output_blob_name: {}".format(output_blob_name))

batch,channel,height,width = net2.inputs[input_blob_name[0]].shape

print("input shape: {} x {}".format(height, width))
print("input channel: {}".format(channel))

# select target device
exec_net2 = ie.load_network(network=net2, device_name='CPU', num_requests=1)

"""comment out
# set video
# cap = cv2.VideoCapture(0)
# cap.set(cv2.CAP_PROP_BUFFERSIZE, 1)
"""

while(True):
    start_time = time.time()

    """comment out
    ret, frame = cap.read()
    # このコメントアウトを外した際は一つ下のコードのframe = cv2.imread('test.jpg')は消してください。
    """
    frame = cv2.imread('input_image.jpg')
    img = cv2.resize(frame, (300, 300))
    img = img.transpose((2, 0, 1))
    img = img.reshape((1, 3, 300, 300))

    # inference (face)
    out = exec_net1.infer(inputs={'data': img})
    out = out['detection_out']
    out = np.squeeze(out)
    # detection process
    for detection in out:
        # conf value
        confidence = float(detection[2])

        # outputs rect
        if confidence > 0.6:
            # translate box into image
            xmin = int(detection[3] * frame.shape[1])
            ymin = int(detection[4] * frame.shape[0])
            xmax = int(detection[5] * frame.shape[1])
            ymax = int(detection[6] * frame.shape[0])

            # adjustment
            if xmin < 0:
                xmin = 0
            if ymin < 0:
                ymin = 0
            if xmax > frame.shape[1]:
                xmax = frame.shape[1]
            if ymax > frame.shape[0]:
                ymax = frame.shape[0]

            # recognition phase
            face = frame[ymin: ymax, xmin: xmax]
            face = cv2.resize(face, (62, 62))
            face = face.transpose((2, 0, 1))
            face = face.reshape((1, 3, 62, 62))
            out = exec_net2.infer(inputs={'data': face})
            age = int(np.squeeze(out['age_conv3']) * 100)
            prob = np.squeeze(out['prob'])
            if prob[0] > prob[1]:
                sex = "female"
            else:
                sex = "male"

            cv2.rectangle(frame, (xmin, ymin), (xmax, ymax), color=(240, 180, 0), thickness=2)
            cv2.putText(frame,
                text=f"{age} {sex}",
                org=(xmin, ymax+25),
                fontFace=cv2.FONT_HERSHEY_PLAIN,
                fontScale=2.0,
                color=(0, 0, 255),
                thickness=2,
                lineType=cv2.LINE_AA)

    cv2.imshow('frame', frame)

    if cv2.waitKey(1) & 0xFF == ord('q'):
        break

""""comment out
cap.release()
"""
cv2.destroyAllWindows()
終わりに
age-gender-recognition編は終了になります。ここまで一緒にやってくださった方ありがとうございます!
今回は二つのモデルを使って入力画像から顔検出を行って年齢と性別の判定までの推論を行いました。
これができればだいぶ楽しくなったのではないでしょうか?
上のコードのcomment outを外してみれば、自分の顔でライブストリーミングができると思いますので是非やってみて、友人にでも見せてみてください。きっとすごいと言ってくれるでしょう!
次回は何をするか迷いましたが、顔識別の違うモデルか、人検出あたりをしようかなと思っています。
それではお疲れさまでした!
よい機械学習ライフを!!!!
参考
第一回の記事