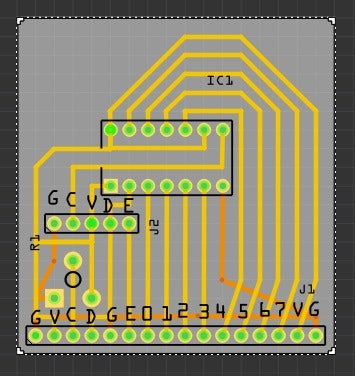
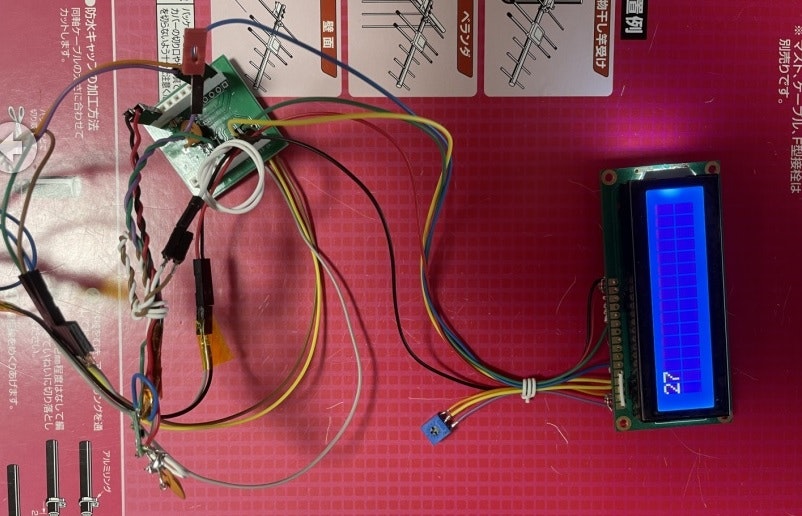
x 原因は、わからないが液晶がちらつく場合は、ウェートを調整してね!!
x SWDをGPIOとして使うから上級者用
x SWD-CLK,SWD-IOをGPIOと共有する
x Bootと共有する為、注意
x リセットを接続するか3秒以内 書き込み
目的
秋月で売っている安価なS-5851A(約110円)を使って温度を出力する。
#include <Arduino.h>
#include <Wire.h>

//*          *****  *****
//*         *       *    *
//*         *       *    *
//*         *       *    *
//*         *       *    *
//********   *****  *****

//STM32G031J6M6 i2cピンの定義
#define sdaPin PA12    // ArduinoA4
#define sclPin PA11    // ArduinoA5

#define S5851A 0x48

#define DW   digitalWrite

#define swdclk   PA14 // 8pin
#define swdio    PA13 // 7pin
//#define swdclk   PA11 // 5pin
//#define swdio    PA12 // 6pin
//#define swdclk   PA12 // 6pin
//#define swdio    PA11 // 5pin
//#define t_led1   PA12 // 6pin
//#define t_led2   PA11 // 5pin
//#define en       PA0  // 4pin
//#define in7      PB7  // 1pin
#define en      PB7  // 1pin

// tx PA14(PB6) 8PIN
// rx PC14(PB7) 1PIN

//              12345678   12345678   12345678   12345678
char b8[8] = {0b10000000,0b01000000,0b00100000,0b00010000,
              0b00001000,0b00000100,0b00000010,0b00000001 };

void seg1(int v,int rs)
{
    for(int jj=0;jj<8;jj++){
        if( (v & b8[jj]) == 0 ){
                DW(swdio,0); //ビットが0
        } else {
                DW(swdio,1); //ビットが1
        }//endif
        DW(swdclk,1);
        DW(swdclk,0);
    }//for

    DW(swdio,rs);
    DW(en,1); delay(1);  //delayMicroseconds(40);
    DW(en,0);
}//seg1

//文字列の表示 nana_seg
int ns_printf(char *str1) {

    //文字の中身がゼロか
    while(*str1){

        //一文字出力
        seg1( *str1 ++ , 1  );

    } //while

    //戻り値
    return(0);
}//ns_printf

int lcd_int[]={
  0x30,0x30,0x30,0x38,0x08,0x01,0x06,0x08+0x04
};//lcd_init

void setup() {

  delay(3000); //not Delete

  //GPIO初期化
  pinMode(swdclk,OUTPUT);
  pinMode(swdio,OUTPUT);
  pinMode(en,OUTPUT);
  DW(en,0);

  //液晶の初期化
  for(int ii=0;ii<8;ii++){
    seg1( lcd_int[ii] , 0);delay(2);
  }//for

  seg1( 0x80+0x00 , 0  ); //1ライン目にカーソルを移動
  ns_printf( "START" ); delay(500);
  seg1(   0x01  , 0  ); delay(5); //画面クリア

  //i2cの初期化
  Wire.begin(sdaPin,sclPin); //STM32G031J6M6

}

char data_read[8]; //バッファー
int  tempval;      //温度

void loop() {

  //画面クリア
  //seg1(   0x01  , 0  );
  //delay(5);

  seg1( 0x80+0x00 , 0  ); //1ライン目にカーソルを移動

  //0番目のレジスター
  Wire.beginTransmission(S5851A);
  Wire.write(0);
  Wire.endTransmission();
  delay(1);

  //温度の読み込み
  tempval = 99;
  Wire.requestFrom(S5851A, 1);
  while(Wire.available())  {    // 要求より短いデータが来る可能性あり
    tempval = (int)Wire.read(); // 1バイトを受信
  }//while
  delay(1);

  //7セグに表示する為の変換
  int s = tempval;
  int n0,n10,n100,n1000;

  n10   = s / 10;            // 1234 -> 123
  n0    = s - (n10 *10);     // 1234 -  1230 -> 4
  n100  = n10 / 10;          // 123  -> 12
  n10   = n10 - (n100 *10);  // 123  -  120 -> 3
  n1000 = n100 / 10;         // 12   -> 1
  n100  = n100 - (n1000*10); // 12   -  10  -> 2

  //画面に表示
  //data_read[0] = '0' + n1000;
  //data_read[1] = '0' + n100;
  data_read[0] = '0' + n10;
  data_read[1] = '0' + n0;
  data_read[2] = 0;
  ns_printf(data_read);

  //1秒待つ
  delay(1000);

} //loop
i2c関連
#include <Wire.h>


//STM32G031J6M6 i2cピンの定義
#define sdaPin PA12    // ArduinoA4
#define sclPin PA11    // ArduinoA5

#define S5851A 0x48


  //i2cの初期化
  Wire.begin(sdaPin,sclPin); //STM32G031J6M6


char data_read[8]; //バッファー
int  tempval;      //温度


  //0番目のレジスター
  Wire.beginTransmission(S5851A);
  Wire.write(0);
  Wire.endTransmission();
  delay(1);

  //温度の読み込み
  tempval = 99;
  Wire.requestFrom(S5851A, 1);
  while(Wire.available())  {    // 要求より短いデータが来る可能性あり
    tempval = (int)Wire.read(); // 1バイトを受信
  }//while
  delay(1);

  //7セグに表示する為の変換
  int s = tempval;
  int n0,n10,n100,n1000;

  n10   = s / 10;            // 1234 -> 123
  n0    = s - (n10 *10);     // 1234 -  1230 -> 4
  n100  = n10 / 10;          // 123  -> 12
  n10   = n10 - (n100 *10);  // 123  -  120 -> 3
  n1000 = n100 / 10;         // 12   -> 1
  n100  = n100 - (n1000*10); // 12   -  10  -> 2

  //画面に表示
  //data_read[0] = '0' + n1000;
  //data_read[1] = '0' + n100;
  data_read[0] = '0' + n10;
  data_read[1] = '0' + n0;
  data_read[2] = '.';
  data_read[3] = 0;
  ns_printf(data_read);

  //1秒待つ
  delay(1000);

