はじめに
執筆者は元々AWSを勉強していたのだが、諸事情でAzureを勉強する必要が出て来た。Azureに関する記事がAWSより少ないと思うので、Azure Learnでやったことをスクリーンショット共に
備忘録として残したい。
手順
こちらの教材を使用。
Azure portalでLinux 仮想マシンを作成する
新しいLinux仮想マシンを作成する
リソースの作成を選択する。

検索ボックスにUbuntu Serverを入力する。
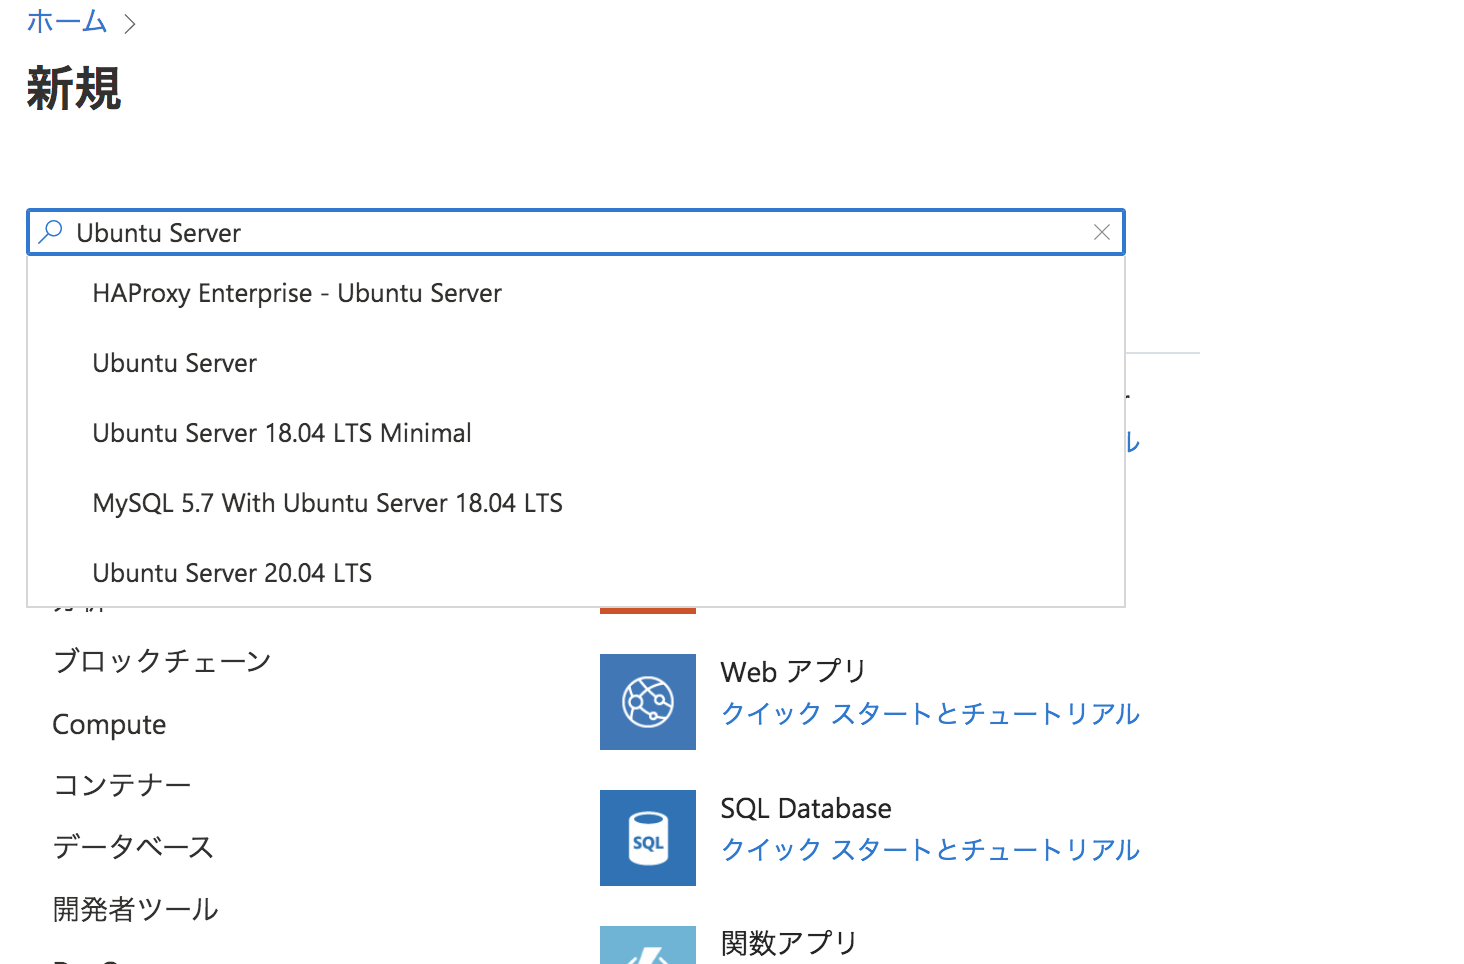
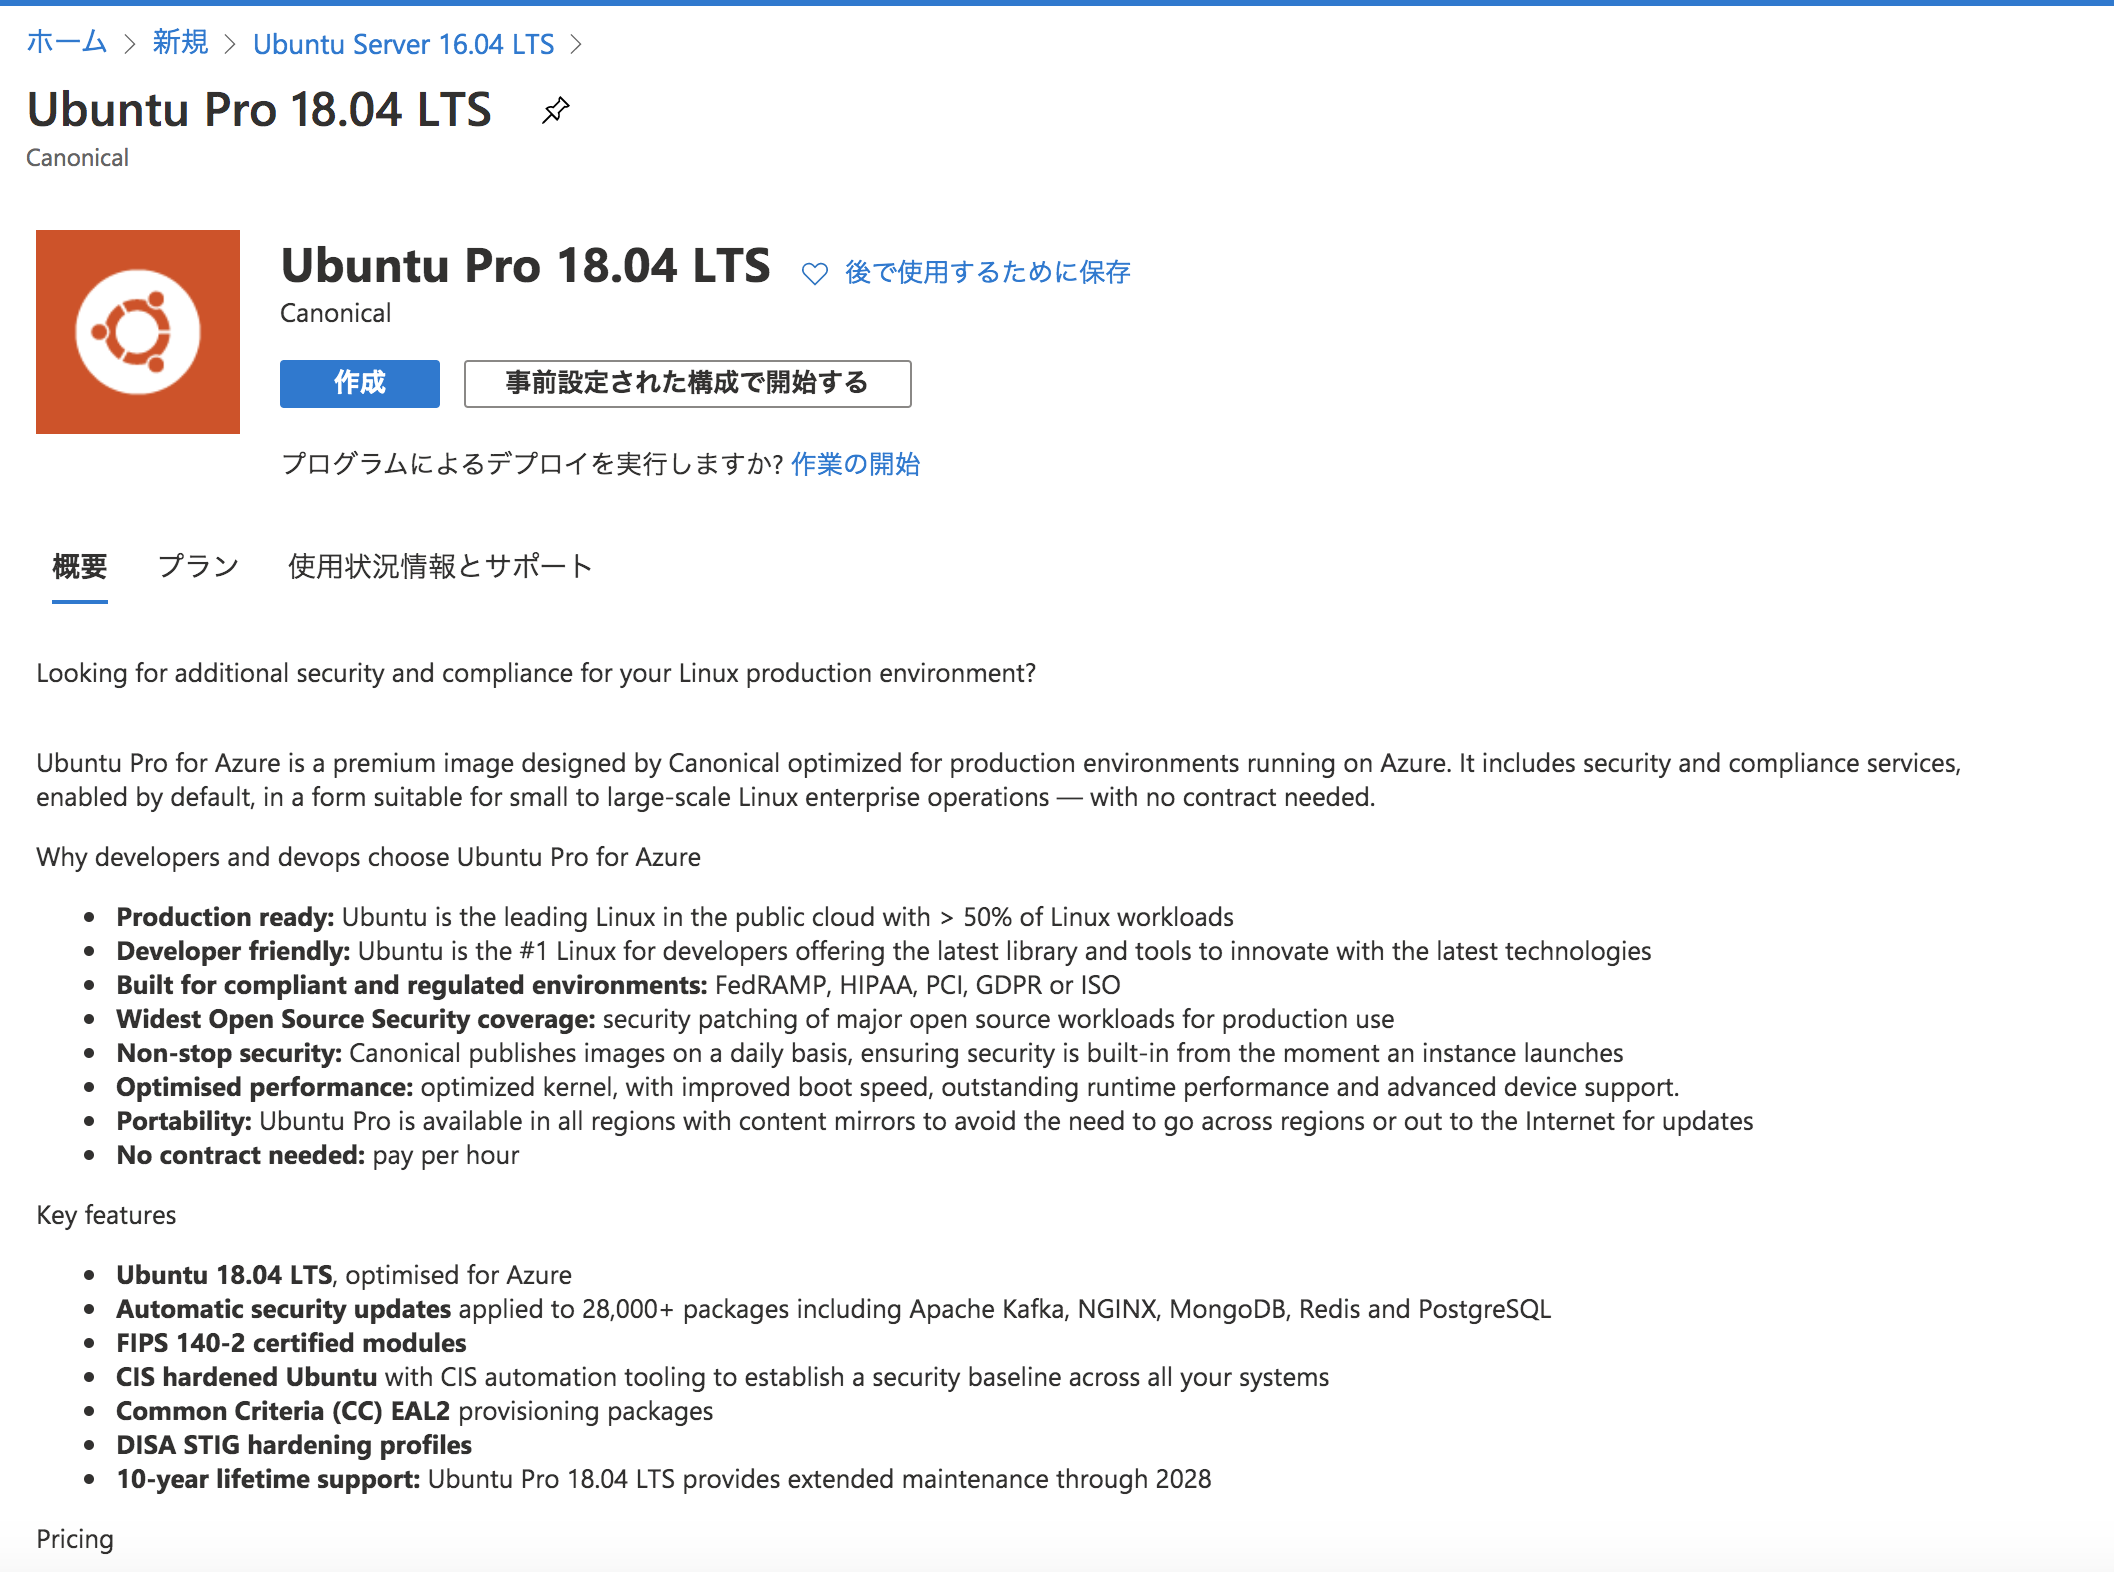
Ubuntu Server 18.04 LTS Canonicalを選択する。
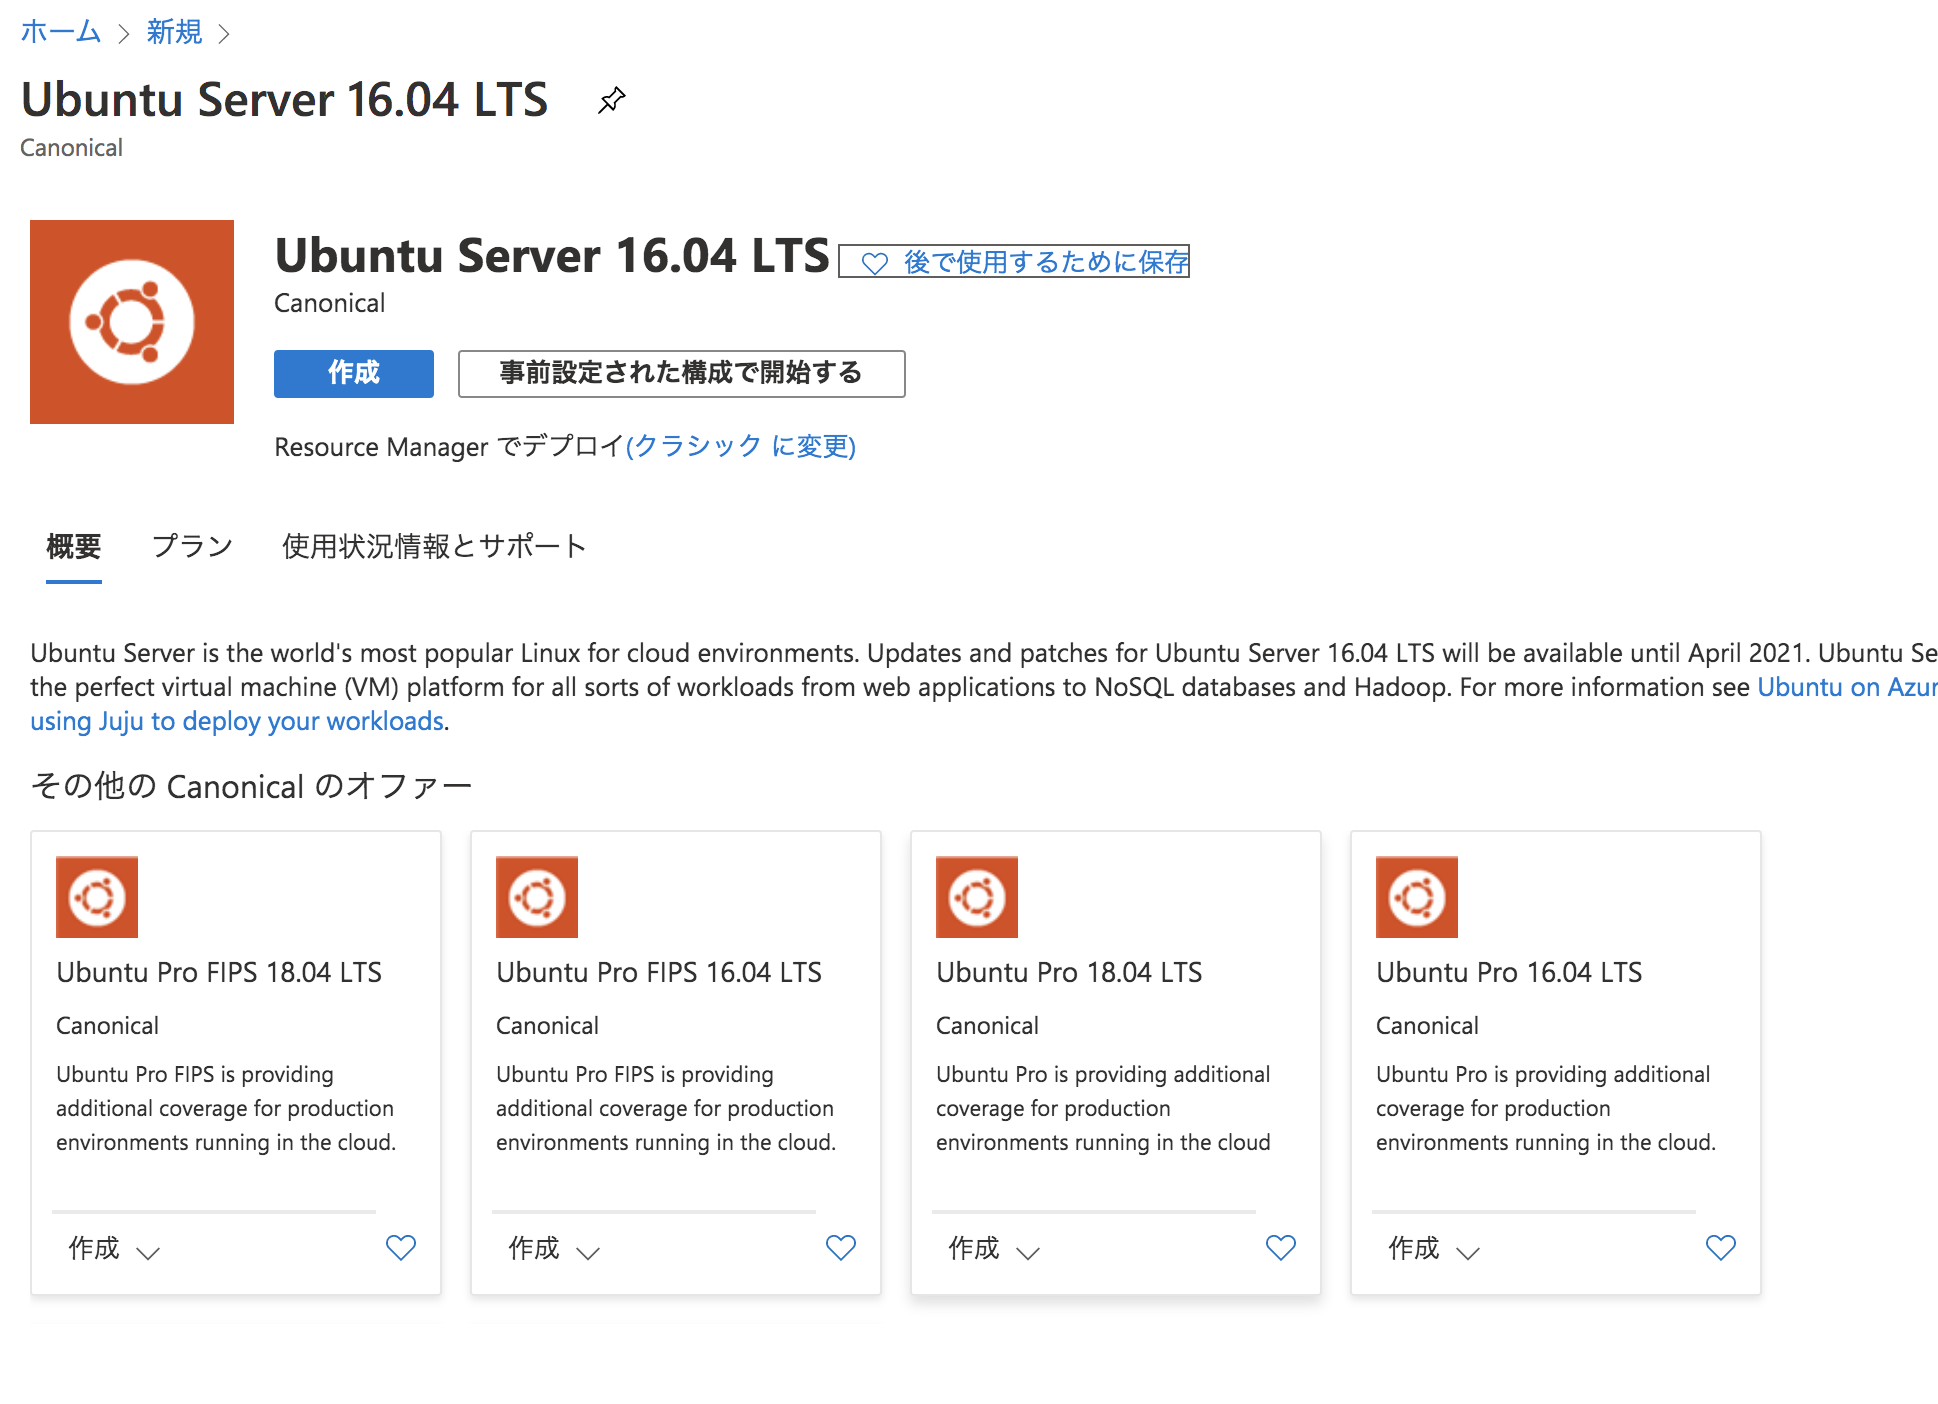
作成ボタンを押す。
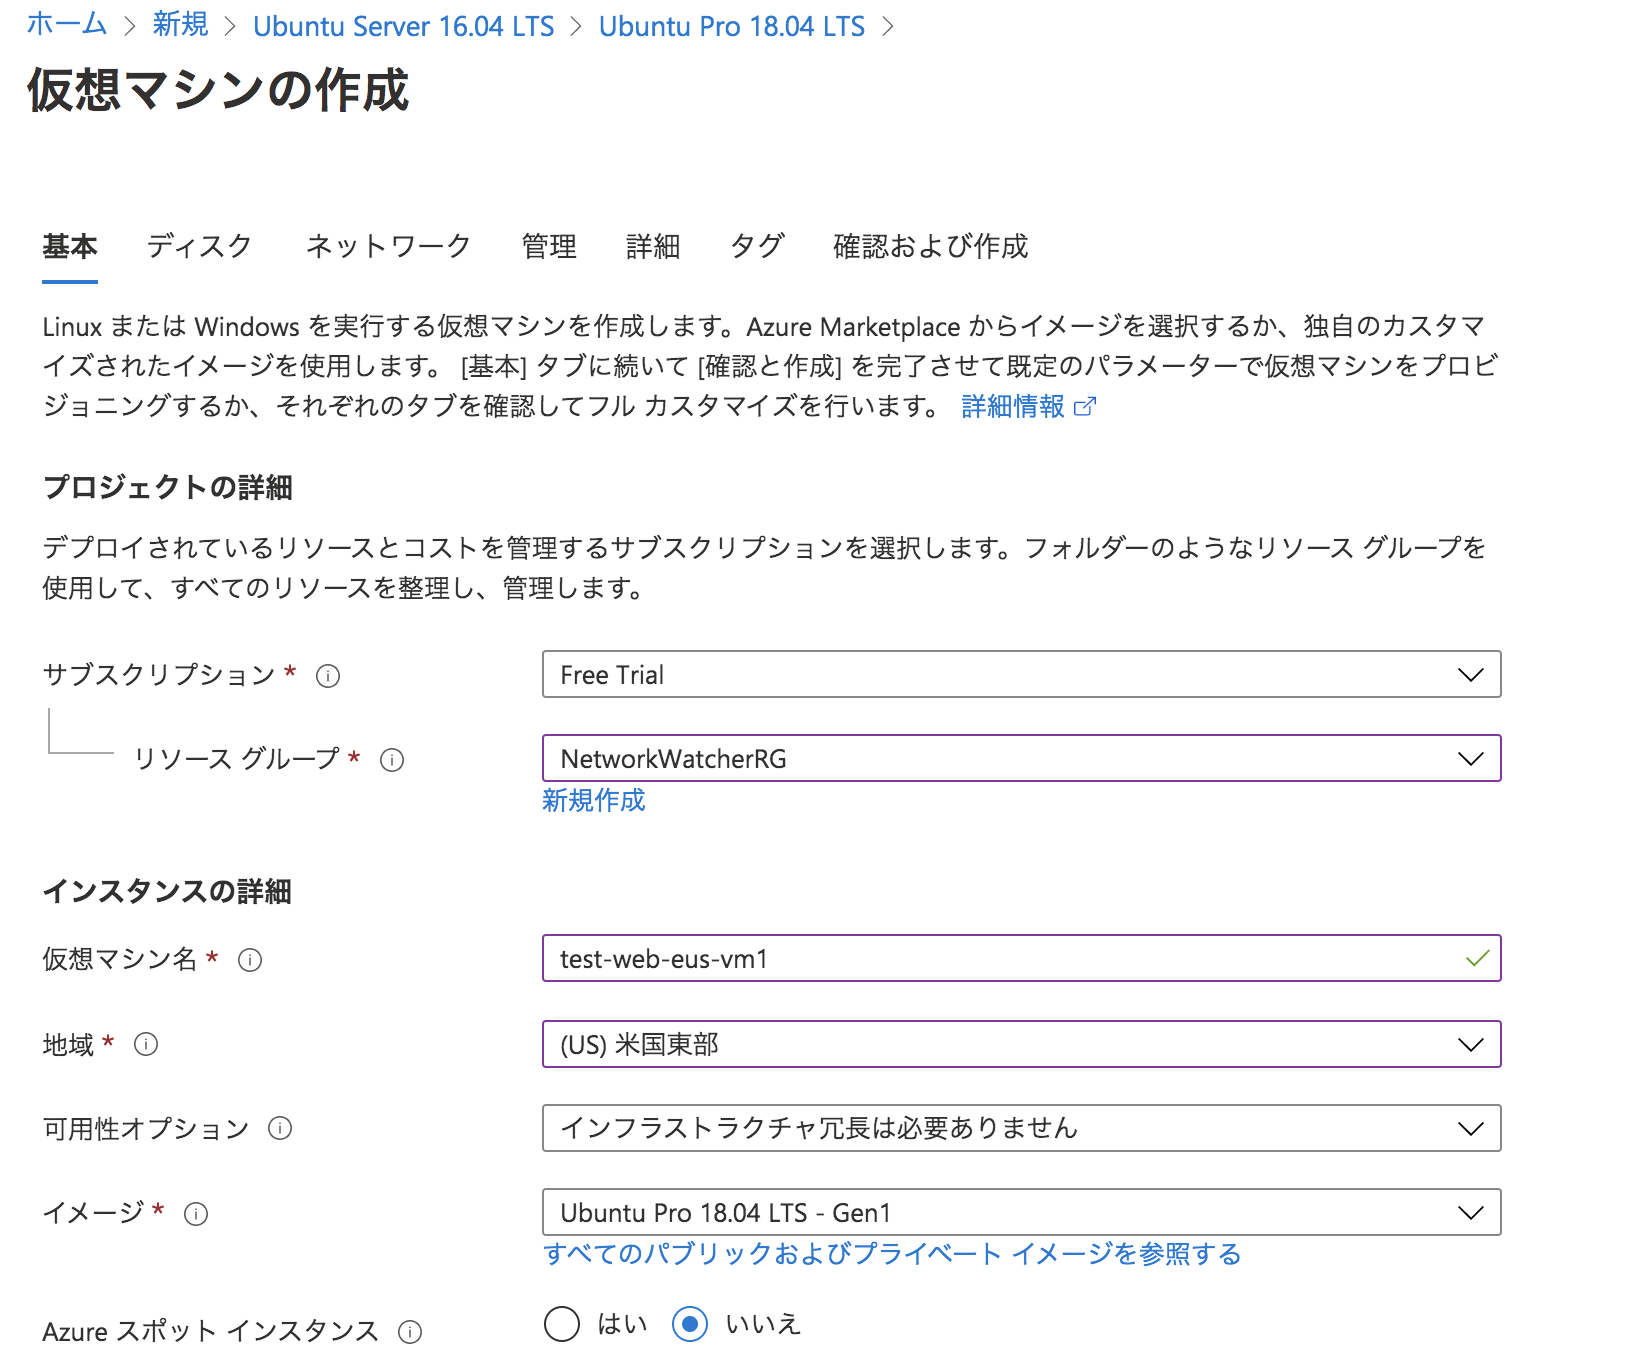
詳細を適宜設定。今回は画像のように設定した。
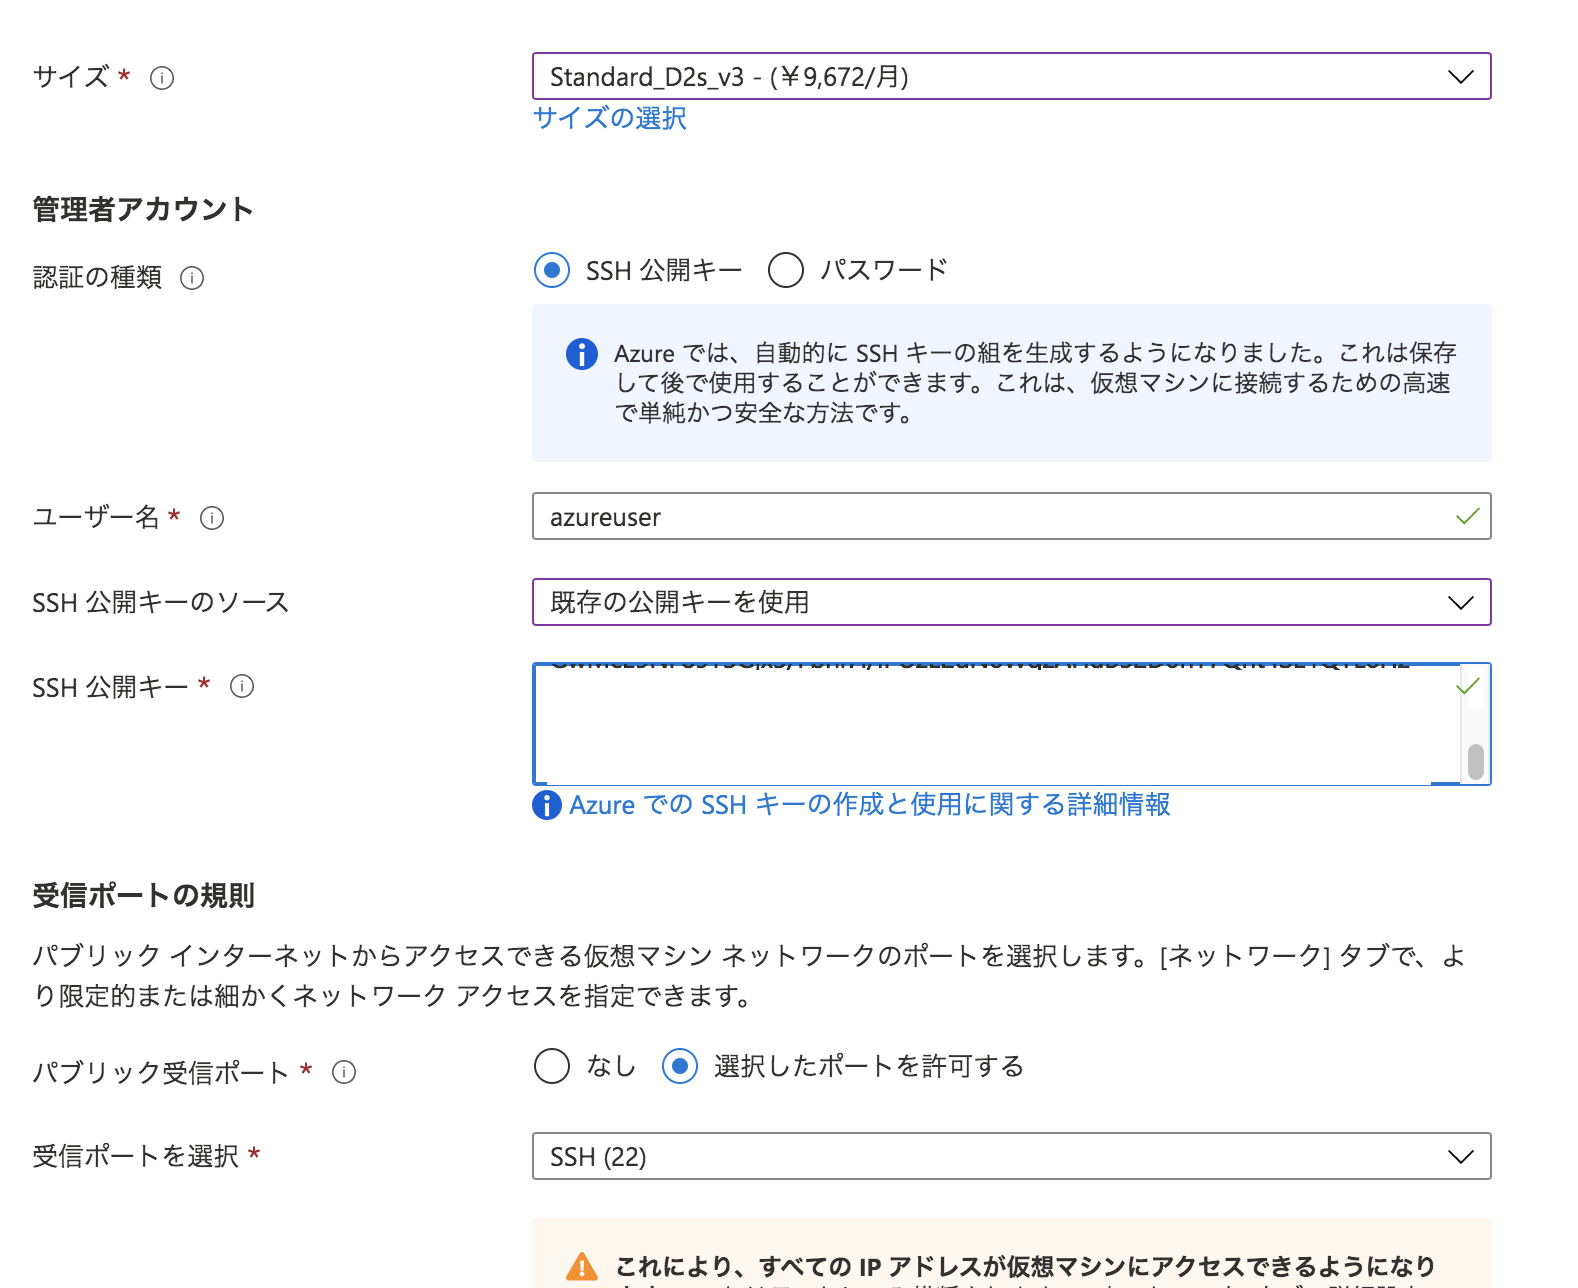
今回はユーザー名をazureuserにし、既存の公開キーを使用にした。
SSHで既存の公開キーを設定するため、Azure Cloud Shellに下記のコマンドでSSHキーペアを作成する。
$ssh-keygen -t rsa -b 4096

# Enter a file in which to save the keyで何も入力せず、エンターを押す。こうするとデフォルトのファイルの場所に作成される。
> Enter a file in which to save the key (/home/you/.ssh/id_rsa): [Press enter]

# パスワードを設定する。確認も含めて2回入力する。
> Enter passphrase (empty for no passphrase): [Type a passphrase]
> Enter same passphrase again: [Type passphrase again]

# 公開鍵の内容を下記のコマンドで表示。表示されたものをコピーする。この時スペースや改行などが入ると認識できないため、入らないように注意する。
cat ~/.ssh/id_rsa.pub
上記でコピーしたSSHキーをSSH公開キーに貼り付ける。
画像を参考にして確認できたら次へ: ディスク >を選択する。
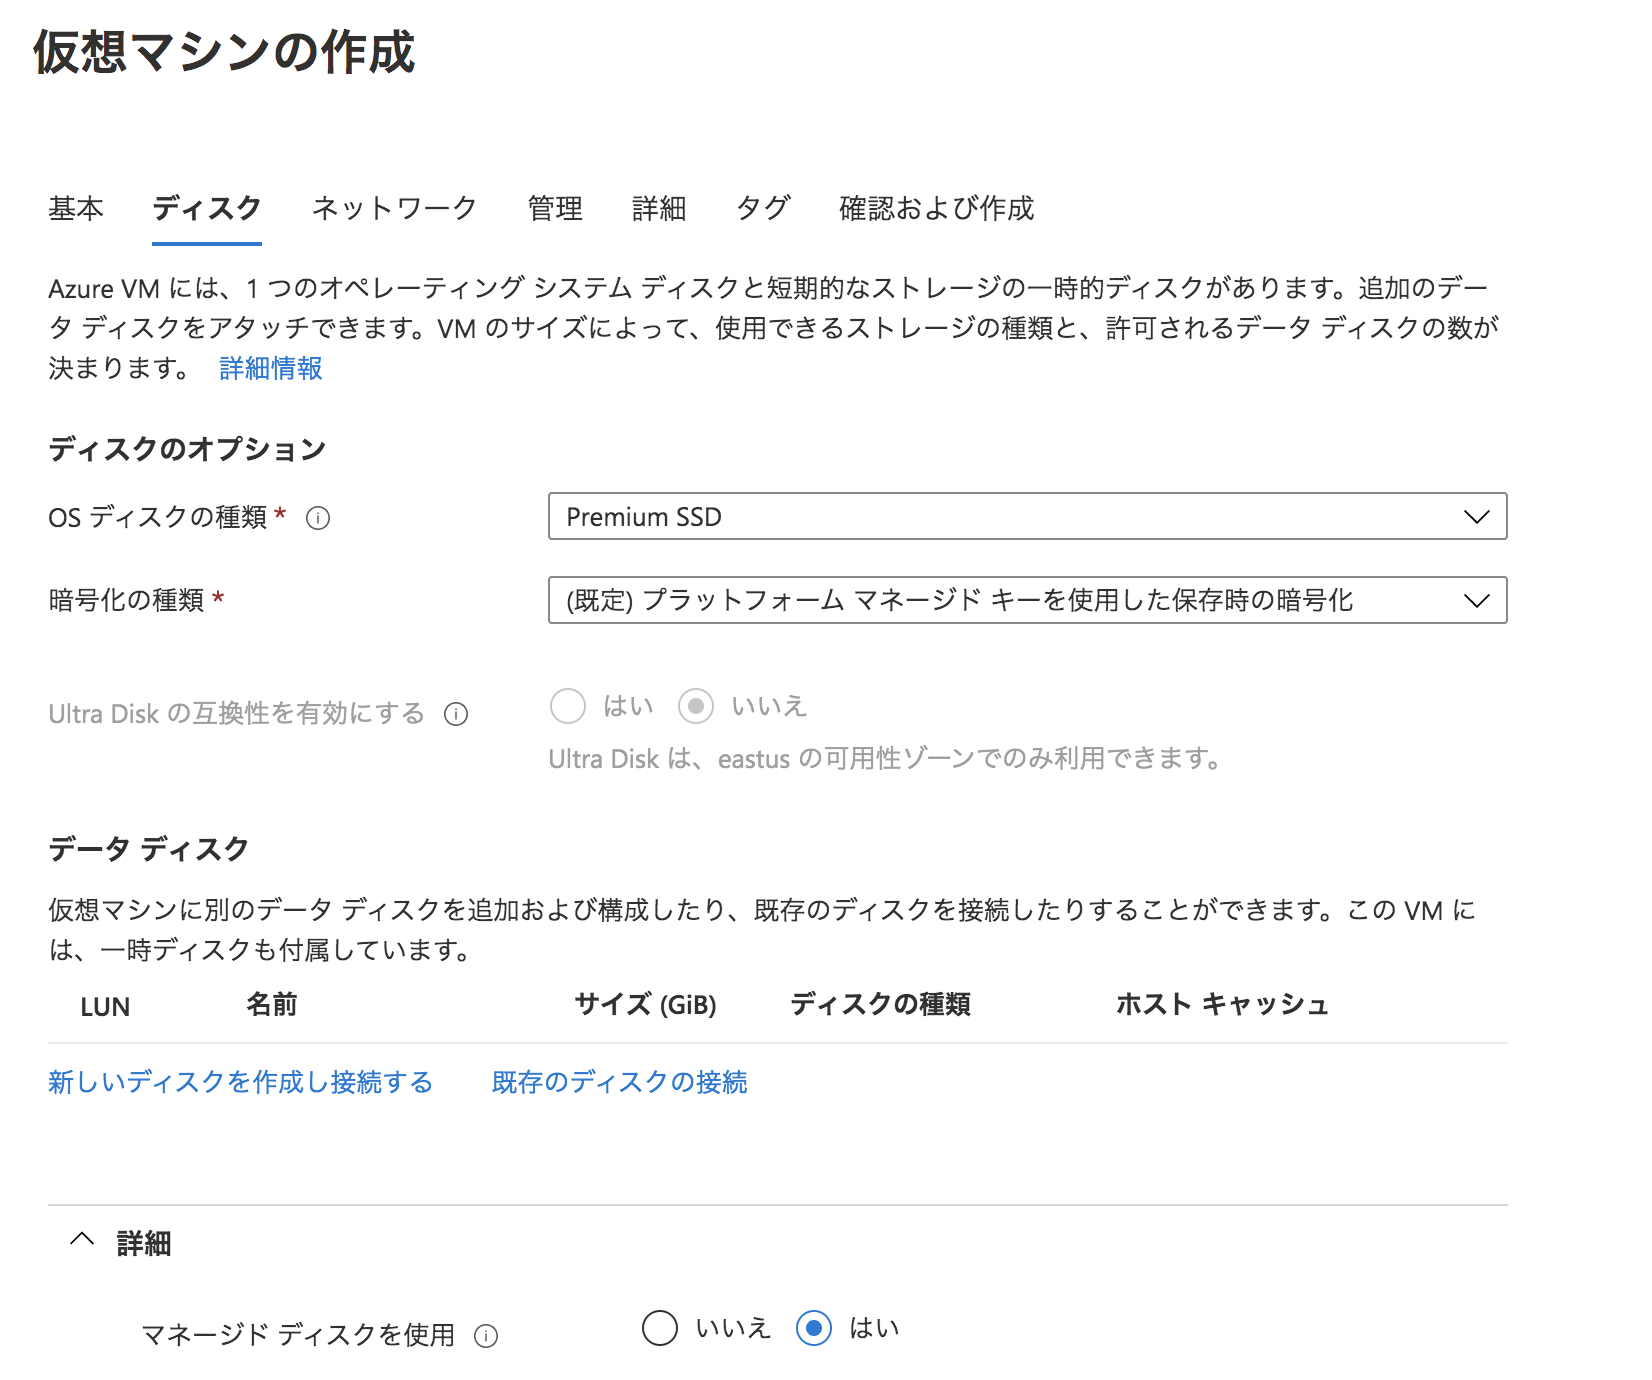
データディスクで「新しいディスクを作成し接続する」を選択する。
デフォルトのままでOKを選択する。
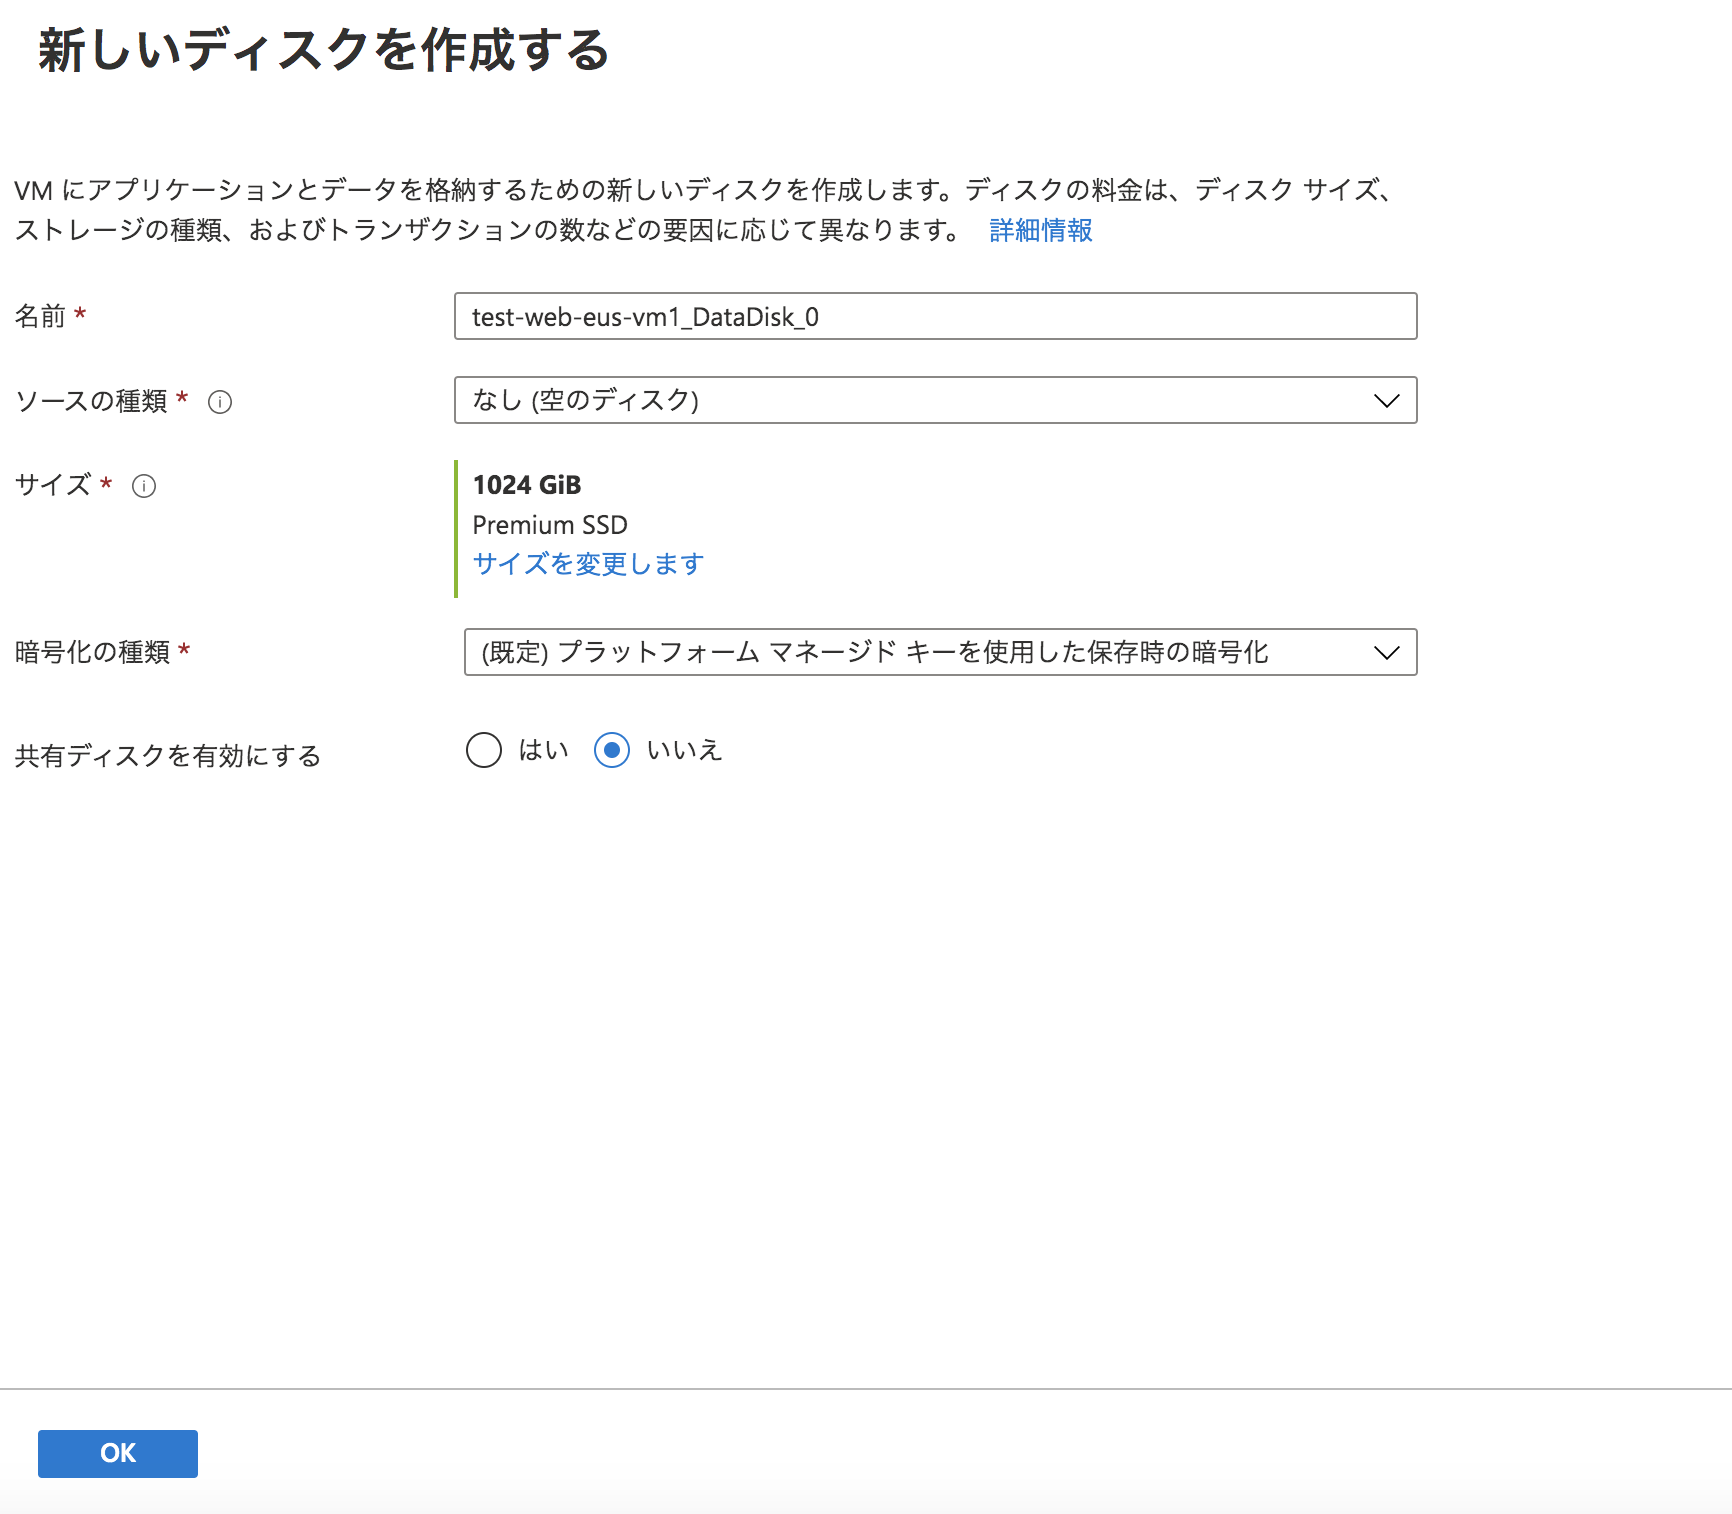
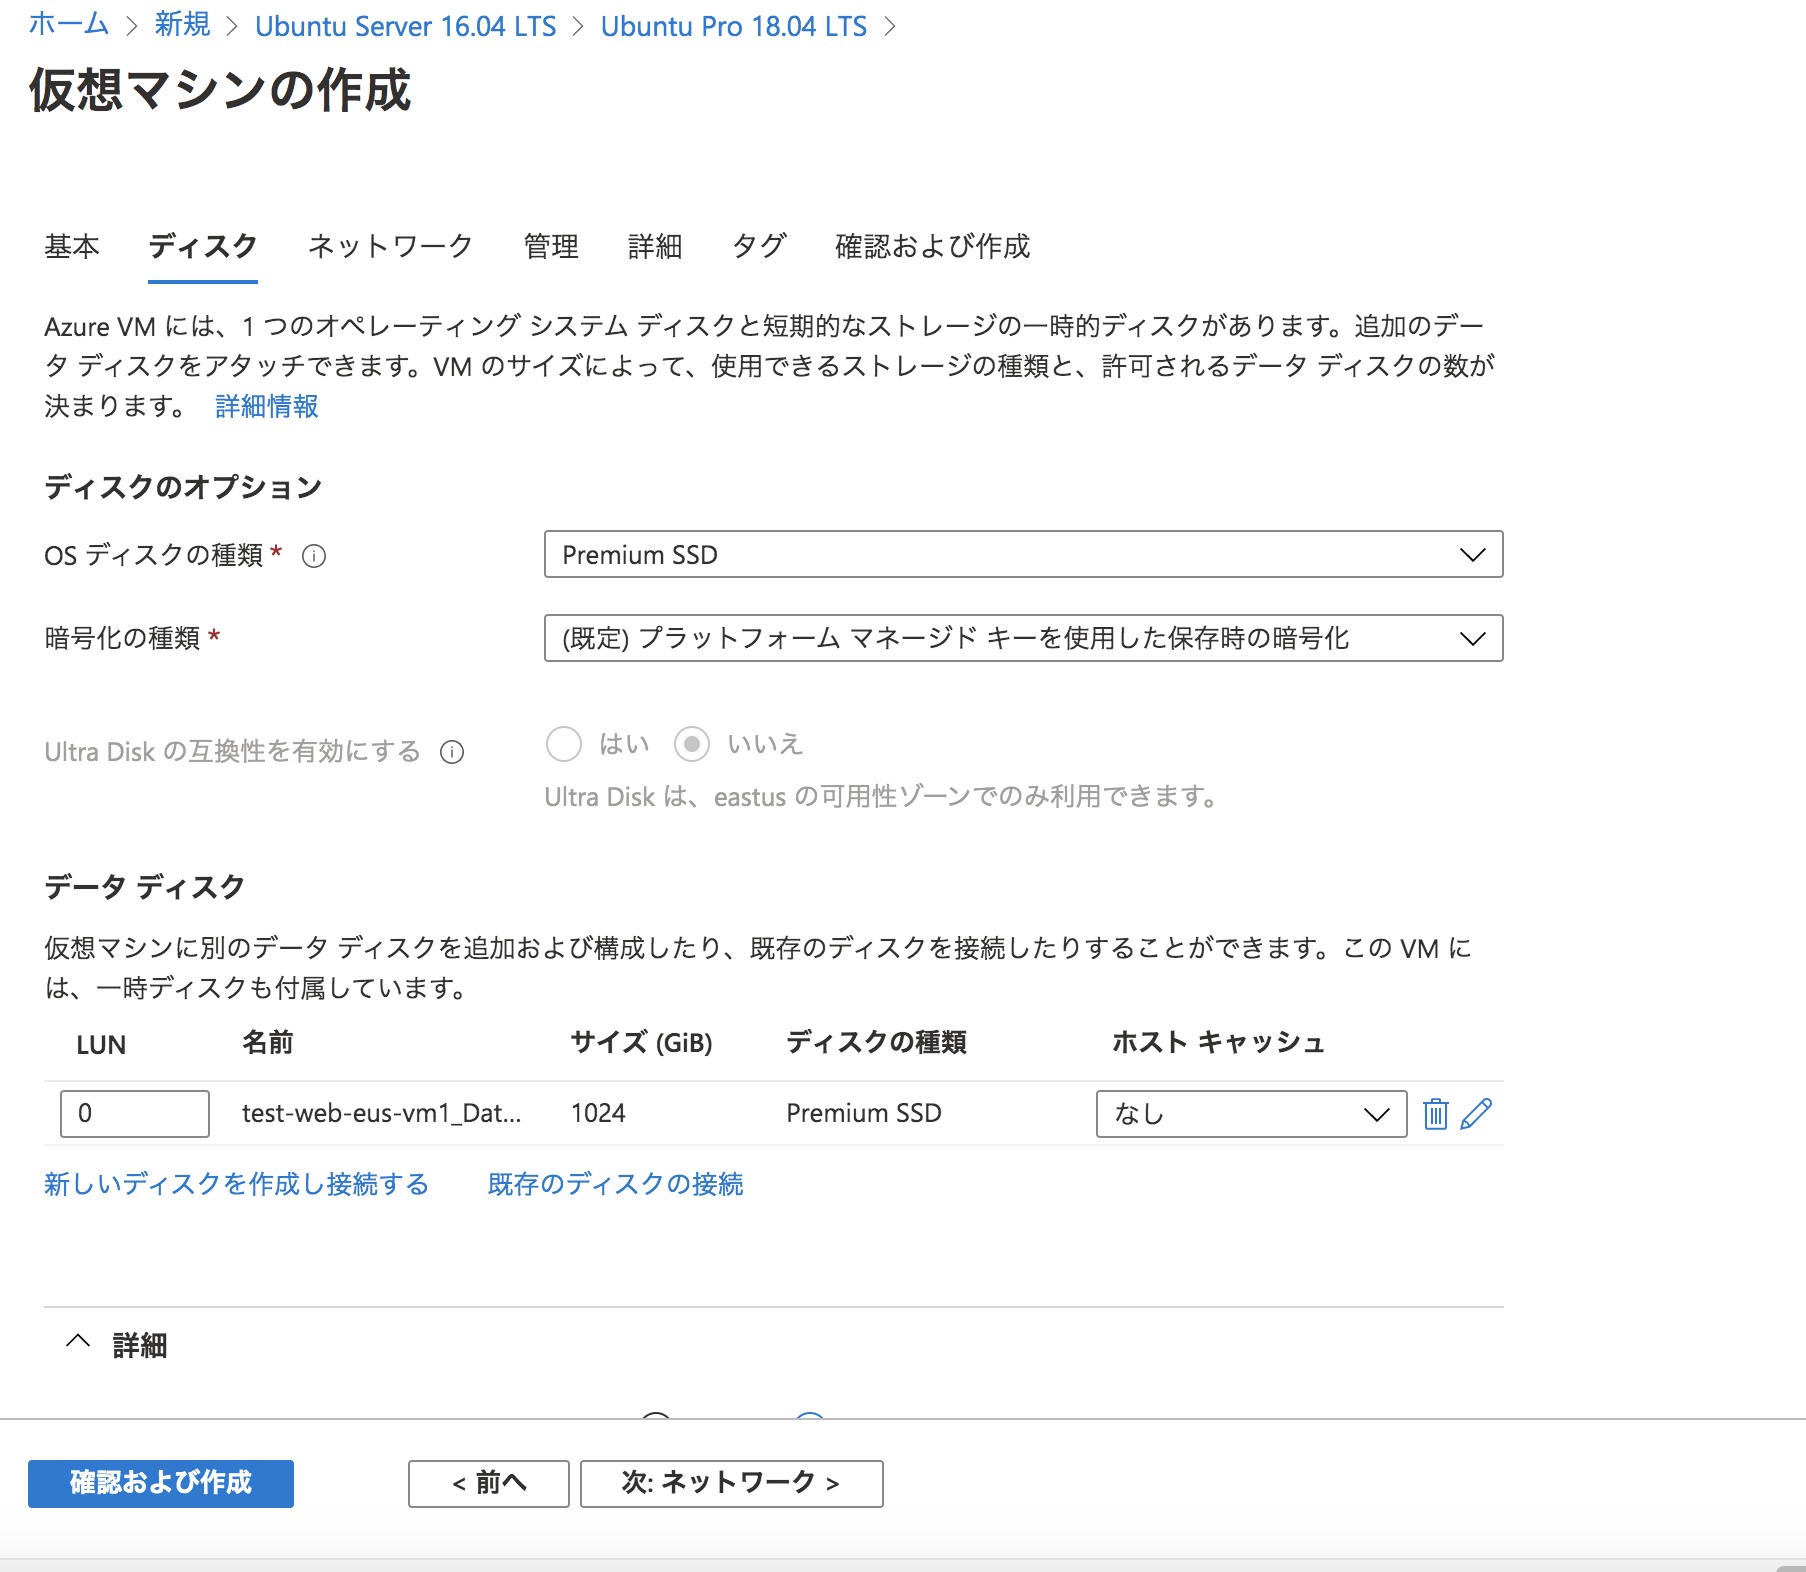
下記のように新しいディスクができていることを確認する。
問題なければ、「次:ネットワーク」と選択する。
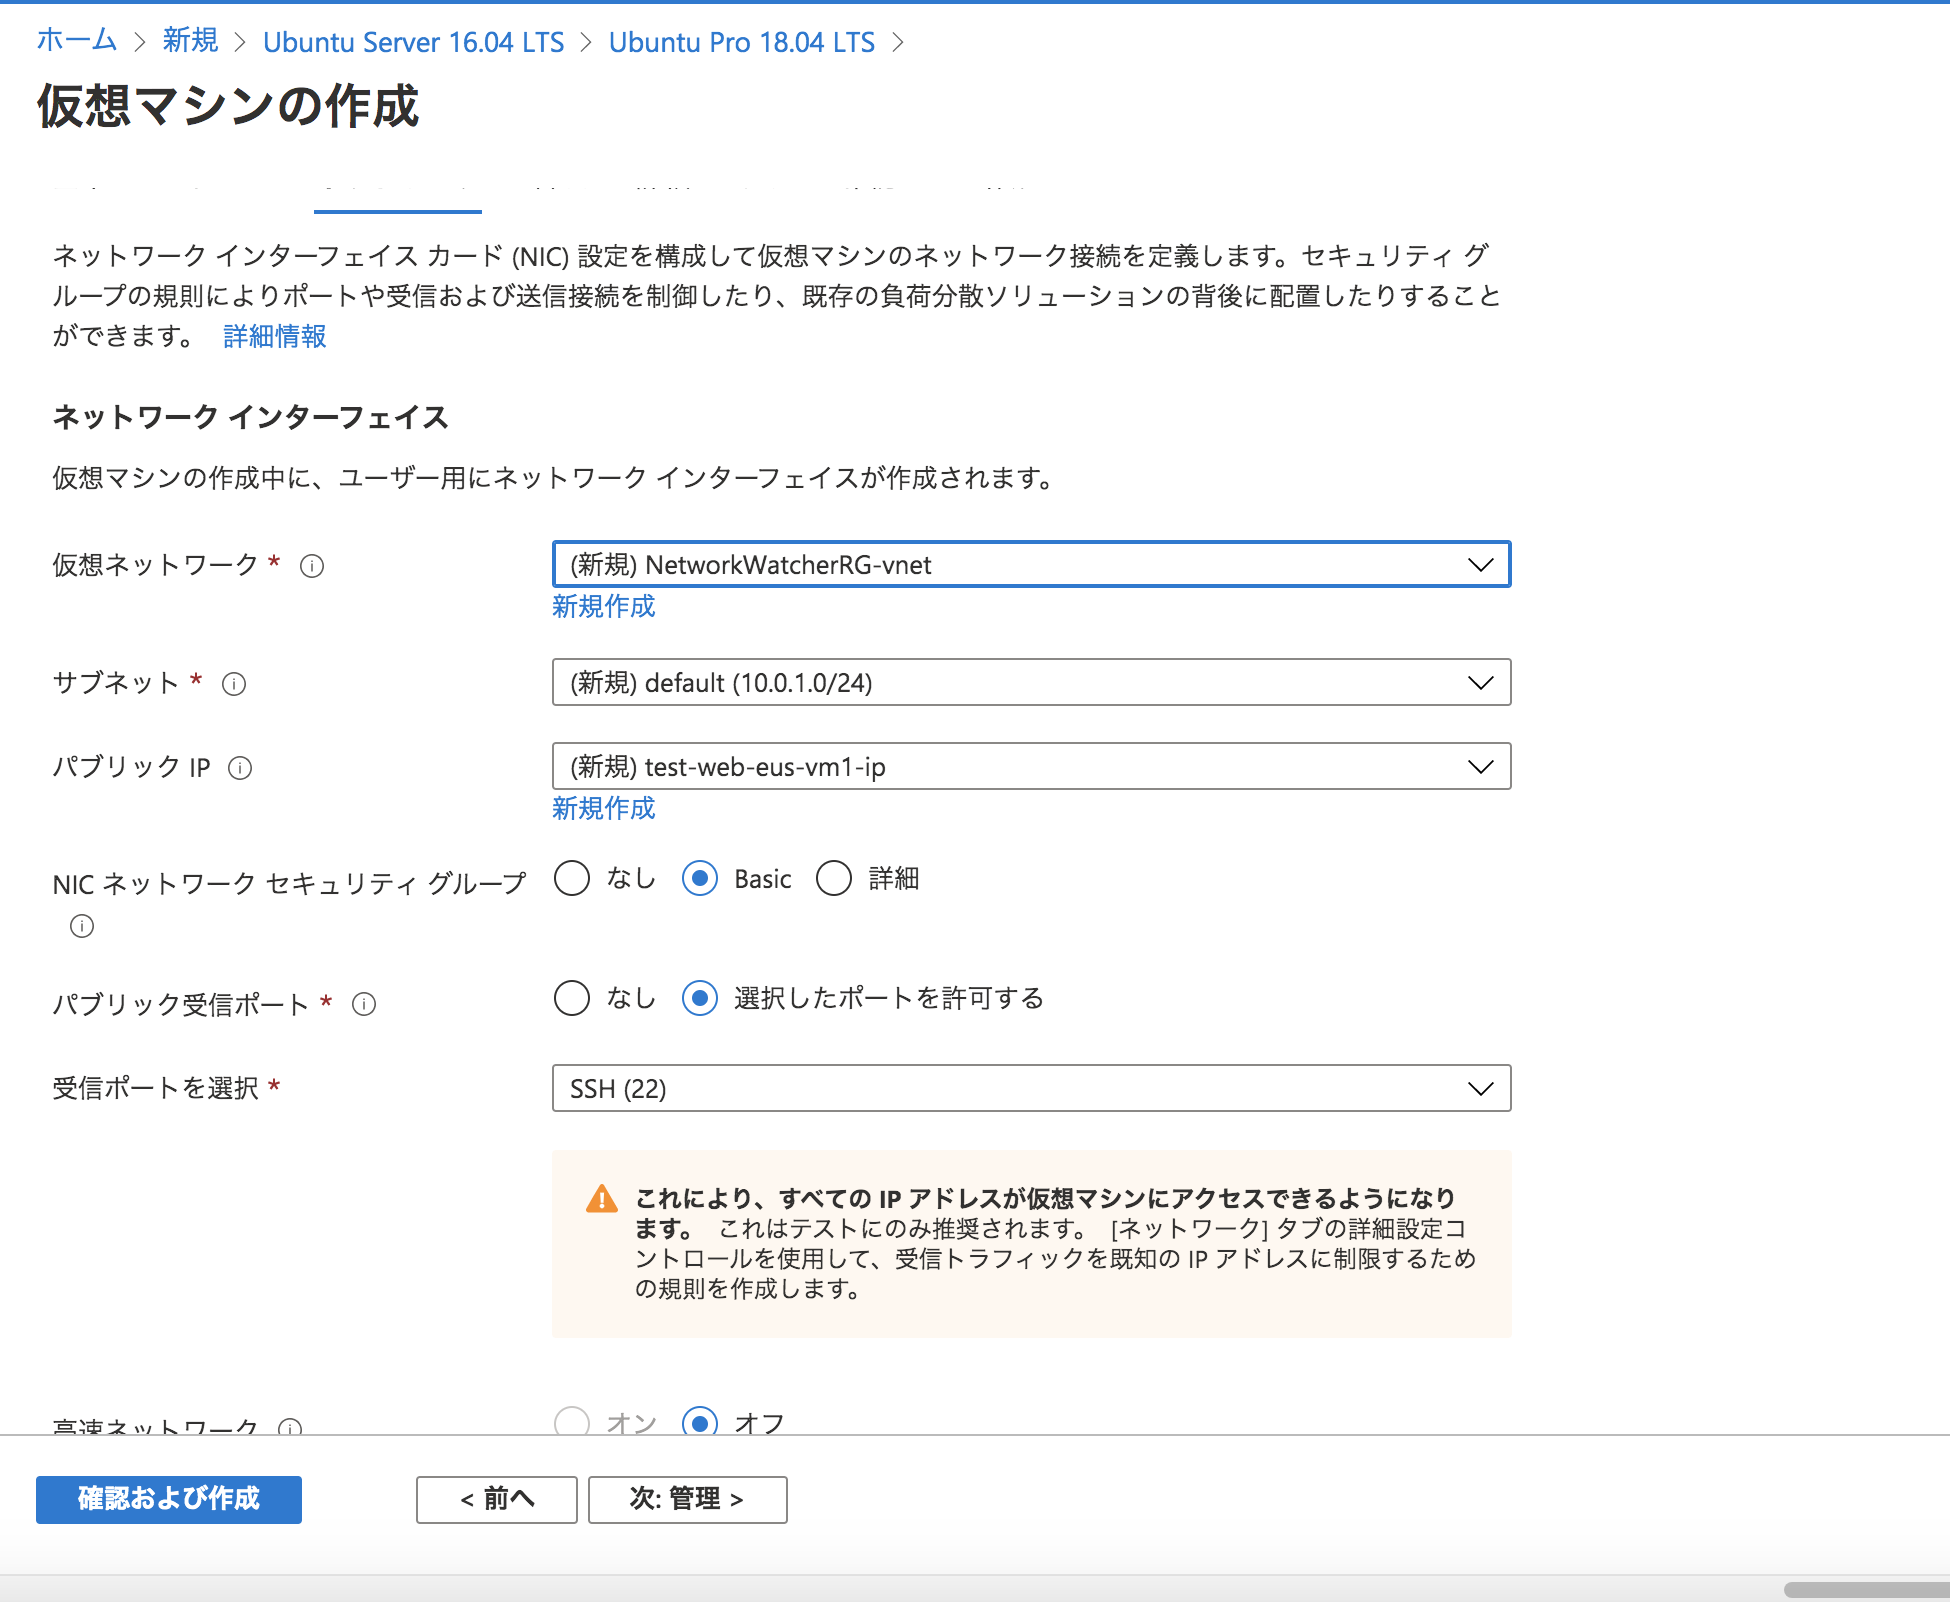
ネットワークに移り、今回は新規で作成するのでデフォルトのままで、「確認および作成」を選択する。
検証され問題なければ作成を選択する。
SSH接続
デプロイできたら該当のVMに行って、パブリックIPアドレスをメモする。

$ssh azureuser@xx.xx.xxx.xxx

The authenticity of host 'xx.xx.xxx.xxx (xx.xx.xxx.xxx)' can't be established.

# yesと入力する。
ECDSA key fingerprint is SHA256:w1h08h4ie1iMq7ibIVSQM/PhcXFV7O7EEhjEqhPYMWY.
Are you sure you want to continue connecting (yes/no)? yes
Warning: Permanently added 'xx.xx.xxx.xxx' (ECDSA) to the list of known hosts.

# その後SSHキーペアの作成時に使用したパスフレーズを入力

# データディスクの初期化のため下記のコマンドを入力
$(echo n; echo p; echo 1; echo ; echo ; echo w) | sudo fdisk /dev/sdc
$sudo mkfs -t ext4 /dev/sdc1
$sudo mkdir /data && sudo mount /dev/sdc1 /data

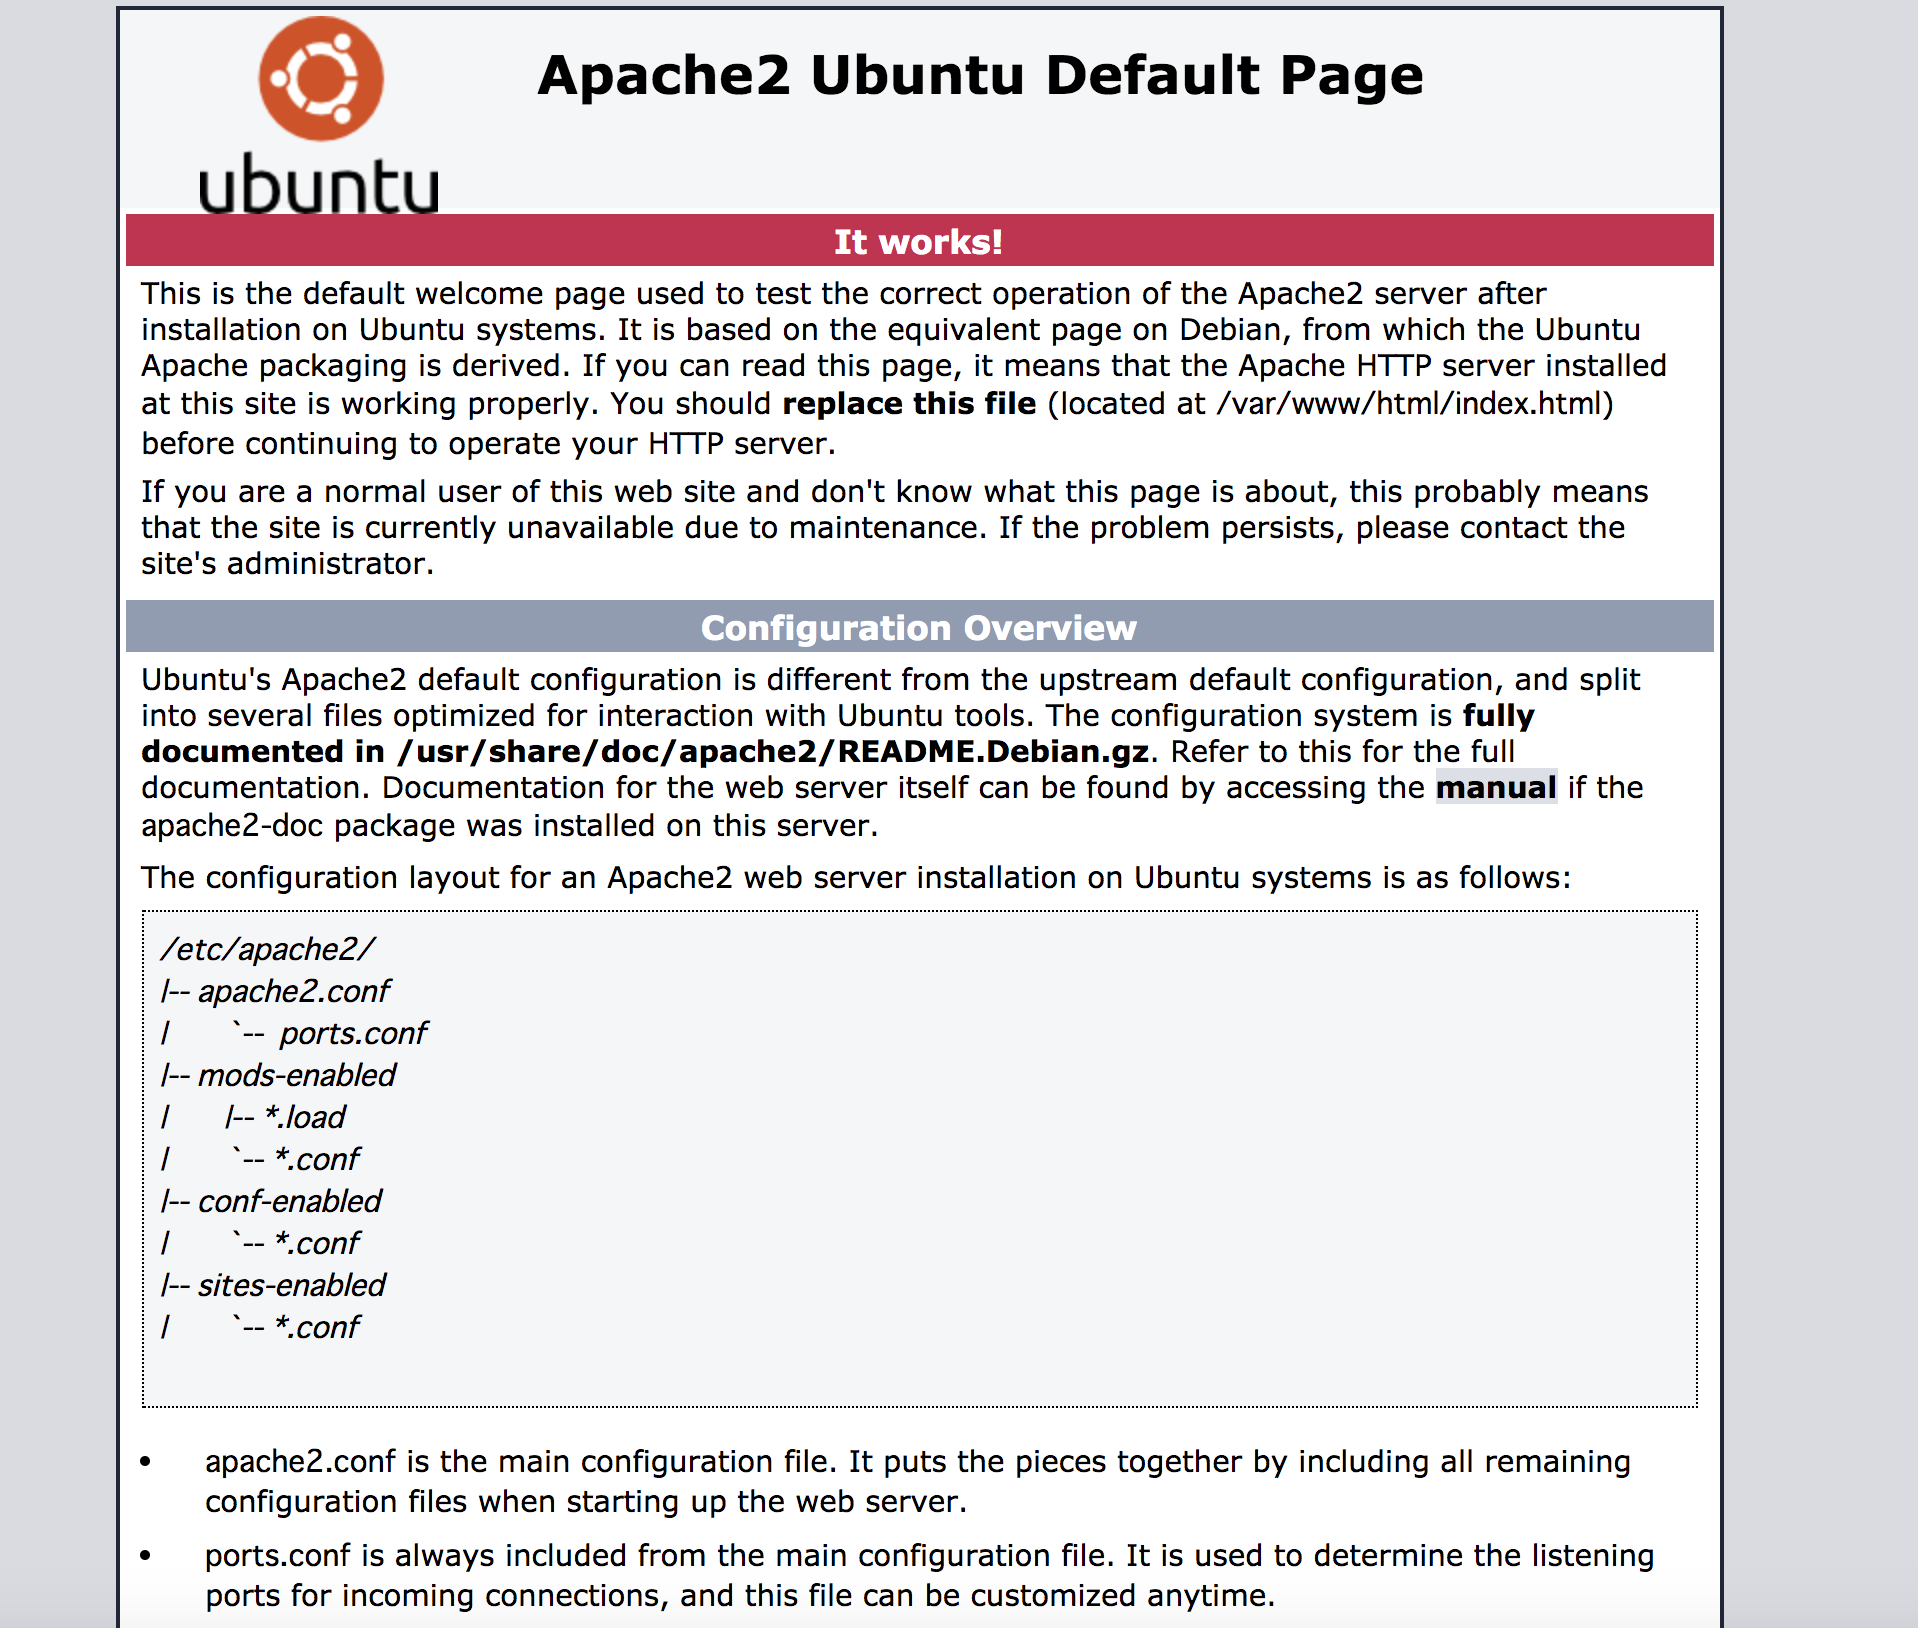
# Apache Webサーバーをインストールする
$sudo apt-get update
$sudo apt-get install apache2 -y
# 下記のコマンドで開始されているか確認。
$sudo systemctl status apache2 --no-pager
ポートの設定
該当のVM>設定>ネットワーキングを選択する。「受信ポートの規則を追加する」を選択する。
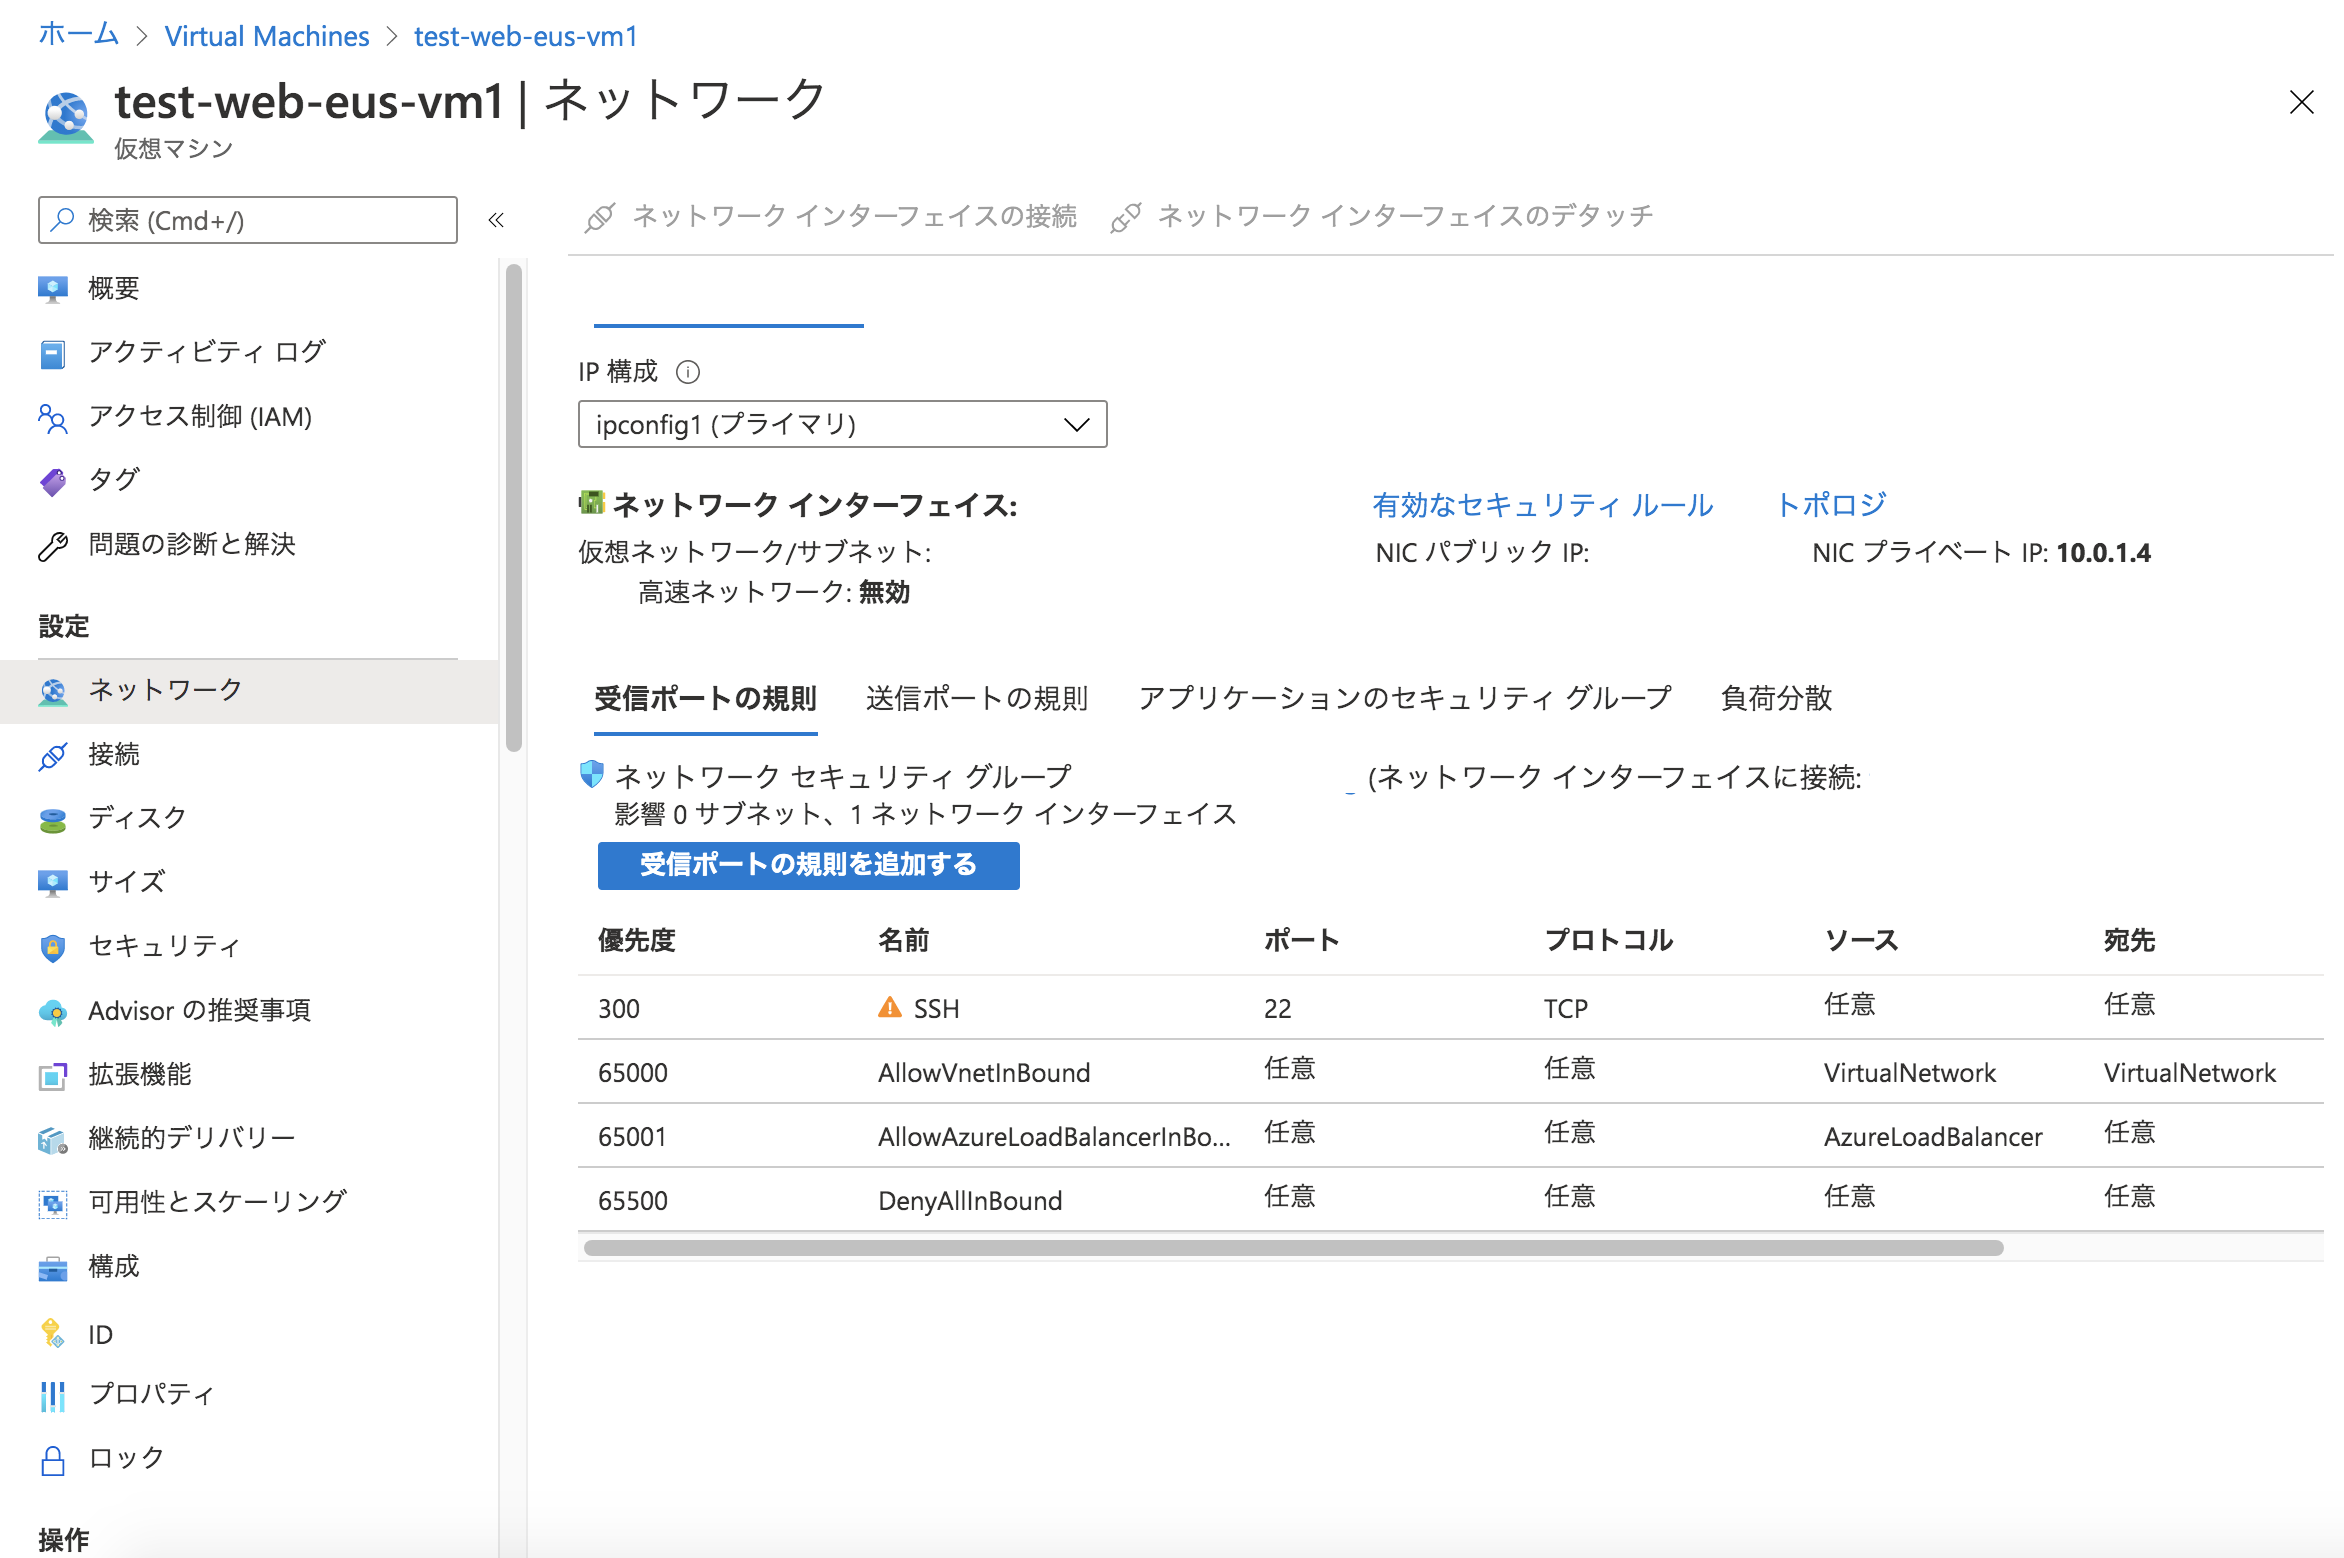
Basicを選択する。
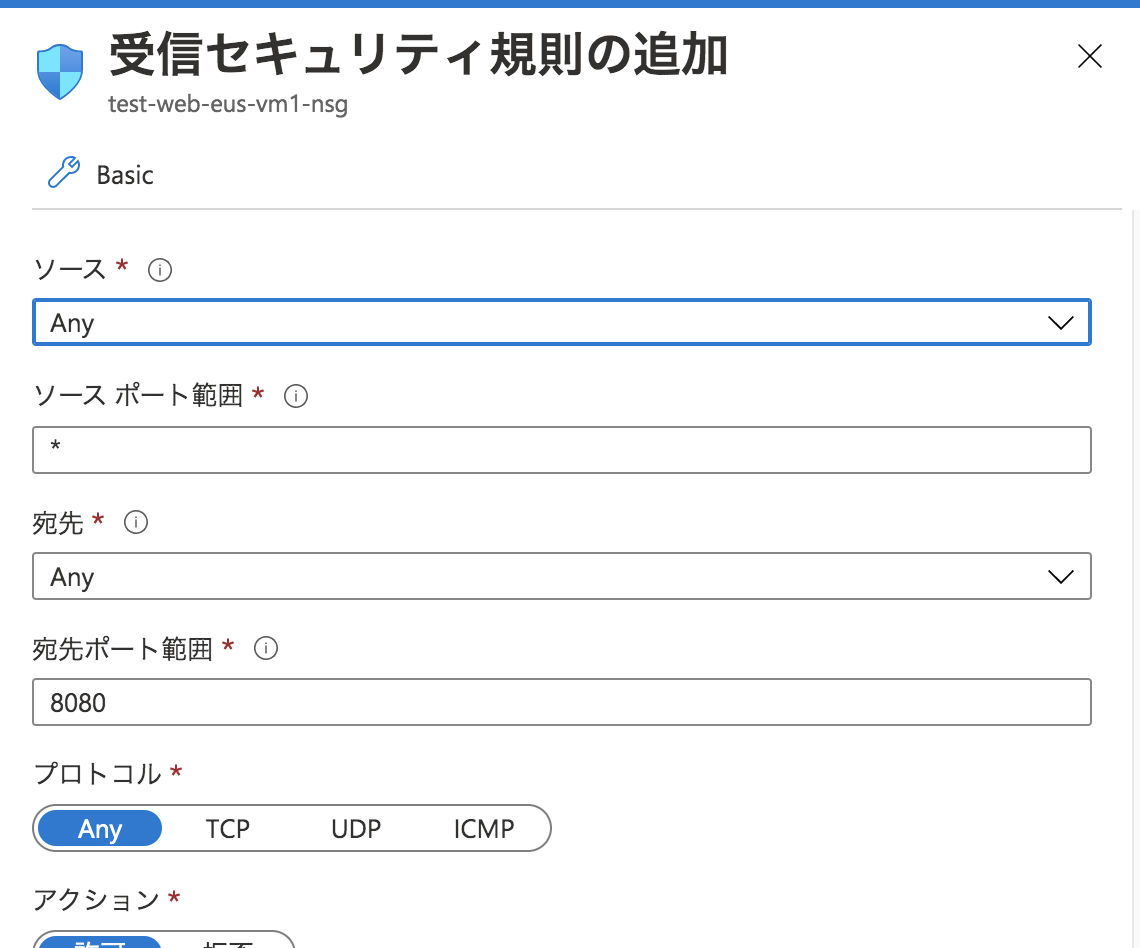
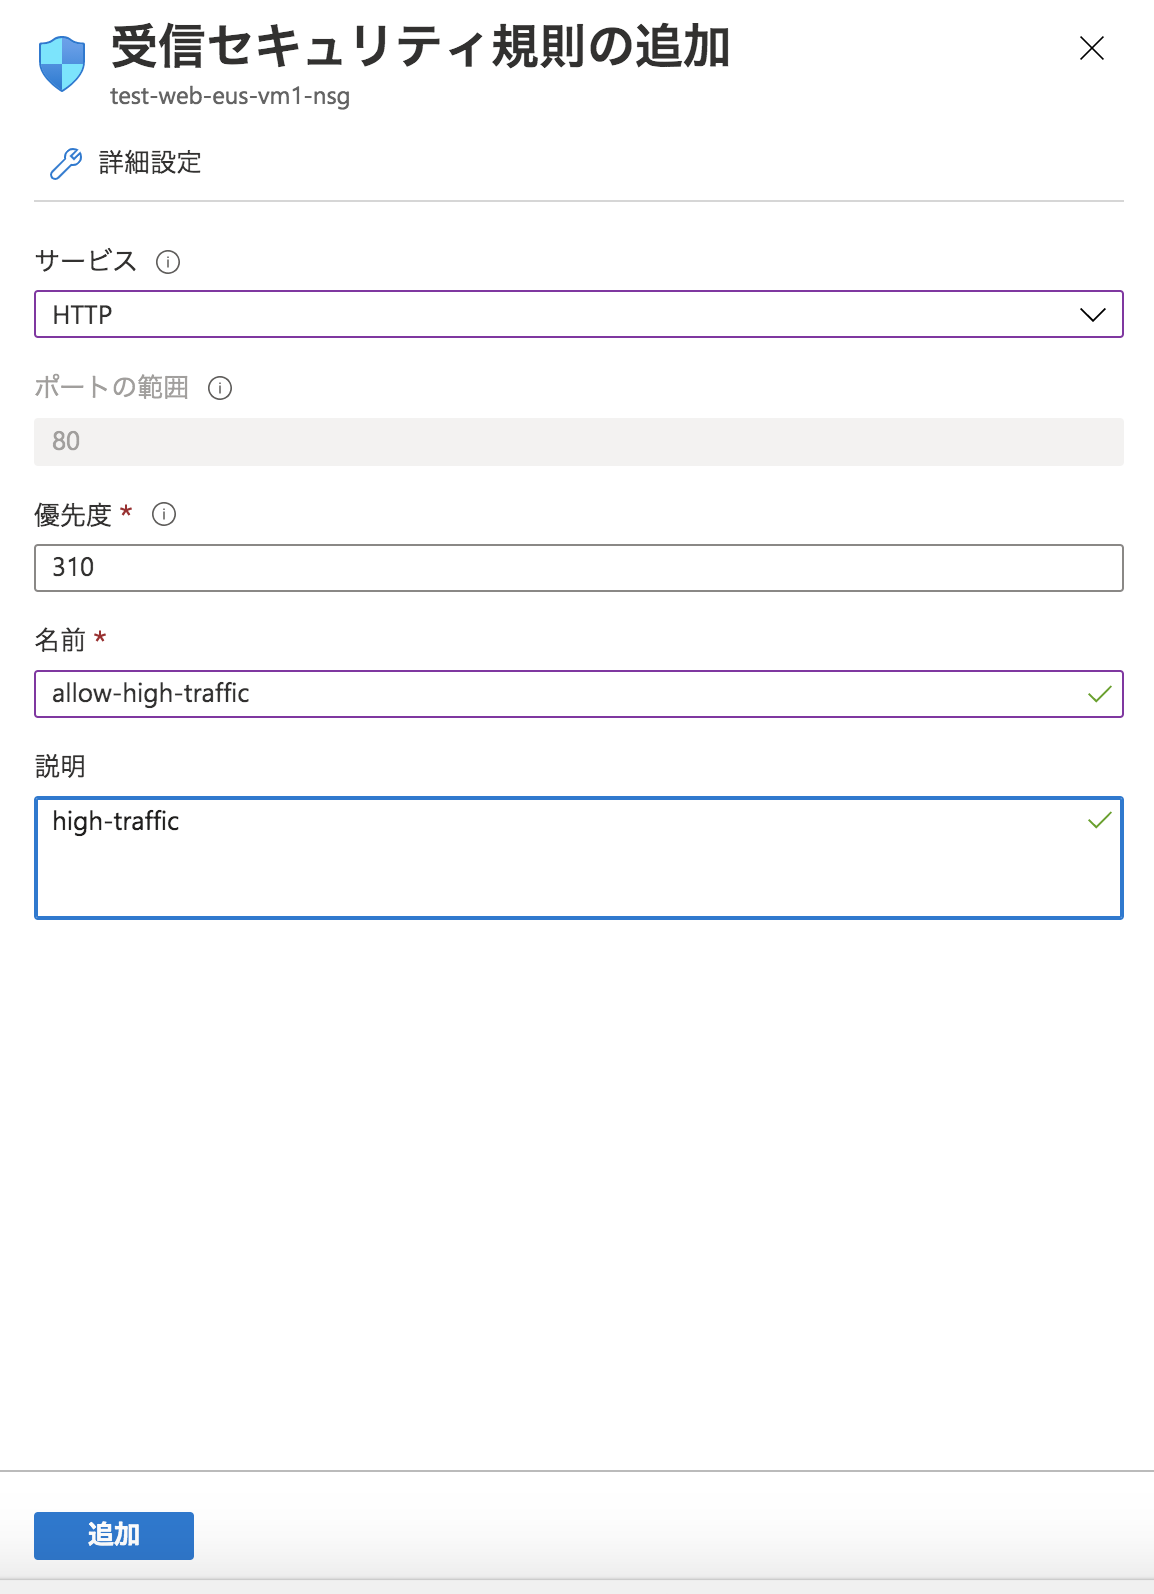
HTTPの設定を下記のように行う。追加を選択する。
